
Candy Cane

Candy Cane
⏱️ cook time 45 minutes
🍽️ servings 12
⚡ Difficulty medium

intro

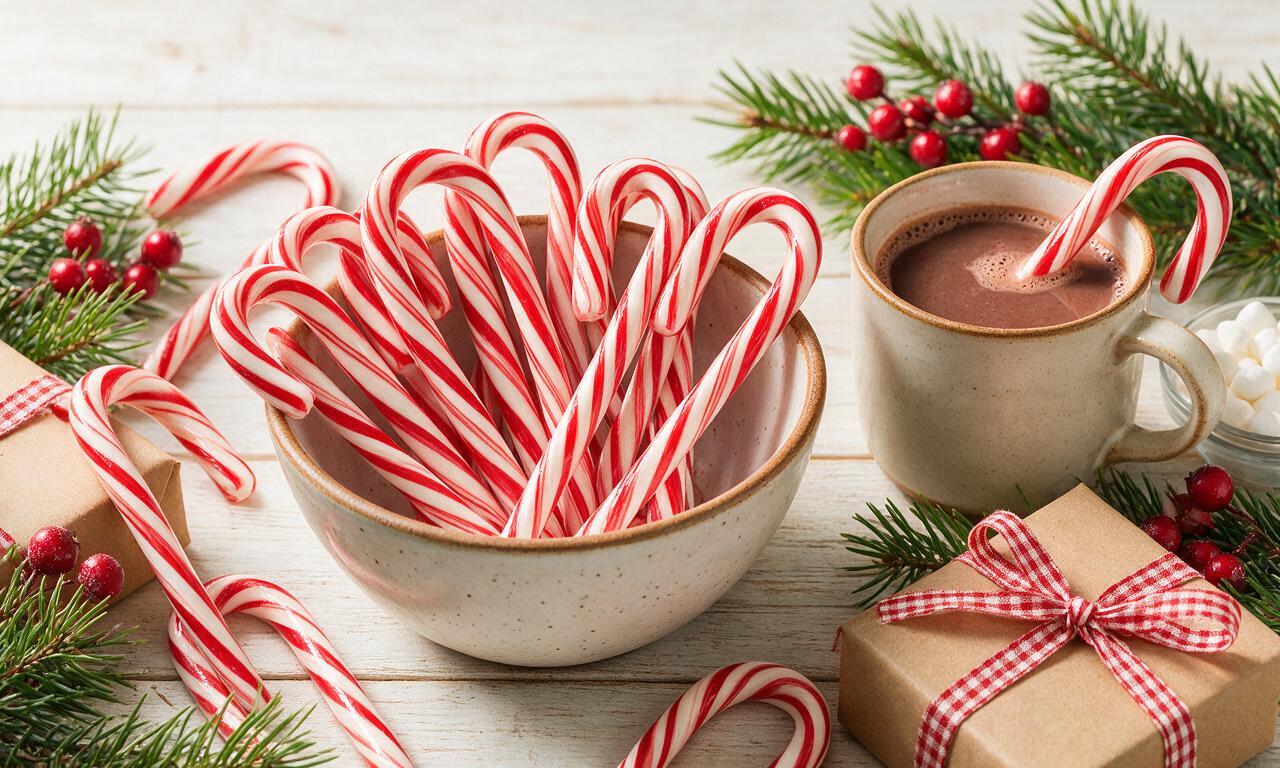
Crisp, refreshing peppermint-flavored striped hard candy canes, ideal for Christmas tree decor, gifting, or stirring into hot cocoa throughout the holiday season.

Ingredients

Granulated sugar 400 grams (2 cups)
Light corn syrup 120 ml (1/2 cup)
Distilled water 120 ml (1/2 cup)
Peppermint extract 5 ml (1 teaspoon)
Red gel food coloring 1/4 teaspoon
Non-stick cooking spray 5 ml (1 teaspoon)

Steps

1

Prep Workstation and Tools

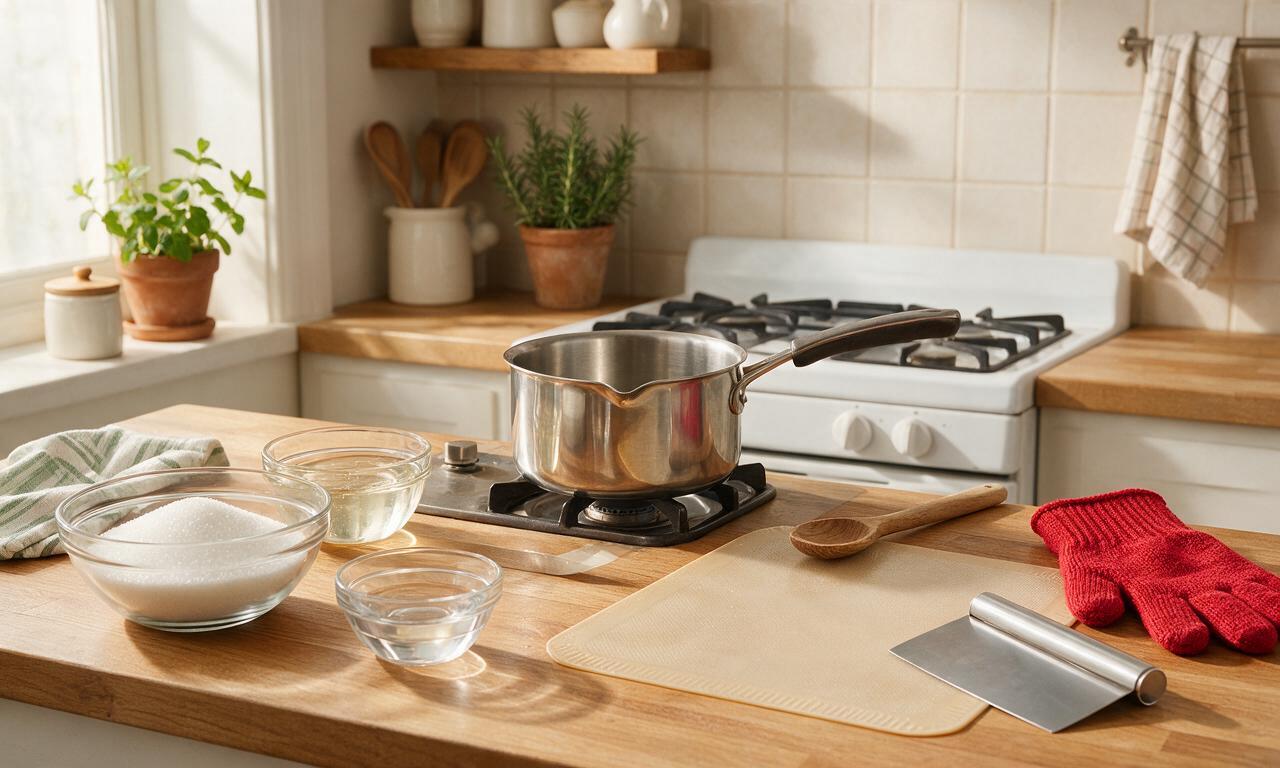
Lightly coat a heat-resistant silicone mat, metal bench scraper, and pair of heat-resistant kitchen gloves with 1 teaspoon of non-stick cooking spray. Clip a candy thermometer to the side of a heavy-bottomed 2-quart saucepan, ensuring the thermometer tip does not touch the pan base. Combine 400g granulated sugar, 120ml light corn syrup, and 120ml distilled water in the saucepan over medium-low heat, stirring constantly with a silicone spatula until sugar fully dissolves, about 3-4 minutes.
Step 1
step1:Prep Workstation and Tools
2

Boil the Sugar Syrup

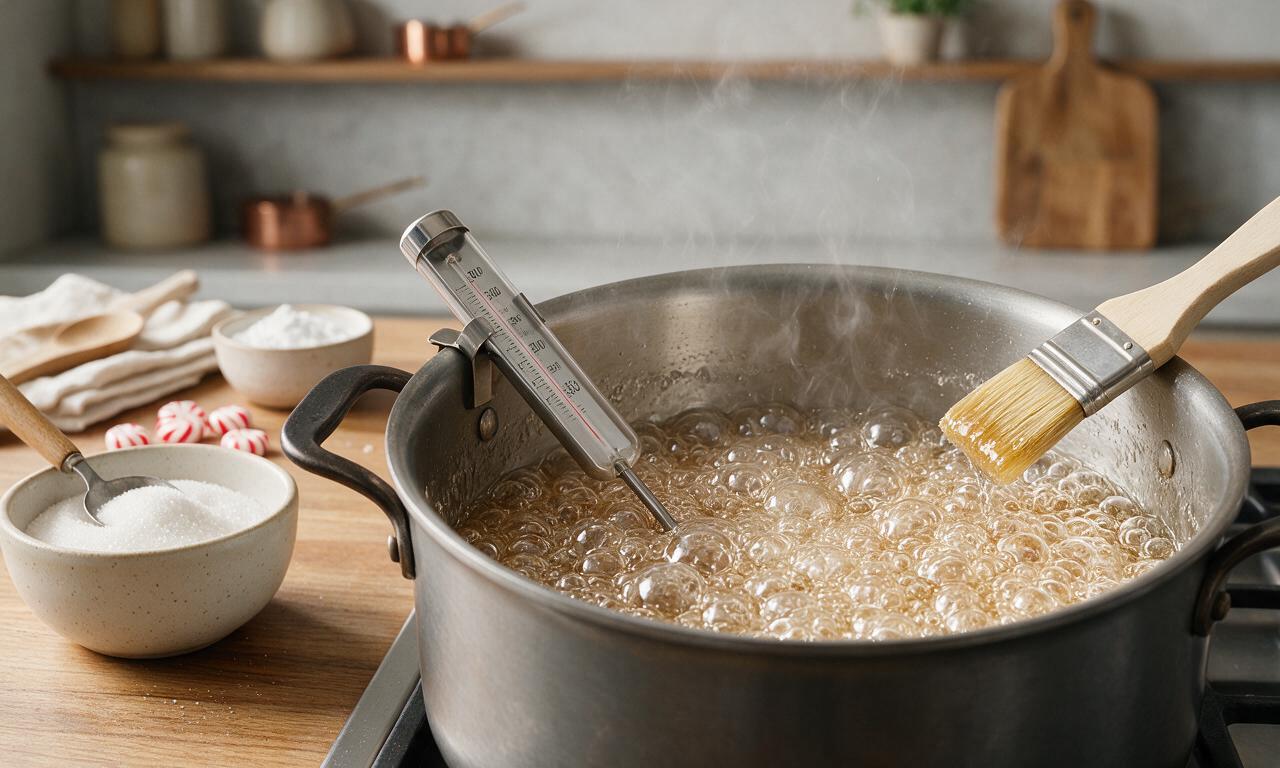
Once sugar is fully dissolved, stop stirring, increase heat to medium, and bring the syrup to a steady rolling boil. Do not stir the boiling syrup; if sugar crystals form on the pan sides, brush them down with a wet pastry brush to prevent grainy crystallization. Cook until the candy thermometer reads 150°C (300°F, hard crack stage), approximately 10-12 minutes. Immediately remove the pan from heat once the target temperature is reached.
Step 2
step2:Boil the Sugar Syrup
3

Stir in Peppermint Extract

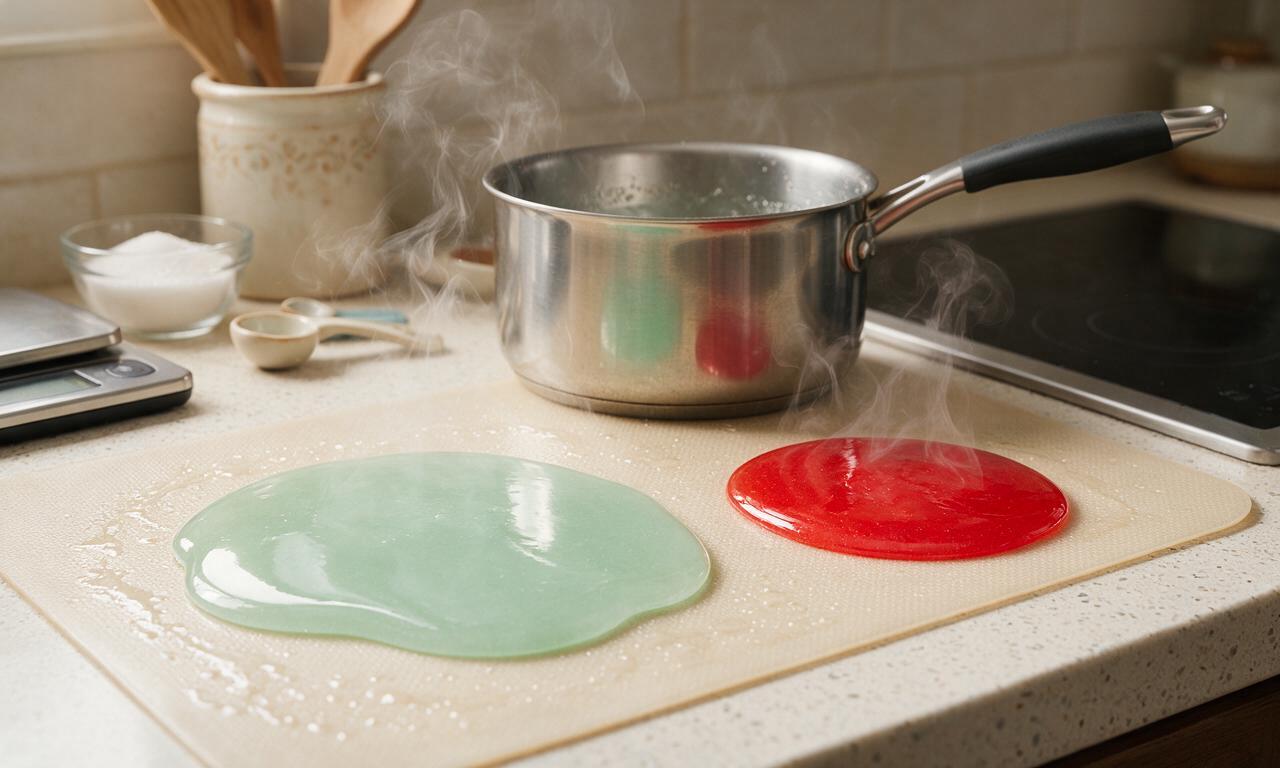
Let the hot syrup rest for 1 minute to allow surface bubbles to subside, then carefully stir in 5ml (1 teaspoon) of peppermint extract—note that the hot syrup may bubble up vigorously when the extract is added. Pour 3/4 of the clear peppermint syrup directly onto the greased silicone mat, then add 1/4 teaspoon red gel food coloring to the remaining 1/4 of syrup in the pan, stirring gently to mix into a uniform bright red.
Step 3
step3:Stir in Peppermint Extract
4

Cool and Gather Clear Candy

Let both candy pools rest for 3-4 minutes, until the edges are cool enough to touch with gloved hands (around 70°C/160°F). Put on the greased heat-resistant gloves, gather the clear candy into a loose ball, and pull, stretch, and fold the candy repeatedly for 3-4 minutes, until it transforms from translucent to an opaque, glossy pearly white and is firm but still pliable. Form the white candy into a 30cm (12-inch) long log, and set it back on the silicone mat.
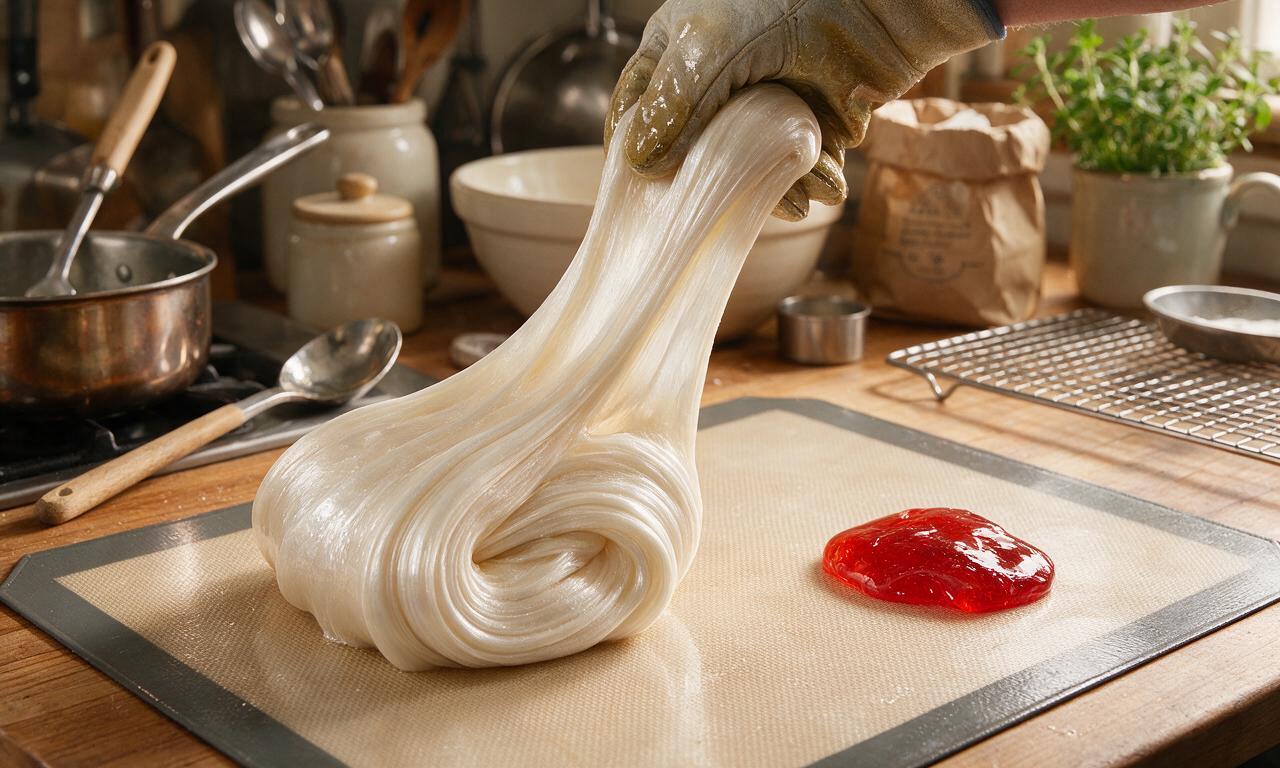
Step 4
step4:Cool and Gather Clear Candy
5

Shape and Place Red Ropes

While the white candy log rests, gather the red candy into a ball, pull and stretch it for about 1 minute into 4 thin, equal-length ropes each 30cm (12 inches) long. Lay the 4 red ropes evenly spaced along the length of the white candy log, pressing gently so they adhere firmly to the white base, creating 4 distinct red stripes running the full length of the log.
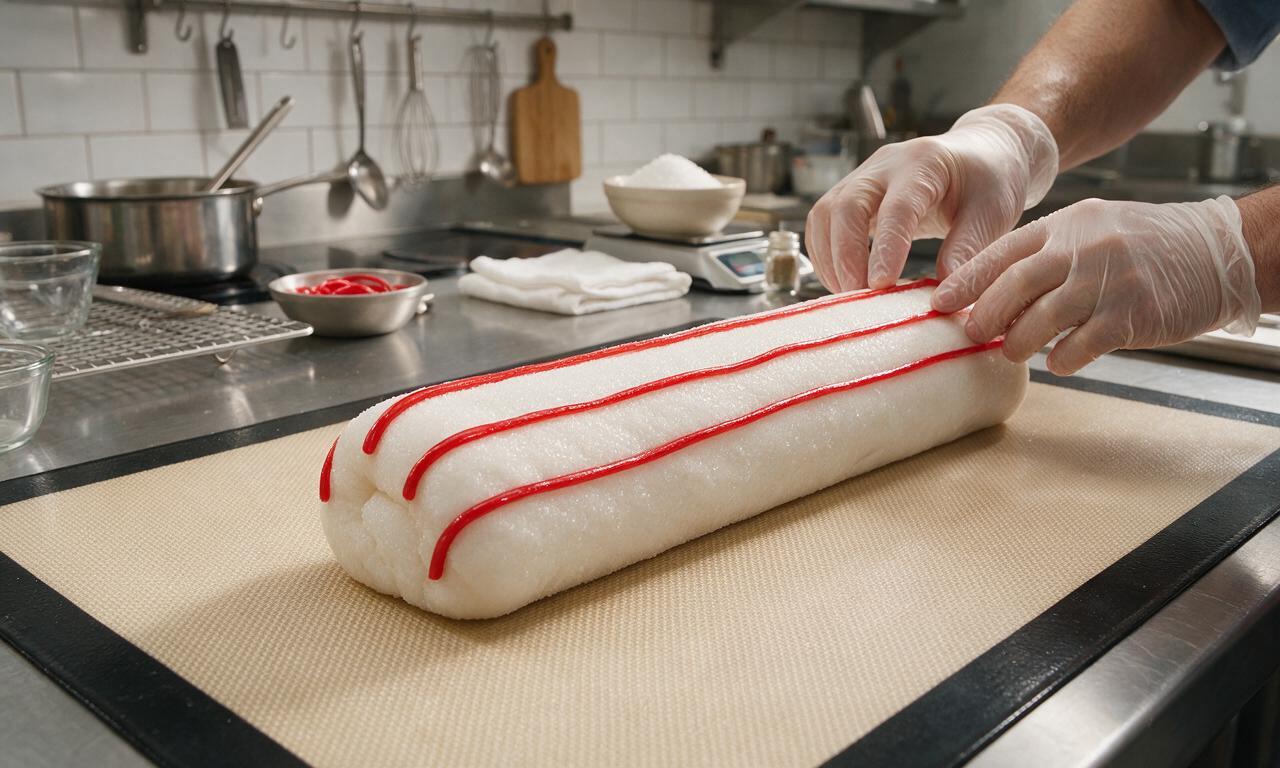
Step 5
step5:Shape and Place Red Ropes
6

Stretch the Striped Candy Log

Work quickly within a 5-minute window before the candy becomes too brittle to shape: roll and stretch the striped log evenly from the center outwards until it reaches 1.8m (6 feet) long, with a consistent diameter of about 1.2cm (1/2 inch). Use the greased bench scraper to cut the stretched candy rope into 15cm (6-inch) long segments, cutting straight across at a slight angle.
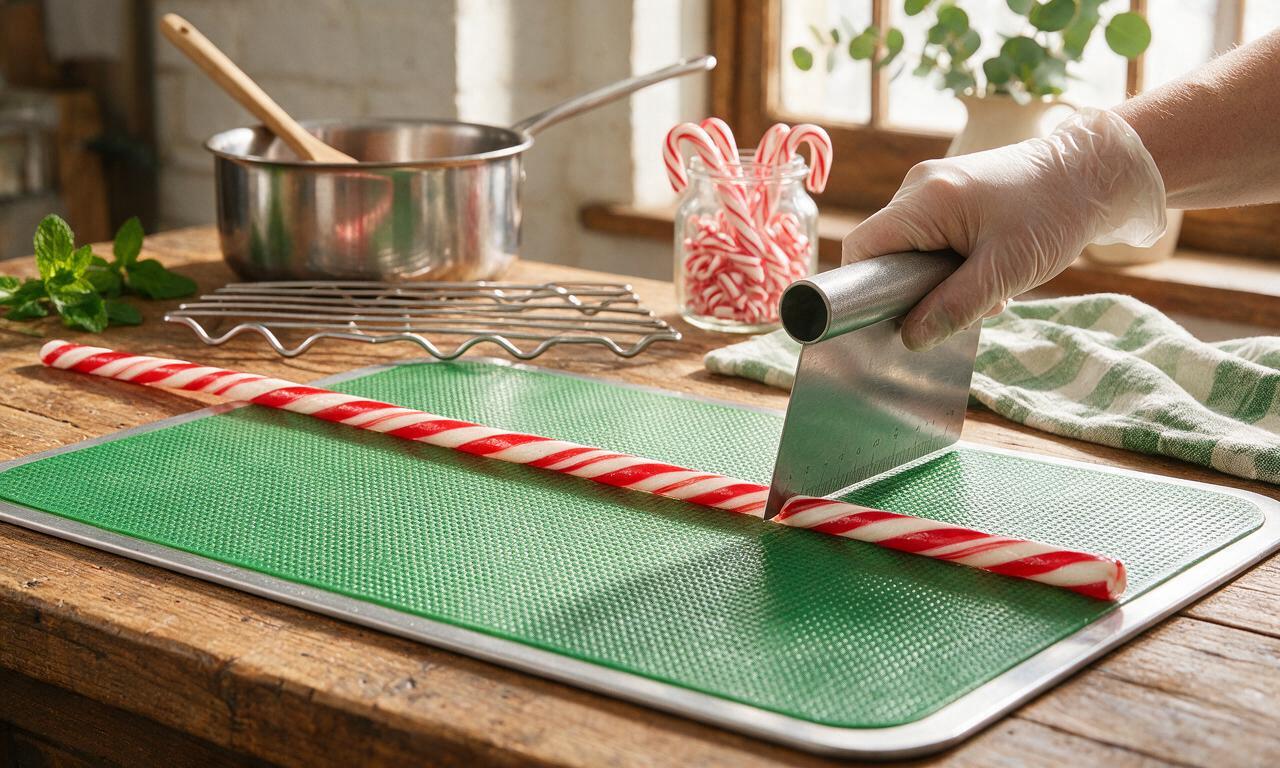
Step 6
step6:Stretch the Striped Candy Log
7

Shape Candy Cane Hooks

Take each cut 6-inch segment, bend the top 2.5cm (1 inch) of the segment over to form the classic hooked candy cane shape. Set the shaped canes on the cool silicone mat with 2cm (1 inch) of space between each, and let them cool completely at room temperature for 1 hour until fully hard and crisp. Once cooled, wrap individually in clear cellophane for storage or gifting.
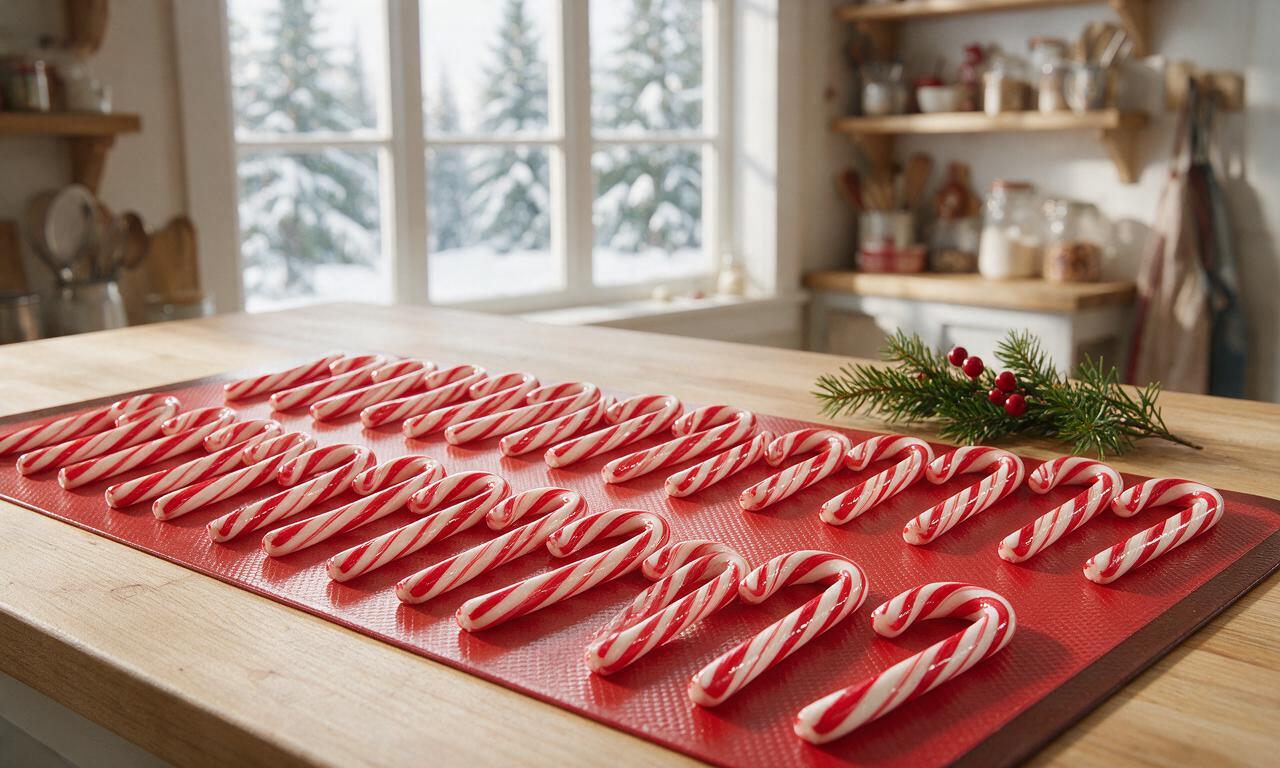
Step 7
step7:Shape Candy Cane Hooks

Tips

1.Use an accurate clip-on candy thermometer to test sugar temperature: syrup heated below 150°C (300°F, hard crack stage) will produce soft, sticky canes, while syrup heated above this temperature will burn and develop a bitter, caramelized flavor.
2.Prep all tools and grease your work surface, gloves, and scraper before you start heating the sugar: pulled sugar hardens in as little as 5 minutes at room temperature, so advance prep prevents the candy from setting before you can shape it.
3.Use gel food coloring instead of liquid food coloring for the red stripes: liquid coloring adds excess moisture to the hot candy, which causes grainy texture and prevents the canes from hardening to a crisp finish.


✨ You May Also Like

Desserts & Baking
🍜 Italy

Creamy, coffee-kissed classic Northern Italian no-bake dessert, with layers of rum-spiked mascarpone cream, soft ladyfingers, and a rich cocoa dusting.

⏱️ 4 hours 3Desserts & Baking ★ 4.8
Desserts & Baking
🍜 France

Flaky, shatteringly crisp, buttery French croissants with golden exteriors and soft, airy layered interiors, perfect for pairing with coffee for a special morning treat.

⏱️ 12 hours Desserts & Baking ★ 4.7
Desserts & Baking
🍜 United States

Warm, spiced baked apples topped with a fluffy golden biscuit crust, this cozy dessert pairs perfectly with vanilla ice cream for cool-weather comfort.

⏱️ 55 minuteDesserts & Baking ★ 4.7
Desserts & Baking
🍜 United States

A star-spangled classic American blueberry pie with buttery flaky crust and bright sweet-tart filling, perfect for summer patriotic gatherings.

⏱️ 1 hour 25Desserts & Baking ★ 4.8
Desserts & Baking
🍜 United States

A beloved no-bake regional Maine candy with a chewy coconut-potato center coated in rich dark chocolate, a New England holiday staple since the 1870s.

⏱️ 2 hours 3Desserts & Baking ★ 4.9
Desserts & Baking
🍜 France

Luxuriously creamy, floral frozen custard made with aromatic Tahitian vanilla beans, boasting a smooth, rich texture that melts slowly on the tongue.

⏱️ 3 hours 3Desserts & Baking ★ 4.6

Candy Cane:Frequently Asked Questions

1.Why do I need to use distilled water instead of regular tap water for this recipe?
Tap water contains trace minerals and impurities that can trigger unwanted sugar crystallization as your syrup cooks, leading to grainy, uneven candy instead of that smooth, crisp finish. Distilled water is completely mineral-free, so it helps your syrup cook evenly for a perfectly clear, non-grainy hard candy base every time.
2.Can I substitute the light corn syrup with another pantry staple?
Light corn syrup is key here because it prevents sugar crystals from forming as the syrup cooks. If you need a swap, use 1:1 confectioner’s glucose for the exact same texture. Avoid honey, maple syrup, or agave—they burn at lower temperatures, alter the peppermint flavor, and leave your canes too soft to hold their shape.
3.What temperature do I need to cook the sugar syrup to for perfect canes?
You’ll need to cook the syrup to the hard crack stage, which is 300–310°F, measured with a clip-on candy thermometer. If you don’t have a thermometer, drop a tiny bit of syrup into ice cold water: it should form hard, brittle threads that snap cleanly when bent, with no soft, chewy center.
4.Why do my finished candy canes turn out sticky instead of crisp?
Sticky canes almost always trace back to one of two issues: either you didn’t cook the syrup to the full 300°F hard crack stage, or you’re making them on a very humid day (over 50% humidity). Hard candy pulls moisture right out of the air, so cook syrup to 305°F, work in a dry kitchen, and avoid making canes on rainy days.
5.Can I use regular liquid red food coloring instead of gel coloring?
Skip liquid food coloring for this recipe! It adds extra water to your hot candy base, which can make canes sticky, dilute the peppermint flavor, and cause blurry, bleeding stripes. Concentrated gel coloring has no added moisture, so it delivers vivid, sharp red stripes without ruining your candy’s crisp texture.
6.How do I keep the candy from hardening too fast while I shape it?
Hot sugar cools and hardens quickly, so work in small batches to avoid rushing. Keep the pulled white candy and red candy portions on separate silicone-lined baking sheets in a 200°F oven while you work with one section at a time. Wear lightly oiled heat-resistant gloves to pull and shape without sticking or losing heat too fast.
7.Do I really need heat-resistant gloves to pull and shape the candy?
Absolutely—food-safe heat-resistant silicone gloves are non-negotiable here. Freshly cooked sugar hits 300°F, which causes instant, severe burns if it touches bare skin. Gloves also prevent the moisture from your hands from making the candy surface grainy, and make pulling the candy to that perfect opaque white far easier.
8.How long do I need to pull the white candy portion for the right texture?
Pull the uncolored white portion for 2 to 3 minutes total, folding it over itself repeatedly as it cools, until it shifts from translucent to a bright, opaque milky white with a soft satiny sheen. Don’t over-pull it, though—if you work it too long, it will harden and crack before you can form the stripes and cane shapes.
9.How do I get clean, even red stripes without the colors bleeding together?
First, roll your pulled white candy into a thick, even log. Press thin, equally sized ropes of pulled red candy along the length of the white log, spacing them evenly apart. Gently roll the whole log to seal the stripes to the surface, and avoid over-kneading or over-rolling once stripes are applied, since that causes blurry, bleeding lines.
10.How do I form the classic hooked top without breaking the candy?
Once you cut individual 6–7 inch thin ropes from your stretched striped log, let them cool for just 30 to 45 seconds until they’re firm enough to hold shape but still pliable. Gently bend the top 1 inch of each rope into a soft, rounded hook—don’t squeeze too hard—and set canes on a silicone mat to fully harden for 10 minutes before moving.
11.Can I swap the peppermint extract for a different flavor?
You can absolutely swap peppermint for other concentrated, oil-based candy flavorings (like wintergreen, cinnamon, or vanilla) at the same measurement. Just make sure you use oil-based flavors, not standard alcohol-based extracts—alcohol evaporates instantly at high sugar temperatures, leaving weak, off-flavors in your finished canes.
12.Why does my candy have a bitter, burnt aftertaste?
That burnt flavor happens when you cook the sugar syrup past 310°F, or let it sit on high heat too long once it hits hard crack stage. Never walk away from the pot once the syrup passes 250°F, pull it off heat the second it hits 305°F, and stir in your peppermint extract off-heat to avoid scorching the flavoring.
13.How should I store finished candy canes to keep them crisp and fresh?
Once canes are fully cooled, wrap each one individually in clear cellophane secured with twist ties, then tuck them into an airtight container in a cool, dry spot away from direct sunlight. They’ll stay perfectly crisp for up to 3 months. Skip the fridge—condensation will build up on the canes and turn them soft and sticky.
14.Can I use these homemade canes as Christmas tree ornaments?
They make fantastic, nostalgic tree ornaments! Just make sure each cane is fully wrapped in cellophane to block ambient moisture, and hang them on interior branches away from heat vents, fireplace heat, or direct sunny window spots that could make them melt. They’ll stay crisp and pretty all holiday season if kept dry.
15.My sugar syrup turned grainy while cooking—what went wrong?
Grainy syrup forms when undissolved sugar crystals stuck to the sides of the pot fall back into the boiling syrup. Prevent this by brushing down the pot sides with a wet pastry brush as the syrup boils to dissolve any stray crystals, avoid stirring the syrup once it hits a rolling boil, and use the full amount of corn syrup to block crystal growth.

Comments (19)

1 week ago

OMG these turned out SO good! I was nervous about pulling the sugar to get that classic white stripe but after the second try I got the hang of it. My kids went absolutely crazy for them, we even hung a bunch on our Christmas tree as edible ornaments. Total game changer for our annual holiday cookie swap!

5 days ago

Wait how hot did you get your sugar? I kept burning mine the first two attempts 😅

3 days ago

Great question! We recommend heating the sugar syrup to exactly 300°F (hard crack stage) using a candy thermometer, and making sure not to stir it once it starts boiling to avoid grainy texture. So glad your family loved the recipe!

2 days ago

Took me a little longer than 45 minutes because I had to redo the peppermint oil measurement (I accidentally poured way too much at first, whoops!) but the final product was chef’s kiss. Brought them to my office potluck and everyone was asking for the recipe.

yesterday

So glad they were a hit at the potluck! Peppermint oil is super concentrated, so a little goes a long way – we always recommend measuring it out over the sink to avoid over-pouring!

30 minutes ago

Made these for my dorm floor holiday party and people thought I bought them from a fancy candy shop! Didn’t have a candy hook so I just pulled the sugar with buttered gloves on my kitchen counter, worked perfectly. 10/10 will make again every year.

2 weeks ago

I’ve been making candy canes for 50 years and this is the best classic recipe I’ve ever tried! The ratio of peppermint to sugar is perfect, not too overpowering, and the texture stays crisp for weeks if stored right. My grandkids fight over the red striped ones every year.

1 week ago

How do you store them to keep them crisp? Mine got sticky after 2 days on the counter last year!

5 days ago

We recommend storing them in an airtight container at room temperature, layered between pieces of parchment paper, in a cool dry spot away from direct sunlight. Humidity is the biggest culprit for sticky candy canes!

3 days ago

Tasted great but man this is trickier than I thought it would be! My first batch turned into a lumpy grainy mess because I stirred the sugar while it was boiling. Second batch was way better, just a little lopsided looking. Tastes better than store bought though!

2 days ago

So glad you gave it a second shot! Candy making definitely has a learning curve, and even lopsided candy canes taste delicious – we think the wonky ones have extra charm.

5 minutes ago

Just pulled my first batch out and they are PERFECT. Used a little extra red food gel for brighter stripes and added a tiny pinch of salt to the sugar mix to cut the sweetness, chef’s kiss. Already got a text from my neighbor asking for a batch for her kid’s class party.

5 days ago

Made these for our neighborhood holiday potluck and they were the first thing gone! Only reason I’m not giving 5 stars is I wish the recipe noted how fast the sugar hardens once you take it off the heat – I had to move way quicker than I expected to shape them before they set.

3 days ago

Oh my gosh same! I turned my back for 30 seconds to grab my cookie cutters and half the batch was too hard to bend into cane shape 😂

2 days ago

That’s such great feedback – we’ve added a note to the recipe about working quickly once the sugar reaches hard crack stage, and recommend having all your tools prepped and buttered before you start heating the sugar to avoid that rush!

2 hours ago

My roommate and I made these as a lazy Sunday activity and we had so much fun! We did half classic peppermint and half added a little hot cocoa mix to the white portion for a chocolate peppermint twist. So fun to customize!

30 minutes ago

That chocolate peppermint twist sounds incredible! We love hearing about fun customizations people add to the base recipe, might have to test that one out ourselves.

yesterday

Used this recipe for my 4-H candy making demo last week and all the kids loved getting to help pull the sugar and twist the stripes. Super hands on, great for a group activity as long as you have an adult handling the hot sugar part. Everyone got to take a mini candy cane home!

1 week ago

I make these every year to tie onto Christmas presents for my coworkers and family, and this recipe is my new go-to. They have that perfect sharp peppermint kick just like the old fashioned candy canes I got as a kid, no weird artificial aftertaste.

5 days ago

Wait what kind of peppermint oil do you use? I bought a cheap one last year and it tasted like toothpaste lol

3 days ago

We always recommend using food-grade pure peppermint oil (not extract, which is much milder) for the best flavor – the cheap craft store versions often have that odd toothpaste aftertaste, so splurging a little on the good stuff is worth it!

3 days ago

Okay so I am NOT good at candy making but these actually came out edible?? My stripes are messy and they’re all different sizes but they taste exactly like the candy canes I get at the mall during Christmas. Win in my book!

2 days ago

Girl same, my first batch looked like abstract candy art but no one cares when they taste that good! 😂

2 days ago

Brought a big batch of these to the fire station for the crew over the holiday shift and everyone raved. Even the guys who say they don’t like peppermint snacks were sneaking second ones. Super easy to portion into mini sizes for quick treats.

5 days ago

So happy this recipe is naturally gluten free! I’ve been missing good candy canes since so many store bought ones have weird hidden gluten additives. These are crisp, perfectly minty, and safe for my whole family to eat at our holiday dinner.

3 days ago

Are they nut free too? Looking for safe treats for my son’s class holiday party with multiple nut allergies!

yesterday

Yes! This recipe is completely nut free as written, just make sure all your ingredients (especially the peppermint oil and food coloring) are labeled nut free if you’re making them for a group with severe allergies!

30 minutes ago

Made these with my best friend after school today and we had a blast! We added a little edible glitter to the stripes and they look so fancy. Already posted them on my TikTok and people are asking for the link to the recipe!

5 minutes ago

Edible glitter is such a fun touch! So glad you and your friend had a good time making them – we’d love to see how they turned out if you tag us!

1 week ago

Made these to give out to my former students when they stop by for holiday visits, and it’s been such a hit. The classic peppermint flavor is so nostalgic, it makes everyone smile when they get one. Worth every minute of the work!

2 weeks ago

Made a double batch of these on Sunday to have for holiday treats all month, and they held up great! The only heads up is don’t try to make them on a super humid day, I learned that the hard way my first go round when the whole batch stayed sticky.

1 week ago

Oh that explains why my batch was sticky last week! It was snowing and super humid outside, I thought I messed up the sugar temp

5 days ago

Humidity is candy’s worst enemy! We always recommend checking the humidity level before making hard candy – if it’s over 50% you’ll likely end up with sticky results no matter how perfect your sugar temp is.

3 days ago

I collect vintage candy recipes and this one tastes exactly like the homemade candy canes my grandma used to make in the 1960s. No weird corn syrup aftertaste, just smooth peppermint and that perfect crisp snap when you break them. 10/10.

2 days ago

I agree! Tastes just like the ones we made at church holiday bazaars back in the 70s, nothing beats that old fashioned flavor.

yesterday

Made these for my baby’s first Christmas photos to use as props, and they looked so cute! Only issue was I didn’t pull the sugar long enough so some of them were still clear instead of opaque white, but they still tasted great.

2 hours ago

They sound adorable for photos! The sugar turns opaque white when you’ve pulled it enough to incorporate air – usually 3-5 minutes of pulling with buttered gloves does the trick, you’ll get it next time!

just now

Just finished making these for our annual ski trip cabin snack stash and they’re perfect! Tossed a bunch in a bag to take up the mountain, they hold up great in the cold and that peppermint kick is perfect for warming you up after a run. So stoked to share these with the group!



