
Dutch Baby (German Pancake)

title 1
Dutch Baby (German Pancake)
⏱️ cook time 30 minutes
🍽️ servings 4
⚡ Difficulty easy

intro

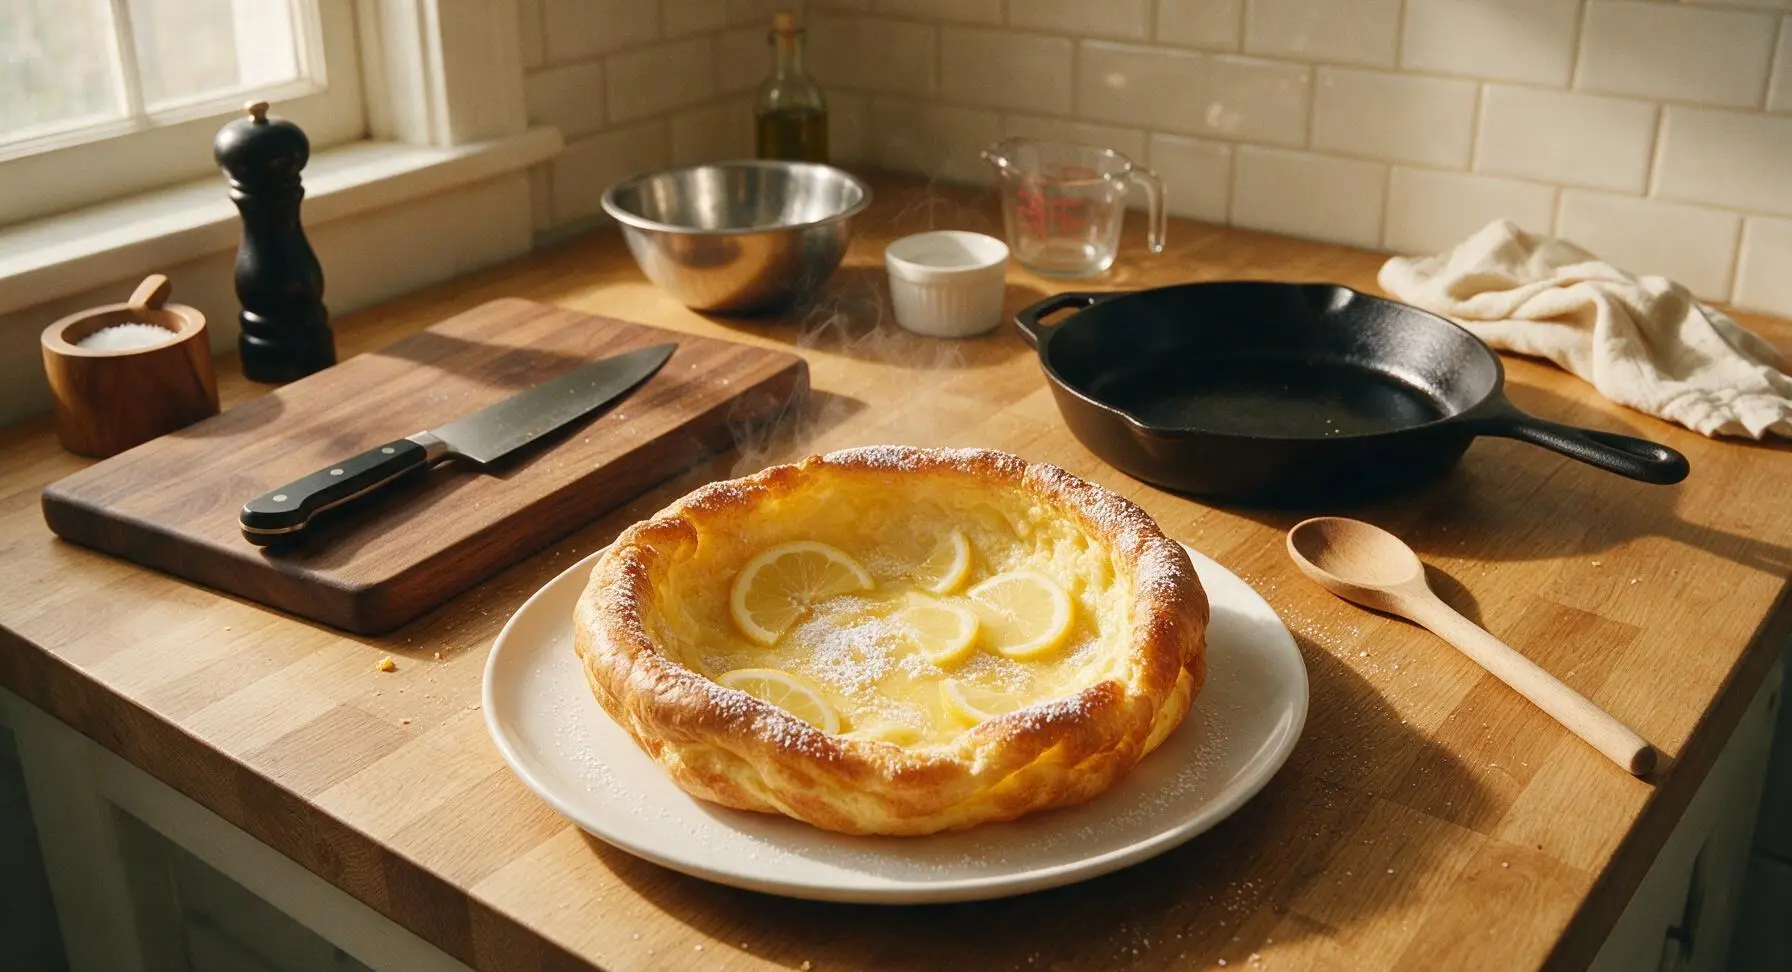
A dramatically puffed, golden German pancake with crisp buttery edges and a soft custardy center, served simply with bright lemon and snowy powdered sugar for a cozy weekend treat.

Ingredients
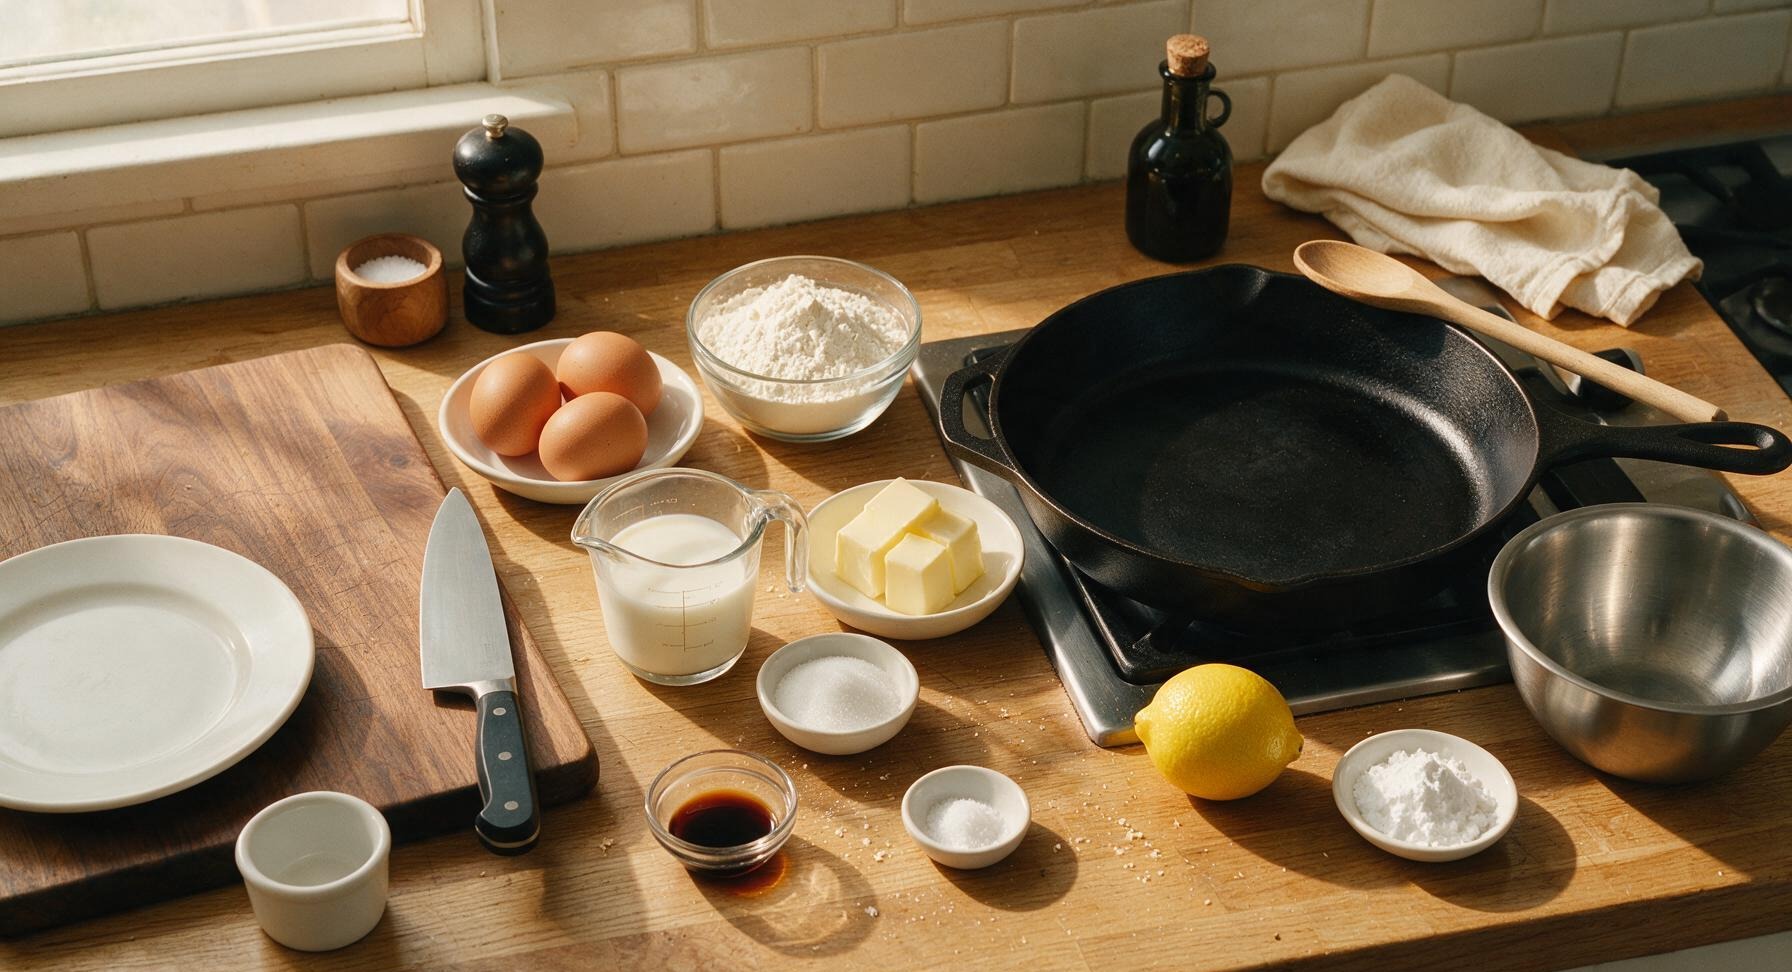
Large eggs 3 each
All-purpose flour 60g (1/2 cup)
Whole milk 120ml (1/2 cup)
Unsalted butter 42g (3 tablespoons)
Granulated sugar 12g (1 tablespoon)
Pure vanilla extract 5ml (1 teaspoon)
Fine sea salt 1/4 teaspoon
Fresh lemon 1 medium
Powdered sugar 15g (2 tablespoons)

Steps

1

Preheat Oven and Skillet

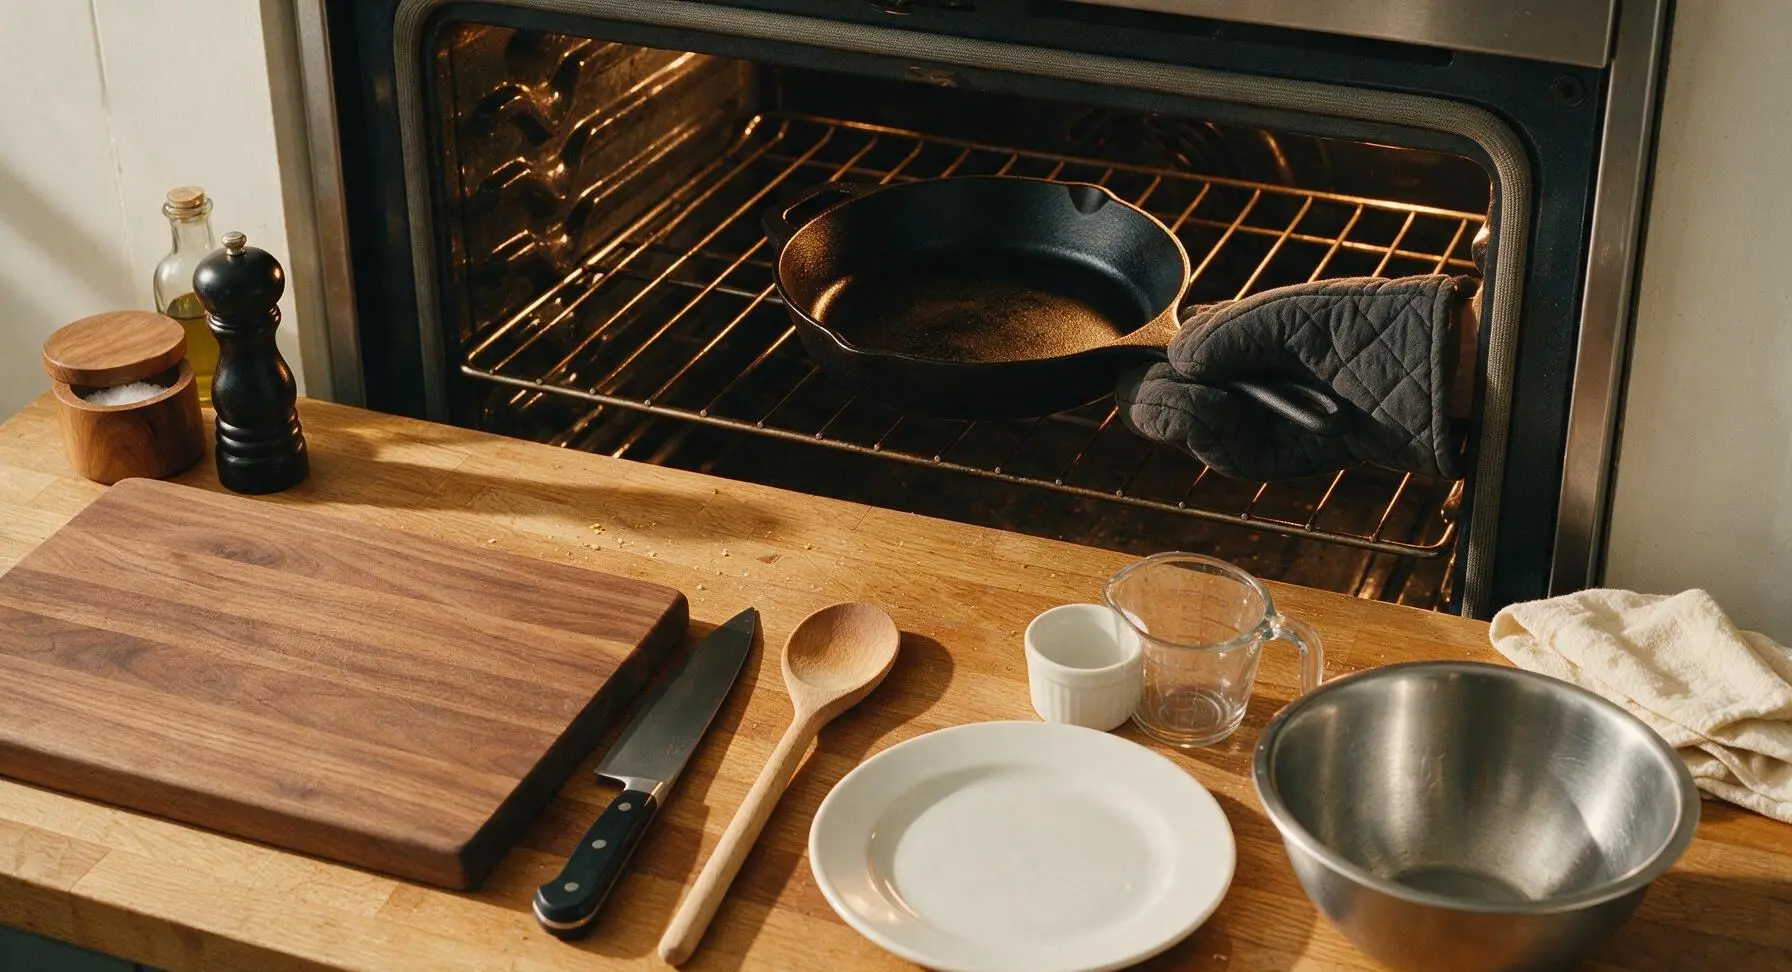
Adjust your oven rack to the middle position, then preheat the oven to 425°F (220°C). Place the 12-inch cast iron skillet directly on the middle rack as the oven heats, letting it preheat for 10 full minutes. A fully heated skillet is essential to create the signature dramatic puff when the batter hits the hot metal surface.
Step 1
step1:Preheat Oven and Skillet
2

Blend Smooth Batter

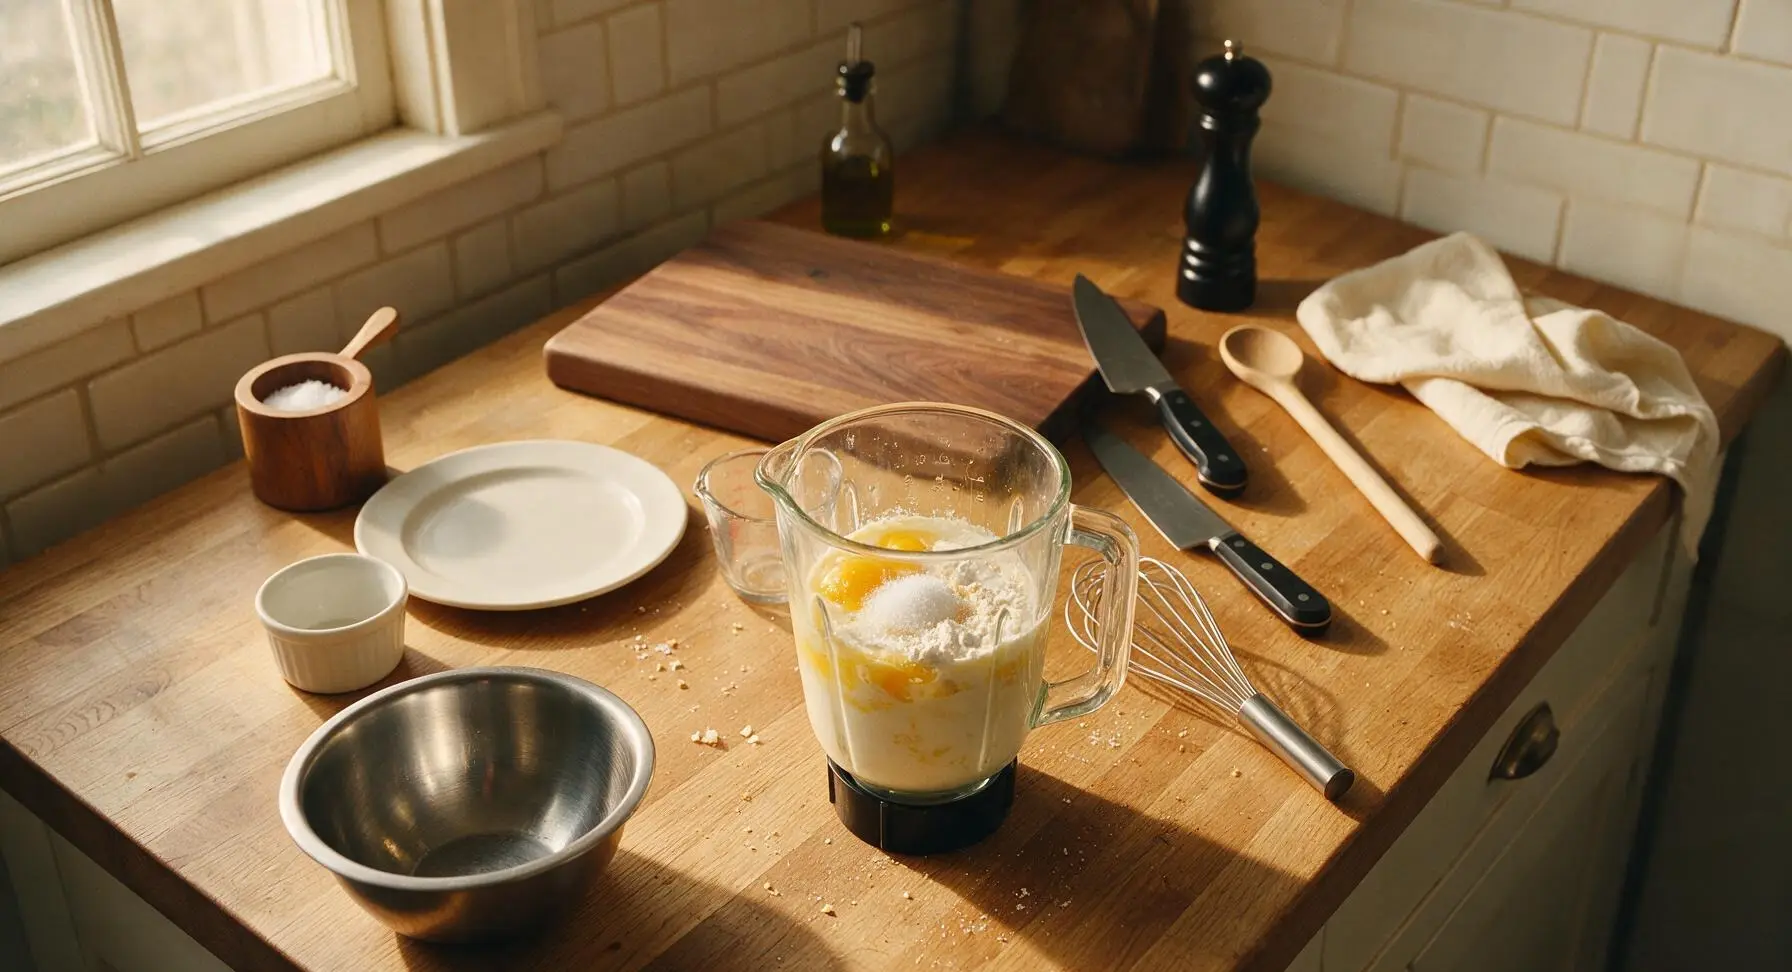
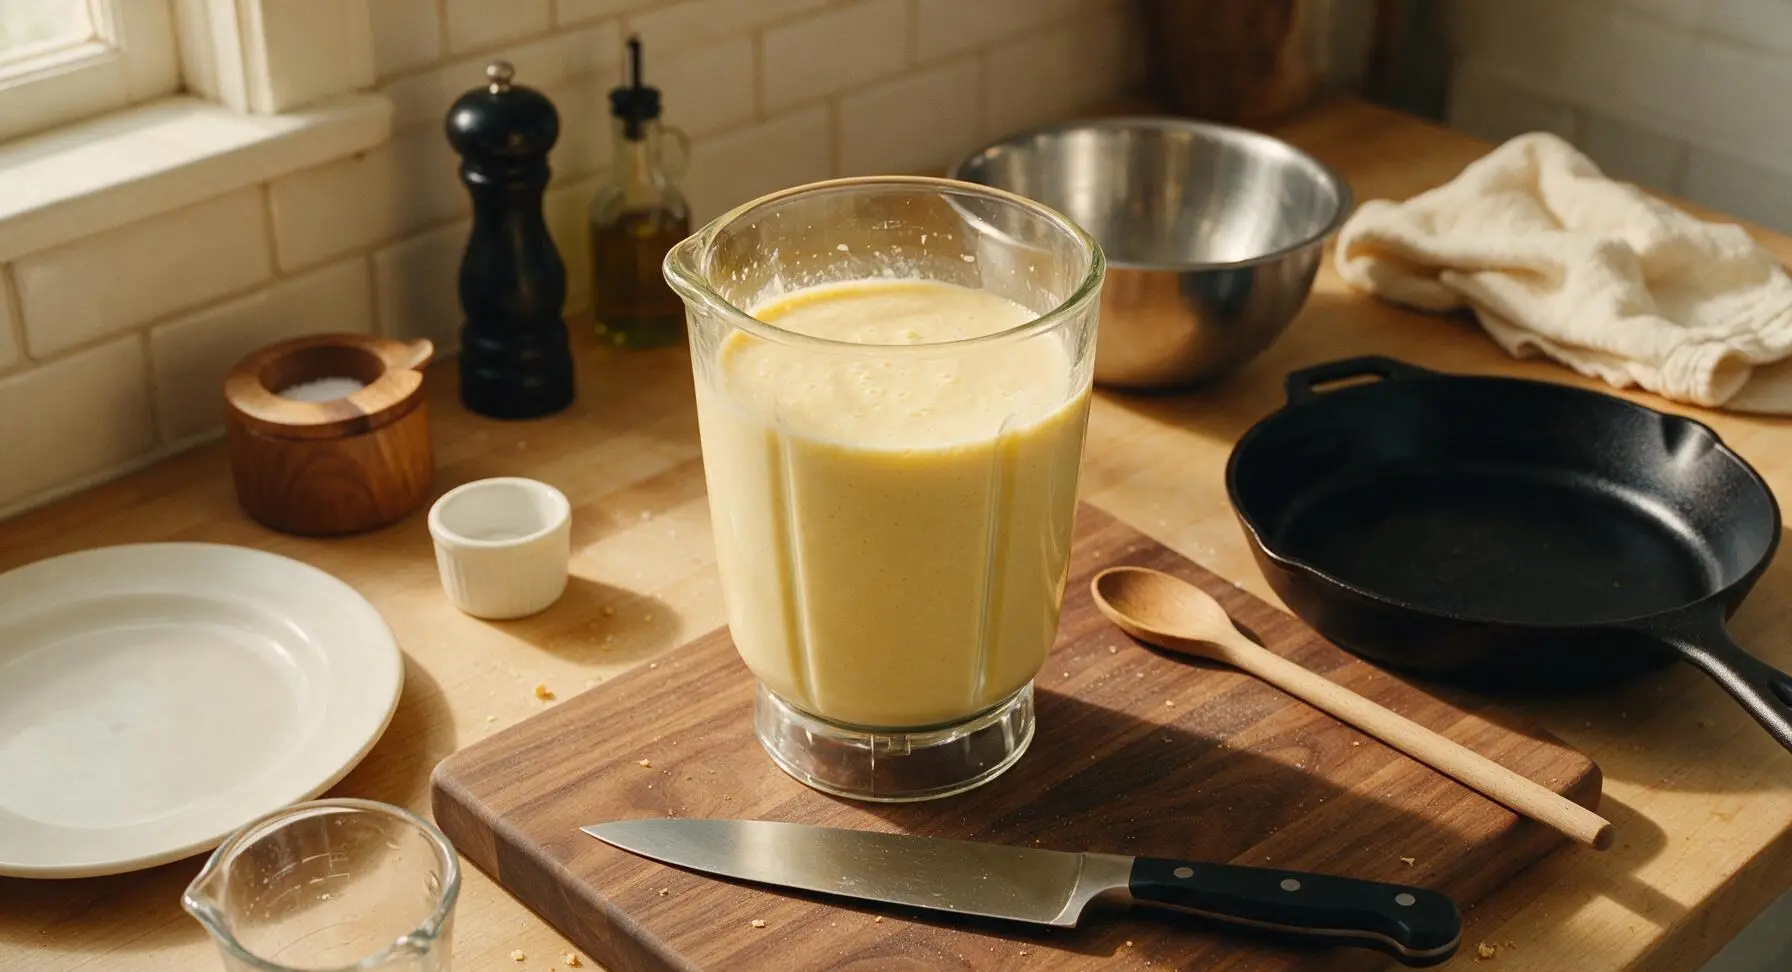
Add the 3 large eggs, 1/2 cup whole milk, 1/2 cup all-purpose flour, 1 tablespoon granulated sugar, 1 teaspoon vanilla extract, and 1/4 teaspoon fine sea salt to the glass blender jar. Blend on high speed for exactly 30 seconds, stopping once to scrape down the sides of the jar with the stainless steel whisk to incorporate any stray flour. The finished batter will be completely smooth, thin, and similar in consistency to heavy cream, with no visible lumps.
Step 2
step2:Blend Smooth Batter
Step 2
step2:Blend Smooth Batter
3

Melt Butter in Skillet

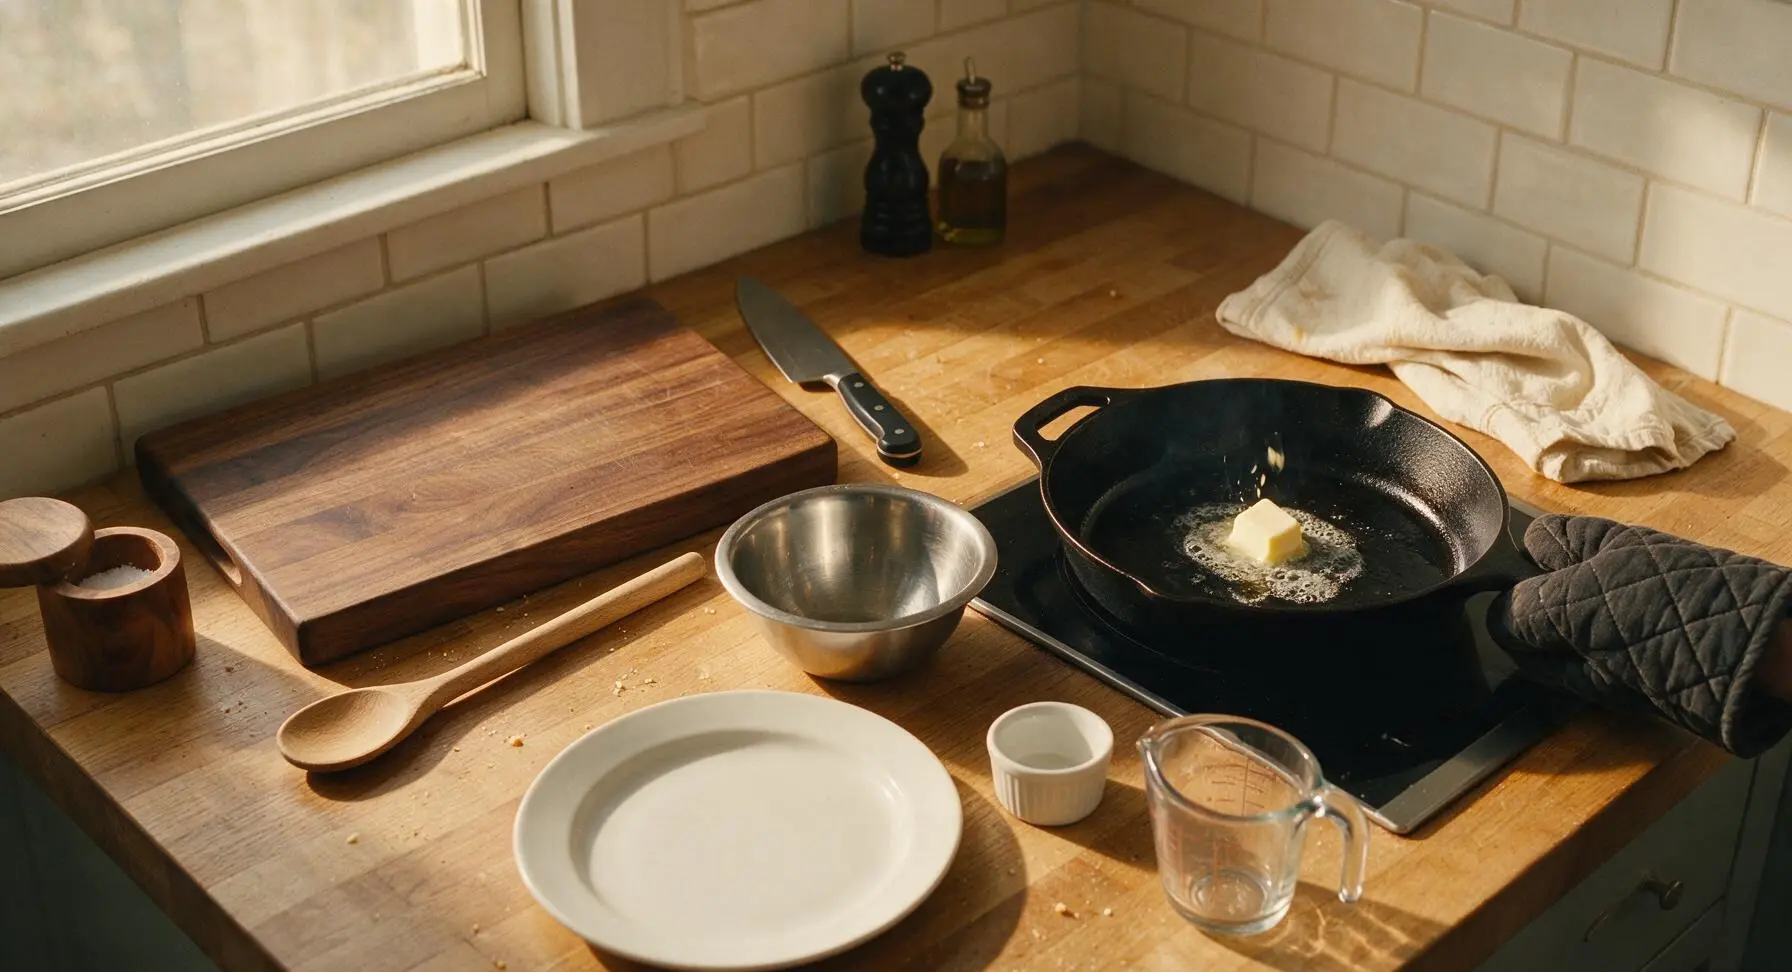
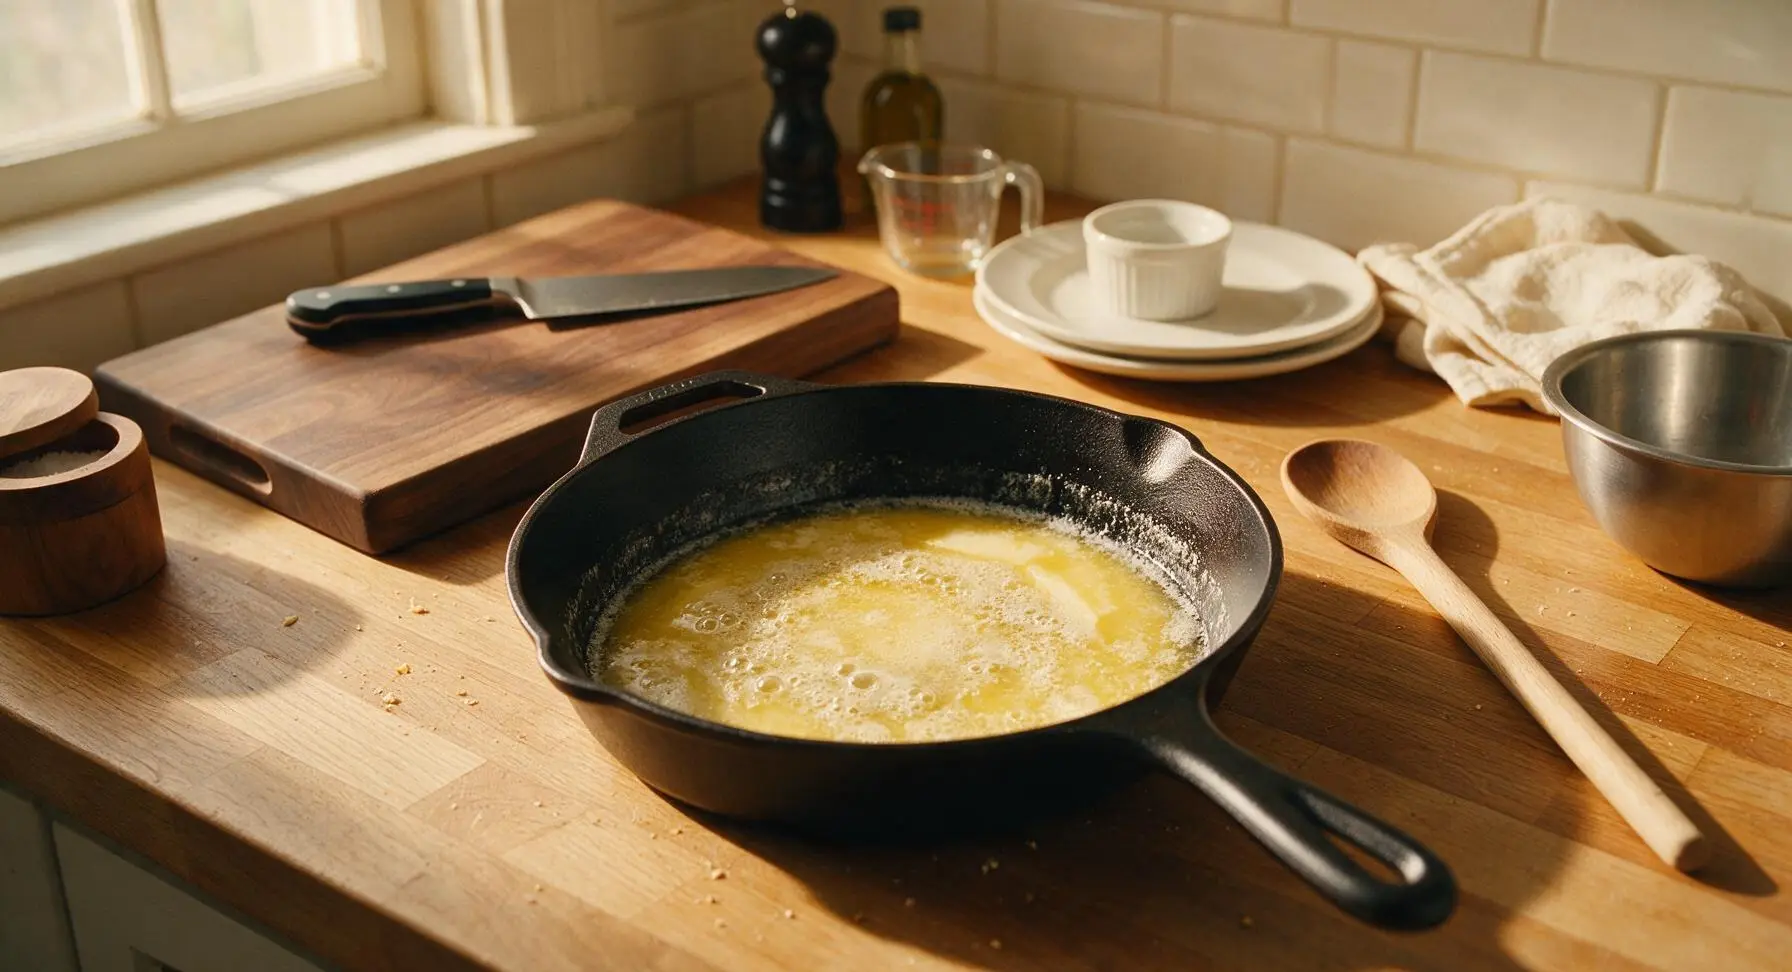
Carefully remove the preheated cast iron skillet from the oven using the charcoal oven mitt, and set it on the inset induction cooktop surface. Add the 3 tablespoons of cut unsalted butter to the hot skillet; the butter will immediately sizzle, melt, and foam. Swirl the skillet to coat the bottom and 2cm up the sides completely with melted butter, taking care not to let the butter burn (it should turn a light golden color, not dark brown).
Step 3
step3:Melt Butter in Skillet
Step 3
step3:Melt Butter in Skillet
4

Pour Batter Into Pan

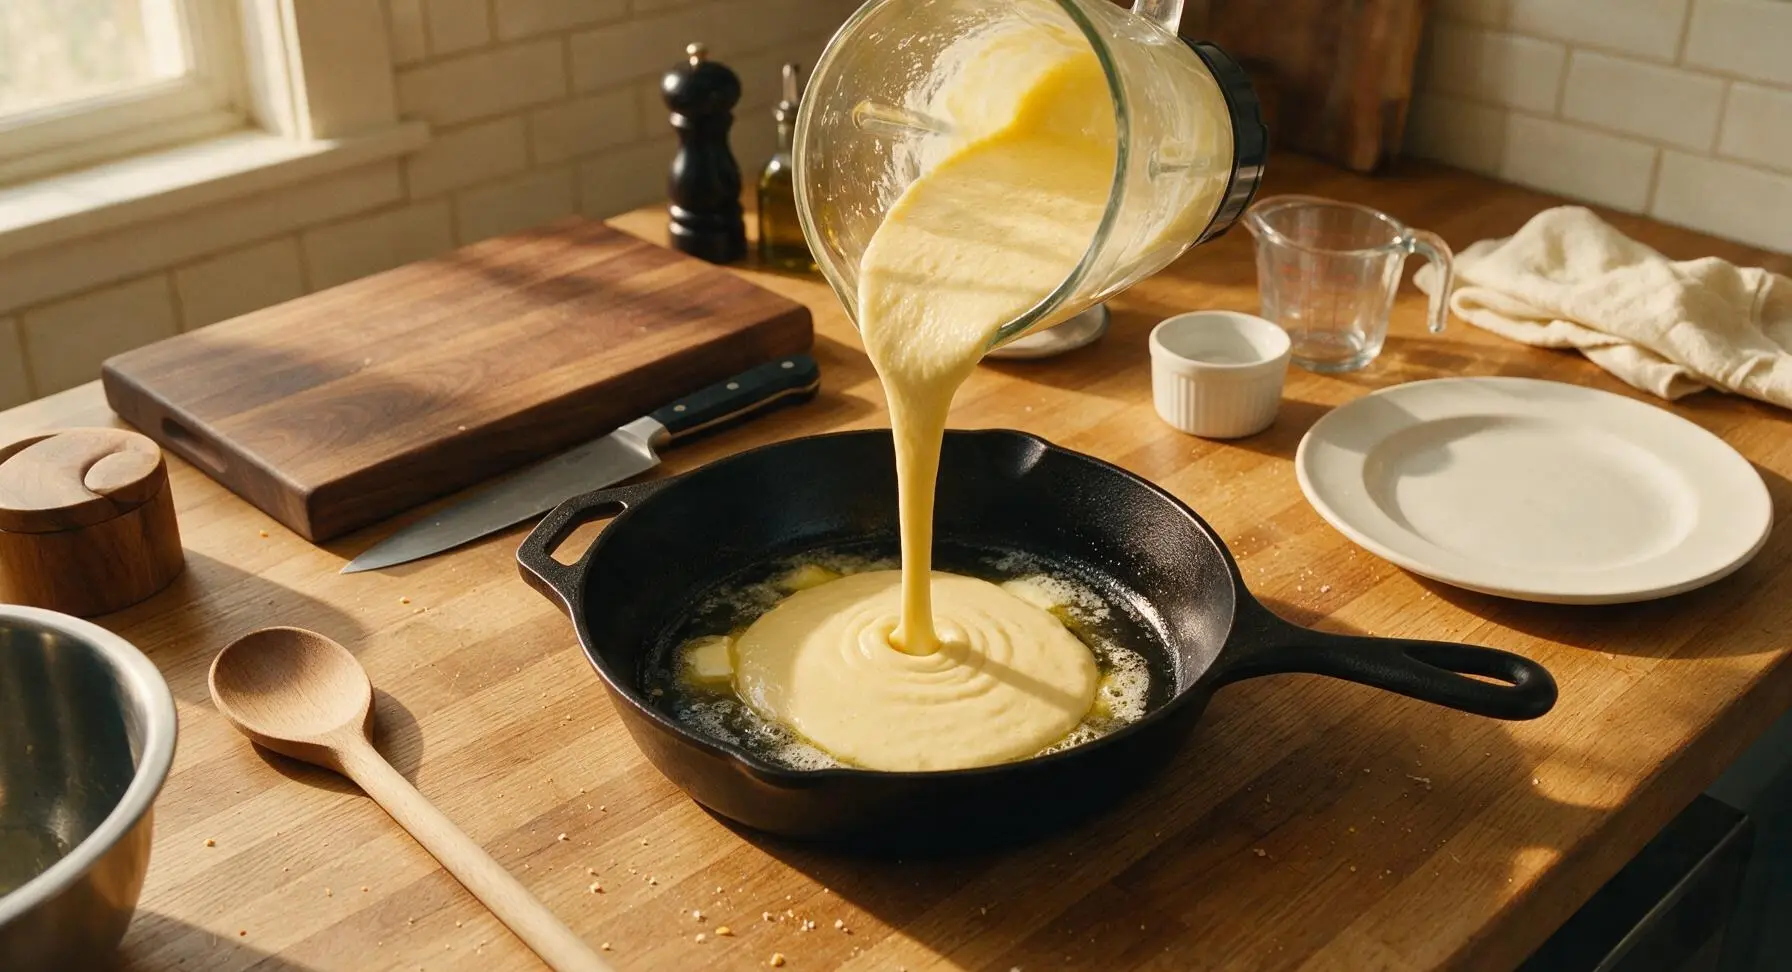
Immediately pour the entire batch of thin, smooth batter directly into the center of the buttered hot skillet. Do not stir the batter once it is in the pan. You will hear a loud sizzle as the batter hits the hot butter and metal, which is a reliable sign that your pan is hot enough to create a tall, even puff.
Step 4
step4:Pour Batter Into Pan
5

Bake Until Golden Puff

Carefully transfer the skillet back to the middle oven rack, and bake for 18-20 minutes at 425°F (220°C). Do NOT open the oven door for the first 15 minutes of baking, as a sudden drop in temperature will cause the pancake to deflate before it can fully puff. The Dutch baby is done when the edges are deep golden brown and puffed 5cm above the pan rim, and the center is just set with a slight custardy wobble.
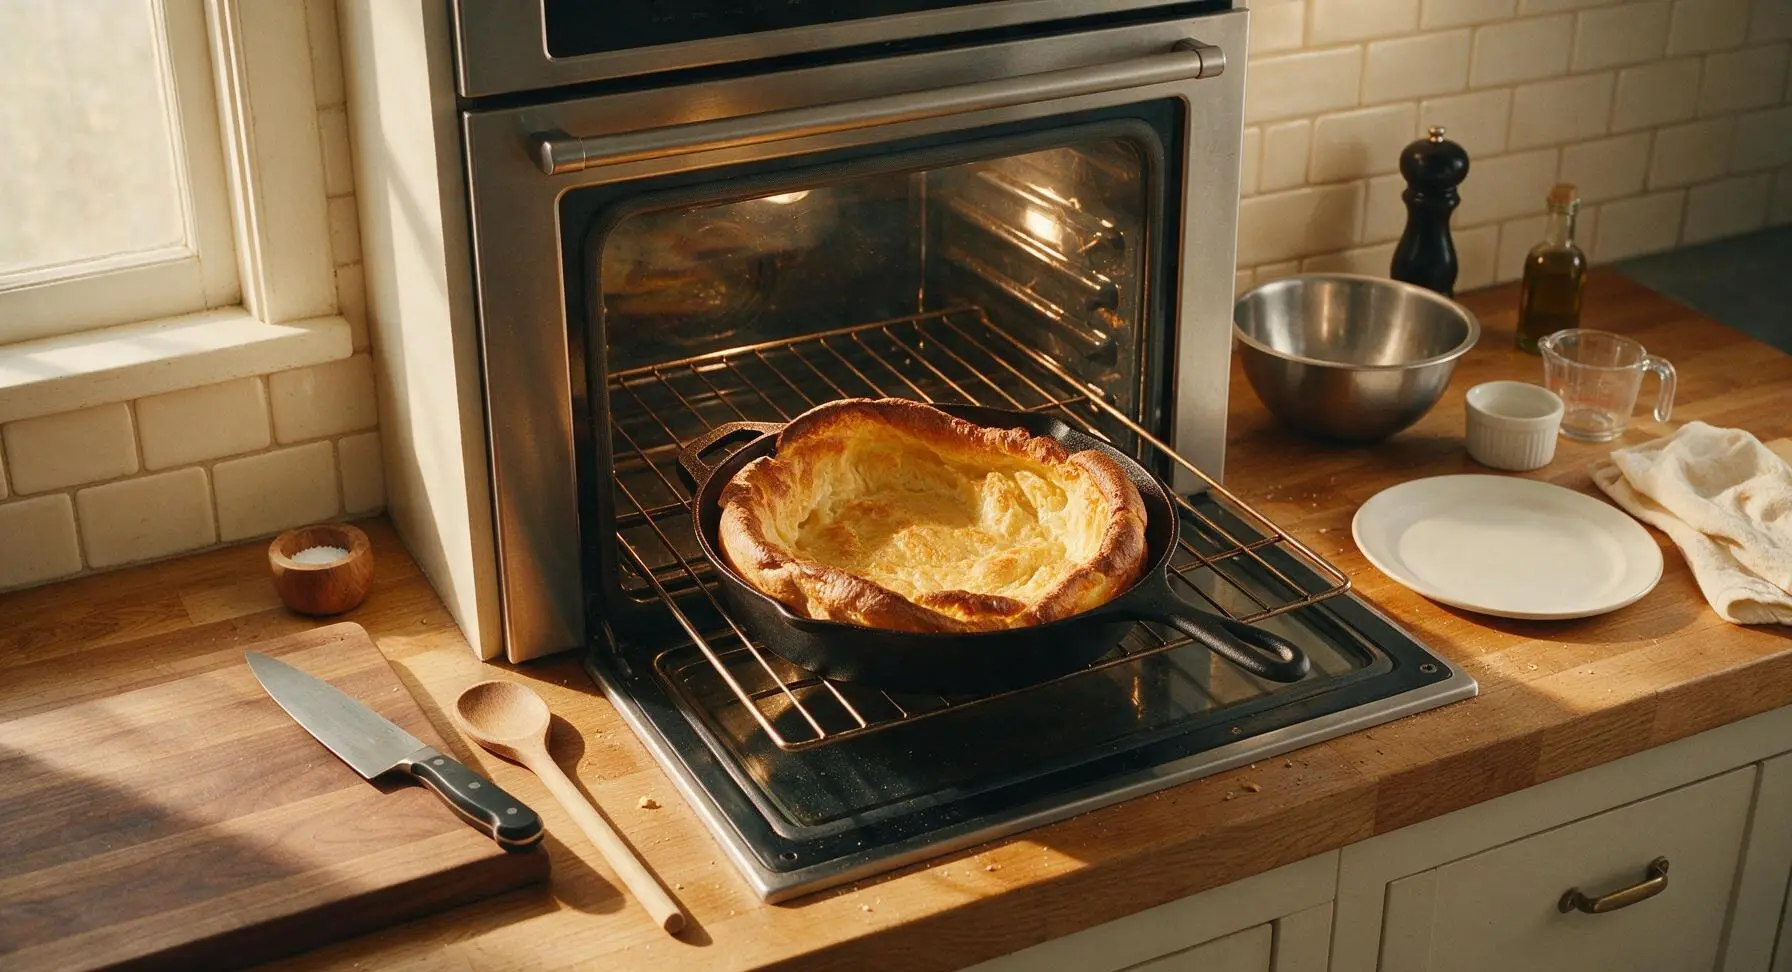
Step 5
step5:Bake Until Golden Puff
6

Dust With Powdered Sugar

Remove the baked Dutch baby from the oven using the oven mitt, and set the skillet on the heat-safe counter surface for 1 minute. Hold the fine-mesh stainless steel sieve 15cm above the pancake, and sift the 2 tablespoons of powdered sugar evenly across the entire surface, creating a light, even snowy coating.
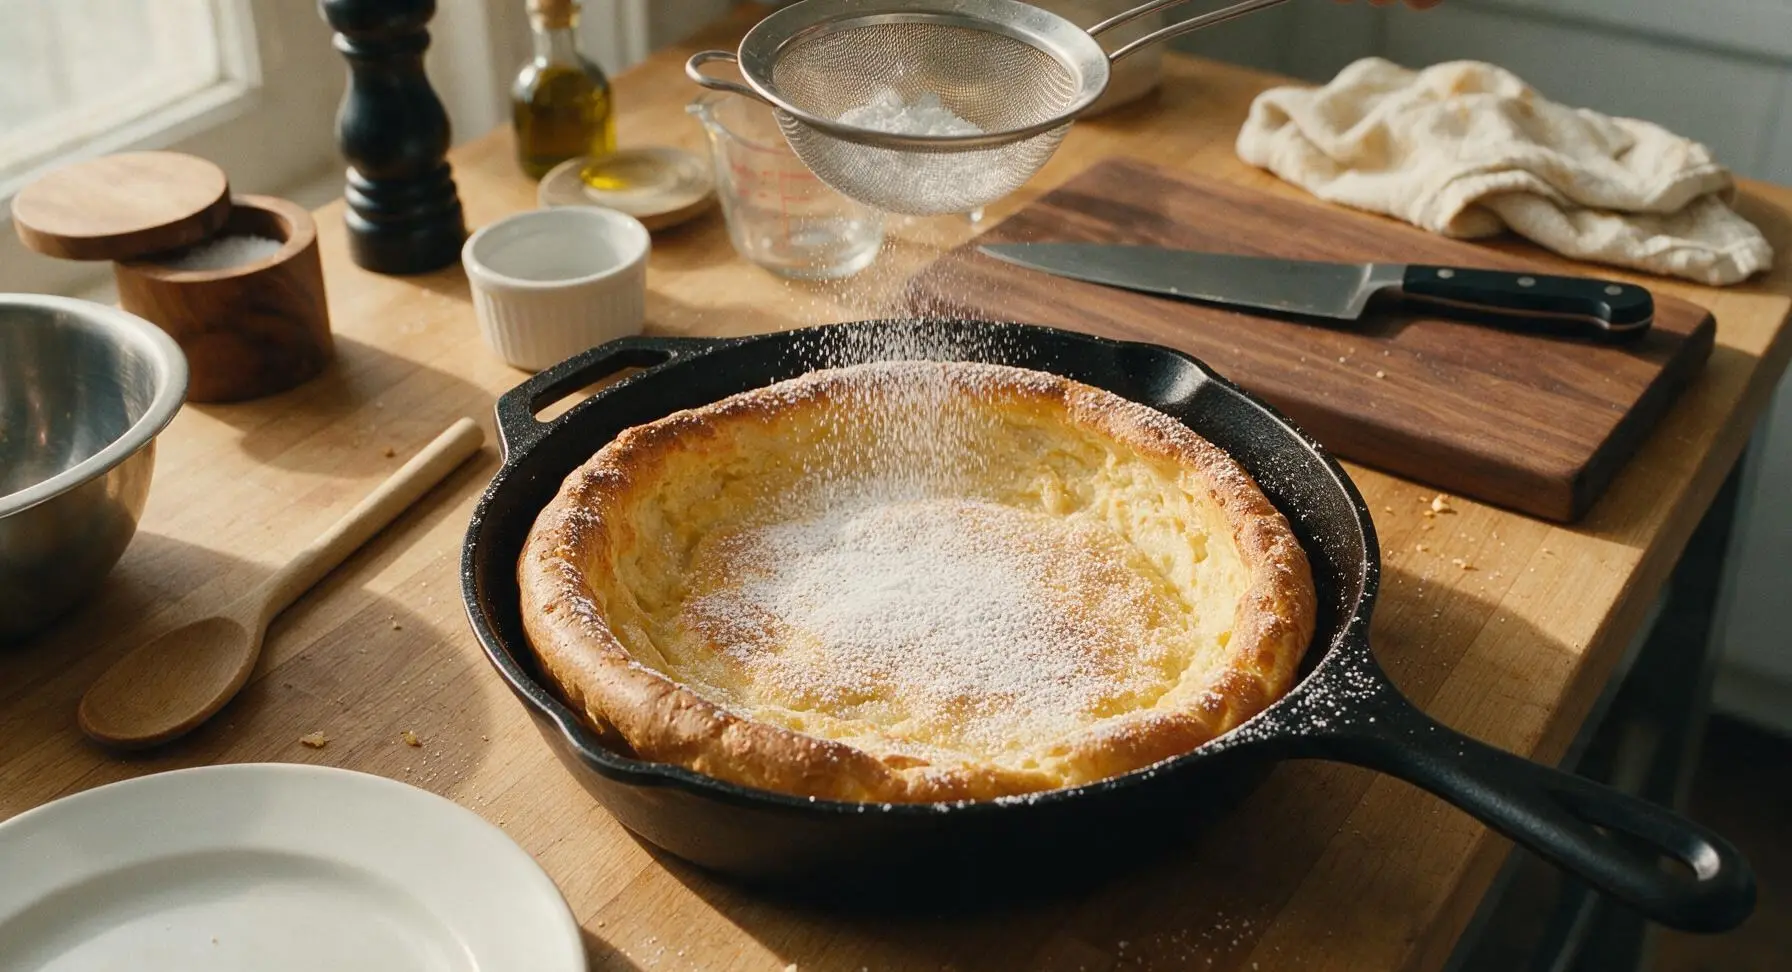
Step 6
step6:Dust With Powdered Sugar
7

Serve Warm With Lemon

Transfer the sugar-dusted Dutch baby from the skillet to the cream white ceramic serving platter. Cut the whole lemon into 4 wedges using the serrated fruit knife, and arrange the wedges at the 3 o'clock position on the platter. Slice the warm pancake into 4 equal wedges, and serve immediately, squeezing fresh lemon juice over each slice to taste. The Dutch baby will begin to deflate slightly within 2-3 minutes of coming out of the oven, which is completely normal and expected.
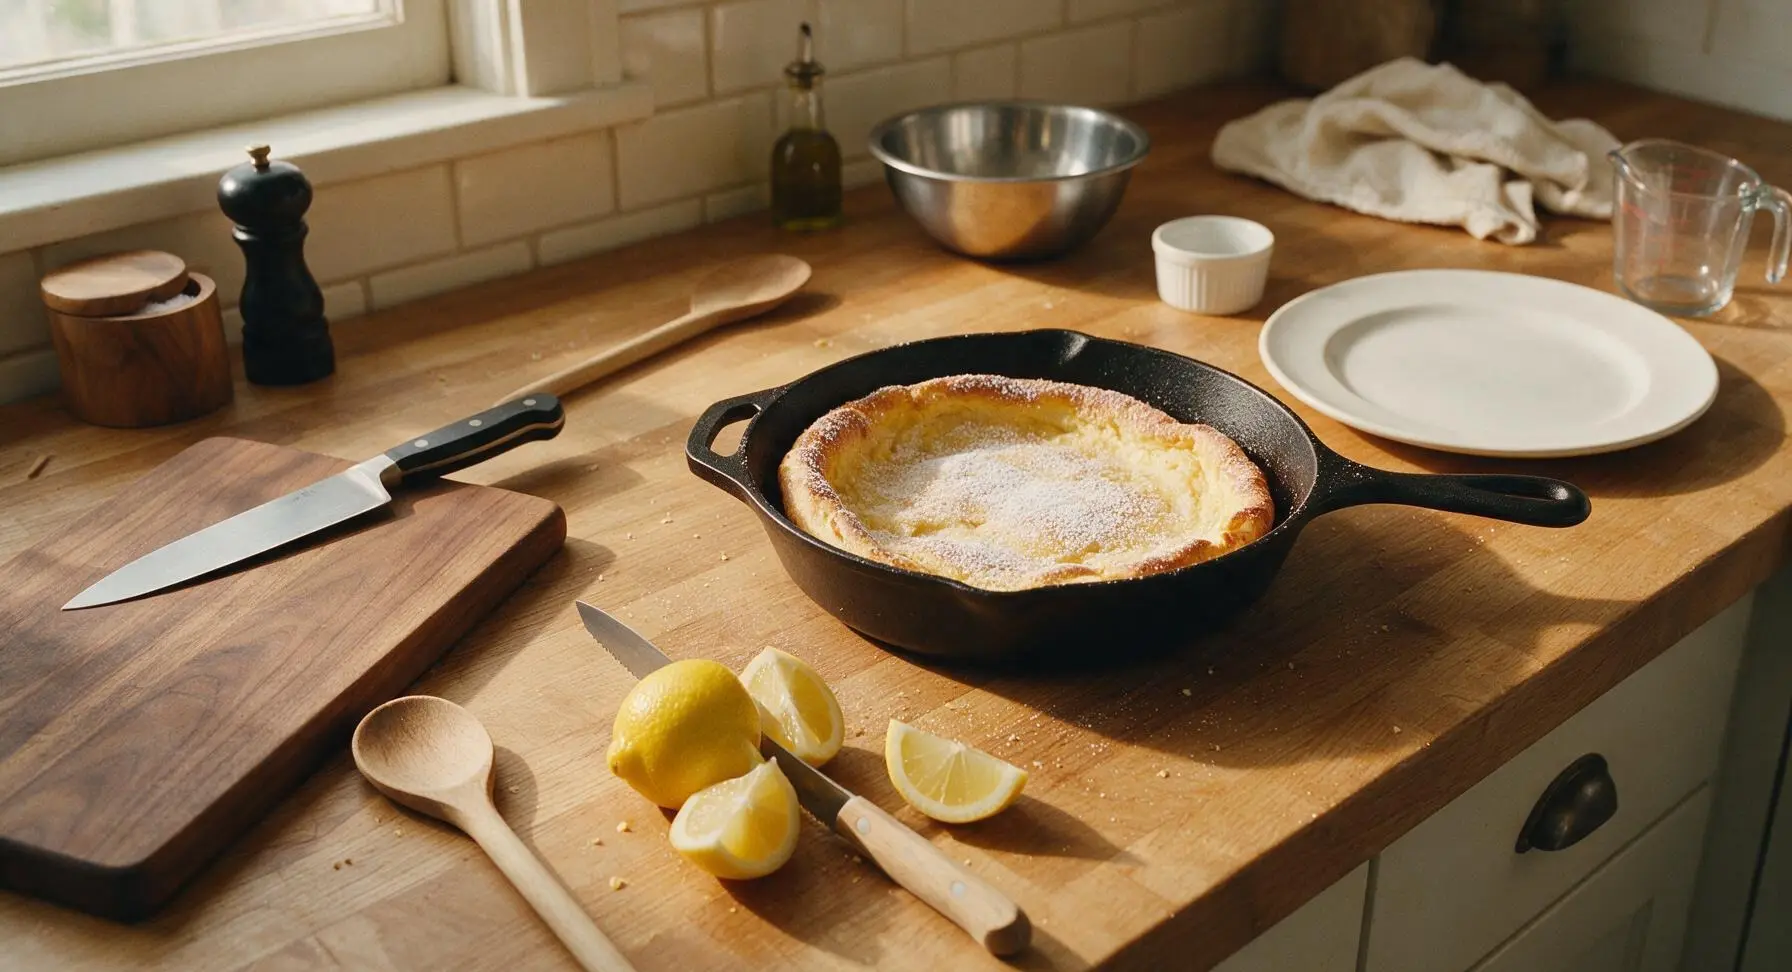
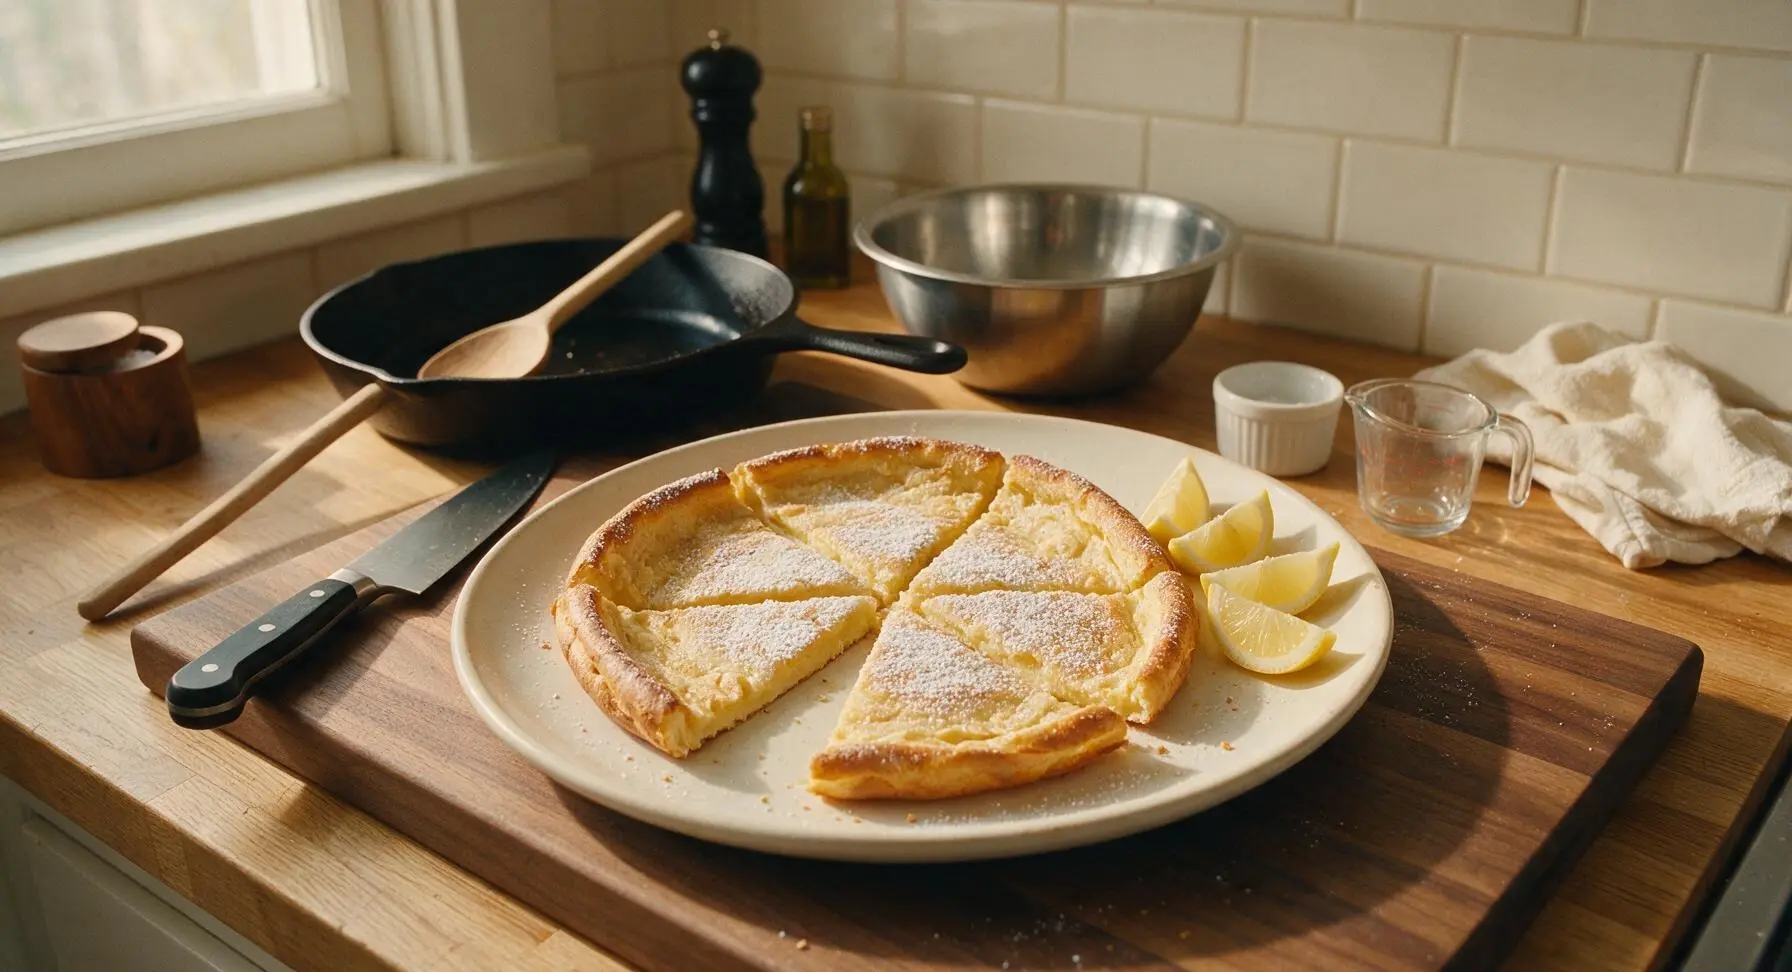
Step 7
step7:Serve Warm With Lemon
Step 7
step7:Serve Warm With Lemon

Tips

1.Never open the oven door for the first 15 minutes of baking: the sudden rush of cool air will collapse the steam that builds up to create the Dutch baby’s signature tall, dramatic puff, resulting in a flat, dense pancake.
2.Use room temperature eggs and milk for the tallest rise: cold ingredients create a thicker, heavier batter that won’t puff as high or cook as evenly when it hits the hot skillet, leading to lopsided, low-rising edges.
3.Skip non-stick cooking spray and use real butter: the hot melted butter creates the nutty, crisp, golden crust that defines a classic Dutch baby, while cooking spray can leave a gummy, artificial-tasting residue on both the pan and the pancake edges.


✨ You May Also Like

Breakfast
🍜 United States

Crisp-edged, fluffy lard griddle cakes are a nostalgic homestyle staple, with rich savoriness from rendered lard, perfect topped with maple syrup or savory gravy.

⏱️ 25 minuteBreakfast ★ 4.8
Breakfast
🍜 United States

Flaky, buttery homemade buttermilk biscuits smothered in creamy, peppery pork sausage gravy: a beloved, hearty Southern American comfort food classic.

⏱️ 35 minuteBreakfast ★ 4.8
Breakfast
🍜 United States

Golden, custardy brioche stuffed with sweet cream cheese and fresh berries, pan-fried to crisp perfection. An indulgent, cozy breakfast perfect for slow weekend mornings.

⏱️ 30 minuteBreakfast ★ 4.7
Breakfast
🍜 United States

Flaky, buttery Southern-style biscuits stuffed with savory salty country ham, a portable, satisfying classic perfect for casual on-the-go meals.

⏱️ 25 minuteBreakfast ★ 4.8
Breakfast
🍜 United States

Iconic puffy baked pancake popularized in Seattle, with crisp golden edges and soft custardy center, served warm with classic sweet toppings.

⏱️ 35 minuteBreakfast ★ 4.6
Breakfast
🍜 United States

Fluffy, golden pancakes studded with juicy peak-summer mixed berries, drizzled with maple syrup for a bright, comforting, crowd-pleasing family breakfast.

⏱️ 25 minuteBreakfast ★ 4.7

Dutch Baby (German Pancake):Frequently Asked Questions

1.Why didn’t my Dutch Baby puff up properly? ▾
The most common culprits are cold ingredients, a non-preheated pan, low oven temperature, or peeking while it bakes. Use room-temperature eggs and milk, preheat your oven-safe skillet with butter inside for 10 minutes, hold your oven at a steady 425°F, and avoid opening the oven door for the first 15 minutes to trap the steam that creates that iconic dramatic puff.
2.Can I make a Dutch Baby without a cast iron skillet? ▾
Absolutely! Any heavy, oven-safe 10-12 inch pan works perfectly—think carbon steel skillets, oven-safe nonstick pans, or even a deep ceramic baking dish. Just make sure it’s fully preheated with melted butter before you pour in the batter, and skip any pans with plastic handles that can melt or warp at the high baking temperature.
3.Why is the center of my Dutch Baby dense instead of custardy? ▾
A dense, gummy center usually means your batter was overmixed, your oven ran too cool, you cut out the granulated sugar that helps tenderize the crumb, or you underbaked it. Whisk the batter just until no dry flour streaks remain—overdeveloping gluten makes the texture tough and dense. Use an oven thermometer to confirm 425°F, and bake until edges are deep golden and the center is just set, not jiggly.
4.Can I prep Dutch Baby batter ahead of time? ▾
Yes, you can prep batter up to 24 hours in advance for easy weekend mornings! Mix all batter ingredients, store in a tightly sealed airtight container in the fridge, and give it a quick, gentle whisk before pouring into your preheated pan. Chilled batter may need 1-2 extra minutes of bake time, but it will still puff beautifully with that signature soft center.
5.Do I really need to use whole milk for this recipe? ▾
Whole milk delivers the richest, most tender custardy center and helps the pancake rise evenly, thanks to its higher fat content. You can swap in 2% milk in a pinch, but avoid skim or low-fat non-dairy milks—they lead to a flatter, less flavorful pancake with a drier, tougher texture instead of that classic soft, creamy middle.
6.Why do my Dutch Baby edges taste burnt sometimes? ▾
Burnt edges usually come from butter that burns while the pan preheats, or uneven oven hot spots. When preheating your pan, watch the butter closely—pull it out once it’s foamy and smells nutty, before it turns dark brown. If your oven has uneven heat, rotate the pan after the first 15 minutes (once the structure is set) to encourage even browning.
7.Can I use salted butter instead of unsalted? ▾
You can use salted butter if that’s what you have on hand, just cut any added salt in the recipe by ¼ teaspoon to keep the flavor balanced. Keep in mind salted butter has a slightly lower smoke point, so watch it closely during the pan preheat step to avoid burning the butter before you pour in batter, which throws off the whole dish’s flavor.
8.What are the best toppings besides lemon and powdered sugar? ▾
While fresh lemon and powdered sugar is the classic bright pairing that cuts through the rich buttery flavor, you have tons of great options! Try fresh berries, a drizzle of warm maple syrup, a dollop of whipped cream, cinnamon sugar, sauteed cinnamon apples, a spoonful of Nutella, or a light dusting of cocoa powder for a fun, flavorful twist.
9.How do I get my Dutch Baby to have those super crisp, buttery edges? ▾
Crisp edges come from three key steps: preheating your pan with 3 tablespoons of unsalted butter so batter sizzles the second it hits the pan, baking at a steady 425°F to quickly set the outer batter layer, and not underbaking—wait until edges are deep golden brown and pull slightly away from the sides of the pan.
10.Why does my Dutch Baby deflate right after I take it out of the oven? ▾
A little deflation right after baking is totally normal! The dramatic puff is held up by trapped steam from hot wet batter hitting the hot pan, and as that steam escapes once you pull it from the oven, it will sink slightly in the middle. That’s not a failure—that’s the classic shape, creating a perfect shallow well for your toppings.
11.Can I make a gluten-free version of Dutch Baby? ▾
Yes, you can swap all-purpose flour for a 1:1 gluten-free all-purpose baking blend that contains xanthan gum for structure. Skip blends heavy on bean flours, as they’ll leave an odd, savory aftertaste. You may notice a slightly less dramatic puff, but you’ll still get that great crisp edge and soft, custardy center everyone loves.
12.What size pan works best for a standard Dutch Baby recipe? ▾
A 10-inch heavy, oven-safe skillet is the perfect size for a standard recipe using 4 large eggs, 1 cup of flour, and 1 cup of milk. A 12-inch pan will make a thinner pancake with extra crisp edges, while an 8-inch pan creates a thicker, more custardy pancake that needs 2-3 extra minutes of bake time to set fully.
13.Do I need to let the batter rest before baking? ▾
Letting batter rest 10 to 15 minutes at room temperature before baking gives flour time to absorb liquid and gluten time to relax, which leads to a more even rise and softer, less chewy texture. If you’re prepping batter ahead to chill in the fridge, that rest happens automatically, so no extra wait is needed before baking.
14.Can I make mini Dutch Babies instead of one large one? ▾
Absolutely! For individual mini Dutch Babies, use a standard 12-cup muffin tin, add a small pat of butter to each cup, preheat the tin in the oven until butter melts, then pour ¼ cup of batter into each cup. Bake at 425°F for 12 to 15 minutes until puffed and golden, and serve with classic lemon and powdered sugar for a fun brunch bite.
15.Why is my batter lumpy even after whisking? ▾
Small, tiny lumps in your Dutch Baby batter are totally fine, and actually preferred! Overwhisking to get a perfectly smooth batter develops too much gluten in the flour, which leads to a tough, chewy pancake instead of that tender, custardy center. Just whisk until no dry flour streaks remain, and leave those little lumps alone—they’ll disappear as it bakes.
16.Can I add mix-ins directly to the Dutch Baby batter? ▾
Skip adding heavy mix-ins like chocolate chips, fruit, or nuts directly to the batter, as they’ll weigh down the pancake, prevent it from puffing properly, and often sink to the bottom to burn against the hot pan. Instead, add all your mix-ins and toppings right after you pull the baked Dutch Baby out of the oven, when it’s still hot.
17.How do I store leftover Dutch Baby? ▾
Leftover Dutch Baby will keep in an airtight container in the fridge for up to 3 days. To reheat, pop slices in a 350°F oven or toaster oven for 5 to 7 minutes until edges crisp up again—avoid microwaving, as it makes the texture soggy and rubbery. It won’t re-puff, but it will still have that rich, buttery flavor and tender crumb.
18.Do my eggs really need to be room temperature? ▾
Room-temperature eggs mix more smoothly into batter and trap air better as they bake, which helps create that tall, dramatic puff and evenly set custardy center. If you forget to pull eggs out ahead of time, submerge them in a bowl of warm tap water for 5 minutes to bring them up to temp quickly—no need to wait an hour for them to warm on the counter.
19.Can I make a dairy-free Dutch Baby? ▾
You can make a dairy-free version, but you’ll need smart swaps to keep the texture right. Use unsweetened oat milk (it has the closest fat content and creaminess to whole milk) instead of thin almond or skim non-dairy milks, and swap butter for a high-smoke-point dairy-free butter stick, not spreadable tub butter, which has too much water to create crisp edges and a good puff.

Comments (12)

2 days ago

OMG this Dutch baby was SO good! I threw it together last minute for Sunday brunch and my whole family went crazy for it. Dusted it with powdered sugar and topped with fresh strawberries, didn’t even need syrup. So easy even my teen could help whisk the batter while I preheated the skillet.

30 minutes ago

Wait mine puffed up perfectly in the oven but totally deflated as soon as I pulled it out? Did I do something wrong? It still tasted great, just wasn’t that tall puffy look I see in all the photos.

5 minutes ago

Hi Kelly! That small deflate is totally normal right after pulling it from the oven—it’s part of the classic Dutch baby texture! For maximum puff, make sure your oven is fully preheated (don’t open the door early to peek!) and your eggs are room temp when you mix the batter. Glad it still tasted great!

1 week ago

Total game changer! I’ve been intimidated to make German pancakes forever because I thought they’d be fussy, but this took literally 5 minutes to throw together before popping in the oven. My three kids devoured half of it before I even got a slice. Topped with lemon juice and powdered sugar just like my grandma used to make.

3 days ago

The lemon and powdered sugar combo is chef’s kiss! I tried it with maple syrup last time and it was fine but the lemon cuts the richness so much better, 10/10 recommendation.

2 days ago

So happy it brought back grandma memories, Liz! The lemon + powdered sugar topping is definitely the classic, no frills pick that never disappoints. So glad your kids loved it!

5 days ago

Made this for our post-hike brunch last weekend before heading out to the Rockies, and it was the perfect hearty, quick meal. Paired it with some crispy bacon and fresh peaches we picked up at the farmers market, will absolutely be adding this to our regular weekend rotation.

2 weeks ago

Brought this to my neighborhood potluck last week and people were asking for the recipe before I even set the platter down! I made it in a big cast iron and cut it into bite-sized squares, topped with a little dollop of whipped cream on each piece. So easy to transport too.

1 week ago

Wait the bite-sized square idea is genius! I’ve been making this for my family for ages but never thought to serve it for a potluck, definitely stealing that for our next block party.

2 hours ago

This tasted great when I made it last weekend, I just wish the recipe mentioned make-ahead tips! Quick question—can I make the batter the night before for meal prep? I have early classes 3 days a week and would love to just pop it in the oven when I wake up without having to mix everything half-asleep.

30 minutes ago

Great question! You absolutely can mix the batter the night before and store it covered in the fridge. Just give it a quick gentle stir before pouring it into your preheated skillet, and it’ll puff up just as well! Perfect for quick early mornings.

yesterday

Swapped the all-purpose flour for a 1:1 gluten free baking flour and it turned out perfect! Was worried it wouldn’t puff right with GF flour but it got so tall and crispy around the edges, my non-GF roommate didn’t even notice the difference. Will be making this weekly.

3 days ago

Tried this last night for breakfast for dinner night and wow, way easier than I expected. I added a little cinnamon and vanilla extract to the batter and it gave it such a warm, cozy flavor. 10/10, will be making this again when my parents come to visit next month.

2 days ago

The vanilla and cinnamon addition sounds chef’s kiss! I usually add a dash of nutmeg too, gives it that cozy fall flavor even when it’s 90 degrees outside here in Florida.

yesterday

Breakfast for dinner is the best night of the week! We do it every Wednesday and I’ve been looking for new recipes to mix it up, adding this to next week’s menu immediately.

5 minutes ago

I’ve made this twice now and it’s incredible, but I’ve been borrowing my roommate’s cast iron each time. Does this work if I use my own regular glass baking dish? I don’t want to buy a whole new pan just for this, but also don’t want it to flop when I make it for my friend’s birthday brunch.

just now

Hi Carl! You can totally make this in a glass or ceramic baking dish! Just make sure you add the butter to the dish while it preheats in the oven so the pan is nice and hot when you pour the batter in. It might not get quite as dramatically puffy as it does in cast iron, but it’ll still taste delicious!

just now

First recipe I’ve made in my new apartment that didn’t turn into a total disaster! It was so straightforward, no fancy ingredients needed, and my roommate said it’s better than the Dutch baby we got at that fancy brunch spot downtown last month. Win for me!

1 week ago

This was amazing! I topped mine with Nutella and sliced bananas and it tasted like a fancy restaurant dessert, not a quick breakfast. My partner said it’s the best thing I’ve baked all year, which is saying something because I bake a lot.

3 days ago

Nutella and banana is such a good call! I usually do berries but I’m a total Nutella fiend, can’t believe I never thought to slather some on a warm Dutch baby before. Trying that this weekend for sure.

yesterday

Made this this morning for my twin toddlers and they went absolutely feral for it. I cut it into little strips they could hold and dip in applesauce, and they ate every single bite without throwing any on the floor, which is basically a miracle on a school morning. So quick, no fuss, 10/10.

2 hours ago

The no-food-on-the-floor win is the highest possible rating a recipe can get, tbh. My 2 year old throws 80% of what I make him on the floor, so I’m absolutely testing this out tomorrow morning.

5 minutes ago

Love this hack for little kids! Finger-friendly dippable foods are always a win with toddlers, so glad it made your school morning a little less chaotic. That’s the best kind of win in our book!



