
Grilled Cheese with Taiyaki

title 1
Grilled Cheese with Taiyaki
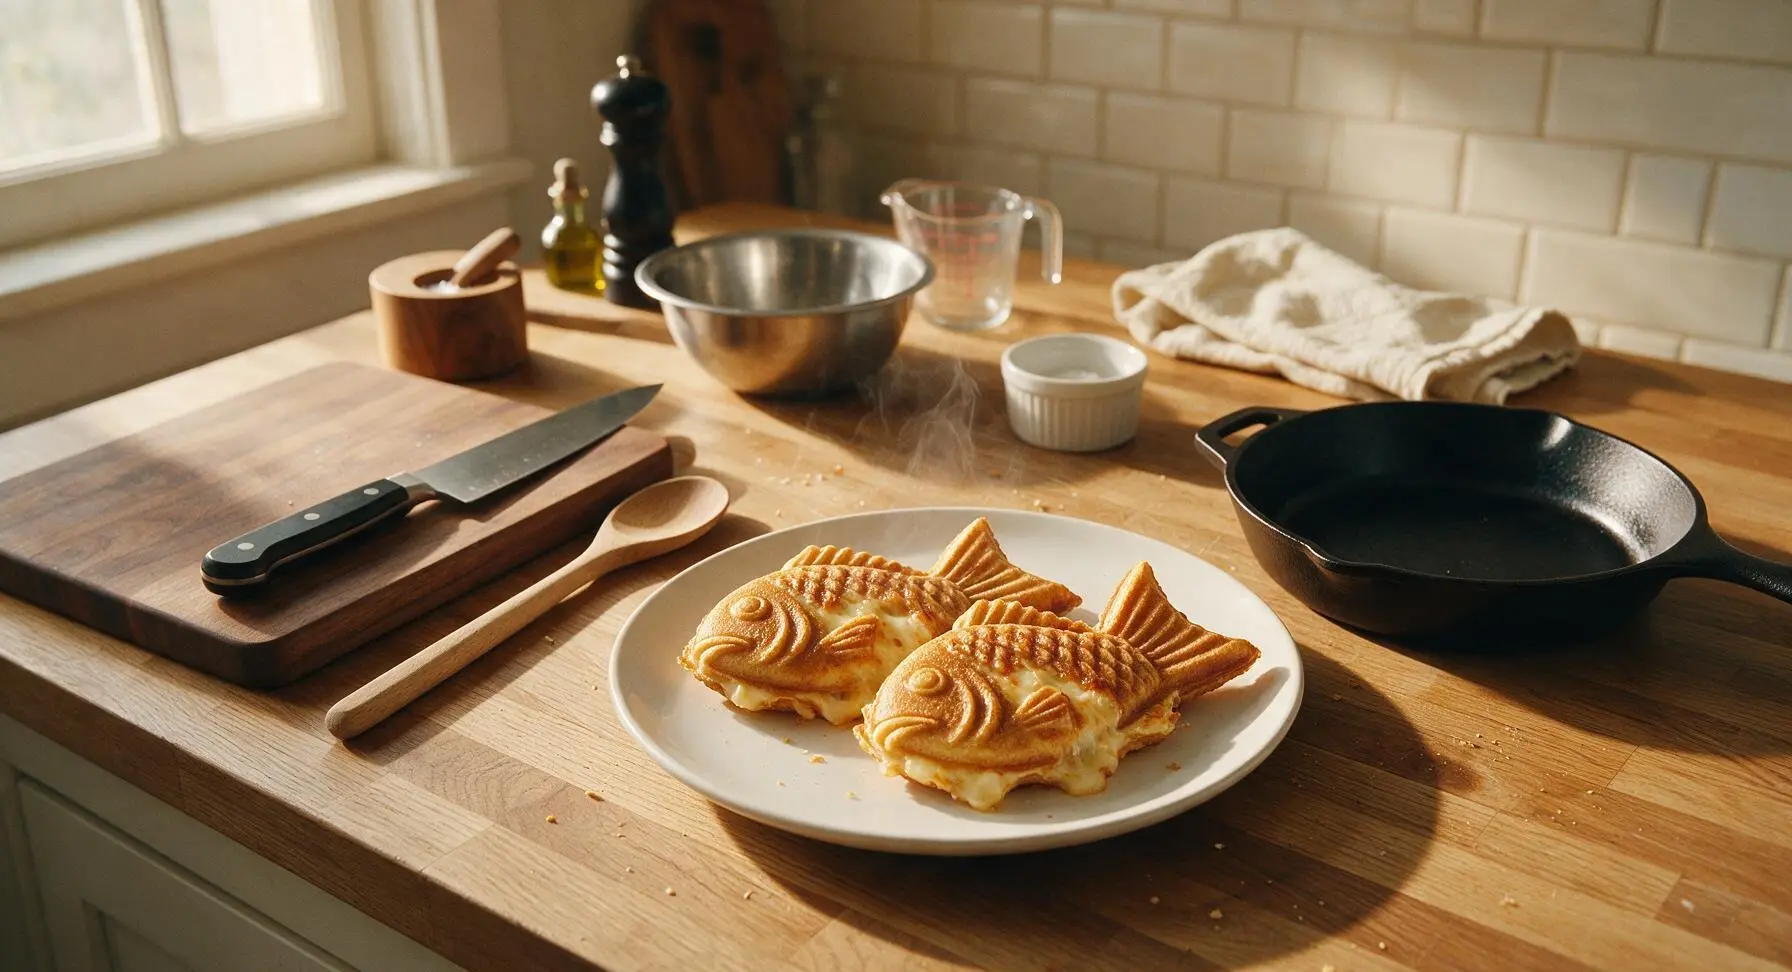
⏱️ cook time 15 minutes
🍽️ servings 4
⚡ Difficulty easy

intro

Crisp, golden fish-shaped taiyaki shells oozing with melted savory cheese: a playful, cozy fusion of Japanese street food and classic American comfort food.

Ingredients
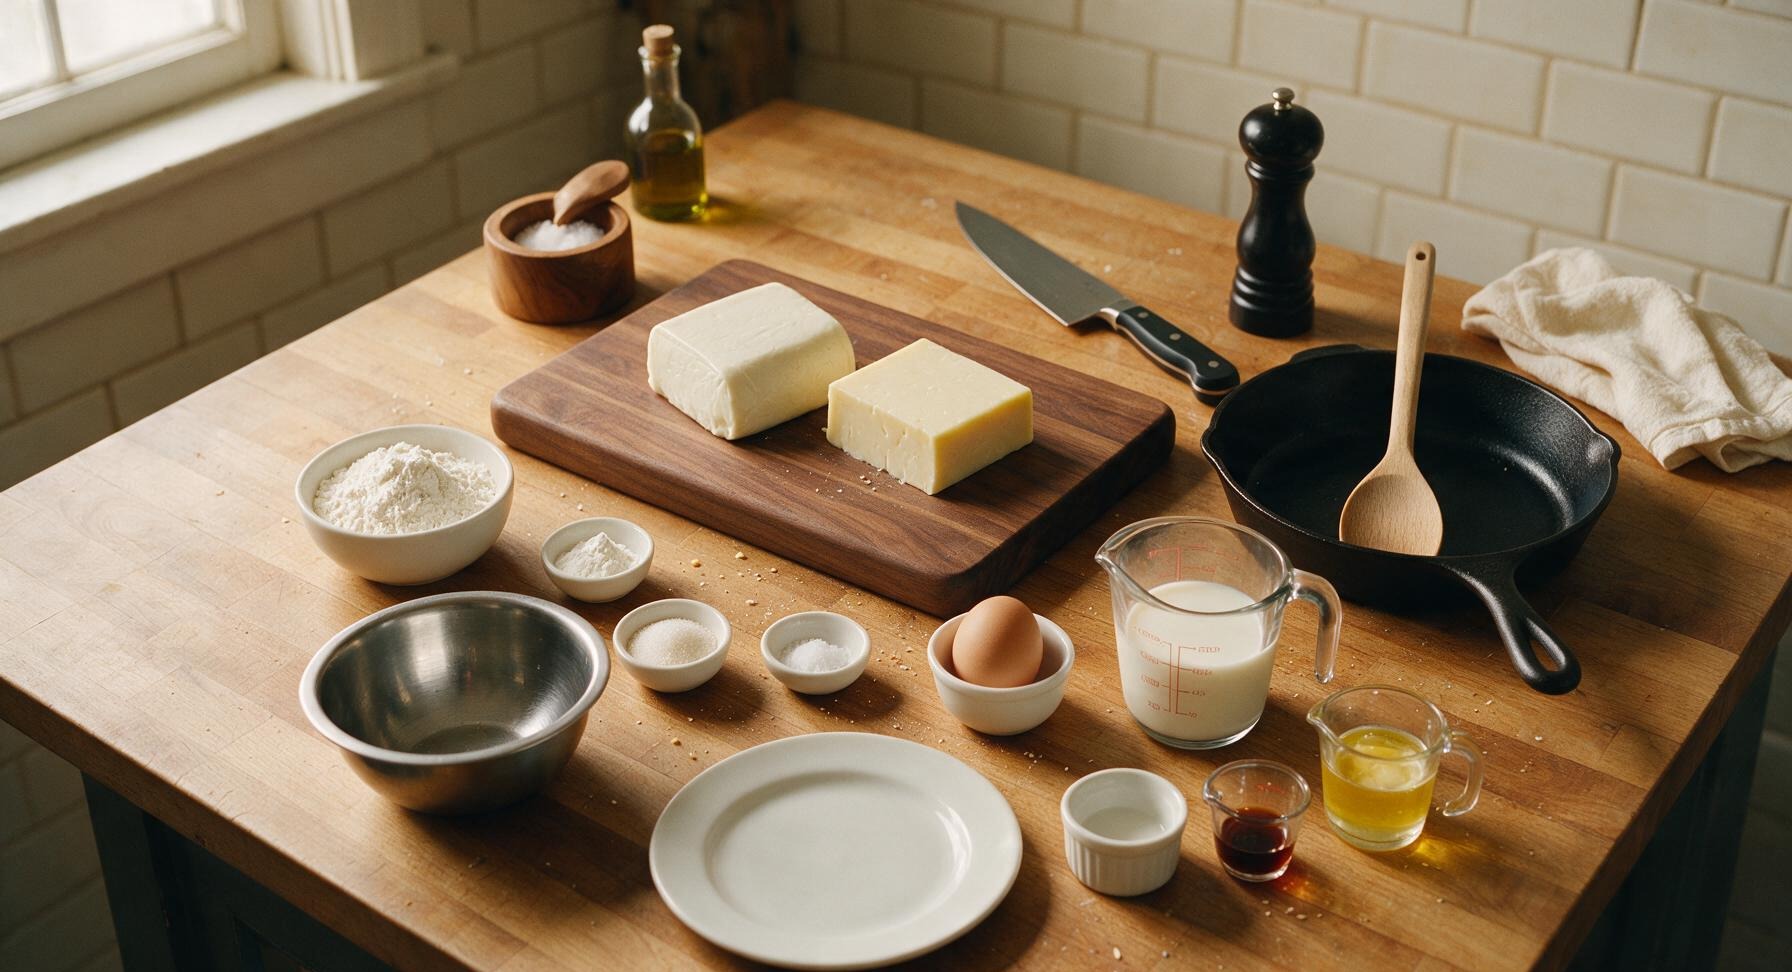
Low-moisture mozzarella cheese (block) 120g
Sharp white cheddar cheese (block) 60g
All-purpose flour 120g (1 cup)
Baking powder 1 tsp
Granulated sugar 1 tbsp
Fine sea salt 1/4 tsp
Large egg 1 unit
Whole milk 160ml (2/3 cup)
Vanilla extract 1/4 tsp
Unsalted butter 2 tbsp (melted)

Steps

1

Prep Cheese Slices

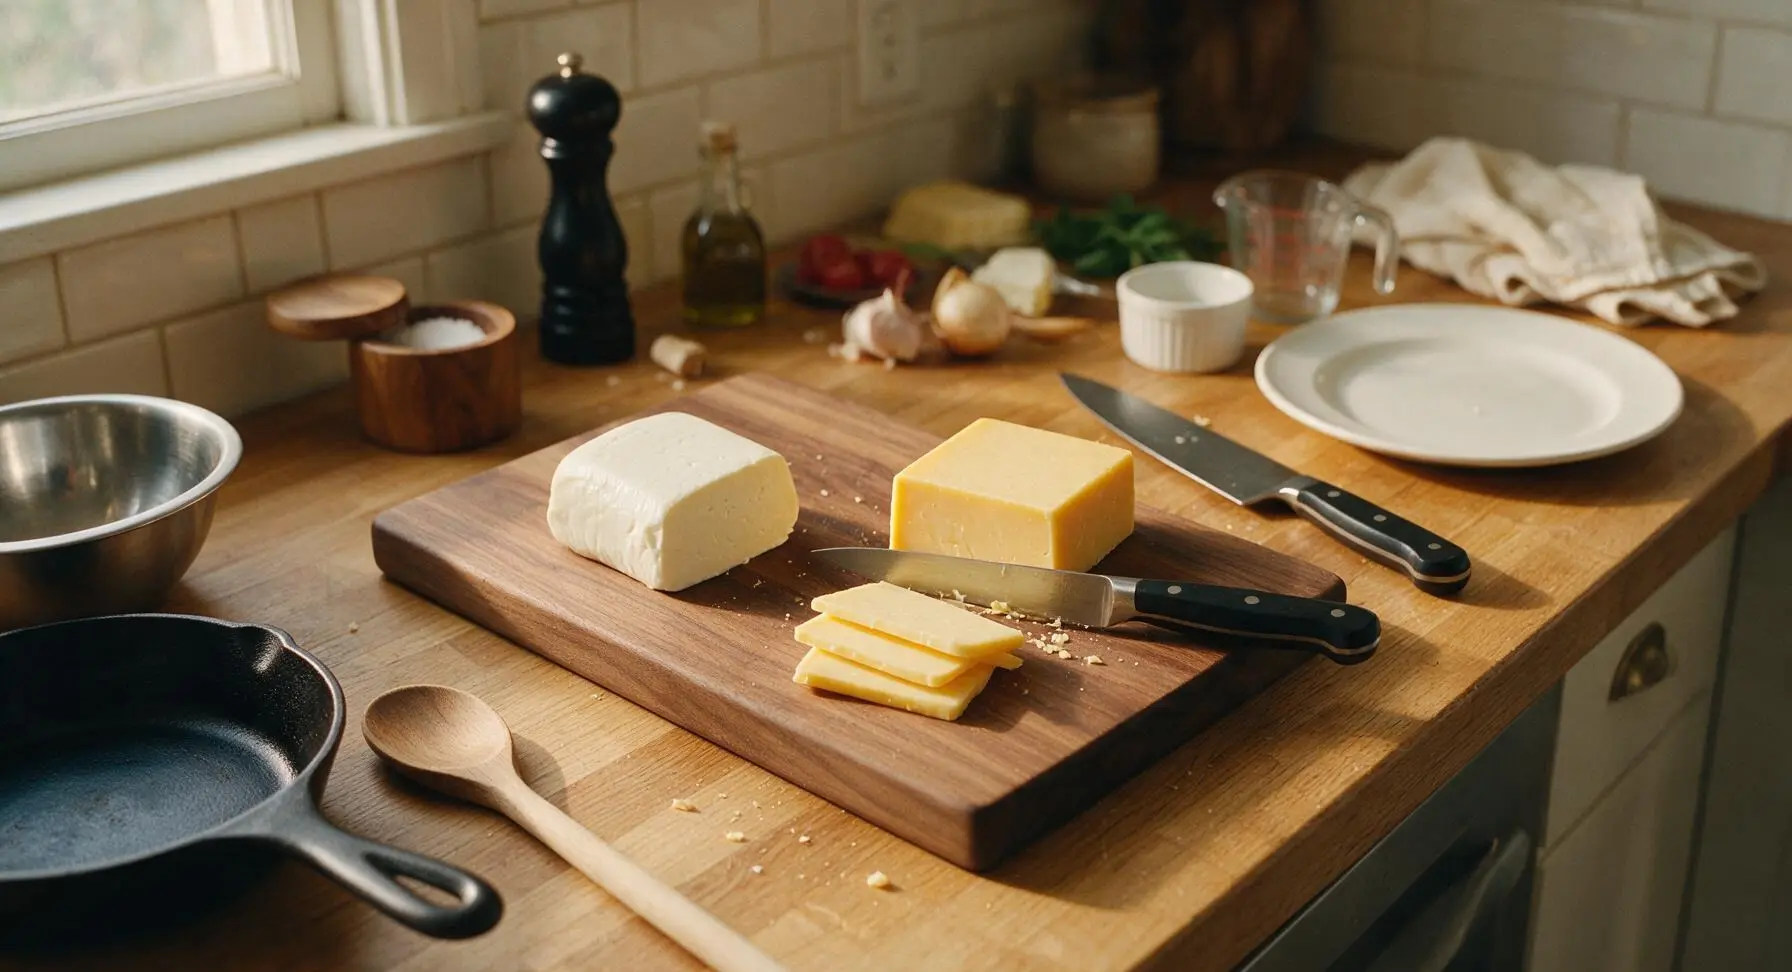
Place the block of low-moisture mozzarella and sharp white cheddar on the acacia wood cutting board. Use the paring knife to slice both cheeses into 3mm thick slices, roughly sized to fit the center of the taiyaki fish molds (avoid slicing thicker than 3mm, as excess cheese will leak out during cooking). Stack sliced cheese neatly on the corner of the cutting board and set aside.
Step 1
step1:Prep Cheese Slices
2

Whisk Smooth Batter

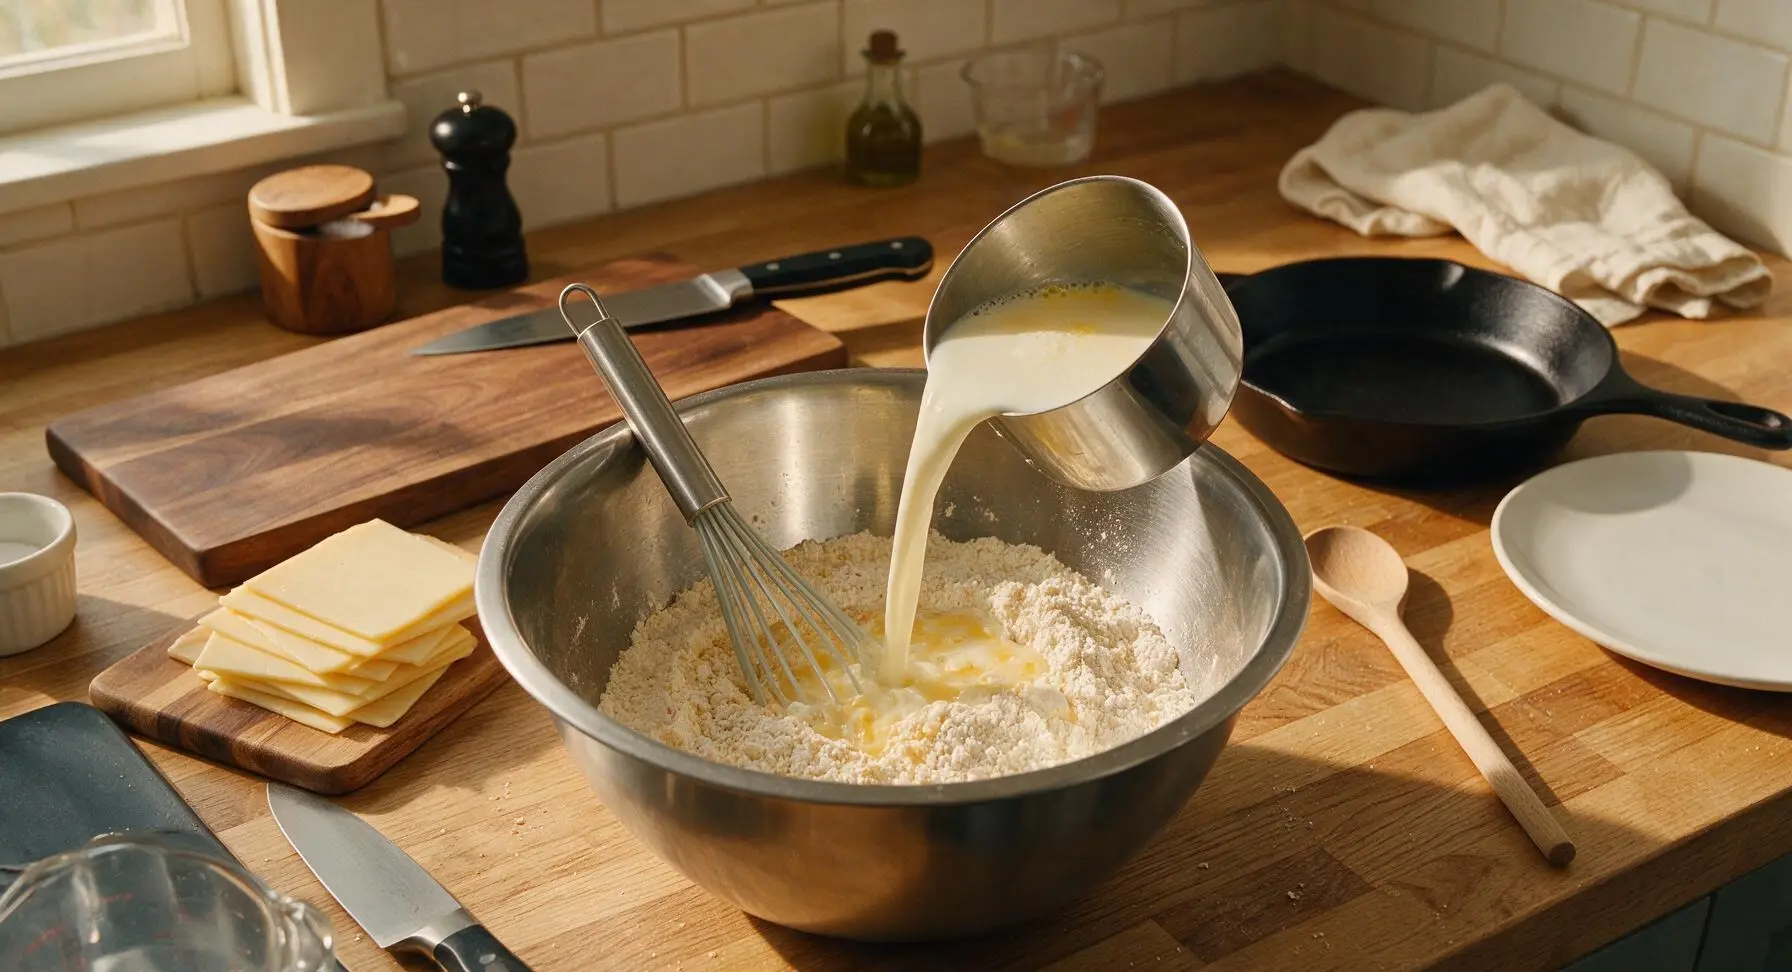
Add the all-purpose flour, baking powder, granulated sugar, and fine sea salt to the stainless steel mixing bowl. Whisk briefly to combine dry ingredients, then add the large egg, whole milk, and vanilla extract. Use the silicone whisk to stir until the batter is completely smooth, with no dry lumps remaining—batter should reach a thin, pourable consistency similar to heavy cream, coating the back of a spoon thinly. Let rest 5 minutes at room temperature to allow baking powder to activate.
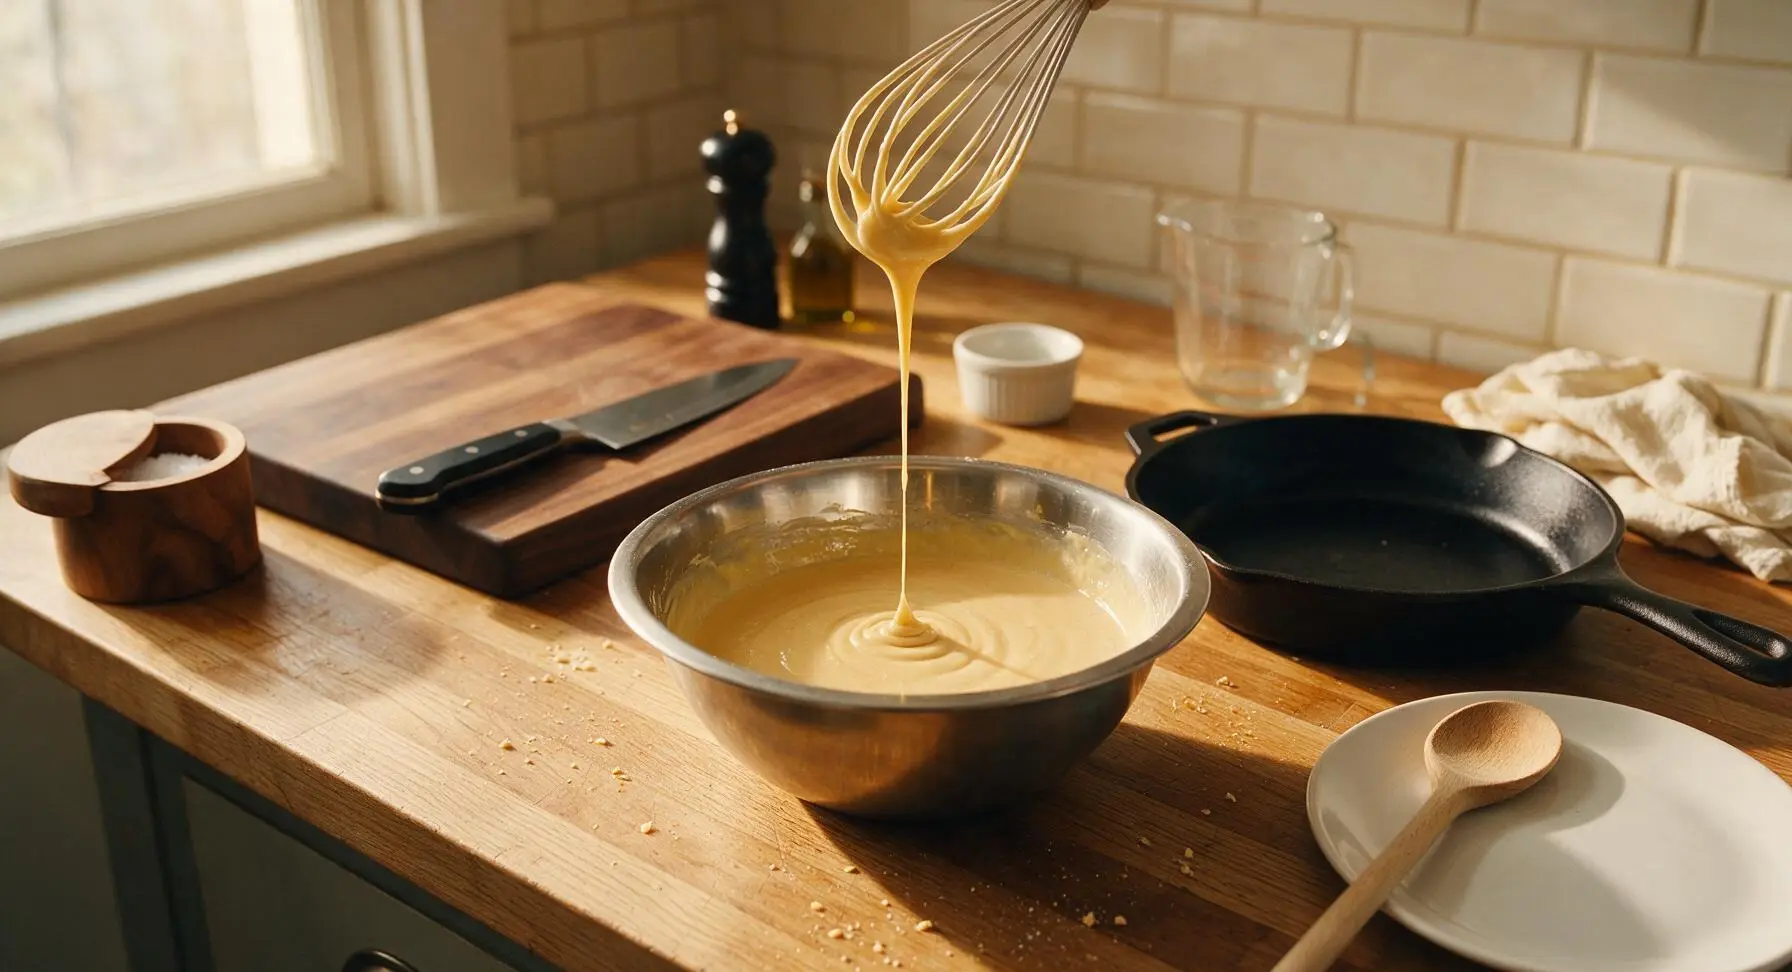
Step 2
step2:Whisk Smooth Batter
Step 2
step2:Whisk Smooth Batter
3

Preheat Taiyaki Pan

Retrieve the cast iron taiyaki pan and place it on the flush induction stovetop set to medium-low heat (160°C / 325°F). Let preheat for 3 minutes, then use the silicone pastry brush to coat both sides of the open fish mold cavities evenly with melted unsalted butter, making sure to brush butter into the narrow tail and fin crevices to prevent sticking during cooking.
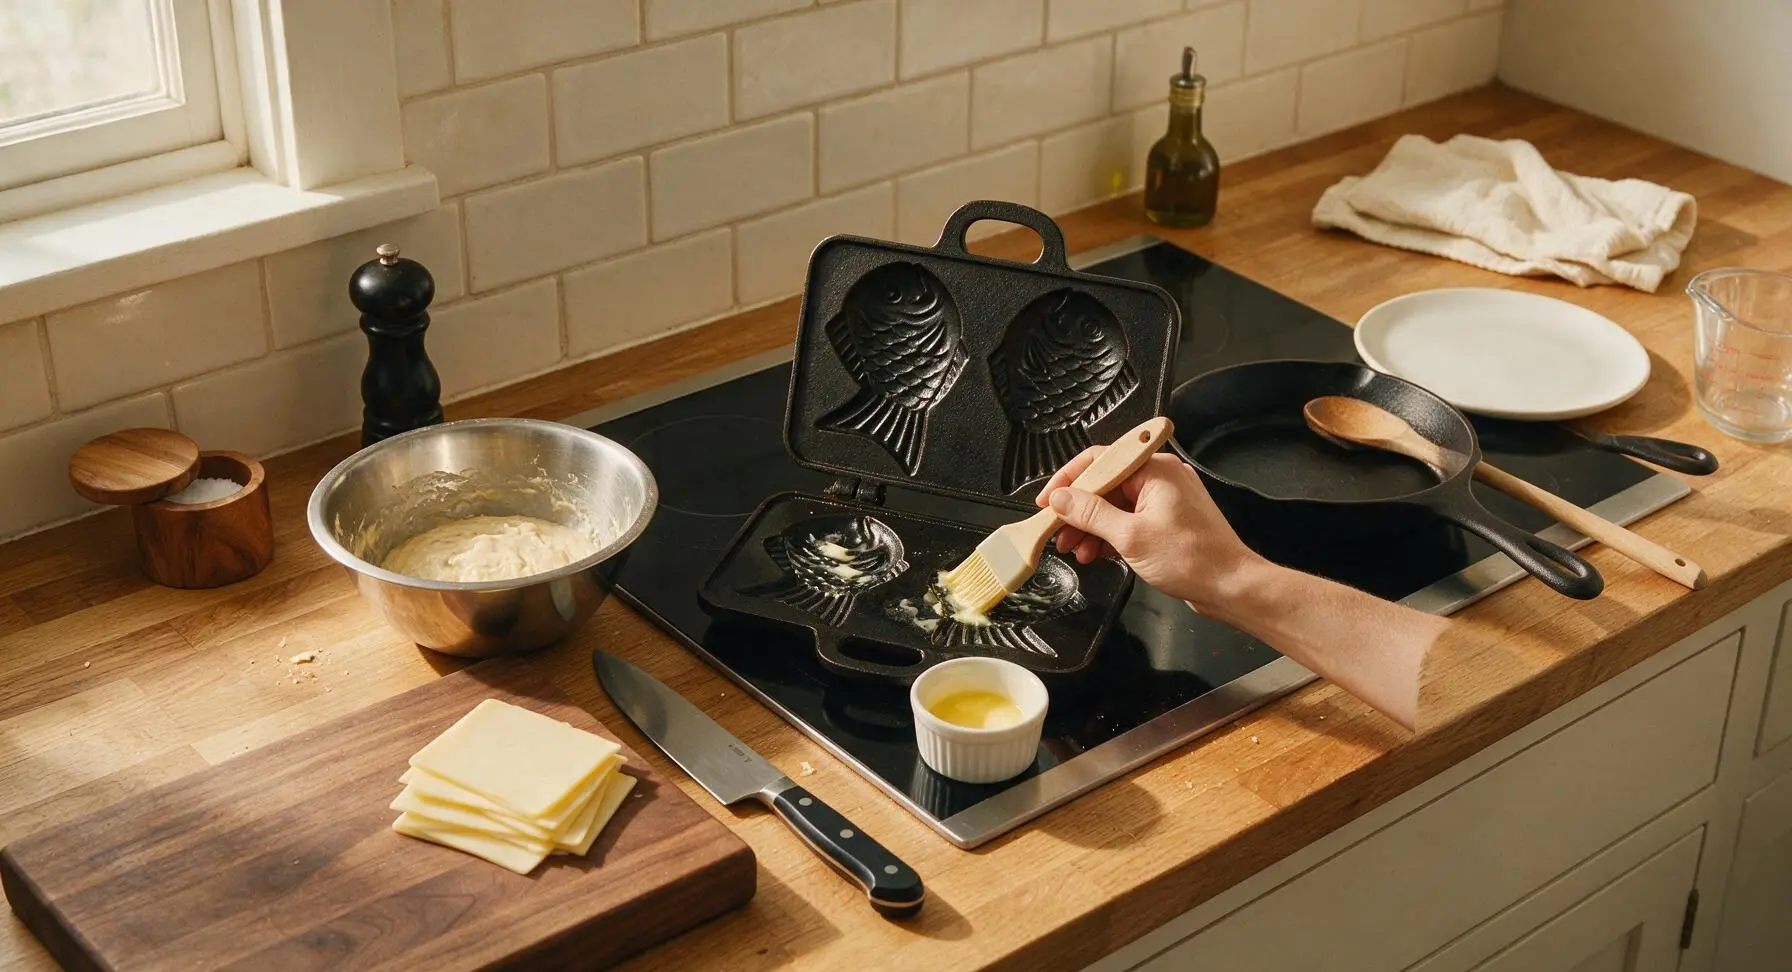
Step 3
step3:Preheat Taiyaki Pan
4

Pour Base Batter Layer

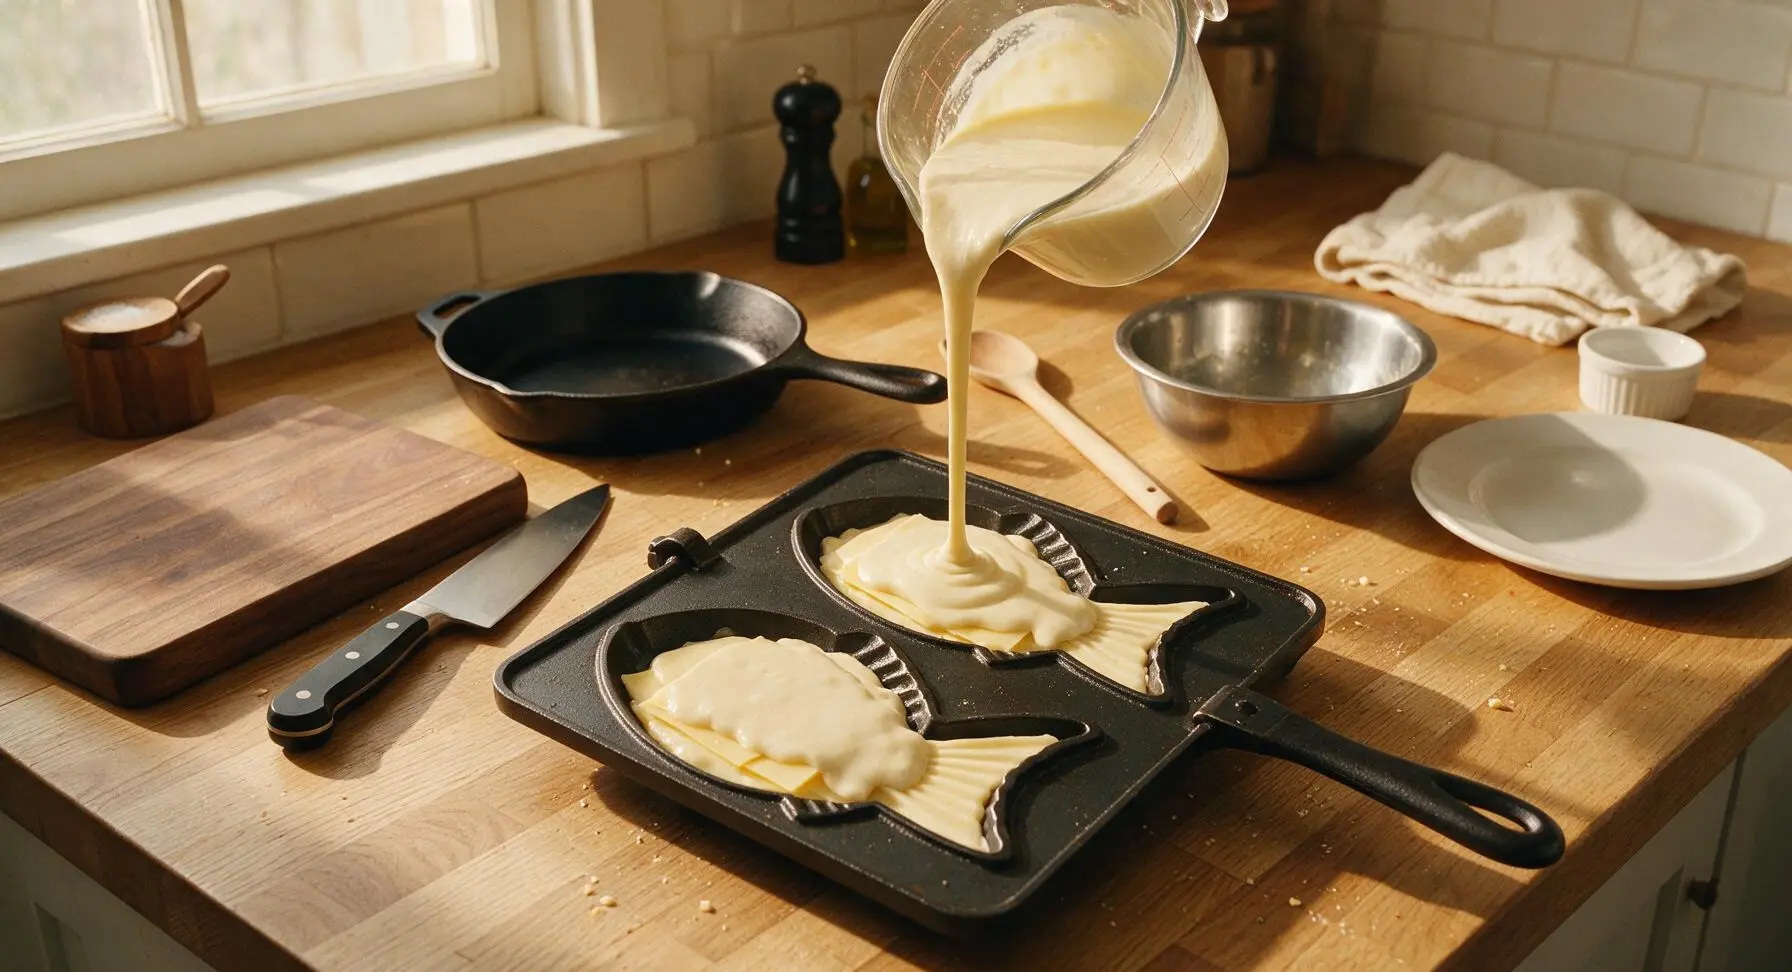
Fill the stainless steel measuring cup with rested batter, then pour 1.5 tablespoons of batter into each open fish mold cavity. Tilt the pan slightly to spread the batter evenly across the bottom of each mold, covering the full tail, body, and head shape without letting batter spill over the mold edges. Tiny bubbles will start to form at the batter edges after 10 seconds as the batter begins to set.
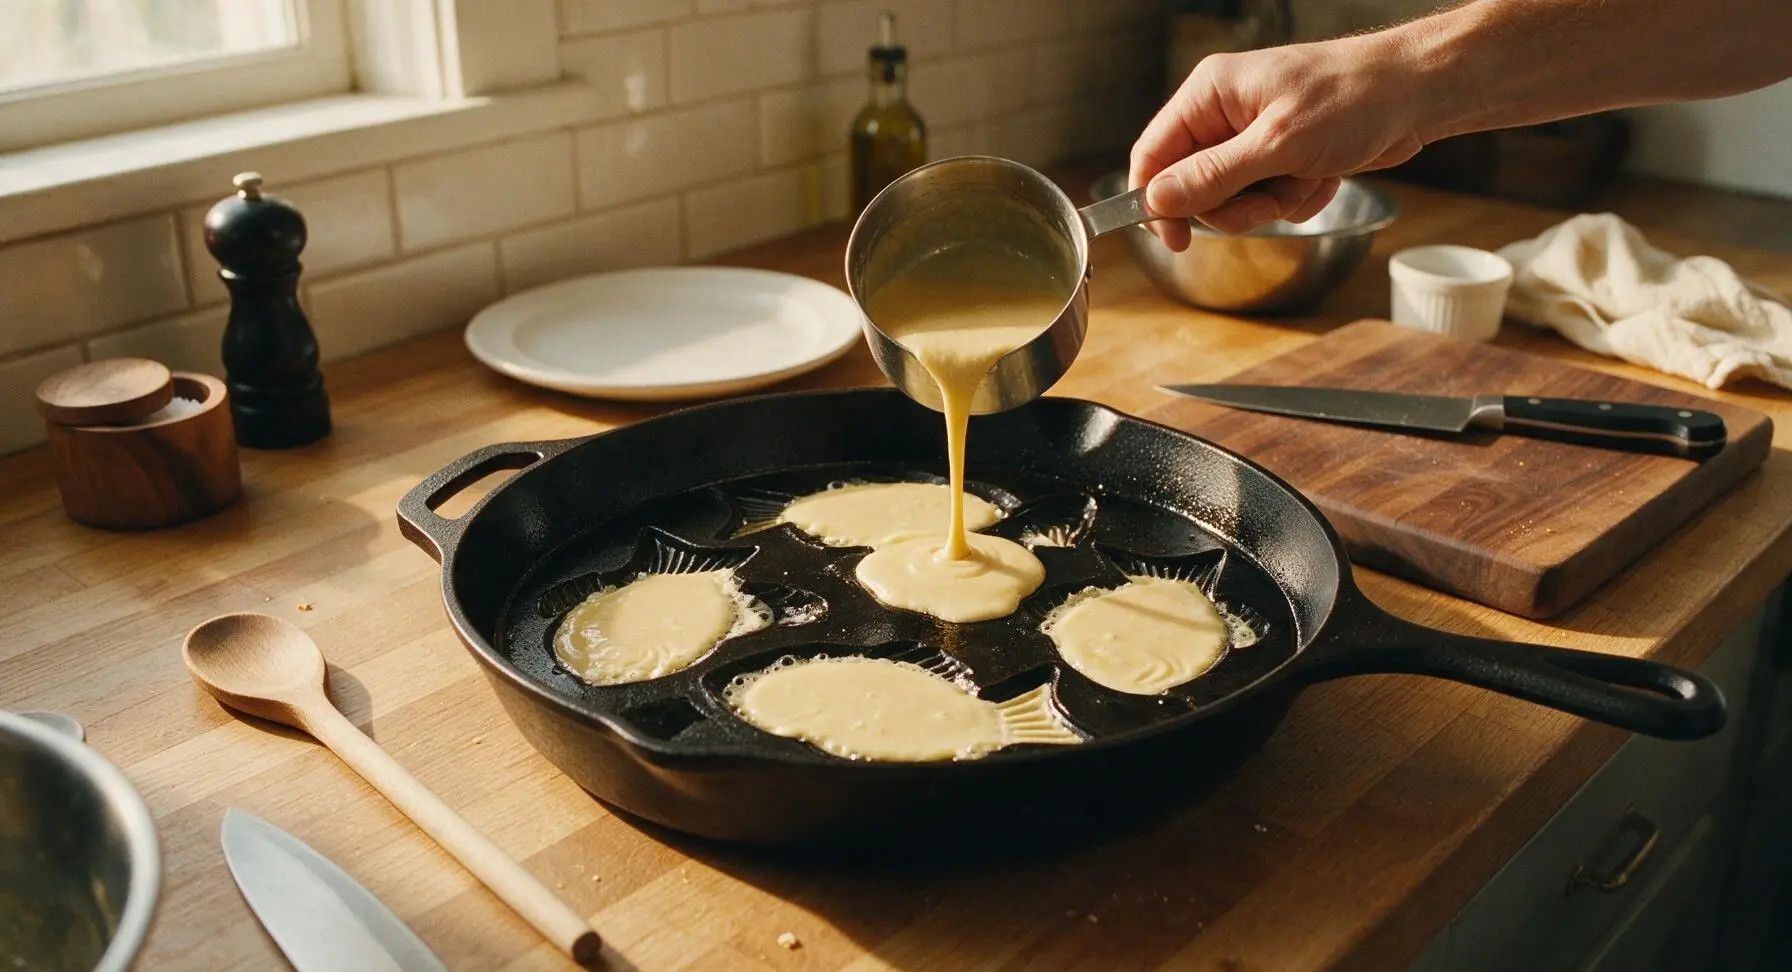
Step 4
step4:Pour Base Batter Layer
5

Add Cheese Filling

Arrange 2 slices of mozzarella and 1 slice of cheddar in the center of each batter-filled mold, keeping the cheese stacked at least 5mm away from all edges of the mold to prevent leaking as it melts. Do not overstuff the molds, as excess cheese will seep out, burn on the cast iron, and prevent the taiyaki edges from sealing properly.
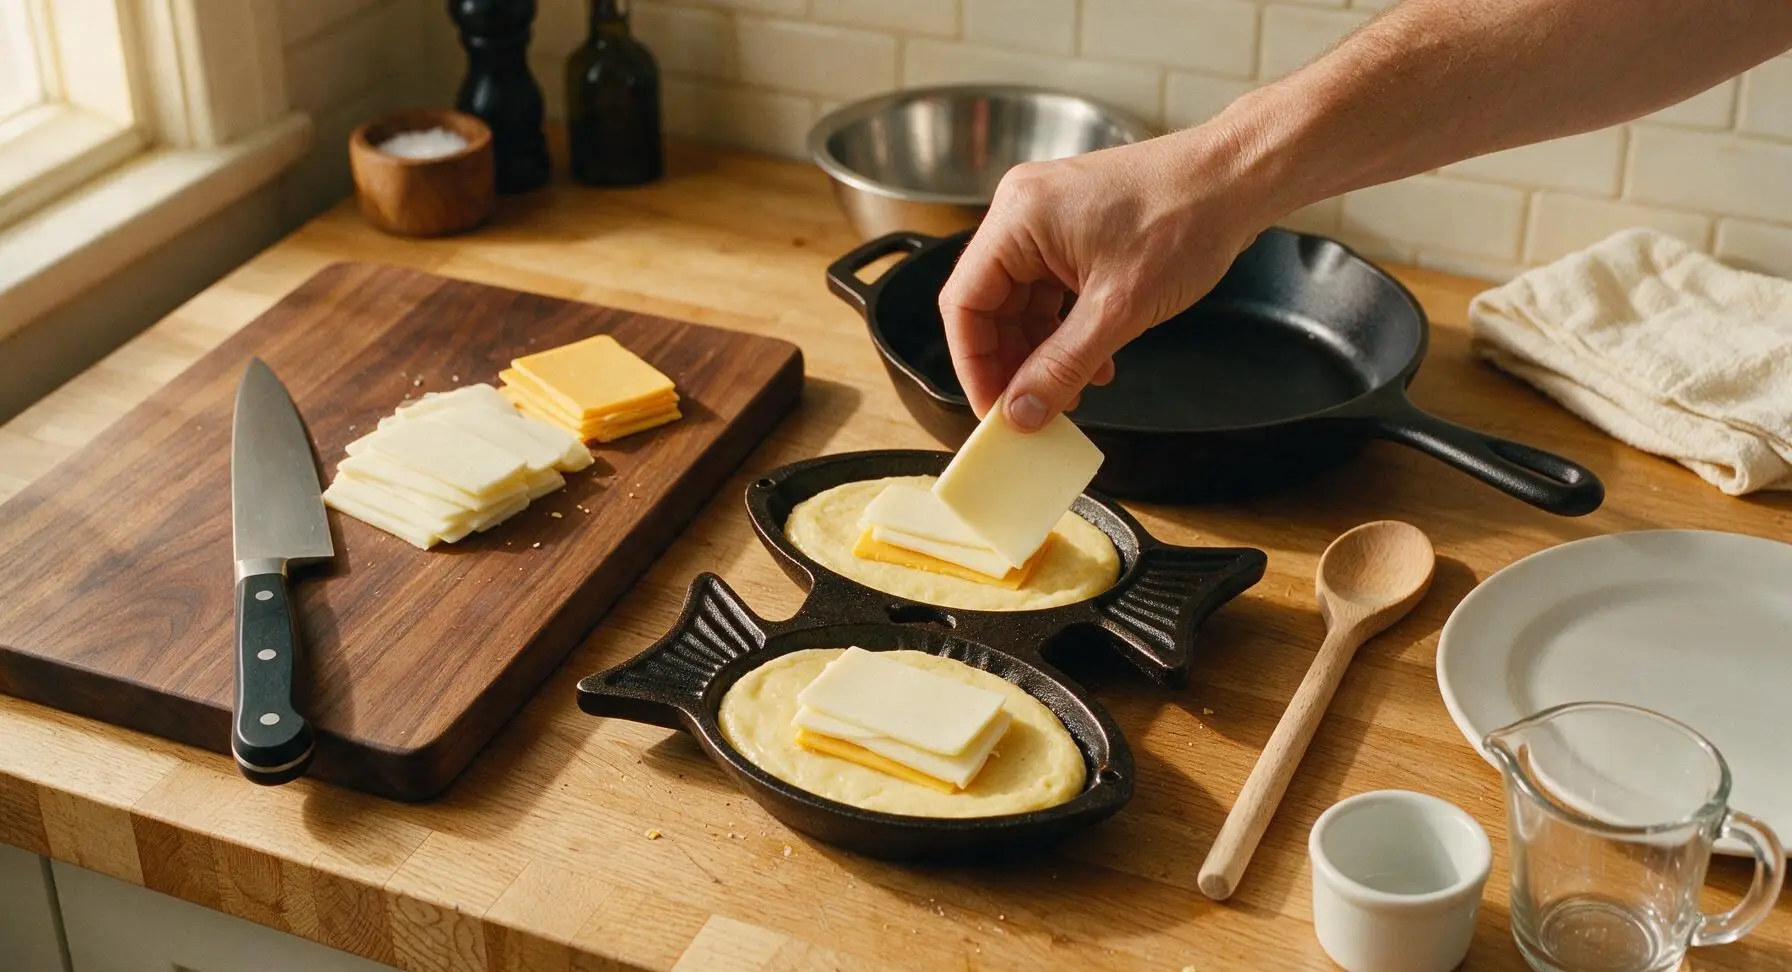
Step 5
step5:Add Cheese Filling
6

Top Batter and Seal

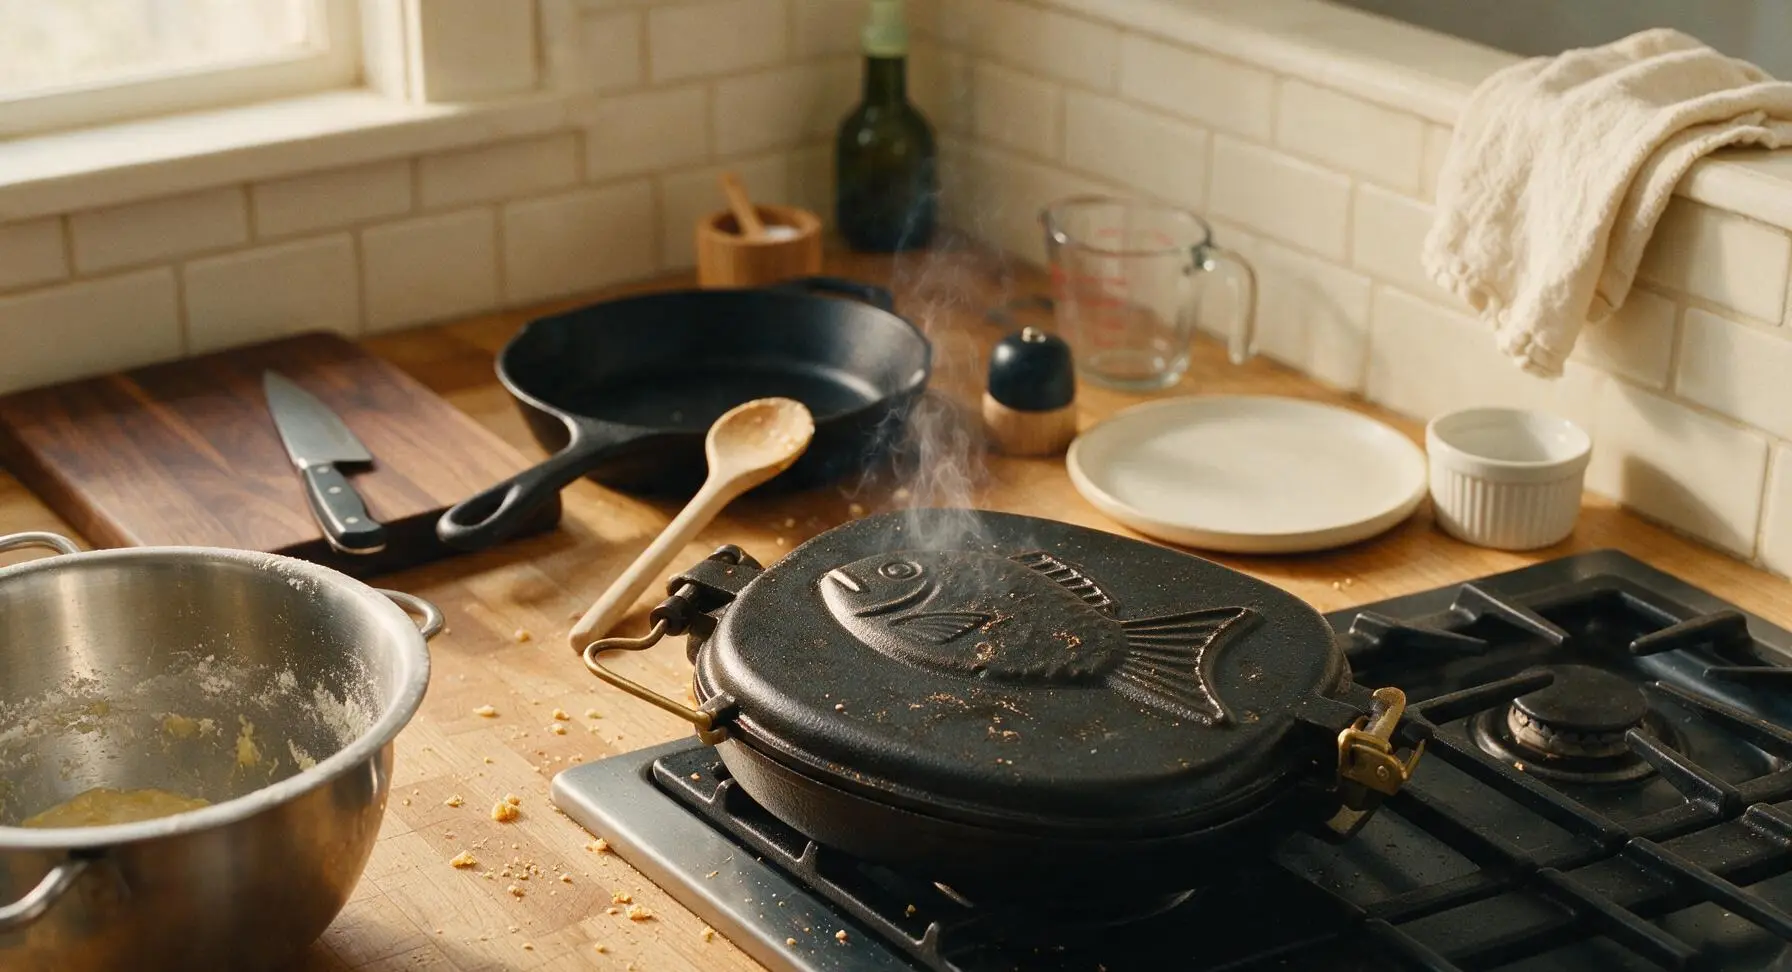
Pour another 1.5 tablespoons of batter over the cheese in each mold, fully covering the cheese so no cheese is exposed through the batter. Immediately close the taiyaki pan lid, clamping it gently but firmly shut to seal the edges of the taiyaki shells.
Step 6
step6:Top Batter and Seal
Step 6
step6:Top Batter and Seal
7

Cook Until Golden Crisp

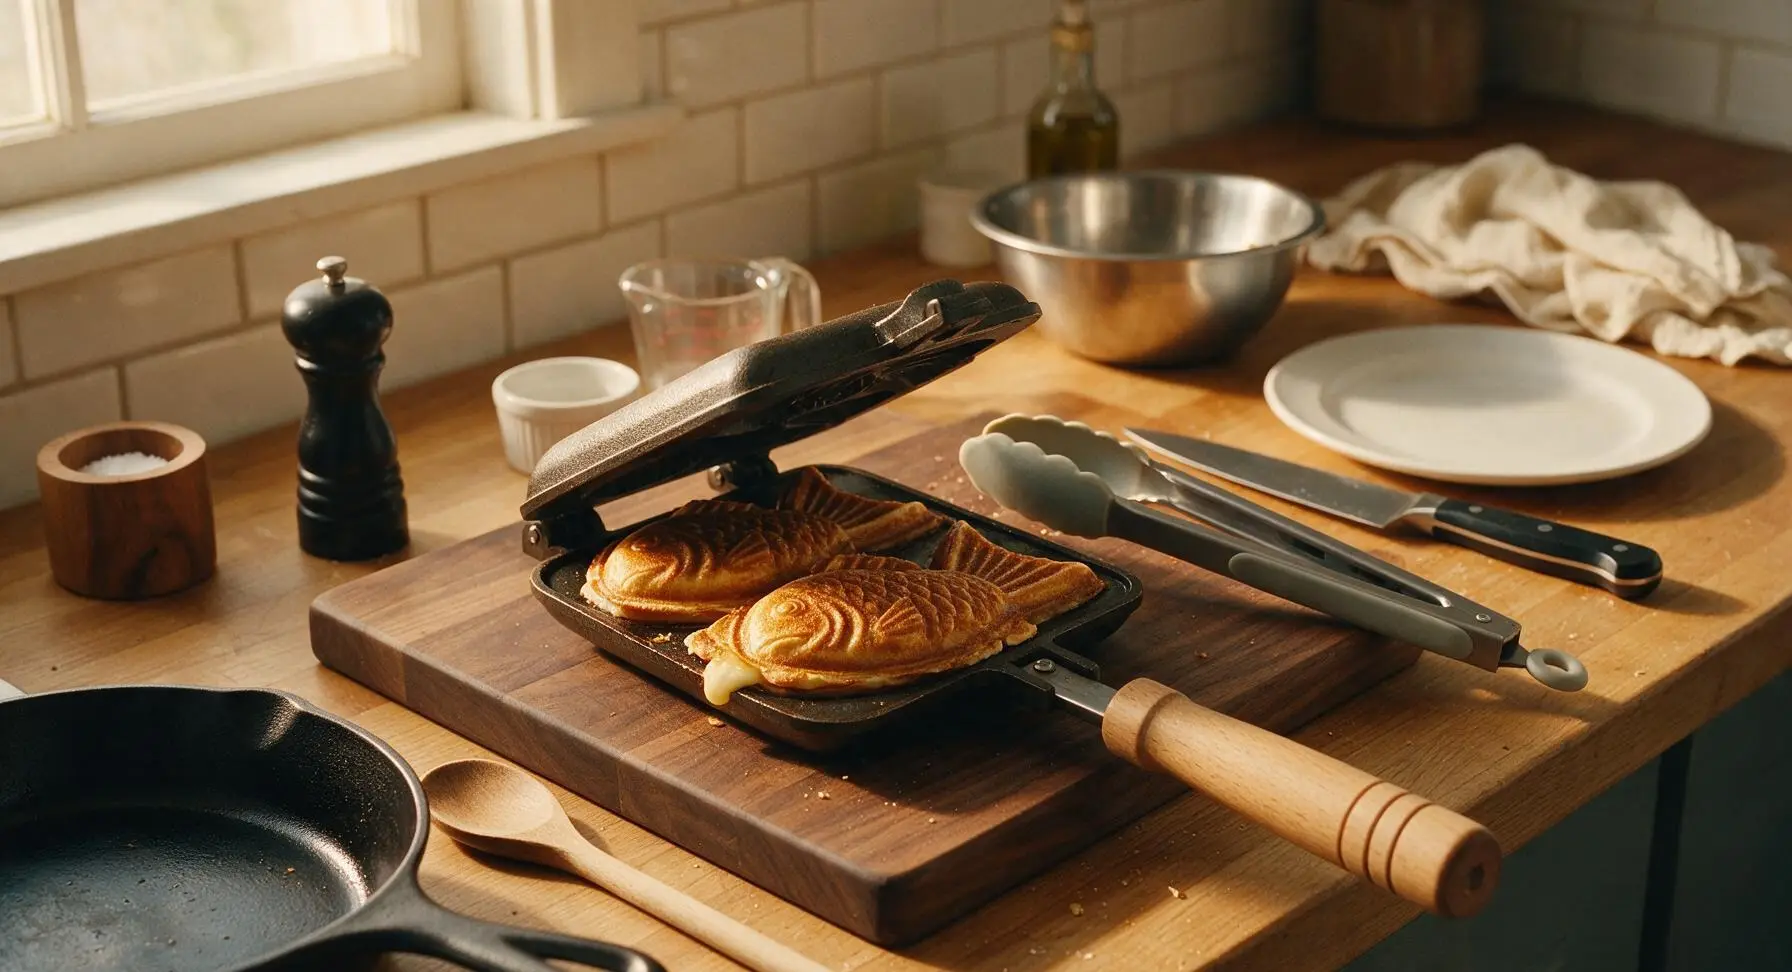
Cook the closed pan for 2 minutes on the first side, then grip the beech wood handle to flip the entire pan over, cooking for another 2 minutes on the second side. After 4 total minutes of cooking, carefully lift the pan lid slightly with tongs to check doneness: the taiyaki should be deep golden brown on both sides, crisp to the touch, with no raw batter visible. Reduce heat to low if crusts brown too quickly before cheese melts.
Step 7
step7:Cook Until Golden Crisp
8

Rest and Serve

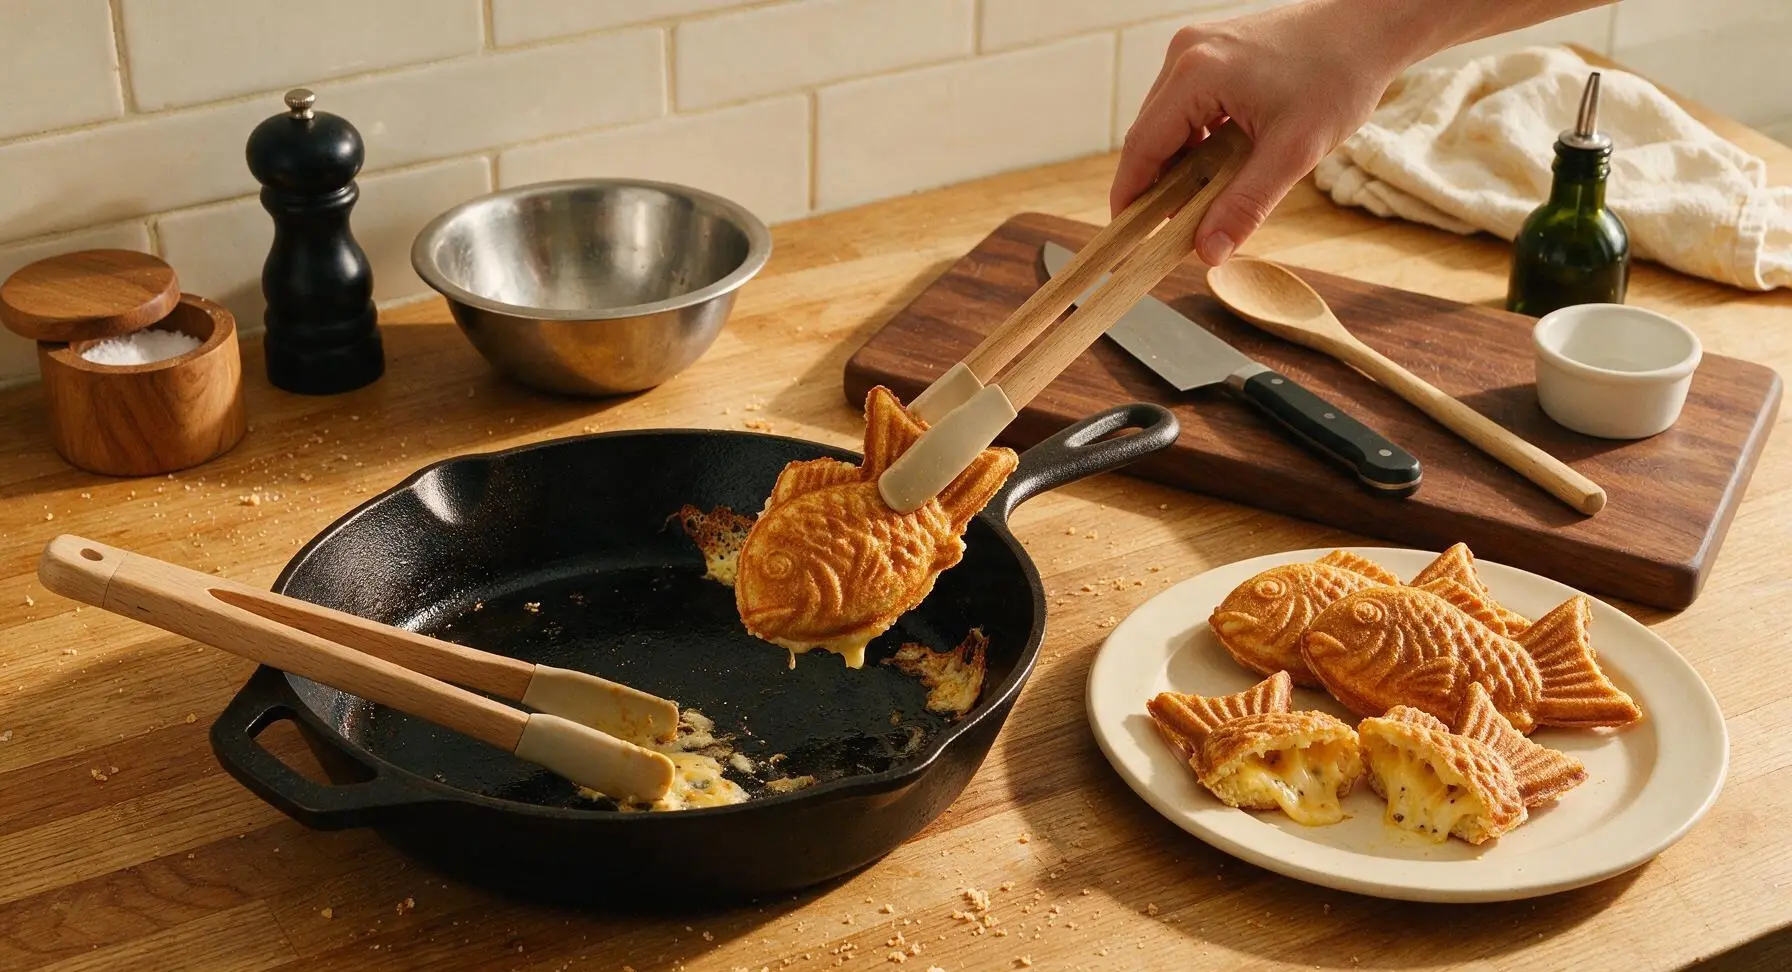
Use the silicone-tipped tongs to carefully lift the finished taiyaki grilled cheeses out of the pan, transferring them to the cream ceramic serving plate in its fixed position. Let rest for 1 minute to allow the cheese to set slightly (this prevents all the cheese from oozing out on the first bite), then cut one taiyaki in half crosswise to showcase the melted cheese filling. Repeat the cooking process for the remaining batter and cheese to make 4 total taiyaki.
Step 8
step8:Rest and Serve

Tips

1.Use low-moisture mozzarella instead of fresh mozzarella: fresh mozzarella has high water content that will sog out the crisp taiyaki crust and cause excess bubbling and leaking during cooking.
2.Keep stovetop heat at medium-low (160°C / 325°F): taiyaki batter browns very quickly on cast iron, and high heat will burn the outer crust before the cheese in the center has time to fully melt.
3.Let cooked taiyaki rest for 1 full minute before cutting or biting: this short rest allows the melted cheese to thicken slightly, creating a perfect stretchy pull instead of runny cheese that oozes straight out of the crust.


✨ You May Also Like

Snacks & Appetizers
🍜 Mexico

Crispy thick-cut tortilla chips piled high with seasoned beef, melted cheese, and bright fresh toppings for a shareable, crowd-favorite bite.

⏱️ 25 minuteSnacks & Appetizers ★ 4.8
Snacks & Appetizers
🍜 United States

Crisp, sweet-tangy spiced pickled watermelon rind is a zero-waste summer staple, perfect with grilled meats, charcuterie, or eaten straight from the jar as a bright snack.

⏱️ 30 minuteSnacks & Appetizers ★ 4.6
Snacks & Appetizers
🍜 Germany

A tangy, jellied pork cold cut slow-simmered with aromatic spices, set into a firm sliceable loaf, served cold with mustard and crusty bread.

⏱️ 3 hours 4Snacks & Appetizers ★ 4.8
Snacks & Appetizers
🍜 United States

Creamy, tangy, perfectly seasoned hard-boiled egg halves filled with a rich, smooth yolk mixture, a timeless, crowd-pleasing bite for holiday and casual gatherings alike.

⏱️ 40 minuteSnacks & Appetizers ★ 4.8
Snacks & Appetizers
🍜 Russia

Silky, dill-forward no-smoke cured salmon, a Scandinavian classic with bright salty-sweet flavor, ideal for holiday starter platters and open-faced rye sandwiches.

⏱️ 48 hours Snacks & Appetizers ★ 4.7
Snacks & Appetizers
🍜 Japan

Crisp golden bottoms, juicy savory pork and vegetable filling, and tangy dipping sauce make these pan-fried gyoza a beloved shareable bite.

⏱️ 45 minuteSnacks & Appetizers ★ 4.8

Grilled Cheese with Taiyaki:Frequently Asked Questions

1.Why do you recommend block low-moisture mozzarella and sharp white cheddar instead of pre-shredded cheese? ▾
Pre-shredded cheese is coated in potato starch and anti-caking agents to prevent clumping in the bag, which stops it from melting into that smooth, oozy pull we want for this fusion grilled cheese. Freshly shredded block cheese melts evenly, blends perfectly between the taiyaki shells, and delivers that rich, stringy bite without any odd gritty texture.
2.Can I use a regular waffle iron if I don’t have a taiyaki fish mold? ▾
Absolutely! While you won’t get the iconic fish shape, a standard waffle iron works perfectly for this recipe. Just pour the same measured amount of batter, nestle your cheese filling in the center, and cook for 3-4 minutes until golden crisp. You’ll still get that ideal contrast of crunchy, slightly sweet batter and gooey melted cheese, just in a different fun shape.
3.How do I prevent cheese from leaking out of the taiyaki while it cooks? ▾
Stick to two simple rules: don’t overfill the mold, and make sure your cheese is fully centered between two thin layers of batter. Leave a ¼-inch border around the edge of each fish mold when adding batter and cheese, and seal edges gently when you close the iron. Any small bits of leaked cheese crisp up into a tasty cook’s snack while you work.
4.Can I make the taiyaki batter ahead of time for meal prep? ▾
You can pre-mix the dry ingredients (flour, baking powder, sugar) and store them in an airtight container at room temperature for up to 3 months, but don’t mix in wet ingredients more than 1 hour before cooking. The baking powder loses leavening power if left too long, leading to dense, flat taiyaki shells instead of light, crisp ones.
5.What’s the best cheese blend ratio for that classic grilled cheese flavor? ▾
I use a 50/50 blend of low-moisture mozzarella and sharp white cheddar for this recipe. The mozzarella delivers that iconic stretchy, melty texture without overpowering the slightly sweet taiyaki shell, while the sharp white cheddar adds tangy, rich depth that cuts through the batter’s subtle sweetness for perfect balance.
6.My taiyaki shells came out soggy instead of crisp—what went wrong? ▾
Soggy shells almost always trace back to two issues: your taiyaki mold wasn’t fully preheated before adding batter, or you used too high-moisture cheese. Make sure your mold is hot enough that a drop of batter sizzles on contact, and skip fresh mozzarella, which releases excess water as it melts and softens the shell.
7.Can I add other fillings besides plain cheese to this recipe? ▾
Of course! This fusion recipe is super flexible. Try adding a thin slice of ham, a spoonful of patted-dry kimchi, a sprinkle of furikake, a thin layer of fig jam, or a few pickled jalapeño slices for extra kick. Just keep add-ins thinly sliced and dry to avoid soggy shells, and don’t overstuff the molds.
8.Do I need to grease my taiyaki mold before cooking? ▾
Even if your mold is labeled non-stick, I recommend lightly greasing it with a neutral oil like canola or avocado oil using a pastry brush before every batch. This prevents delicate batter from sticking to the fish shape crevices, creates an evenly golden, crisp crust, and makes it far easier to pop finished taiyaki out without tearing.
9.How long should I cook these on a taiyaki grill for perfect results? ▾
Cook them for 3 to 4 minutes total, flipping the mold halfway through once the batter sets around the edges. They’re done when shells are a deep, even golden brown on both sides, the cheese is fully melted (you’ll often see a tiny bubble out the sealed edge), and the shell releases easily from the mold without sticking.
10.Can I use gluten-free flour to make this recipe gluten-free? ▾
Yes! Swap the all-purpose flour for a 1:1 gluten-free all-purpose baking blend that contains xanthan gum for the closest texture match. Avoid single gluten-free flours like almond or coconut flour, as they won’t create that light, crisp, slightly chewy taiyaki shell, and can make batter too dense to hold the cheese filling.
11.Why is there granulated sugar in the batter for a savory grilled cheese? ▾
The small amount of sugar is traditional for taiyaki batter, and it creates that perfect subtle sweet-savory balance that makes this fusion work so well. It doesn’t make shells taste like dessert—it just adds caramelization for a deeper golden crust, and cuts through rich, salty cheese for a more balanced, satisfying bite.
12.How do I reheat leftover grilled cheese taiyaki so it stays crisp? ▾
Skip the microwave, which turns shells soggy and cheese rubbery. Instead, reheat leftovers in a 350°F oven or toaster oven for 5 to 7 minutes, or in an air fryer at 325°F for 3 to 4 minutes. This crisps the shell back up and re-melts the cheese perfectly, so it tastes just as fresh as when you first cooked it.
13.Can I use other types of cheese if I don’t have mozzarella or white cheddar? ▾
You can swap in other low-moisture melting cheeses, but skip high-moisture options like fresh mozzarella, brie, or ricotta that will make shells soggy. Great alternatives include shredded Monterey Jack for extra melt, smoked gouda for a smoky twist, or pepper jack for heat, as long as you shred them fresh from a block.
14.How thick should I shred the cheese for the filling? ▾
Shred your cheese on the large holes of a box grater for the best results. Finely shredded cheese melts too fast and can leak out of batter seams before the shell is fully cooked, while thick cheese chunks won’t melt all the way through by the time the shell crisps. Large shreds melt evenly and give that perfect stringy pull.
15.Is there a way to make this without a specialty taiyaki pan at all? ▾
If you don’t have a taiyaki pan or waffle iron, you can make a loose version by cooking thin batter rounds in a non-stick skillet, adding cheese to the center of one round, topping with a second round, and flipping like a regular grilled cheese. You won’t get the molded fish shape, but you’ll still get that great sweet batter and melted cheese combo.
16.How much batter should I add to each fish mold to avoid messy overflow? ▾
Add 2 tablespoons of batter to the bottom of each fish cavity first, spread it thinly to cover the shape, add 1 ½ tablespoons of shredded cheese centered in the middle, then top with another 1 ½ tablespoons of batter to fully cover the cheese. That leaves just enough room for batter to rise as it cooks without spilling over the mold edges.
17.Can I adjust this recipe to make it dairy-free? ▾
Absolutely! Swap the mozzarella and white cheddar for your favorite block-style low-moisture dairy-free melting cheese (shred it fresh at home, as pre-shredded dairy-free cheese also has anti-caking coatings), and use your preferred neutral dairy-free milk to mix the batter for results that match the original texture closely.
18.Why do you specify low-moisture mozzarella instead of regular fresh mozzarella? ▾
Fresh mozzarella has a very high water content, which releases as it melts and seeps into the taiyaki batter, leaving you with soggy, mushy shells instead of crisp ones. Low-moisture mozzarella has most of that extra water removed during production, so it melts smoothly into that iconic stretchy texture without making the batter wet.
19.What should I serve with these grilled cheese taiyaki? ▾
These are perfect as a handheld snack on their own, but they pair beautifully with classic grilled cheese sides like creamy tomato soup for dipping, a small side salad with tangy vinaigrette, or crispy tater tots. For a fun fusion twist, serve them with kewpie mayo mixed with a little sriracha for a spicy, creamy dip.

Comments (17)

2 days ago

OMG y’all, this grilled cheese taiyaki is a GAME CHANGER! I made it for my kids’ after school snack yesterday and they begged me to make a second batch before dinner. The crispy fish-shaped waffle outside with melty cheese inside? *Chef’s kiss* Took me literally 12 minutes total, way easier than I thought it would be. 10/10 will be making this for our next neighborhood potluck!

yesterday

Wait did you use the red bean taiyaki mix or just plain waffle batter? I’ve been trying to figure out if the sweet batter clashes with the cheese!

yesterday

So glad your family loved it! We used a plain slightly sweet waffle batter for this recipe – the subtle sweetness pairs perfectly with salty melted cheese, no weird clash at all! If you try it with red bean mix let us know how it turns out 😊

3 days ago

Tried this last night for a quick lazy dinner and wow, SO good. I added a little bit of crispy bacon bits inside because I’m a sucker for bacon and cheese, and it hit so hard. Only thing I messed up was overfilling the taiyaki mold a little so cheese oozed out everywhere, but that just made crispy cheese edges so no complaints tbh.

2 days ago

Crispy cheese edges are the best happy accident! The bacon addition sounds incredible, we might have to test that version ourselves. Pro tip: only fill the mold ⅔ full next time to cut down on oozing (though we won’t judge if you don’t, those crispy bits are chef’s kiss)

1 week ago

15 minutes, minimal cleanup, uses stuff I already have in my pantry? This is going into my weekly meal prep rotation for sure. I made a batch on Sunday and reheated them in the toaster oven for quick lunches between classes, they held up perfectly. No sad dorm food for me this semester!

5 days ago

Wait a grilled cheese in a taiyaki?? Why didn’t I think of this sooner? I’ve had my taiyaki pan sitting in the back of my cabinet for months because I got tired of making sweet red bean ones. This is the perfect savory switch up. I used sharp cheddar and a little sprinkle of everything bagel seasoning on the batter and it was insane.

3 days ago

The everything bagel seasoning addition is genius! I’m stealing that for my next batch, that sounds like it adds the perfect salty crunch.

1 week ago

My kids are so picky, I swear half the things I make get pushed across the table. But these? They ate three each! I let them help pour the batter and add the cheese, which they thought was the coolest thing ever. Way better than plain old grilled cheese on bread, 100% adding to our weekly family dinner rotation.

5 days ago

Ugh same, my 4 year old turns his nose up at everything! I’m definitely making these this weekend, letting him help sounds like the perfect way to get him excited to eat.

5 days ago

We love that getting kids involved makes such a big difference! So happy this was a hit with your picky eaters – it’s such a fun twist on a classic that feels special without being a ton of work.

2 weeks ago

Made these before a day hike last weekend and they were the perfect trail snack! Portable, filling, didn’t get soggy in my pack, and tasted great even when they were room temp. I used pepper jack for a little kick and it was chef’s kiss. Will absolutely be making these for all my upcoming outdoor trips.

1 week ago

Pepper jack is such a great call for a little heat! We love that these work as a portable snack too – we’ve brought them on picnics before and they hold up so much better than regular grilled cheese. Thanks for the trail snack tip!

2 weeks ago

Brought these to my office potluck last week and they were gone in 10 minutes flat. Multiple people asked me for the recipe, I felt so fancy. Nobody could believe they only took 15 minutes to whip up that morning before work. 10/10, perfect potluck food.

yesterday

Tried these for brunch this past weekend with my roommates and we are obsessed. We did a mix of cheese and Nutella ones (don’t judge, sweet and savory combo slaps) and it was the best lazy Sunday meal ever. Only note is that my taiyaki maker runs a little hot, so I had to cook them 30 seconds less than the recipe said to avoid burning.

2 hours ago

Cheese and Nutella?? That sounds wild but weirdly good, I need to try that combo next time. I feel like the slight sweetness of the taiyaki batter would work so well with Nutella.

30 minutes ago

Great note about cook times! All taiyaki makers run a little differently, so keeping an eye on them after the first minute is always a good call. The sweet-savory Nutella and cheese combo sounds incredible, we might have to test that for a future brunch recipe!

30 minutes ago

As someone who is literally obsessed with both grilled cheese and taiyaki, this recipe was made for me. I used a mix of mozzarella and cheddar so the cheese got super stretchy, and it was everything I dreamed it would be. So easy too, I don’t know why I never thought to combine these two before.

5 minutes ago

The mozzarella/cheddar mix is my go-to for grilled cheese too! That pull is unbeatable, I can already picture how good that is in the crispy taiyaki shell.

2 hours ago

Super easy, super tasty, minimal dishes to wash after. That’s my kind of recipe. I didn’t even have a taiyaki mold, I just used my mini waffle maker and it still turned out great. Not fish shaped, but who cares when it tastes that good? Will make again.

3 days ago

I swapped the dairy cheese for vegan cheddar and used a plant-based waffle mix, and this still turned out SO good! My non-vegan partner even said he liked it better than regular grilled cheese. Super easy to adapt for dietary restrictions, which is a huge win for us.

2 days ago

We love that this recipe is so easy to adapt for different diets! Thanks for sharing your vegan swap – we know so many readers will appreciate that tip, and we’re stoked your non-vegan partner loved it too.

5 days ago

I saw this recipe on TikTok last week and knew I had to try it. Let me tell you, it did not disappoint. I added a little slice of ham inside for extra protein and it was like a fancy homemade hot pocket but 100x better. My roommate walked in while I was making them and immediately asked me to make him one too.

3 days ago

The ham addition is such a good idea! That makes it a whole meal instead of just a snack, I’m adding that to my grocery list for this week.

3 days ago

The ham and cheese version sounds so hearty and delicious! It’s basically the perfect portable hand pie, we love that. So glad you and your roommate enjoyed it!

1 week ago

I was skeptical at first because I’m a grilled cheese purist, y’know? But my cousin made these for our family game night and I was converted. The crispy outside, the melty cheese, the tiny bit of sweetness from the batter? It works way better than it sounds. I’ll definitely be making these at home soon.

5 days ago

These are perfect for game night! No messy plates, you can hold them in one hand while you play cards, and everyone loves them. I made them for my game night last month and they were a total hit.

2 weeks ago

Made these for my little sister’s birthday party and all the kids went crazy for them. The fish shape is so fun, the kids thought they were eating “cheese fish” and thought that was the funniest thing ever. Way better than serving plain pizza, I will absolutely be making these for future kid events.

just now

Wait, I thought taiyaki was only for sweet fillings? This blew my mind. I cooked these on my cast iron taiyaki pan over the grill instead of the stovetop to get a little extra smoky flavor, and man, that was a next level move. The smoke from the grill paired so well with the cheese and sweet batter. 10/10 will be making these at my next cookout.

just now

Cooking them on the grill?? That is genius. I’ve got a cookout next weekend and I’m absolutely testing this, that smoky flavor sounds insane with the melty cheese.

just now

Grilling them is such a creative hack! That subtle smoky flavor sounds absolutely incredible, we’re running out to get our cast iron taiyaki pan to test this this weekend. Thanks for the amazing tip!

5 minutes ago

This recipe is so budget friendly! All the ingredients cost me less than $5 total at the grocery store, and it made 6 whole taiyaki grilled cheeses. That’s cheaper than buying one fast food sandwich, and way tastier. Perfect for anyone trying to save money on food right now.

just now

Right?? I’m on a super tight grocery budget right now and this was such a win. I already had all the ingredients in my kitchen so I didn’t even have to run to the store.

yesterday

15 minutes from start to finish on a busy weeknight? Sign me up. I got home late from work last night, threw these together with a side of tomato soup, and it felt like a cozy comfort meal without all the hassle. I will be keeping this recipe saved for busy nights from now on.



