
slider sandwich ideas

title 1
slider sandwich ideas
⏱️ cook time 15 minutes
🍽️ servings 6
⚡ Difficulty easy

intro

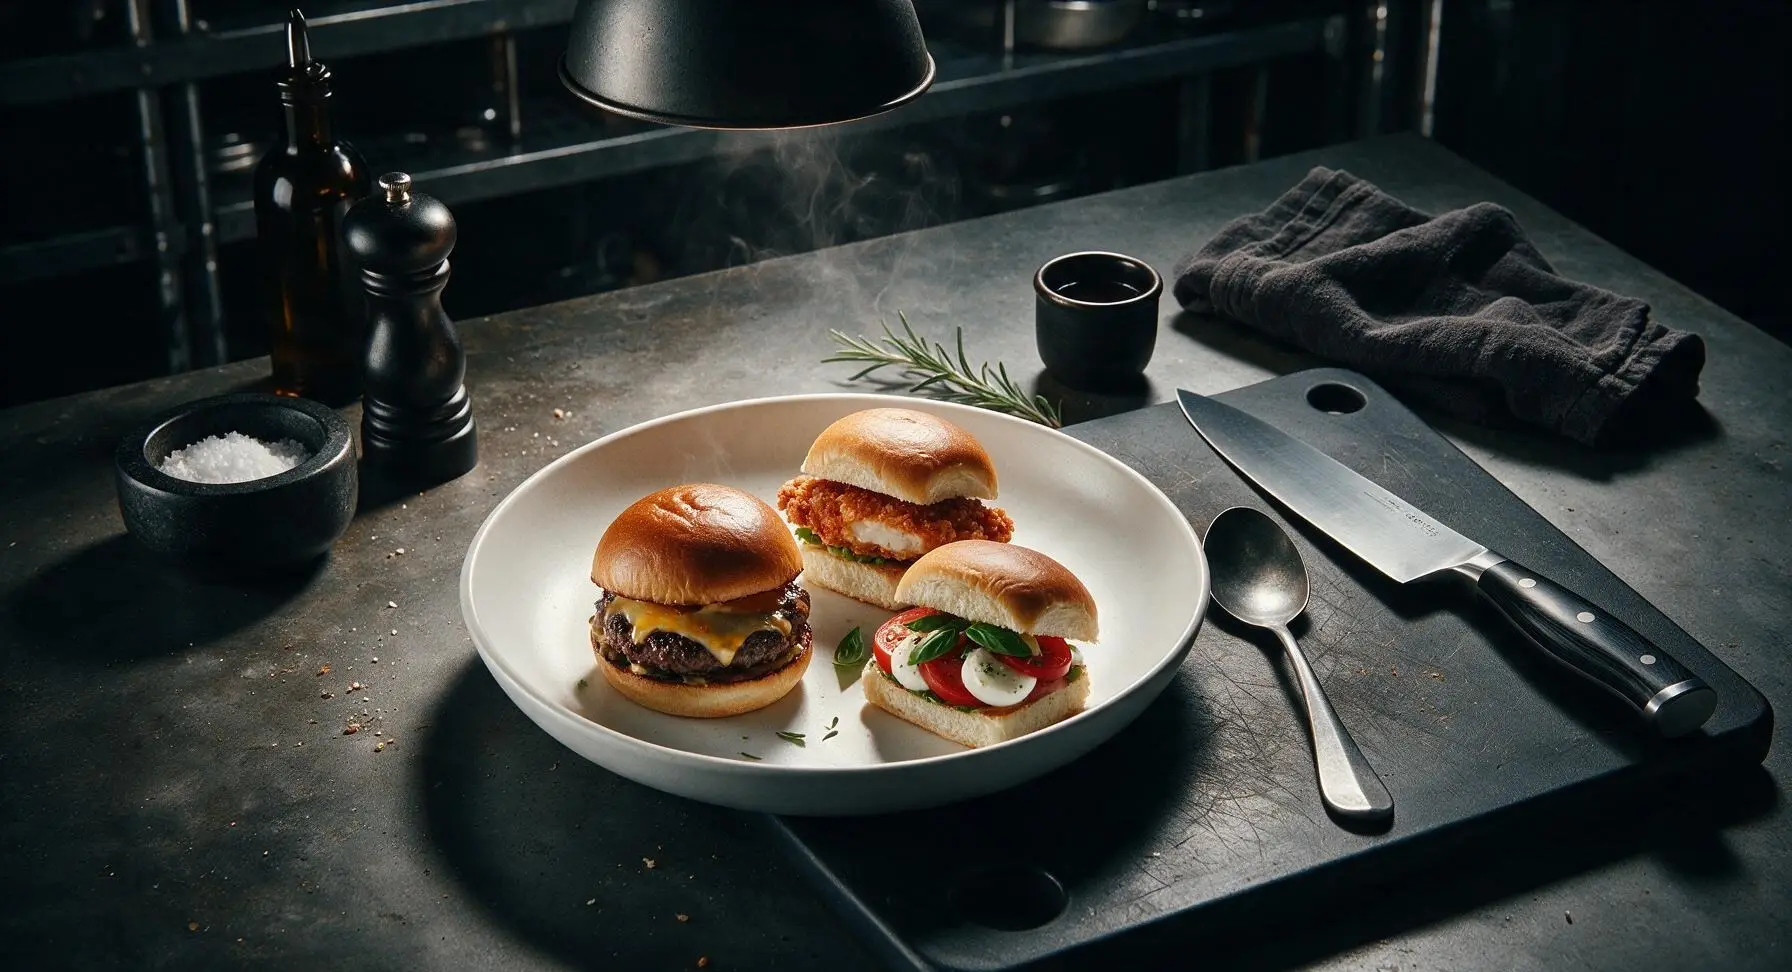
Three irresistible bite-sized sliders—juicy beef cheeseburger, crispy chicken, and fresh caprese—perfect for sharing, with soft toasted buns and bold, crowd-pleasing flavors.

Ingredients
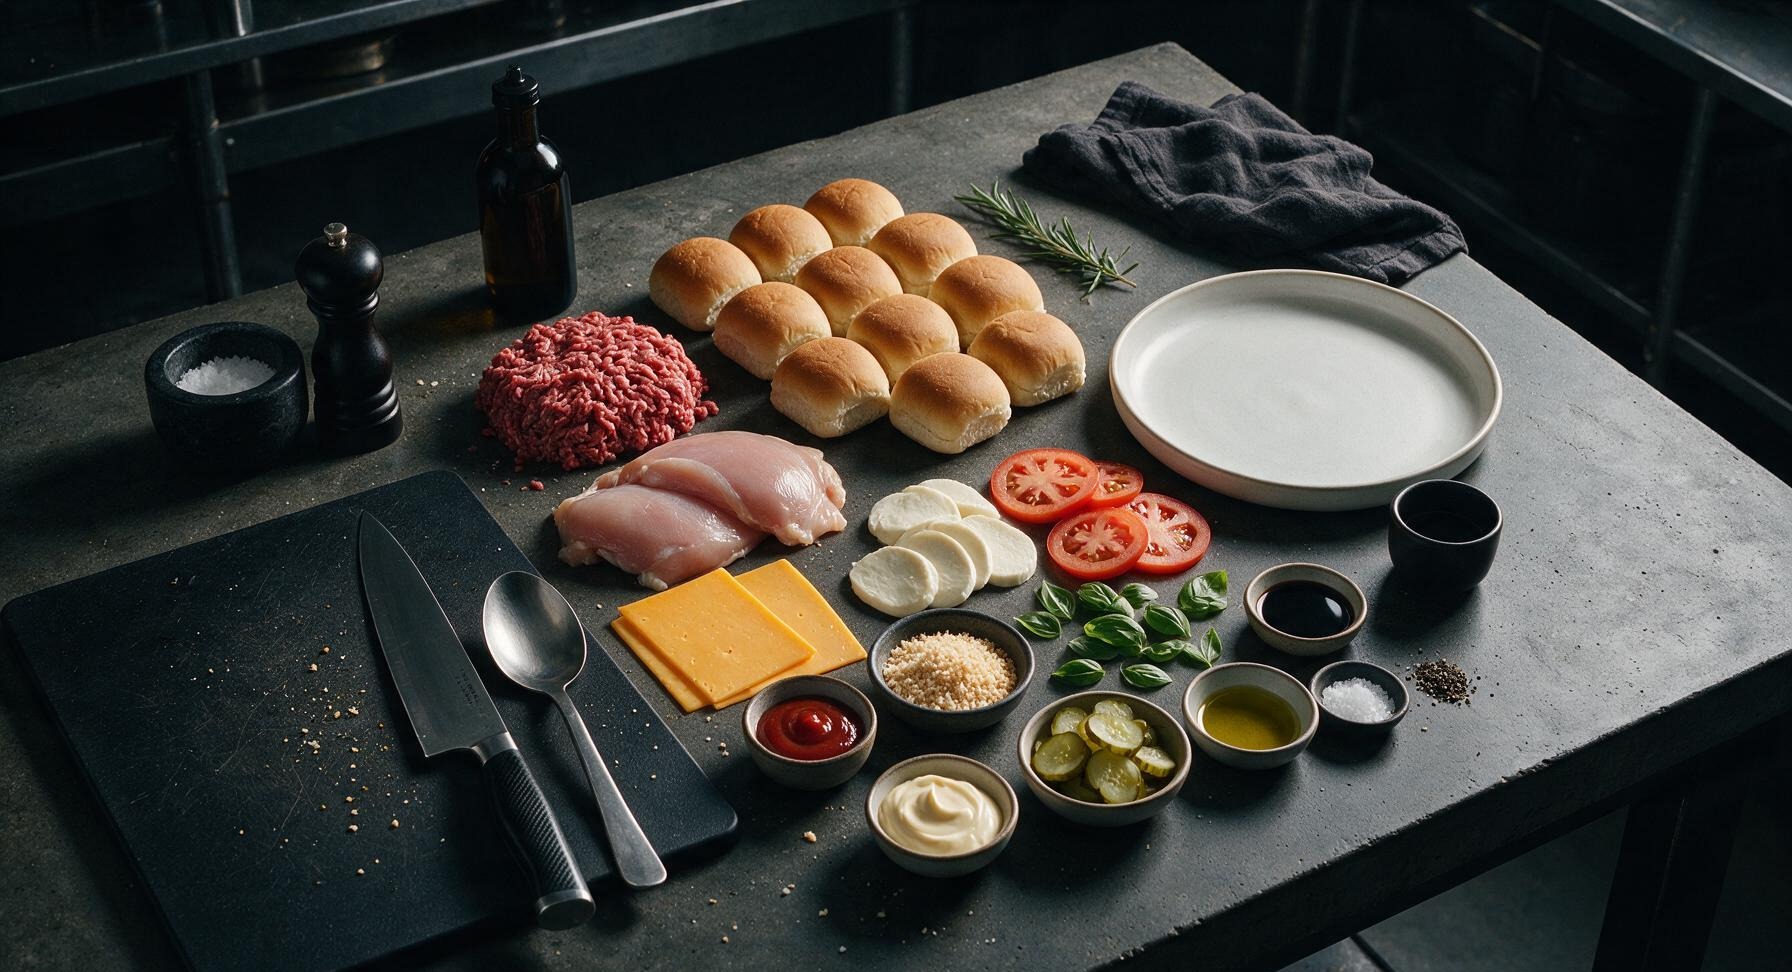
Soft mini potato slider buns 12 count
80/20 ground beef 225g
Boneless skinless chicken thighs 220g (2 large)
Sharp cheddar cheese 2 slices, cut into halves to fit sliders
Fresh mozzarella cheese 110g, thinly sliced
Roma tomatoes 2 medium, thinly sliced
Fresh basil leaves 15 leaves
Dill pickle slices 1/2 cup
Mayonnaise 1/3 cup
Ketchup 2 tbsp
Panko breadcrumbs 1/2 cup
Extra virgin olive oil 2 tbsp
Balsamic glaze 1 tbsp
Coarse kosher salt 1 tsp
Freshly ground black pepper 1/2 tsp

Steps

1

Toast the Slider Buns

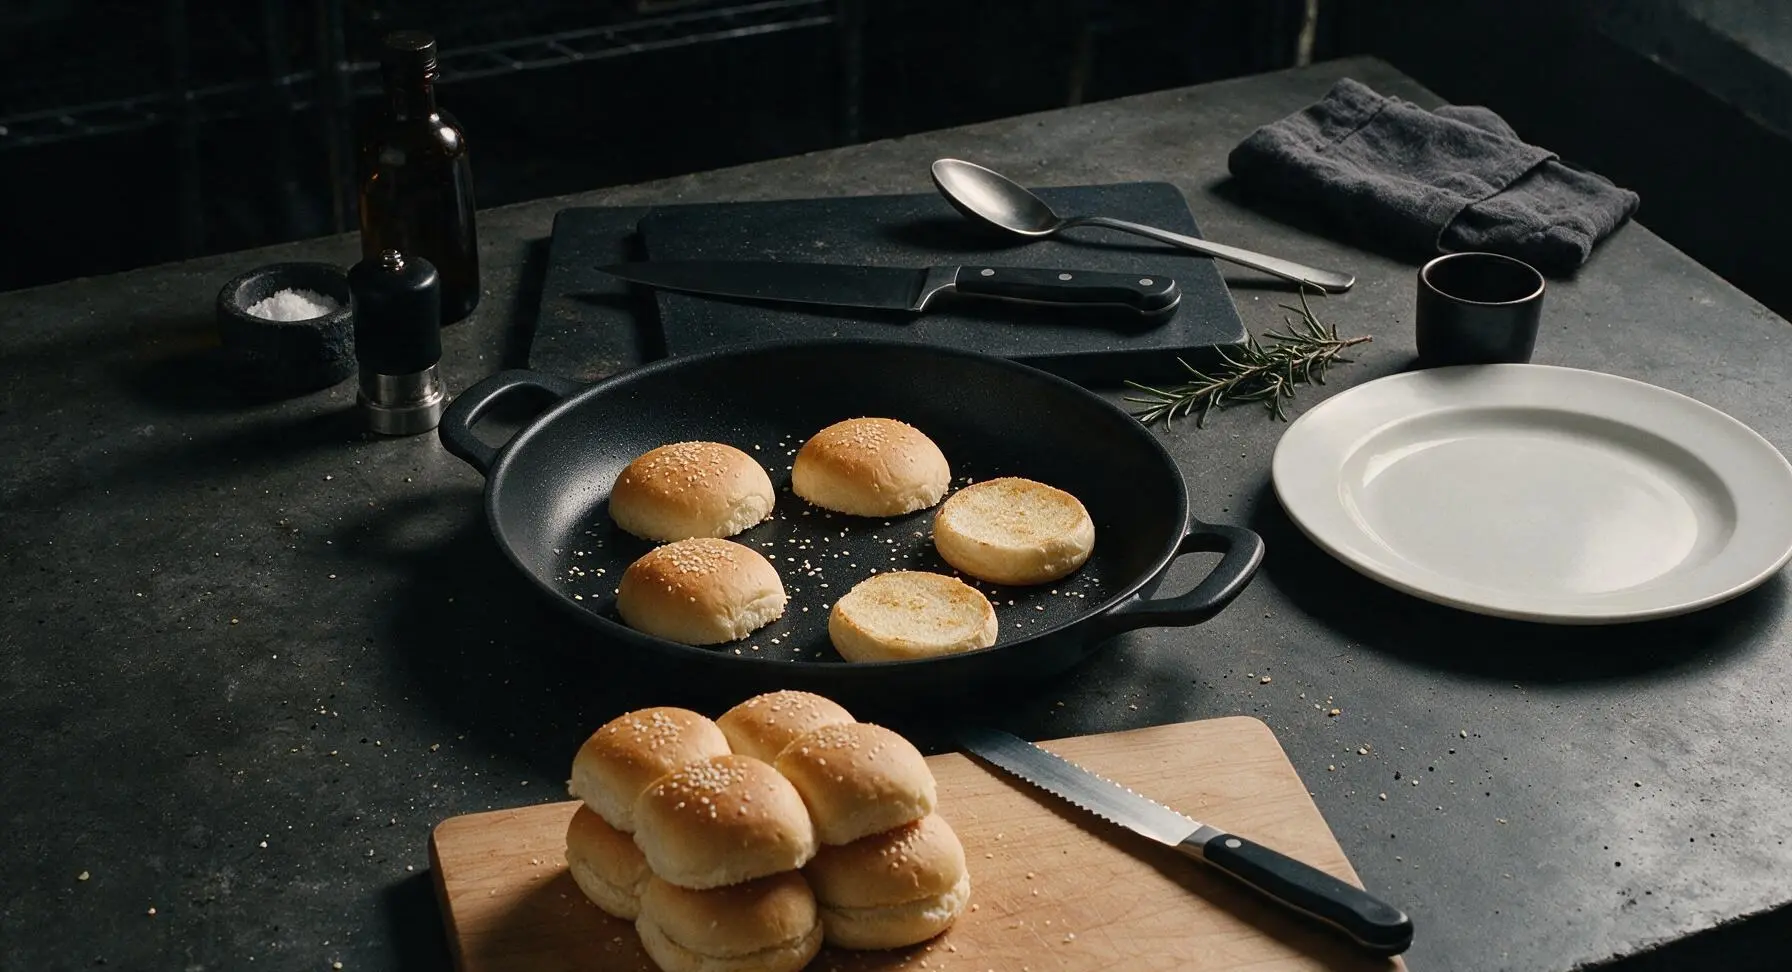
Preheat the matte black non-stick skillet over medium heat for 2 minutes. Split all 12 slider buns horizontally with the serrated bread knife, then place them cut-side down in the dry skillet. Toast for 45-60 seconds until light golden brown with faint crisp edges, taking care not to burn. Transfer toasted buns to the matte white serving platter to cool, leaving the skillet over medium heat. Visual cue: cut surfaces show pale golden toast marks, no dark charred spots.
Step 1
step1:Toast the Slider Buns
2

Shape Beef Patties

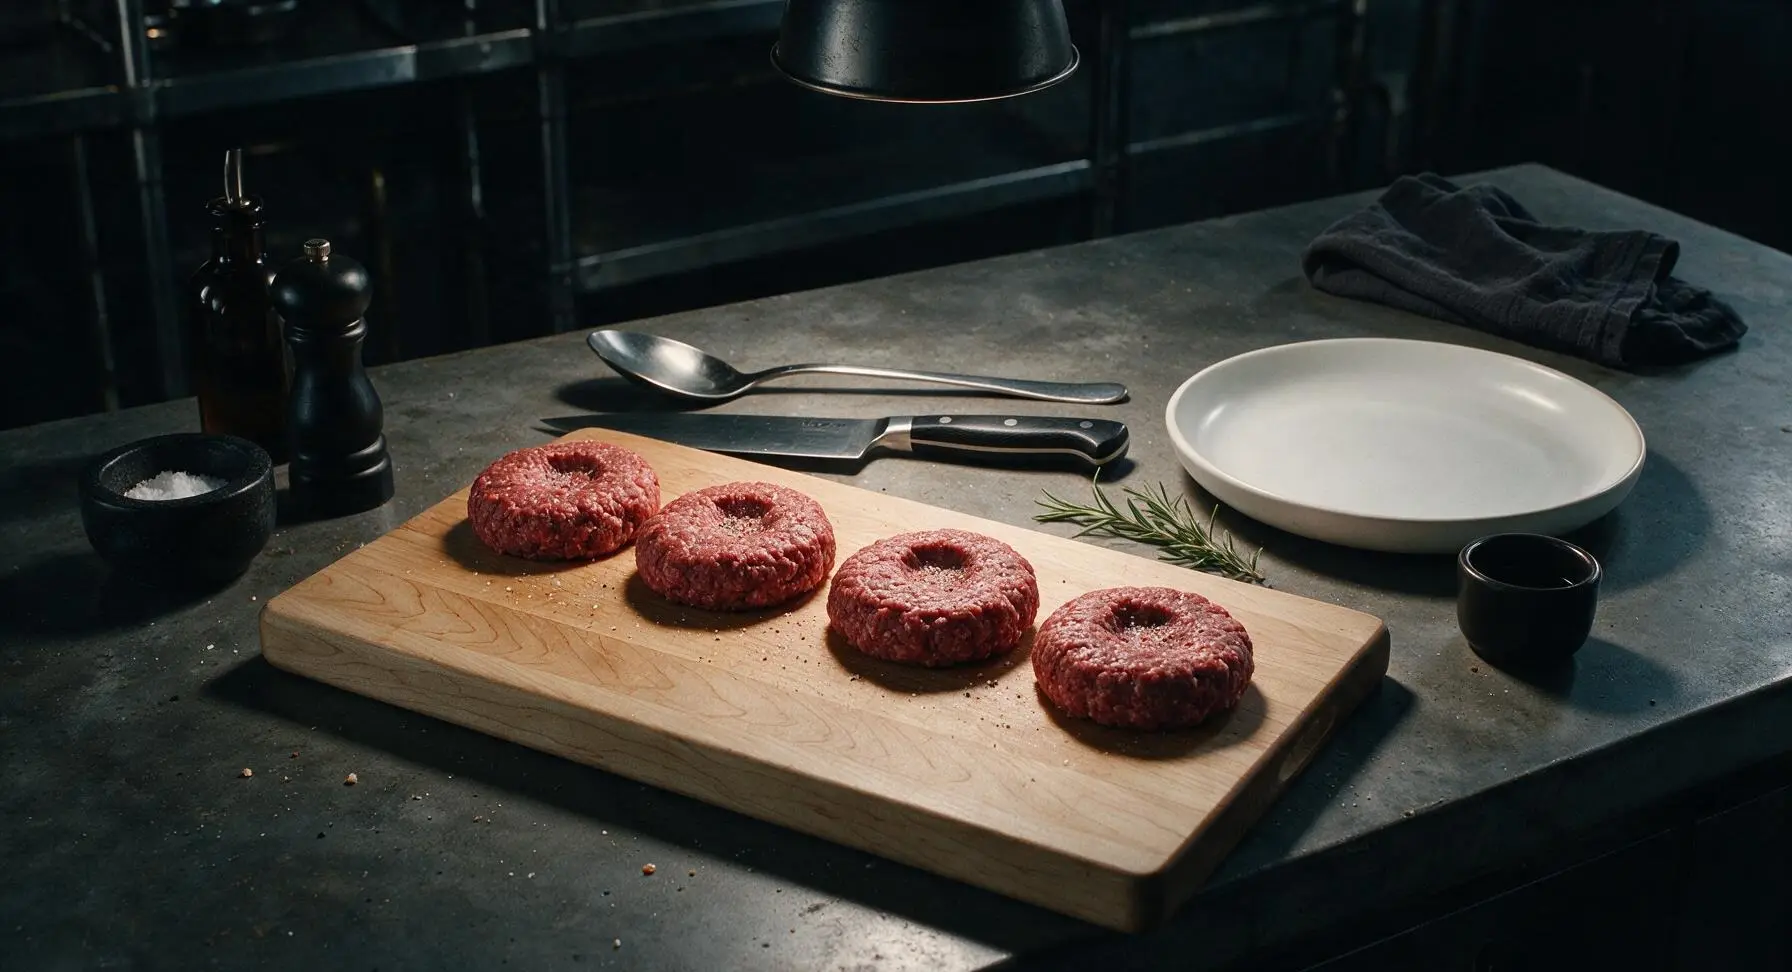
Place the 225g 80/20 ground beef on the maple cutting board. Divide evenly into 4 small 55g portions, then gently press each into 5cm wide, 1cm thick patties (slightly wider than the buns, as they will shrink during cooking). Press a small 1cm indent in the center of each patty with your thumb to prevent bulging as they cook. Season both sides lightly with 1/2 tsp kosher salt and 1/4 tsp black pepper.
Step 2
step2:Shape Beef Patties
3

Cook Beef Patties

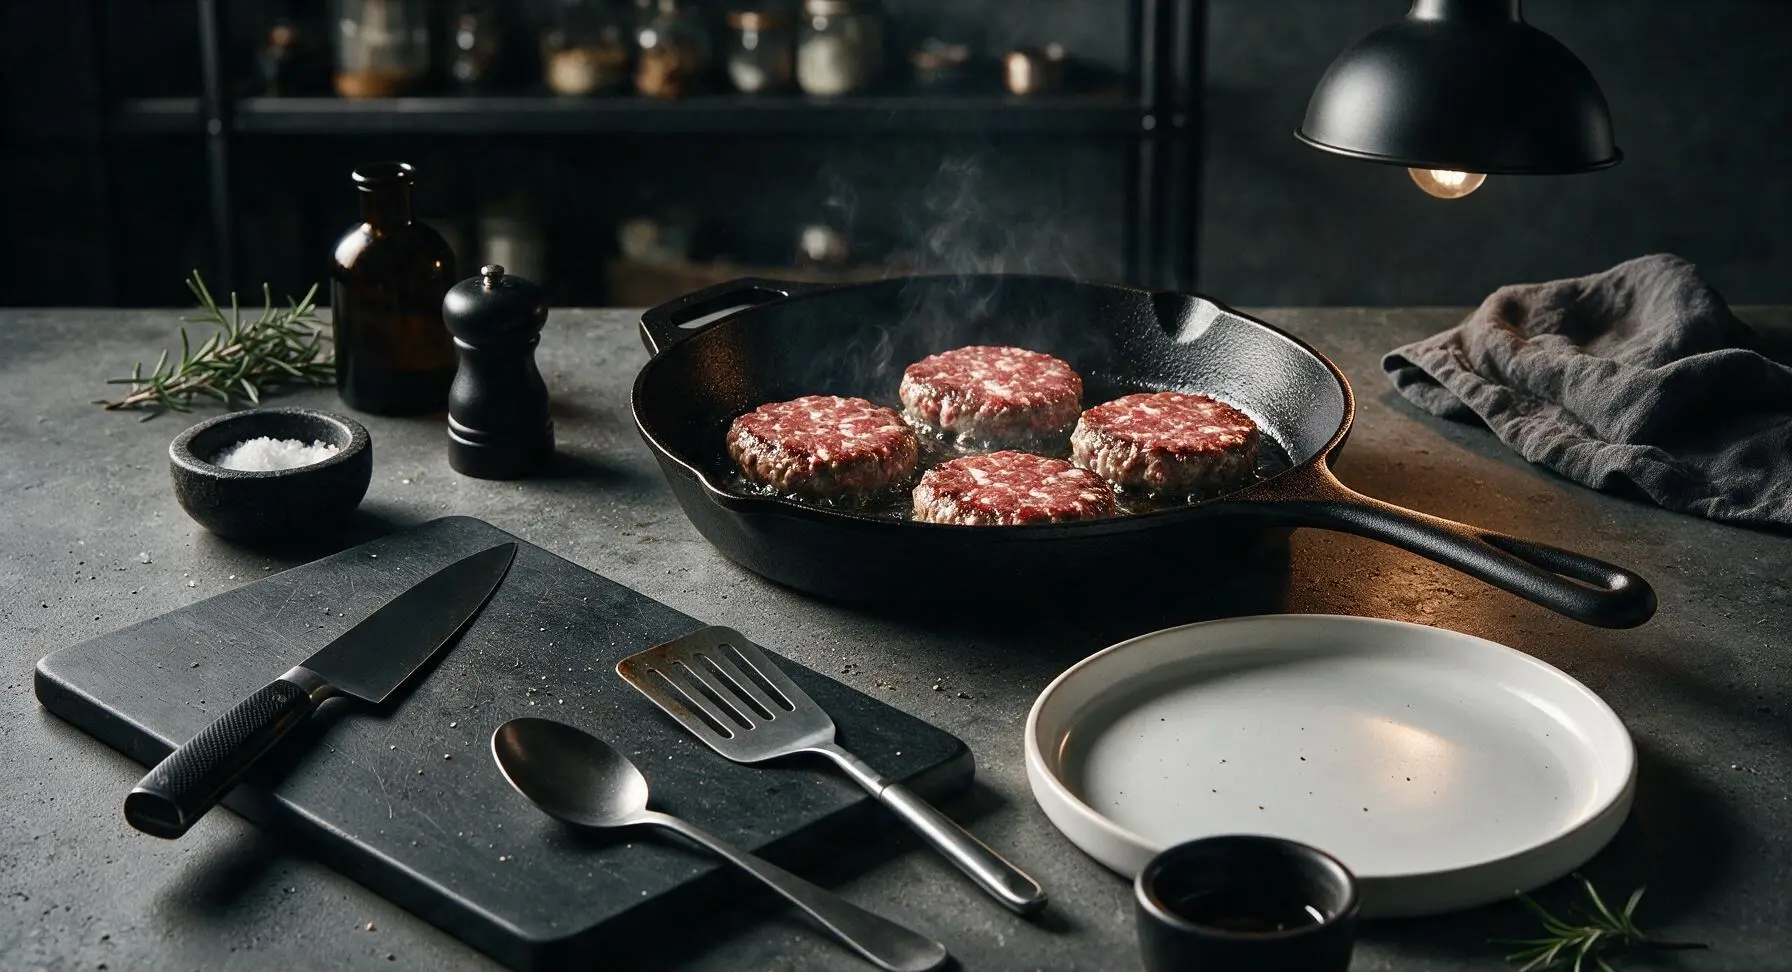
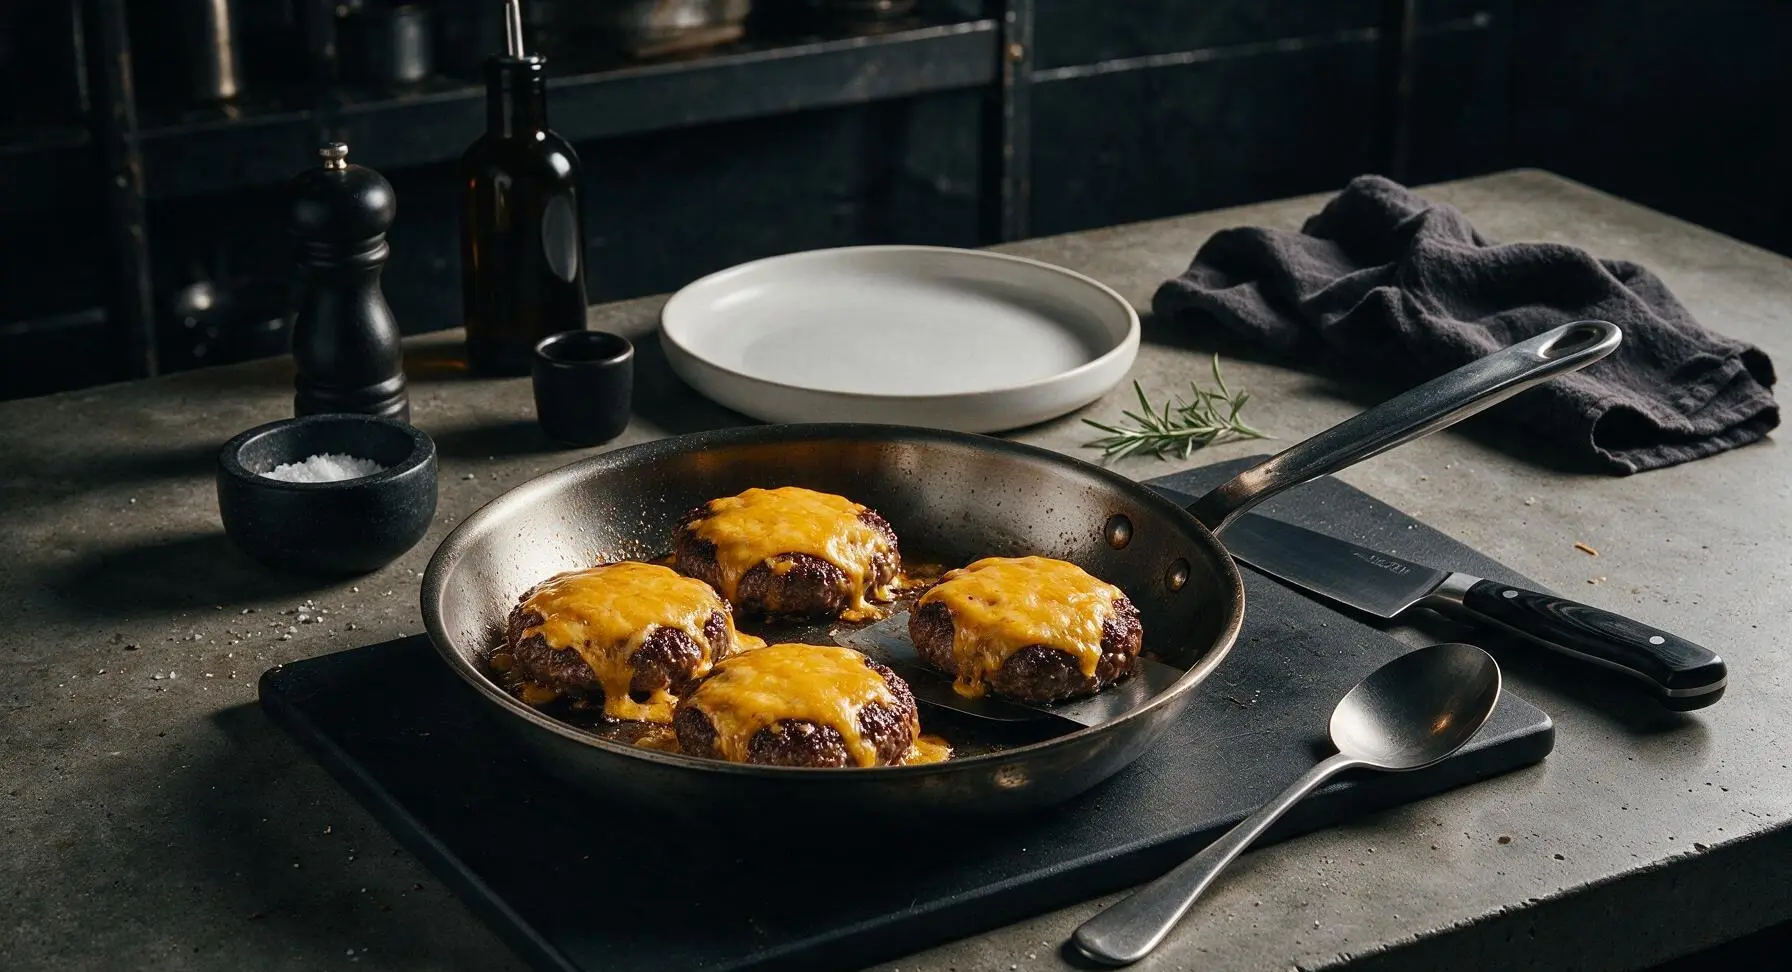
Place all 4 beef patties in the preheated skillet in a single batch. Cook for 2 minutes per side for medium doneness, until the exterior is deep brown and crispy. During the last 30 seconds of cooking on the second side, top each patty with a half-slice of sharp cheddar to melt. Transfer cooked patties to a clean corner of the cutting board to rest for 2 minutes, allowing juices to redistribute.
Step 3
step3:Cook Beef Patties
Step 3
step3:Cook Beef Patties
4

Cook Crispy Chicken

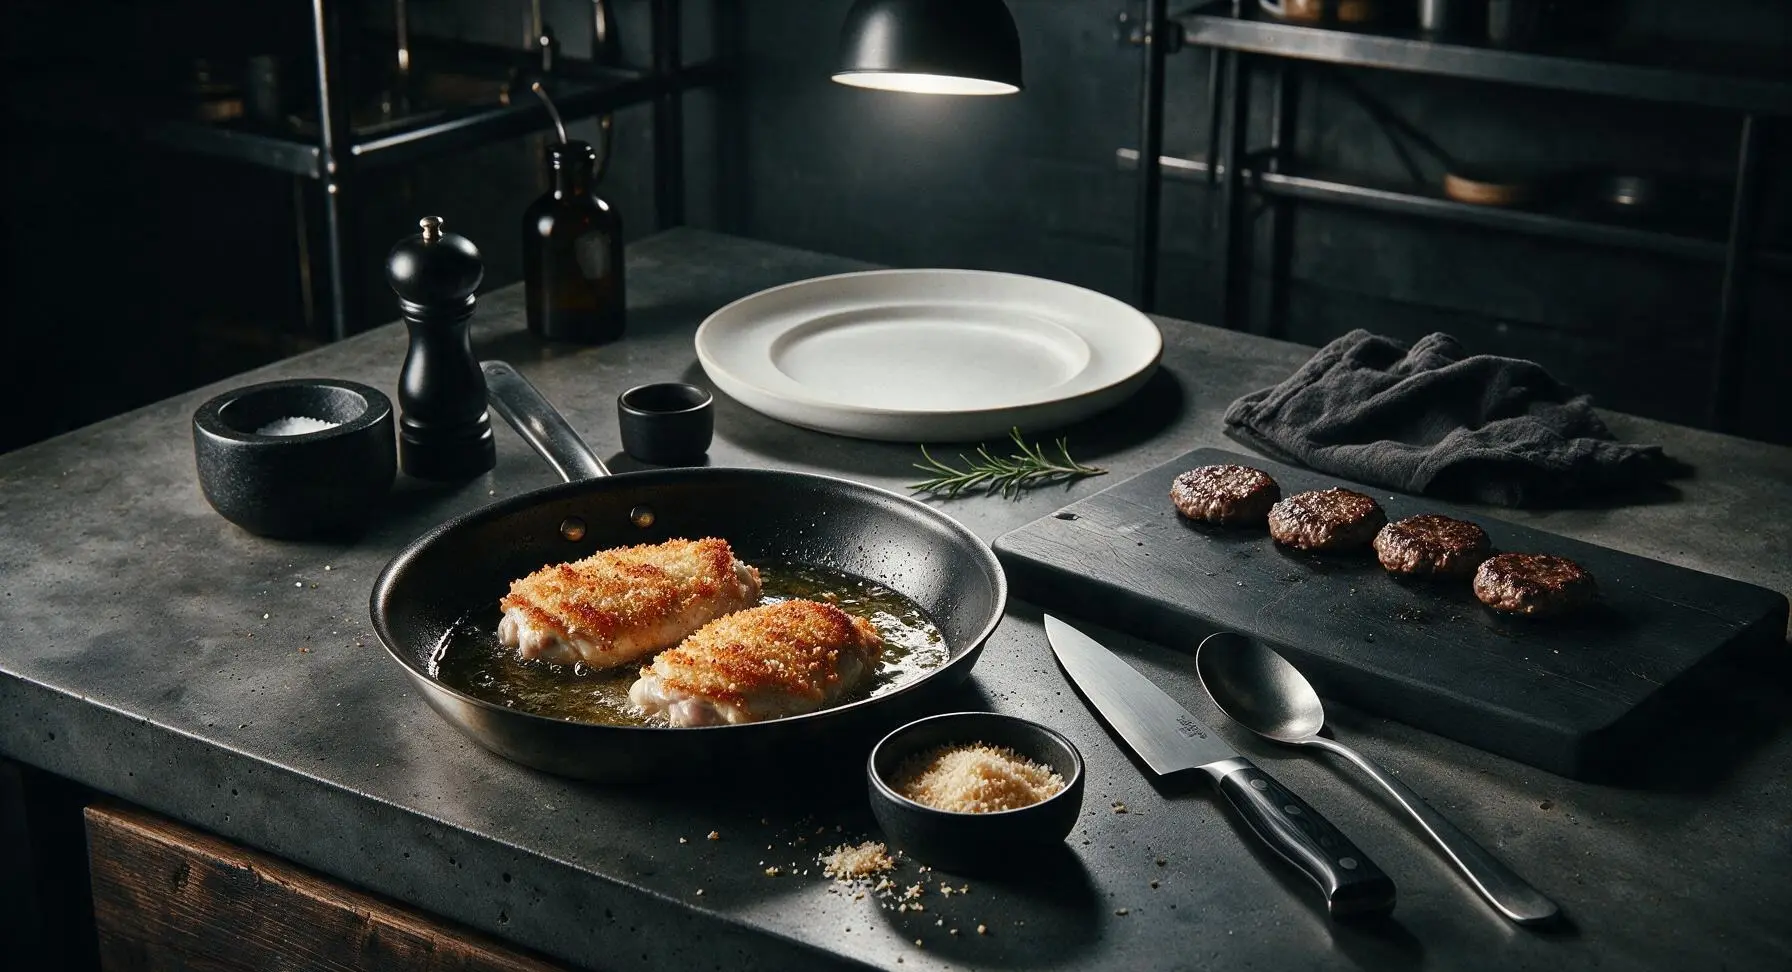
First, pound the chicken thighs to an even 1cm thickness so they cook quickly and evenly. Season with the remaining 1/2 tsp salt and 1/4 tsp pepper, then press firmly into the panko breadcrumbs to coat both sides evenly. Add 1 tbsp olive oil to the same skillet used for the beef, place breaded chicken in the pan, and cook for 3 minutes per side until golden brown, crispy, and reaching an internal temperature of 74°C. Transfer cooked chicken to the cutting board, then slice each thigh into 2 even pieces sized to fit the slider buns, for 4 total chicken pieces.
Step 4
step4:Cook Crispy Chicken
5

Mix Special Sauce

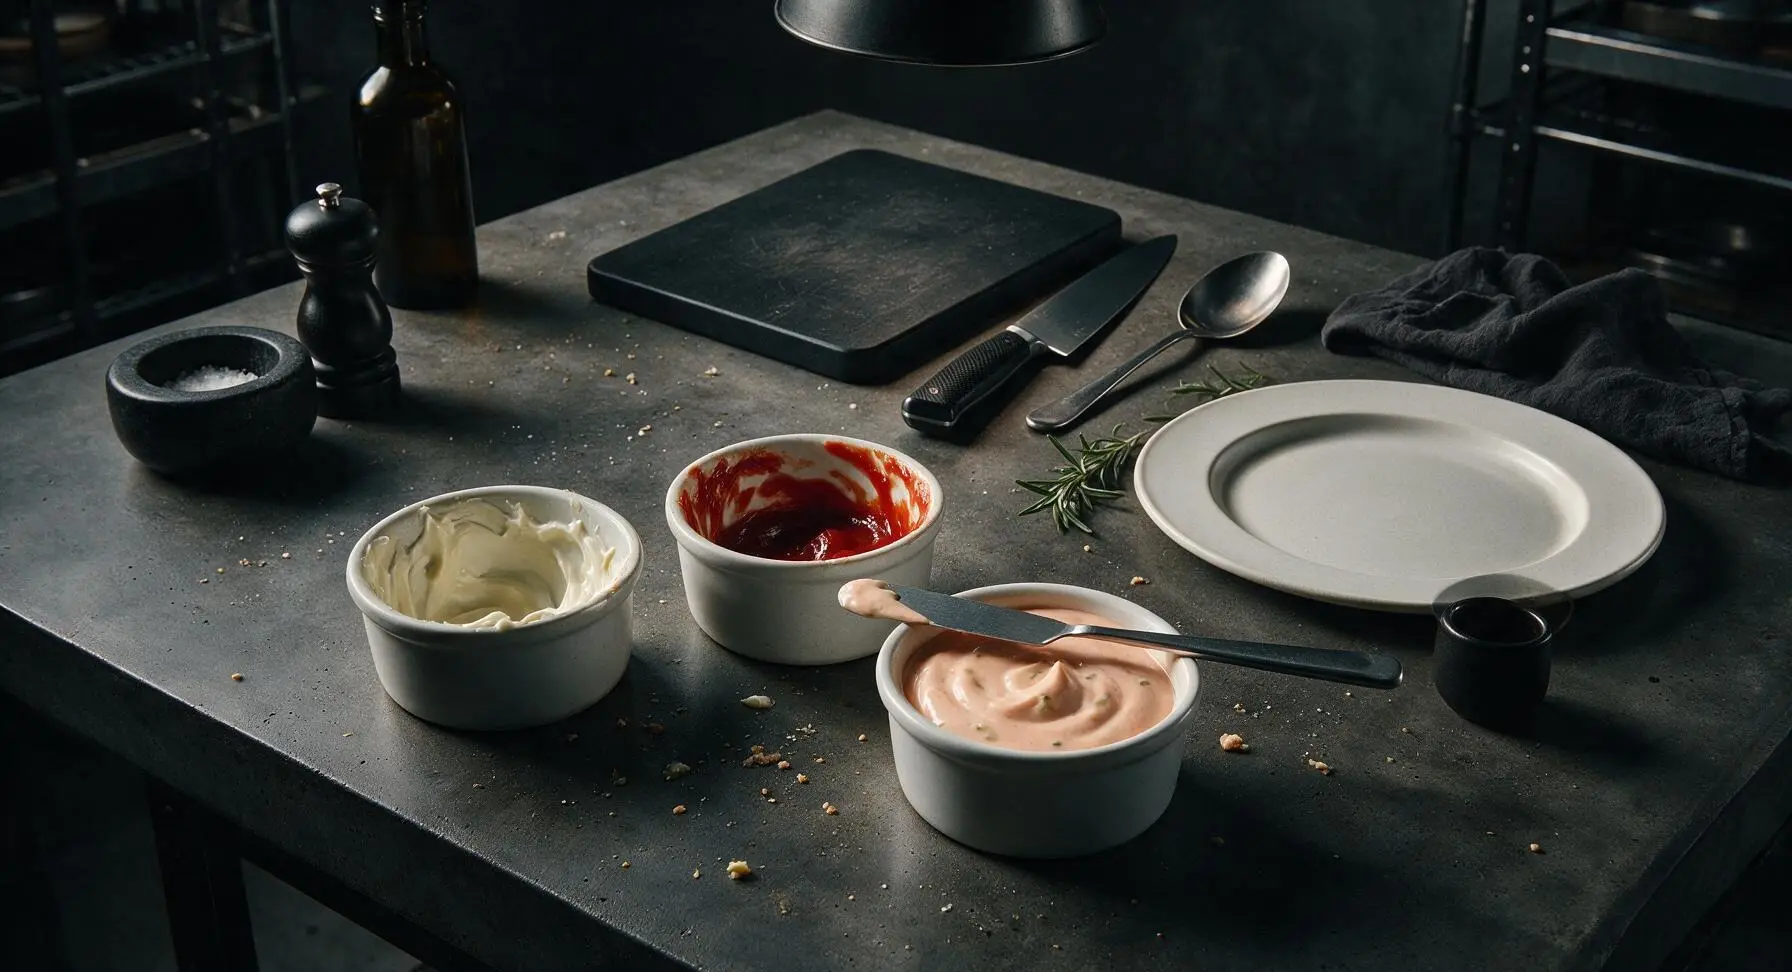
In one of the empty matte white ramekins, stir together 1/3 cup mayonnaise, 2 tbsp ketchup, and 1 tbsp finely chopped dill pickle until fully combined into a smooth, pale pink-orange sauce. This tangy, creamy spread works for both beef and chicken sliders.
Step 5
step5:Mix Special Sauce
6

Build Cheeseburger Sliders

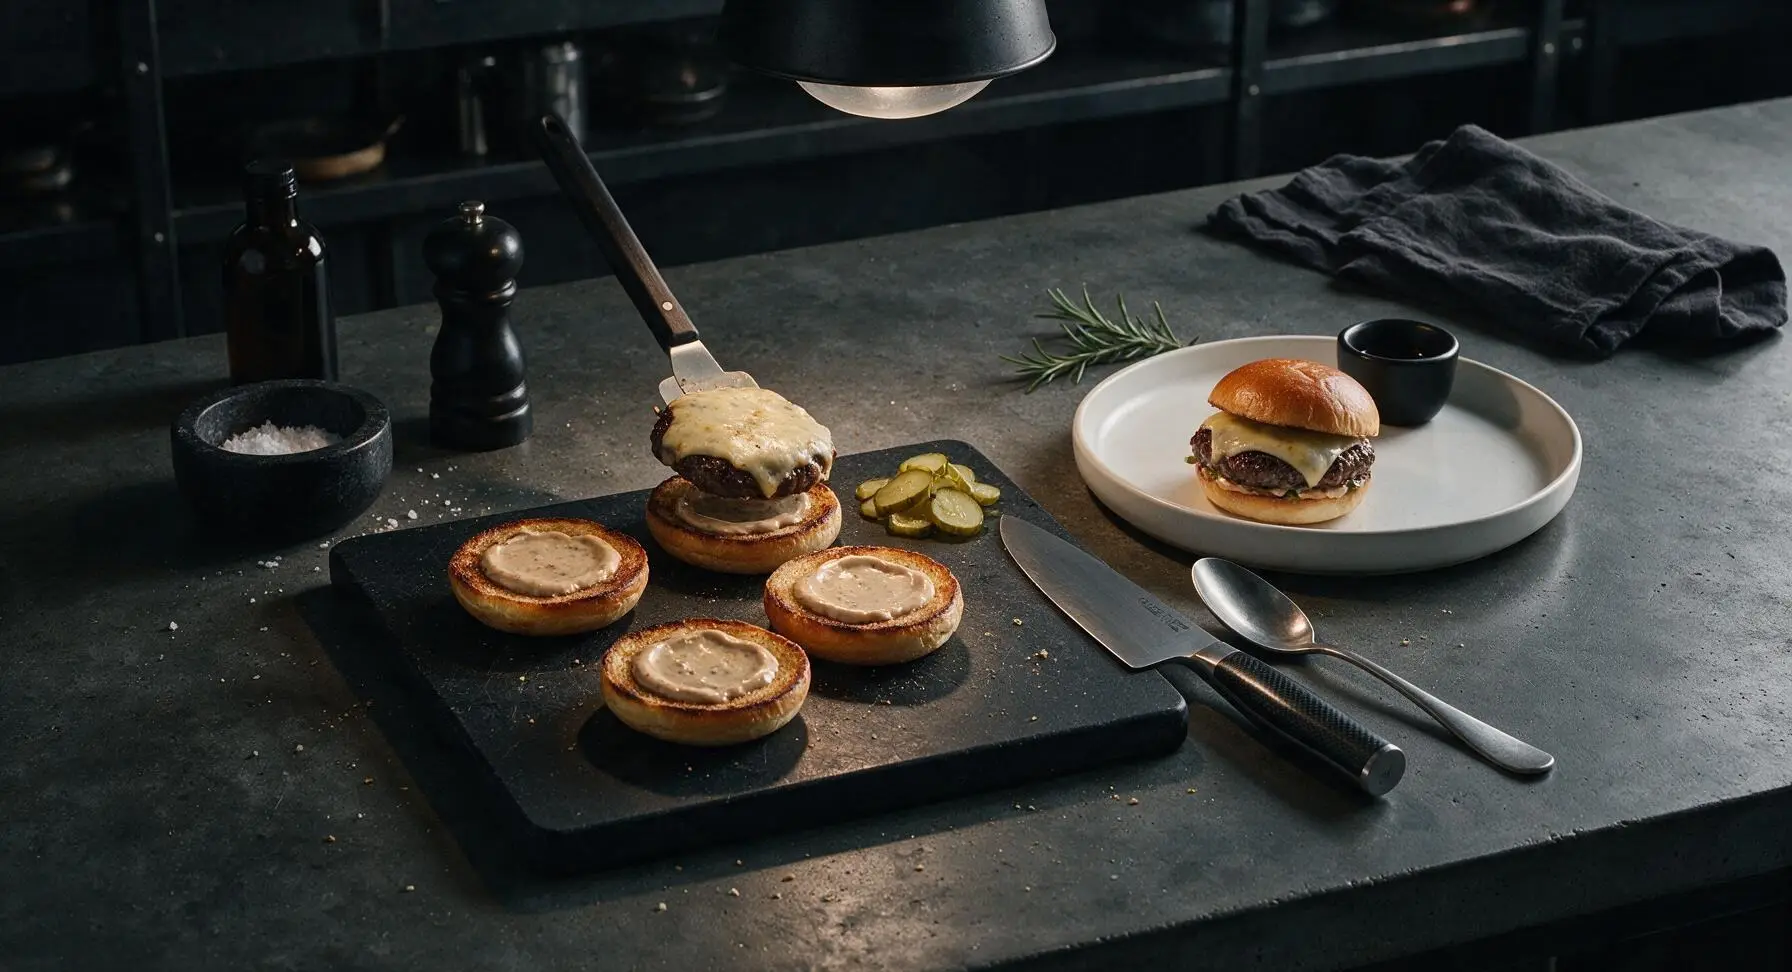
Spread 1 tsp of special sauce on the cut sides of 4 toasted bun bottoms. Top each with a cheddar-topped beef patty, 2 dill pickle slices, then place the matching toasted bun top on each. Secure each slider with a small frilled toothpick to hold layers together, then set the finished sliders in a row on the white serving platter.
Step 6
step6:Build Cheeseburger Sliders
7

Build Chicken Sliders

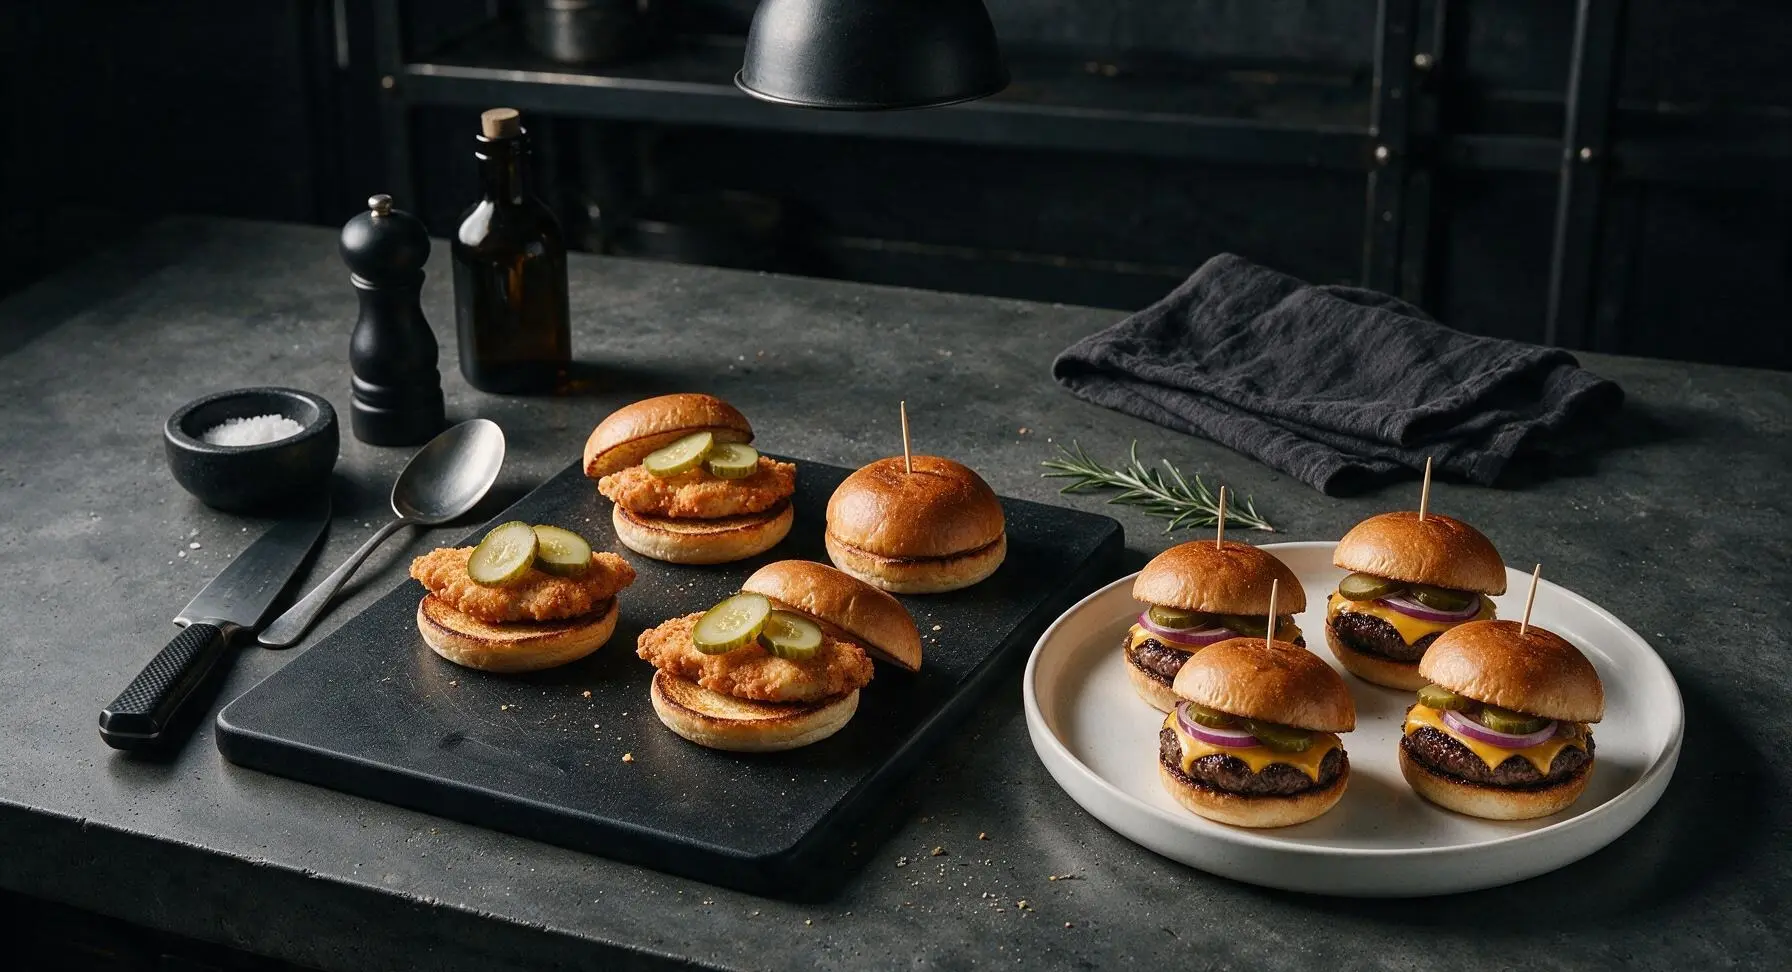
Spread 1 tsp of special sauce on the cut sides of the next 4 toasted bun bottoms. Top each with a piece of crispy cooked chicken, 2 dill pickle slices, then place the matching bun top on each. Secure with a toothpick and add the sliders to the serving platter in a row next to the beef cheeseburger sliders.
Step 7
step7:Build Chicken Sliders
8

Build Caprese Sliders

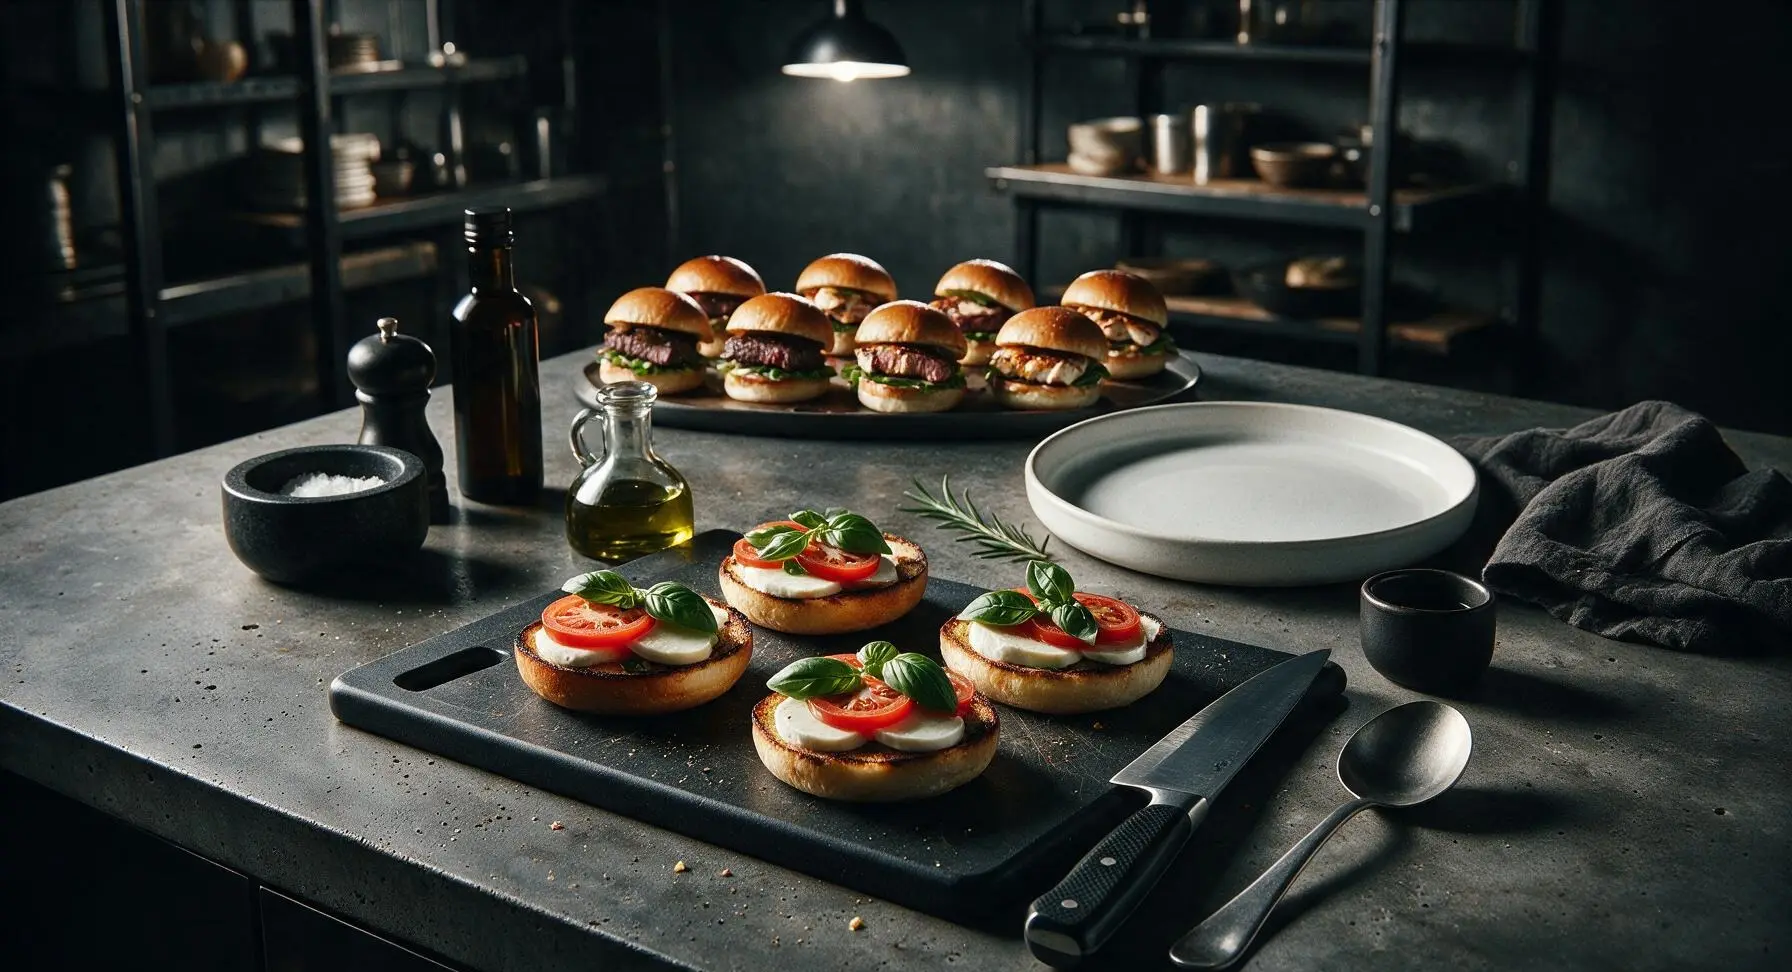
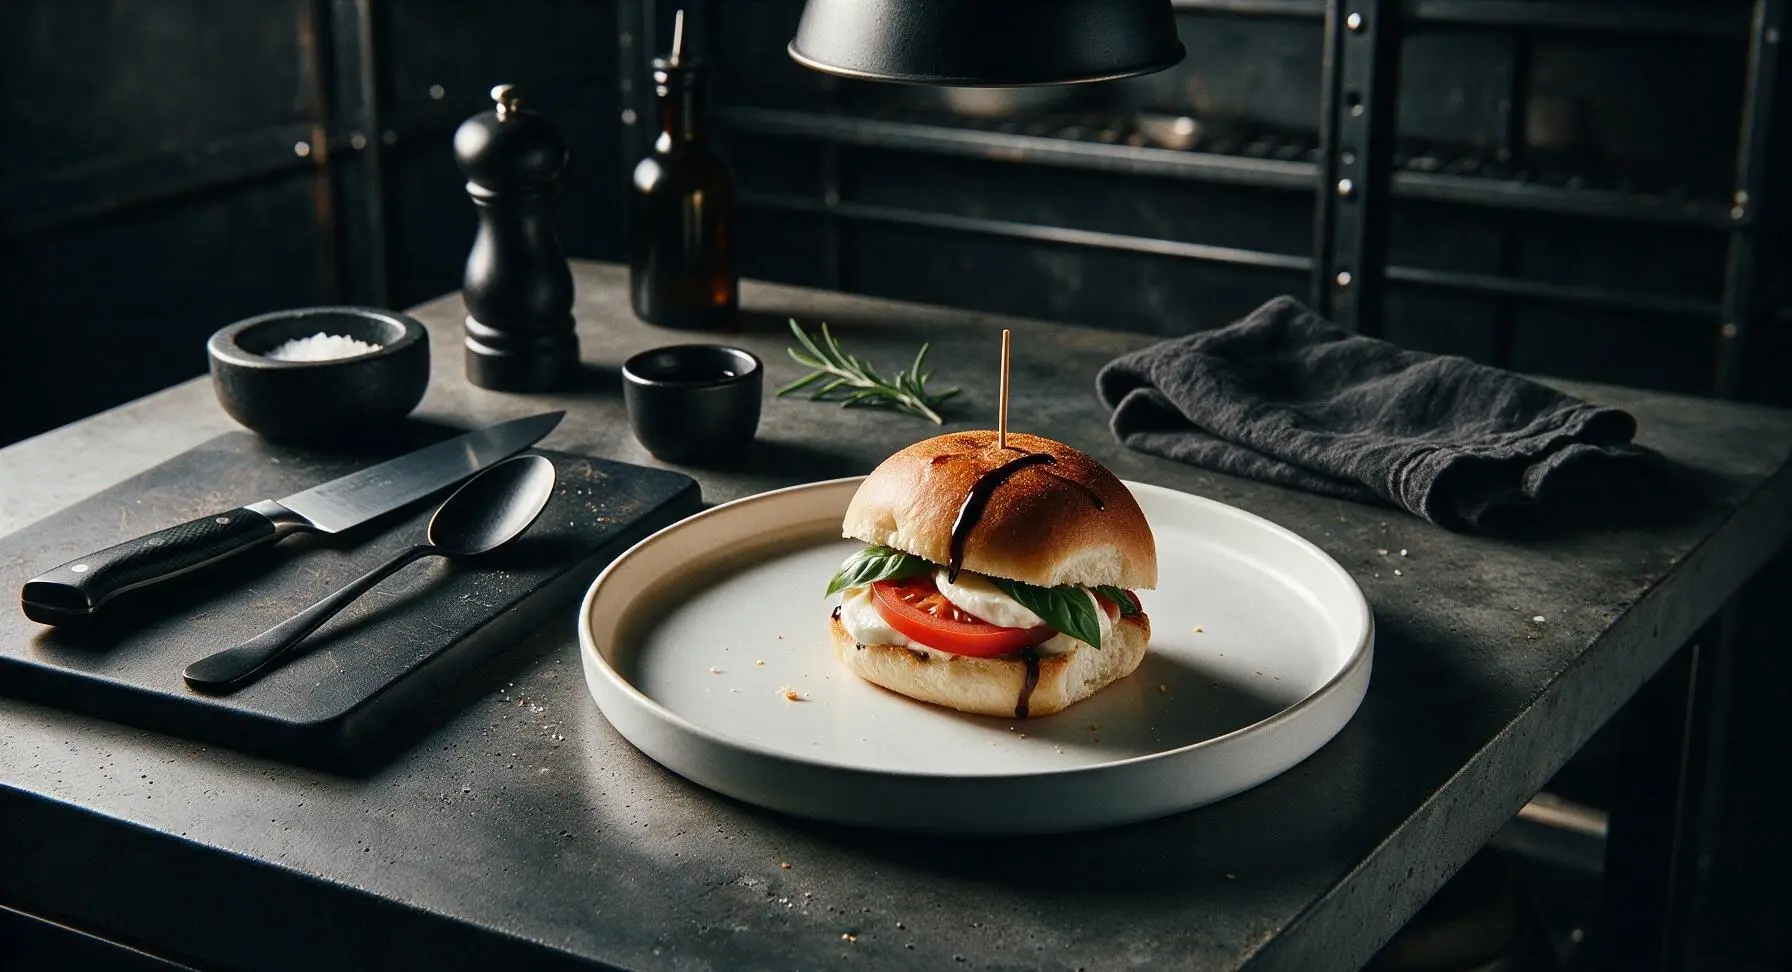
Drizzle 1/4 tsp olive oil on the cut sides of the last 4 toasted bun bottoms. Top each with a thin slice of fresh mozzarella, a slice of Roma tomato, 2 fresh basil leaves, and a tiny drizzle of balsamic glaze. Place the bun top on each, secure with a toothpick, and add to the serving platter to complete the three slider varieties.
Step 8
step8:Build Caprese Sliders
Step 8
step8:Build Caprese Sliders

Tips

1.Use 80/20 ground beef for patties: the 20% fat content keeps the tiny slider patties juicy during quick, high-heat cooking, as leaner beef blends will dry out much faster in the small patty form.
2.Never press down on patties while cooking: this squeezes out all the flavorful rendered fat and meat juices, leading to dry, tough sliders instead of juicy, tender bites.
3.Always toast the bun cut-sides before assembling: this creates a thin, crisp barrier that prevents sauce and patty juices from soaking into the soft bun, keeping sliders intact even if they sit for 30-45 minutes during a party.


✨ You May Also Like

Snacks & Appetizers
🍜 Mexico

Crispy thick-cut tortilla chips piled high with seasoned beef, melted cheese, and bright fresh toppings for a shareable, crowd-favorite bite.

⏱️ 25 minuteSnacks & Appetizers ★ 4.8
Snacks & Appetizers
🍜 United States

Crisp, sweet-tangy spiced pickled watermelon rind is a zero-waste summer staple, perfect with grilled meats, charcuterie, or eaten straight from the jar as a bright snack.

⏱️ 30 minuteSnacks & Appetizers ★ 4.6
Snacks & Appetizers
🍜 Germany

A tangy, jellied pork cold cut slow-simmered with aromatic spices, set into a firm sliceable loaf, served cold with mustard and crusty bread.

⏱️ 3 hours 4Snacks & Appetizers ★ 4.8
Snacks & Appetizers
🍜 United States

Creamy, tangy, perfectly seasoned hard-boiled egg halves filled with a rich, smooth yolk mixture, a timeless, crowd-pleasing bite for holiday and casual gatherings alike.

⏱️ 40 minuteSnacks & Appetizers ★ 4.8
Snacks & Appetizers
🍜 Russia

Silky, dill-forward no-smoke cured salmon, a Scandinavian classic with bright salty-sweet flavor, ideal for holiday starter platters and open-faced rye sandwiches.

⏱️ 48 hours Snacks & Appetizers ★ 4.7
Snacks & Appetizers
🍜 Japan

Crisp golden bottoms, juicy savory pork and vegetable filling, and tangy dipping sauce make these pan-fried gyoza a beloved shareable bite.

⏱️ 45 minuteSnacks & Appetizers ★ 4.8

slider sandwich ideas:Frequently Asked Questions

1.Can I prep these sliders ahead of time to make party day less stressful? ▾
Absolutely! Prep all cooked components (beef patties, crispy chicken) up to 1 day in advance, store them in airtight containers in the fridge, and reheat gently right before serving. Toast buns and assemble sliders at the last minute to avoid soggy bread; caprese sliders hold up best if assembled no more than 30 minutes before serving.
2.Why do you recommend 80/20 ground beef for the cheeseburger sliders instead of leaner ground beef? ▾
That 20% fat ratio is non-negotiable for juicy, flavorful tiny beef patties. Leaner ground beef (like 90/10) dries out extremely quickly when cooked into thin slider-sized patties, and the rendered fat from 80/20 beef creates that craveable crispy, caramelized edge on each patty without needing extra cooking oil.
3.How do I get perfectly crispy chicken for the chicken sliders without deep frying? ▾
Start with boneless, skinless chicken thighs (they stay juicier than breast!) and pat them completely dry before coating in seasoned panko breadcrumbs. Bake them on a wire rack set over a baking sheet at 425°F for 18–20 minutes, flipping halfway—air circulation all around gives even crunch without the mess of deep frying.
4.What can I use if I can’t find soft mini potato slider buns at the grocery store? ▾
Soft mini Hawaiian dinner rolls or plain white dinner rolls work as a solid substitute! Look for rolls with a tender, pillowy crumb rather than crusty artisan rolls, and give the cut sides a quick toast in a little melted butter before assembling to add subtle richness and prevent sogginess from juicy fillings.
5.How do I keep the caprese sliders from getting watery and making the buns soggy? ▾
The key is removing excess moisture from your fresh ingredients first. Slice fresh mozzarella 20 minutes early and lay slices on paper towels to blot off excess whey, and seed your tomato slices to remove the juicy inner pulp. Assemble these sliders right before serving, and apply balsamic glaze directly to the bun instead of drizzling it over fillings.
6.What size should I make the patties so they fit the slider buns properly? ▾
Aim for 2-ounce portions for both beef and chicken patties, and press them about ¼ inch wider than the base of your slider buns—all patties shrink a bit as they cook. For beef patties, press a small dimple in the center before cooking to keep them from puffing up into a dome, so toppings sit evenly without sliding off.
7.Can I make a big batch of these sliders in the oven instead of cooking patties on the stovetop? ▾
Definitely! For easy large-batch prep, arrange bottom buns in a 9x13 baking dish, top with pre-cooked beef or chicken patties and sharp cheddar, add the top buns, and brush with melted garlic butter. Cover and bake at 350°F for 10 minutes; hold off on adding caprese toppings like fresh mozzarella and basil until after baking to keep them bright and fresh.

Comments (13)

2 days ago

OMG these sliders were an absolute hit at my son’s soccer team potluck last weekend! I made all three varieties and the BBQ pulled pork ones vanished in literally 10 minutes. 15 minute cook time is NO JOKE, I was shocked how fast these came together even with a house full of chaotic pre-teens running around. SO good, will be making these for every game day from now on!

1 day ago

Wait did you make the Hawaiian roll ones? I’m debating if I should pick up sweet rolls or regular brioche for our watch party this Sunday!

1 day ago

So stoked these were a hit at the potluck! Quick tip for Greg too: both work great, but sweet Hawaiian rolls really complement the tangy BBQ pulled pork filling perfectly if you want that extra pop of flavor!

1 week ago

Game changer for my weekly meal prep! I batch made the buffalo chicken sliders on Sunday, wrapped them individually, and they reheated perfectly for quick lunches all week. Only note: I added a little extra ranch drizzle because I’m a ranch fiend, no regrets. Super easy even for someone who burns toast half the time tbh.

6 days ago

Love the ranch hack! So glad these worked for your meal prep – the sliders hold up surprisingly well in the fridge for 3-4 days when wrapped tight, perfect for quick grab-and-go meals!

30 minutes ago

Made the cheeseburger sliders for my roommates last night and we all agreed they taste way better than the fast food sliders we usually order on movie nights. The secret sauce? *Chef’s kiss* No notes, will be doubling the batch next time because four each was not enough lmao.

3 days ago

Brought these to our neighborhood block party and I had no less than 8 people ask me for the recipe! I was worried the 15 minute cook time sounded too good to be true, but nope – it was so straightforward I even let my 10 year old help assemble them. The buffalo chicken variety was the surprise favorite, I thought for sure the BBQ pulled pork would win!

2 days ago

Ooh how did you keep the buffalo chicken ones from getting soggy when you transported them to the party? I always struggle with that for potlucks!

2 days ago

Great question! I recommend letting the cooked buffalo chicken filling cool for 5 minutes before assembling the sliders, and toasting the inside of the rolls lightly if you’re transporting them long distances – it creates a little barrier so the bread doesn’t get mushy!

5 days ago

Took these for a test run before our big Fourth of July cookout and let me tell you, they passed the vibe check. I did add a little extra dill pickles to the cheeseburger sliders because my family is obsessed with pickles, and it slapped. Easy enough that I didn’t have to spend the whole party stuck in the kitchen, which is the real win.

4 days ago

Dill pickles are such a great addition! So glad these freed up your time to enjoy the party – that’s exactly what easy slider recipes are for, right?

2 hours ago

Made these in my tiny dorm kitchen with just a toaster oven and they came out perfect!!! All three varieties were so easy, no fancy equipment needed. My floor mates kept knocking on my door asking what smelled so good lmao, ended up sharing half the batch. 10/10 for broke college students who want something that isn’t ramen.

yesterday

My kids are SO picky I was nervous to try these, but they both went back for seconds of the buffalo chicken sliders! I left the spicy sauce on the side for my youngest who hates heat, and that worked perfectly. It’s so hard to find quick dinners everyone in my house will eat, this is going into the regular rotation for sure.

yesterday

This makes my day! Serving the spicy sauce on the side is such a smart hack for kids (or adults!) who don’t love a lot of heat – so glad your whole family enjoyed them!

1 week ago

Made these for our tailgate last weekend and they were a total game changer. We didn’t even have leftovers to bring home, which is how you know a recipe slaps. Only thing I’d say is make more than you think you need, people will eat way more than 2 sliders each trust me.

5 days ago

How did you keep them warm at the tailgate? We’re doing an early game next month and I don’t want them to get cold!

4 days ago

I wrapped the whole pan in heavy duty aluminum foil right after baking and stuck them in a cooler lined with towels! They stayed toasty for almost 3 hours, worked like a charm.

2 weeks ago

These were so tasty! I swapped the regular Hawaiian rolls for gluten free Hawaiian rolls to accommodate my celiac, and they worked almost exactly the same. My only small complaint is the cheeseburger filling was a little onion-heavy for my taste, but I just cut back the onion amount next time and it’ll be perfect.

1 week ago

Which brand of GF Hawaiian rolls did you use? I’ve tried a couple and they always fall apart when I try to make sliders!

1 week ago

So glad the GF swap worked for you! Cutting back on onions is totally a valid personal preference, recipes are just a jumping off point after all. If you find a good sturdy GF roll brand, feel free to drop it in the comments for other GF folks too!

5 minutes ago

Wait who said sliders are only for game days? These are all savory and I’m not mad about it. I made all three for a casual girls’ night in and we ate almost the entire batch while watching rom coms. The little size is so perfect for snacking without feeling like you’re overeating (even if you eat 6, don’t judge me).

just now

No judgment here! Sliders are the ultimate girls’ night snack, in my opinion – perfect for nibbling while you’re focused on the movie, no messy plates required. So glad you and your friends loved them!

2 days ago

I volunteered to bring food for our team lunch last minute and remembered this recipe. 15 minute cook time saved my butt, I didn’t even have to leave work early to prep. Everyone in the office was raving, even our boss who never compliments anything asked where I got the recipe. Total win.

3 days ago

I made a vegetarian version of the cheeseburger sliders using plant-based crumbles and my meat-eating husband didn’t even notice the difference until I told him! The recipe is super versatile, I love that you can swap out fillings to fit whatever dietary needs you have. So easy too, perfect for busy weeknights.

2 days ago

That plant-based swap sounds amazing! I love that you adapted the recipe to fit your preferences – that’s the best part of cooking, right? I might have to test that veggie version for the site soon!

just now

Made these for my kid’s birthday party and let me tell you, the adults were more obsessed than the kids. I lost count of how many I ate myself while I was manning the snack table. 15 minutes to make, zero stress, everyone happy. That’s the kind of recipe I keep saved in my bookmarks for every event from now on.



