
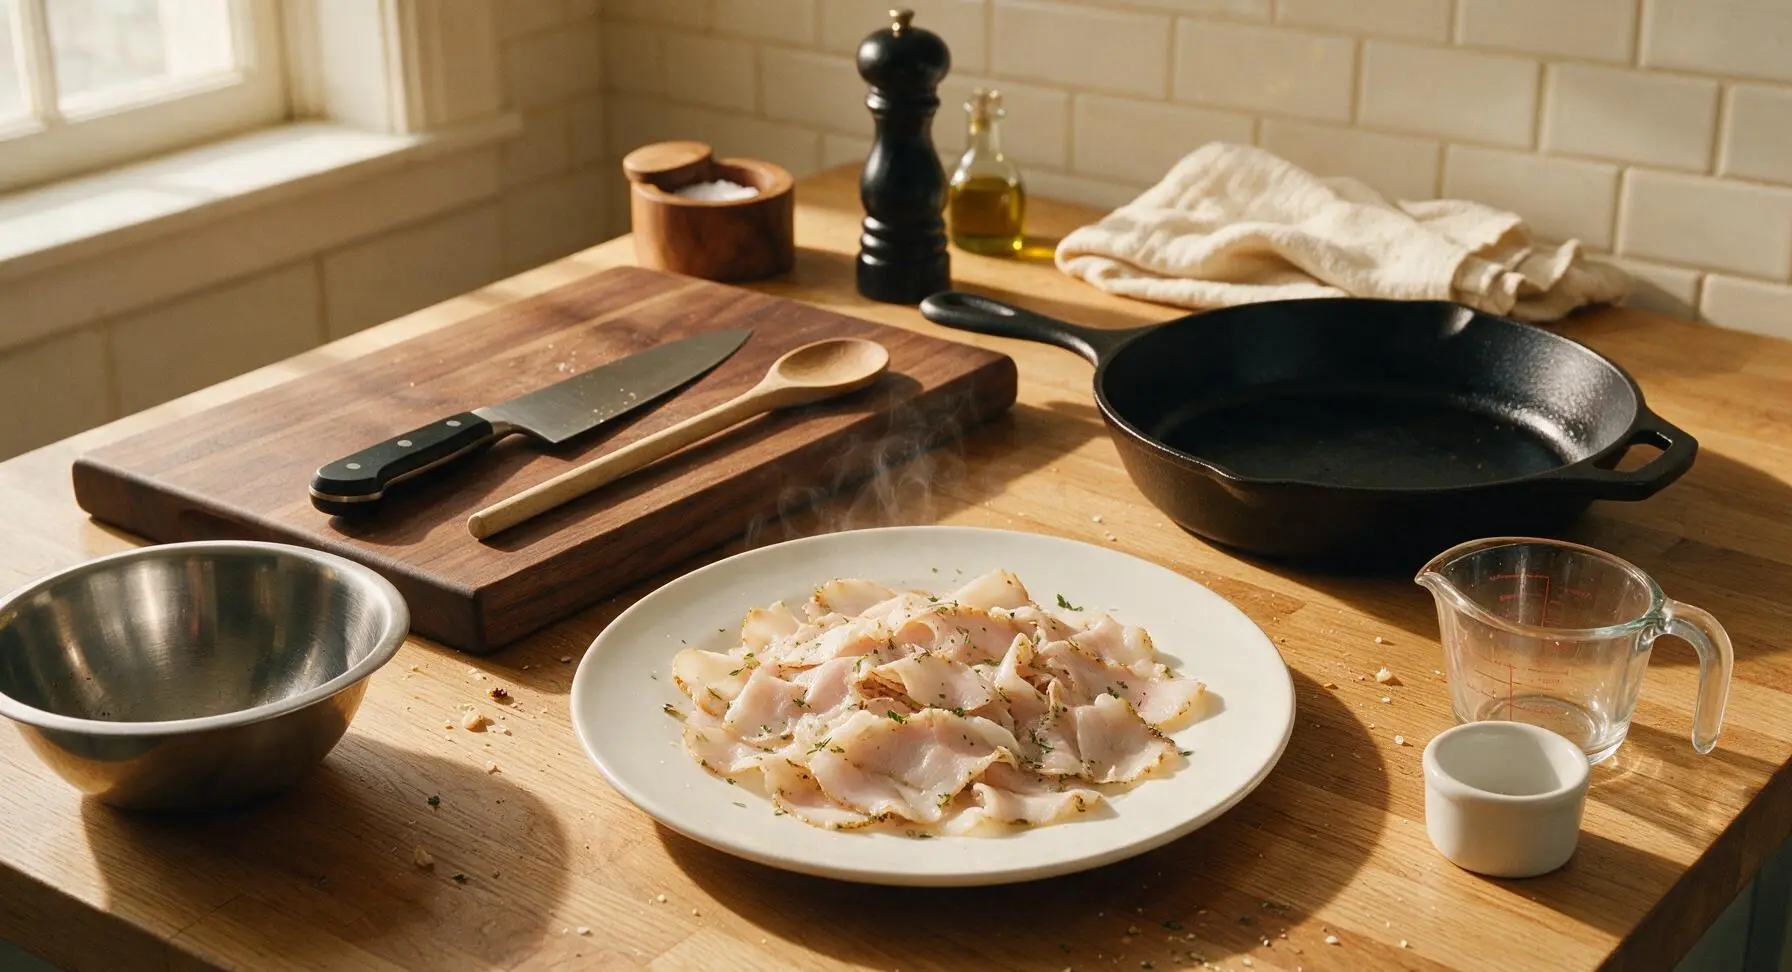
Turkey Lardo

title 1
Turkey Lardo
⏱️ cook time 2 hours
🍽️ servings 8
⚡ Difficulty medium

intro

Silky, herb-cured turkey lardo, paper-thin with melt-in-your-mouth fat and warm aromatic notes, a luxurious Italian-inspired twist on classic Thanksgiving fare.

Ingredients
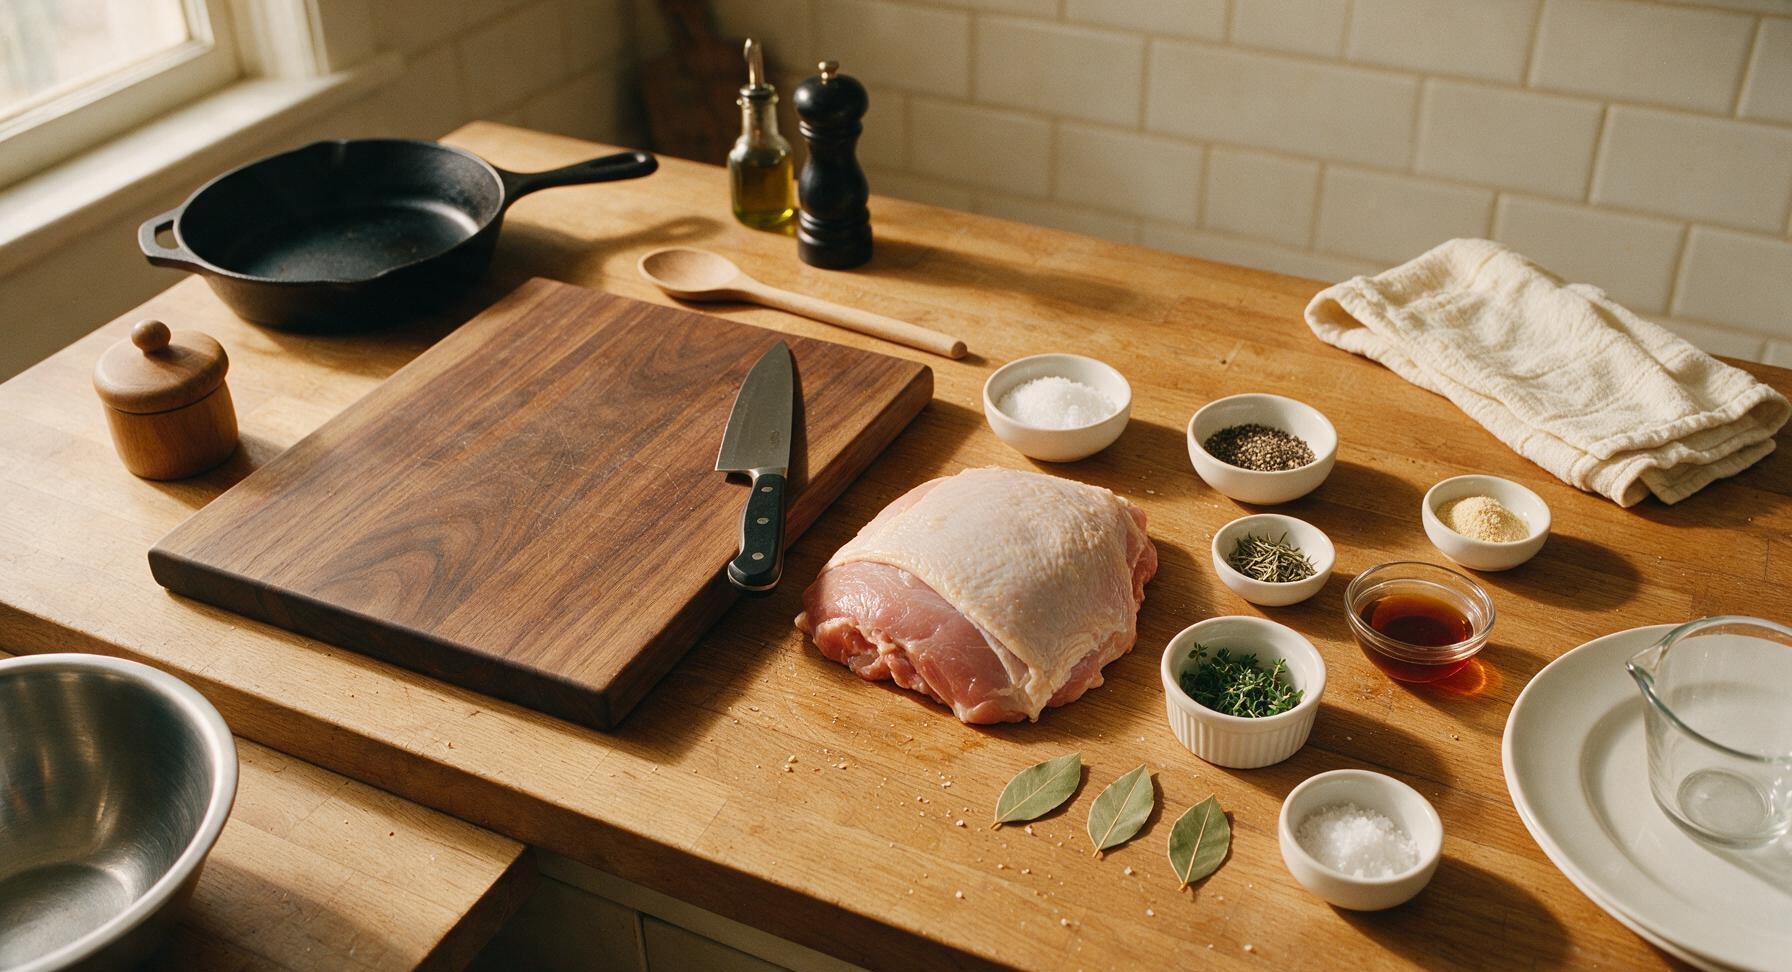
Boneless skinless turkey thigh (1cm fat cap intact) 1kg (2.2 lbs)
Kosher salt 3 tbsp
Cracked black pepper 1 tbsp
Dried rosemary 1 tsp
Garlic powder 1 tsp
Fresh thyme leaves 1 tbsp
Pure maple syrup 1 tbsp
Whole bay leaves 3 each
Flaky sea salt for serving

Steps

1

Trim Turkey Fat Cap

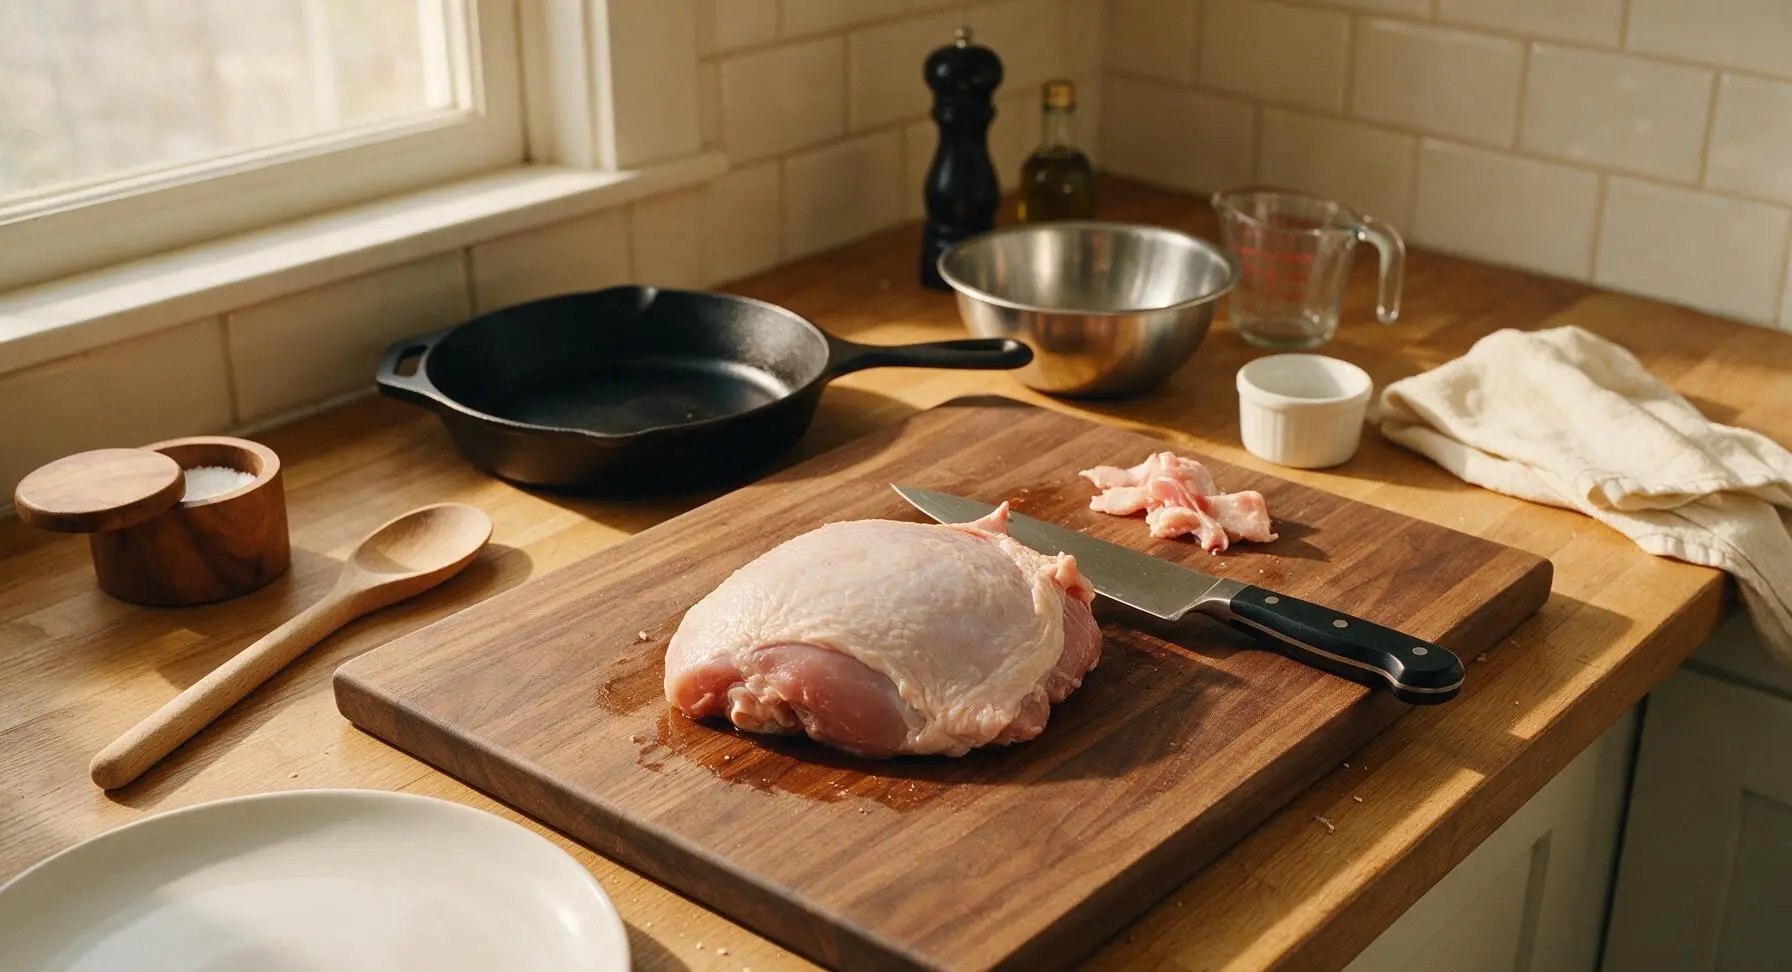
Place the 1kg boneless, skinless turkey thigh fat-side up on the maple cutting board. Use the 8-inch walnut-handled chef knife to trim ragged meat edges, and adjust the fat cap to a uniform 1cm thickness across the entire surface, removing all tough silver skin and loose connective tissue from the meat side. Pat all surfaces completely dry with a corner of the linen towel. The finished trimmed thigh should have a smooth, even fat layer with no thin spots or tough sinew to ensure even curing and cooking.
Step 1
step1:Trim Turkey Fat Cap
2

Mix Curing Spice Blend

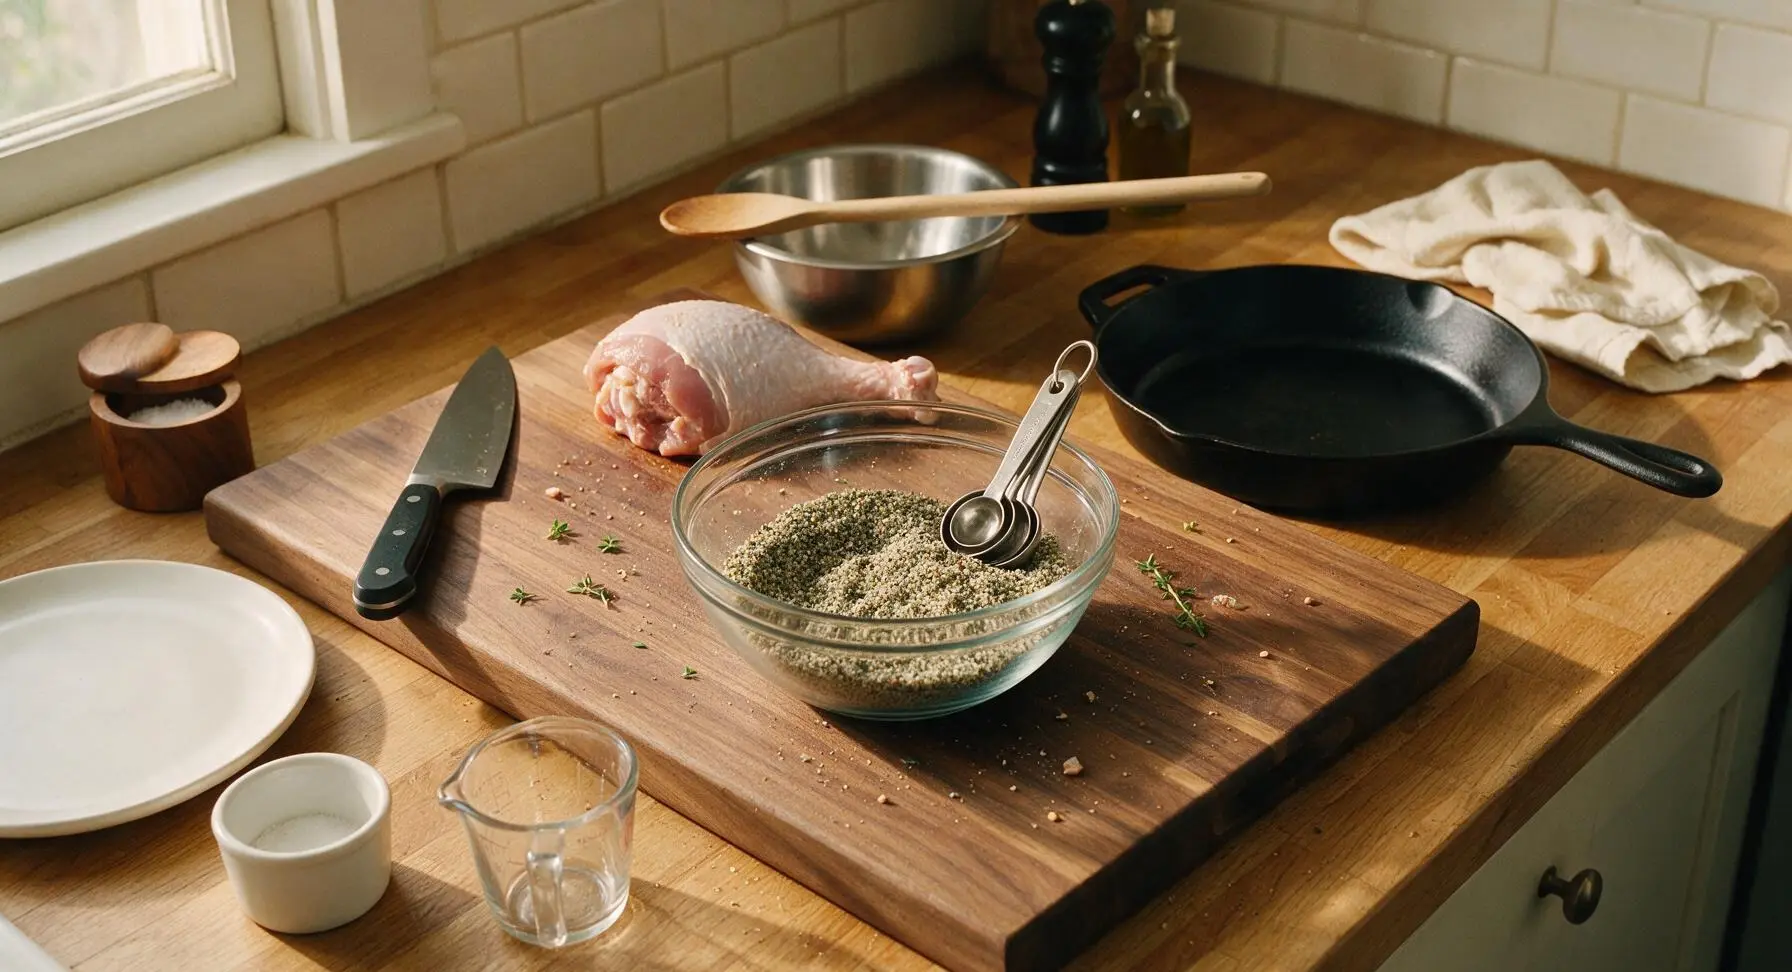
In the small clear glass mixing bowl, combine 3 tbsp kosher salt, 1 tbsp cracked black pepper, 1 tsp dried rosemary, 1 tsp garlic powder, and 1 tbsp picked fresh thyme leaves. Use the 1 tbsp stainless steel measuring spoon to stir the blend until all spices are evenly distributed, with no clumps of garlic powder or rosemary. The finished blend will be a speckled gray-green color, with a coarse, evenly mixed texture.
Step 2
step2:Mix Curing Spice Blend
3

Apply Spice Cure

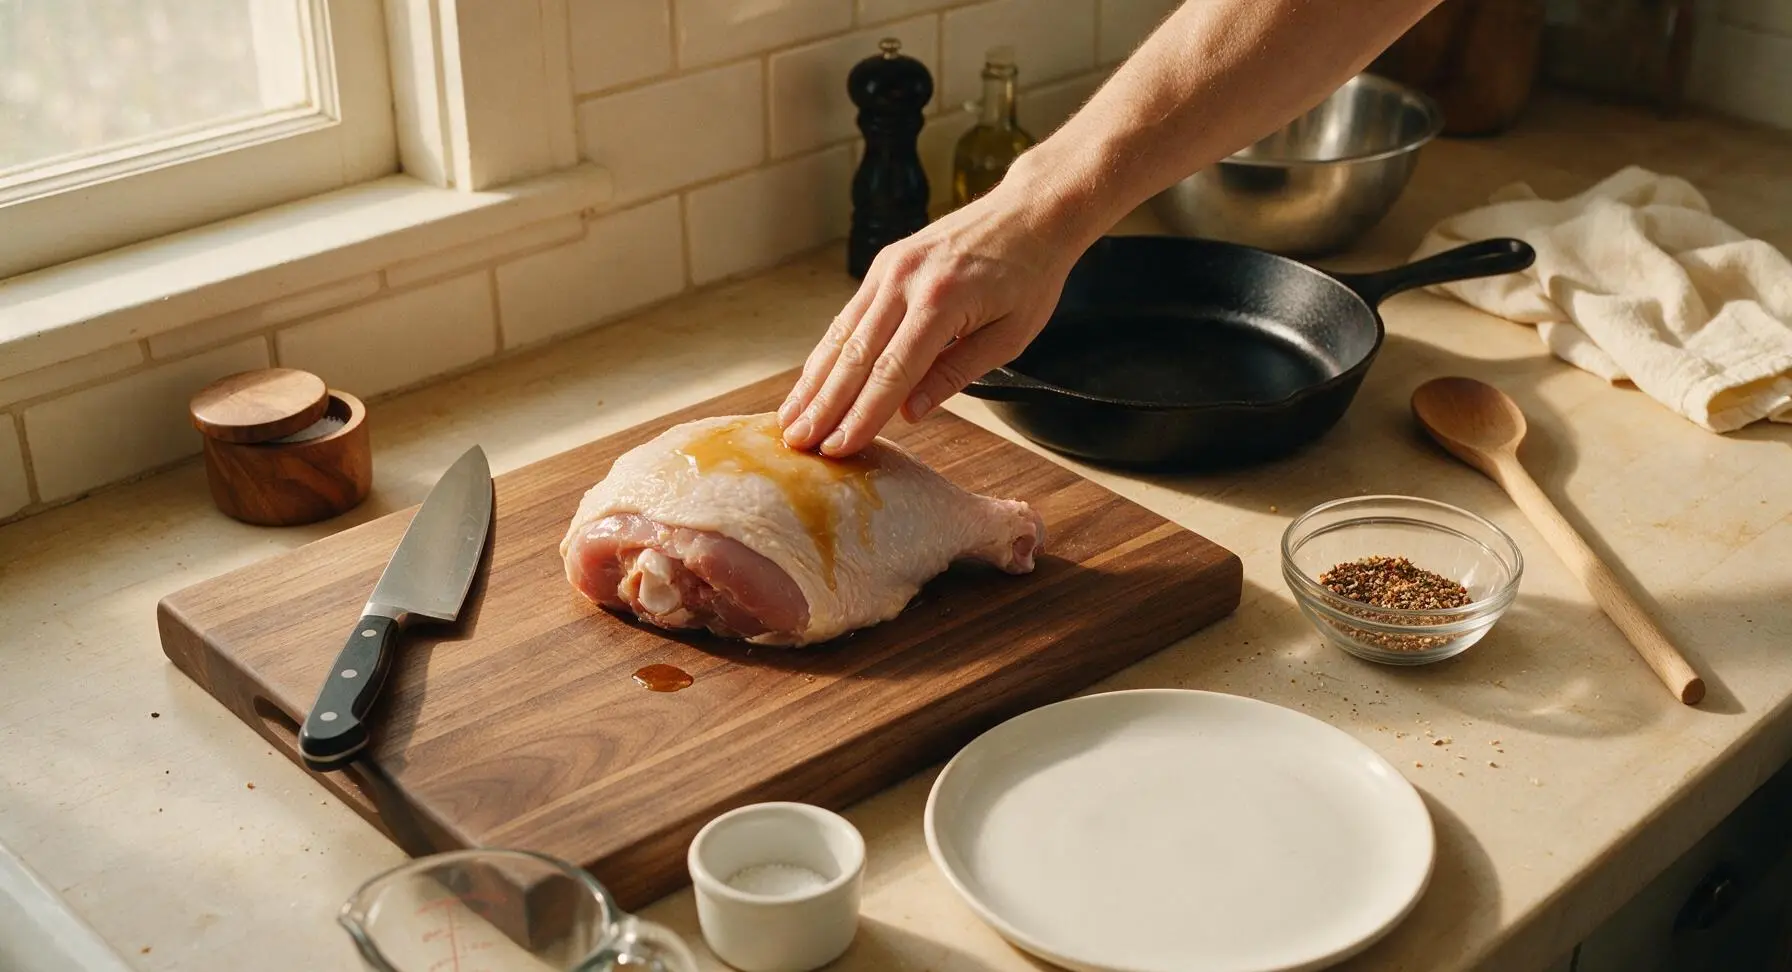
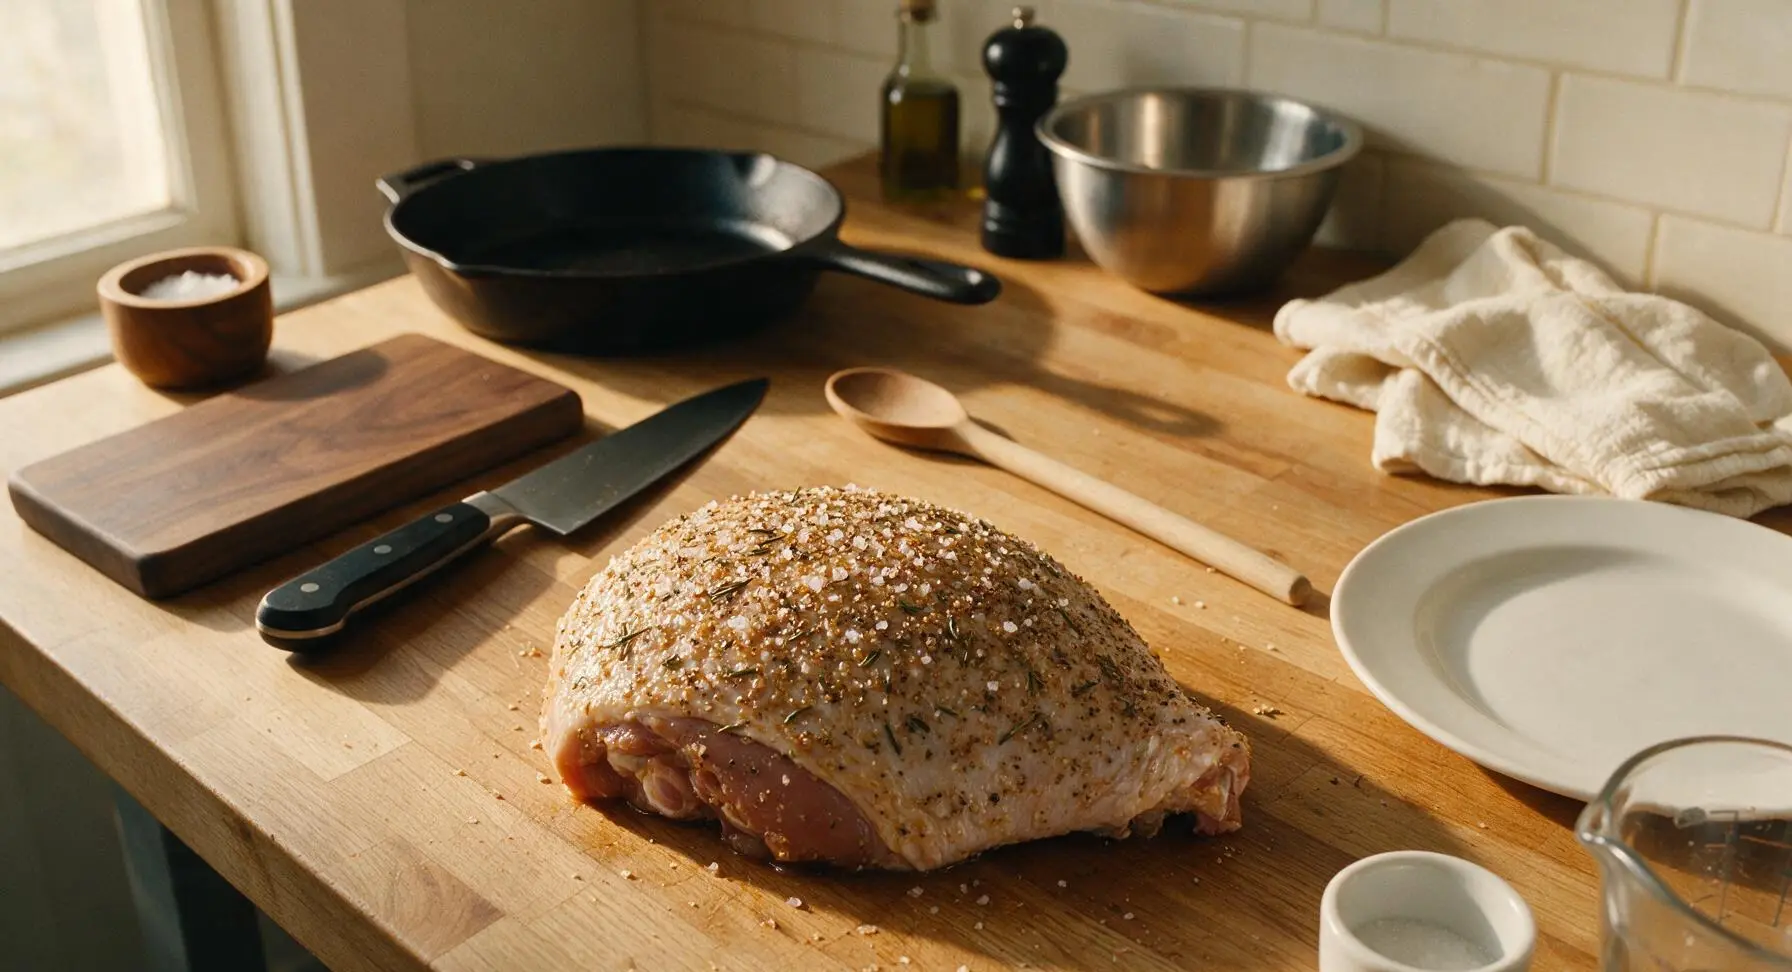
Drizzle 1 tbsp pure maple syrup over all sides of the trimmed turkey thigh, rubbing it into the fat and meat with clean hands to create a thin, sticky base. Sprinkle the entire spice blend evenly over every surface of the turkey, pressing gently with your palms so the spices adhere firmly to the meat and fat. No bare patches of meat or fat should be visible once the cure is fully applied.
Step 3
step3:Apply Spice Cure
Step 3
step3:Apply Spice Cure
4

Roll and Tie Roast

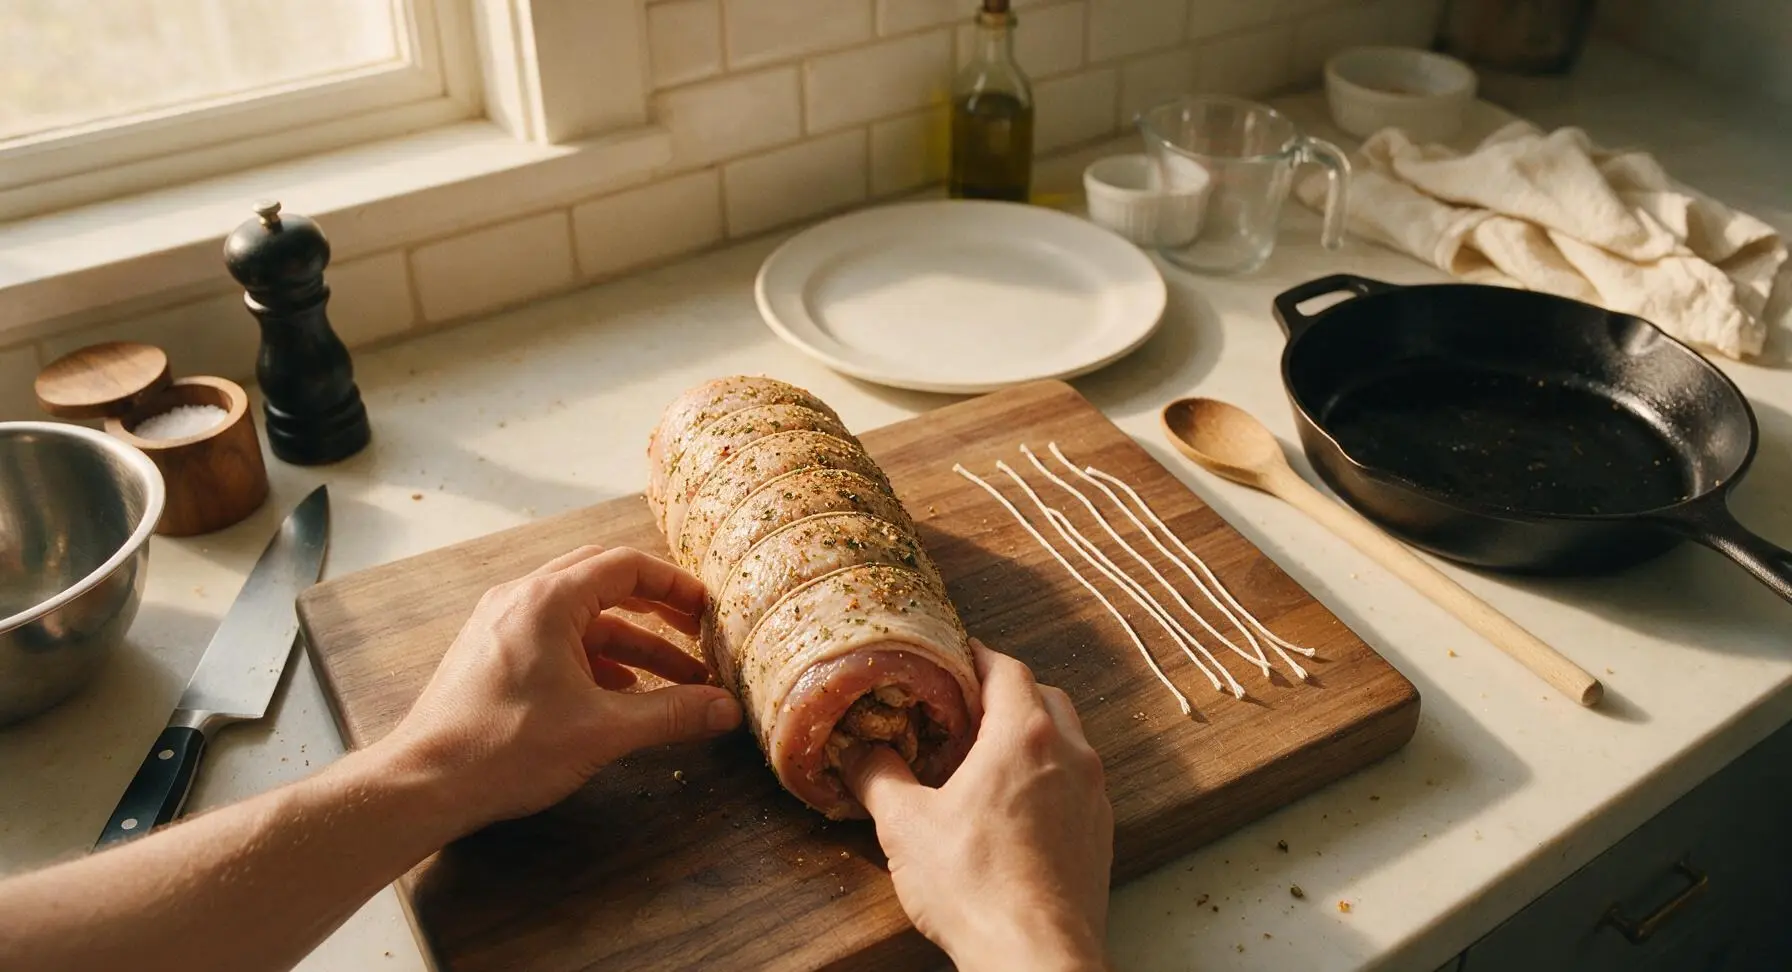
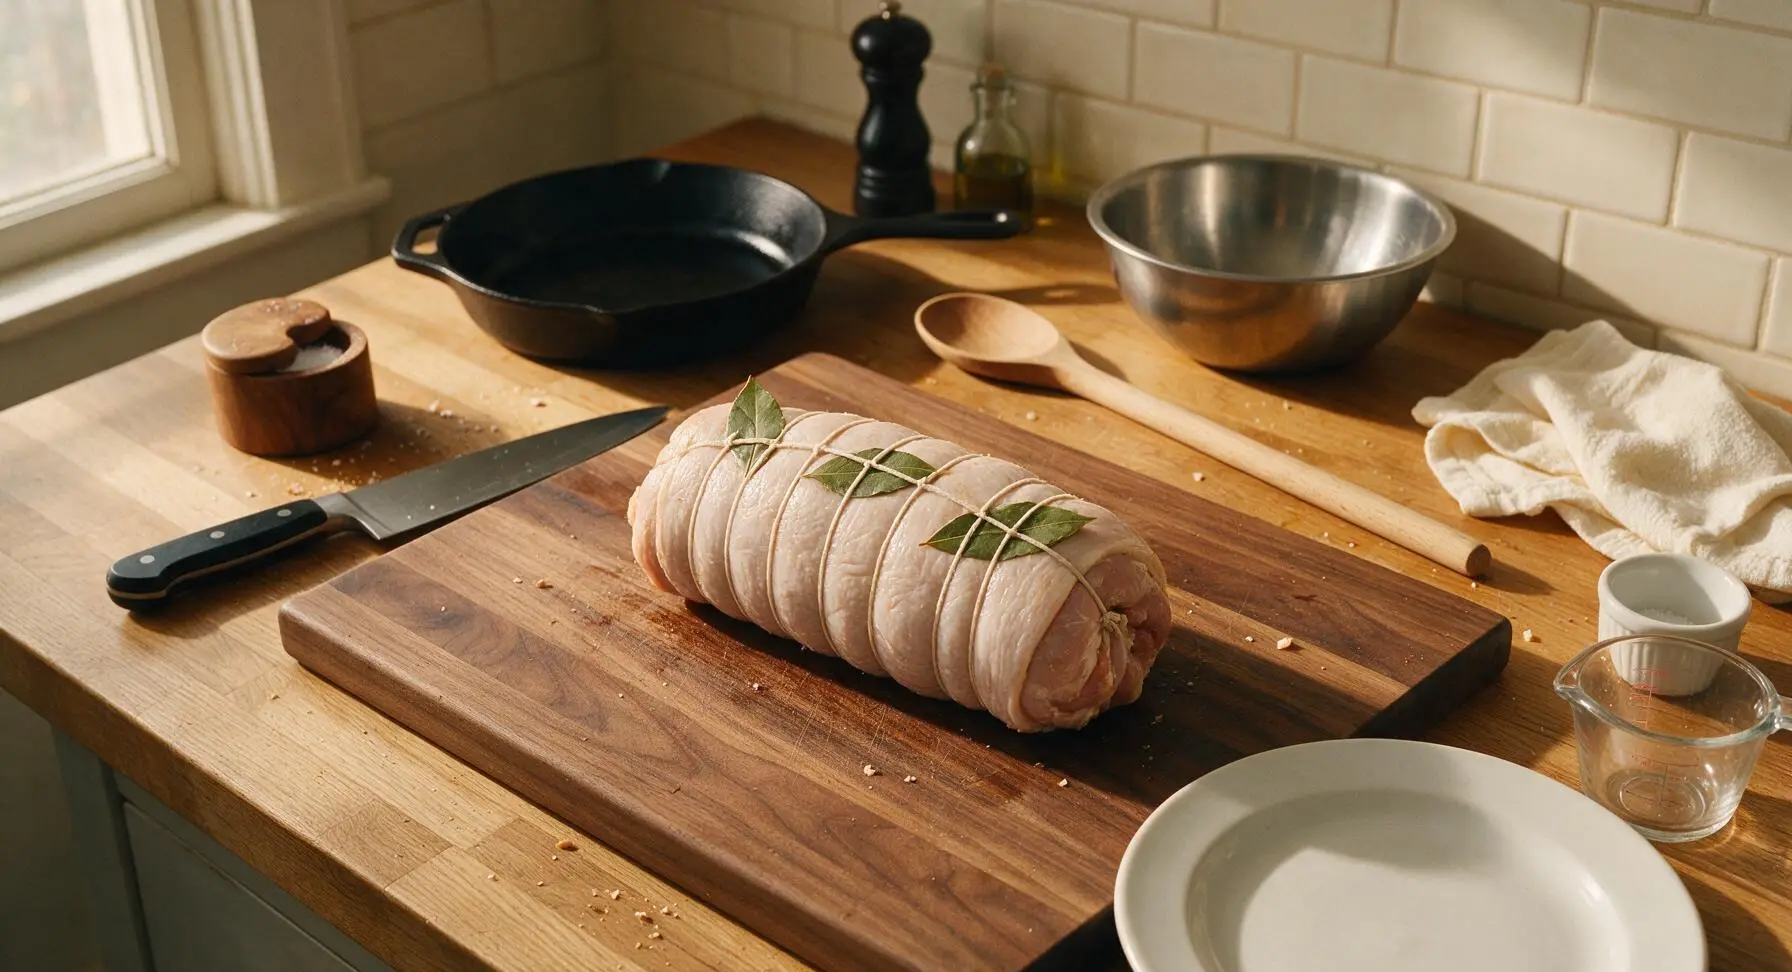
Starting from the shorter, narrower end of the spiced turkey thigh, roll the meat tightly into a uniform cylindrical log, ensuring the fat cap faces outward to cover the entire outer surface of the roll. Cut five 20cm lengths of cotton butcher's twine, and tie them snugly around the roll at 4cm intervals, taking care not to tie so tight that meat squeezes out from between the strings. Tuck the 3 whole bay leaves under the twine around the roll to add aromatic flavor during cooking.
Step 4
step4:Roll and Tie Roast
Step 4
step4:Roll and Tie Roast
5

Slow Cook Low and Slow

Set the chrome wire cooling rack inside the stainless steel roasting pan, then place the tied turkey log seam-side down on the rack. Transfer to a preheated 95C (200F) oven, and cook for 2 hours, basting once halfway through with rendered fat that collects in the pan bottom. The lardo is done when an instant-read thermometer inserted into the center of the log reads 71C (160F), and the outer fat is soft, translucent, and deep golden brown.
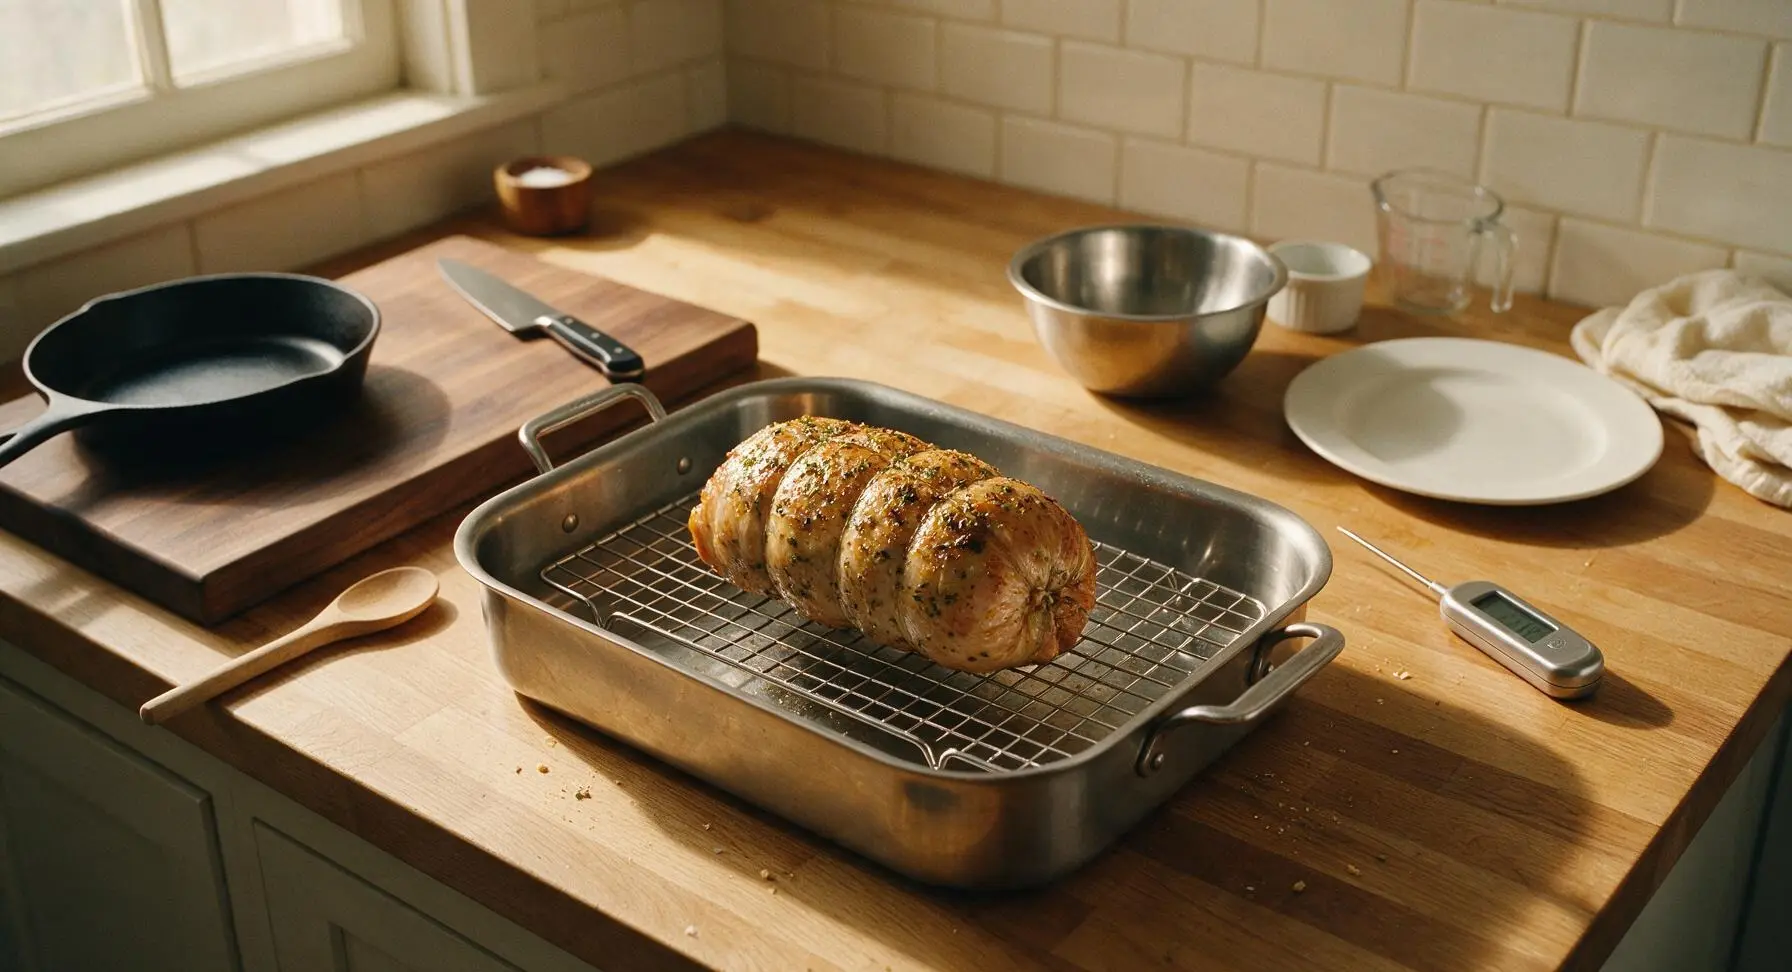
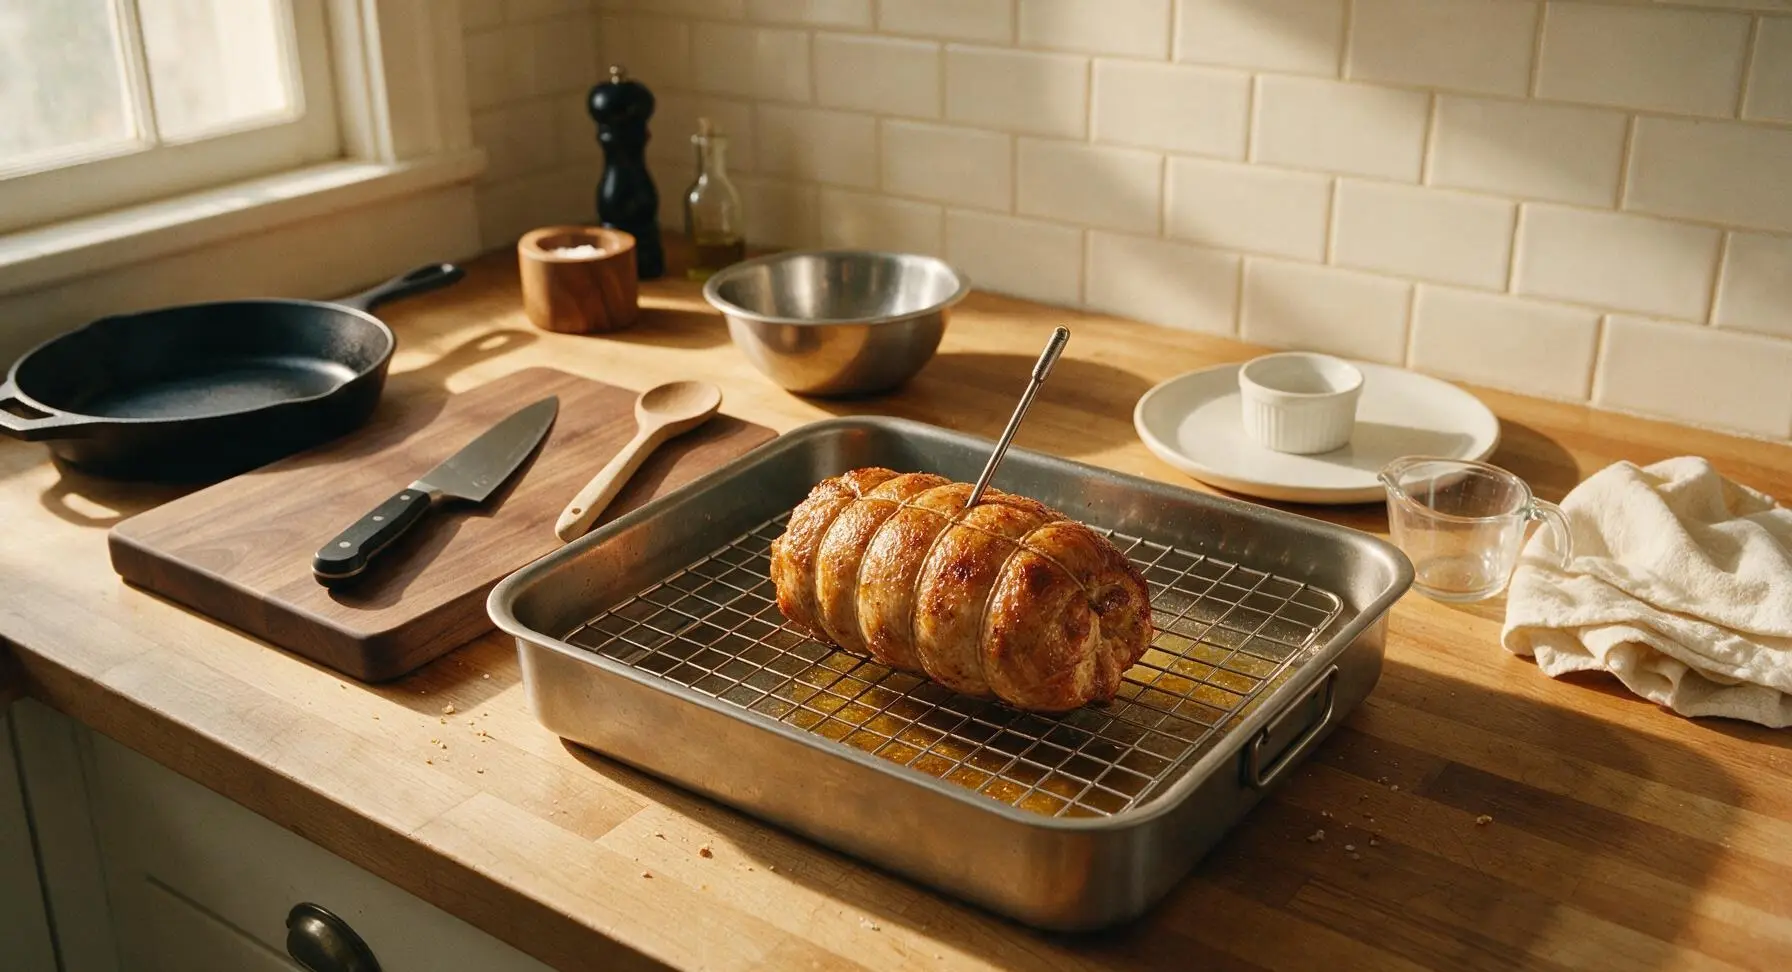
Step 5
step5:Slow Cook Low and Slow
Step 5
step5:Slow Cook Low and Slow
6

Chill for Firm Texture

Carefully lift the cooked turkey log from the rack and transfer it to a clean section of the cutting board to cool completely to room temperature, about 1 hour. Once cool, wrap tightly in parchment paper and refrigerate for a minimum of 8 hours (or up to 3 days, stored in an airtight container) until the fat and meat are completely firm to the touch. This firm texture is non-negotiable for cutting clean, paper-thin lardo slices.
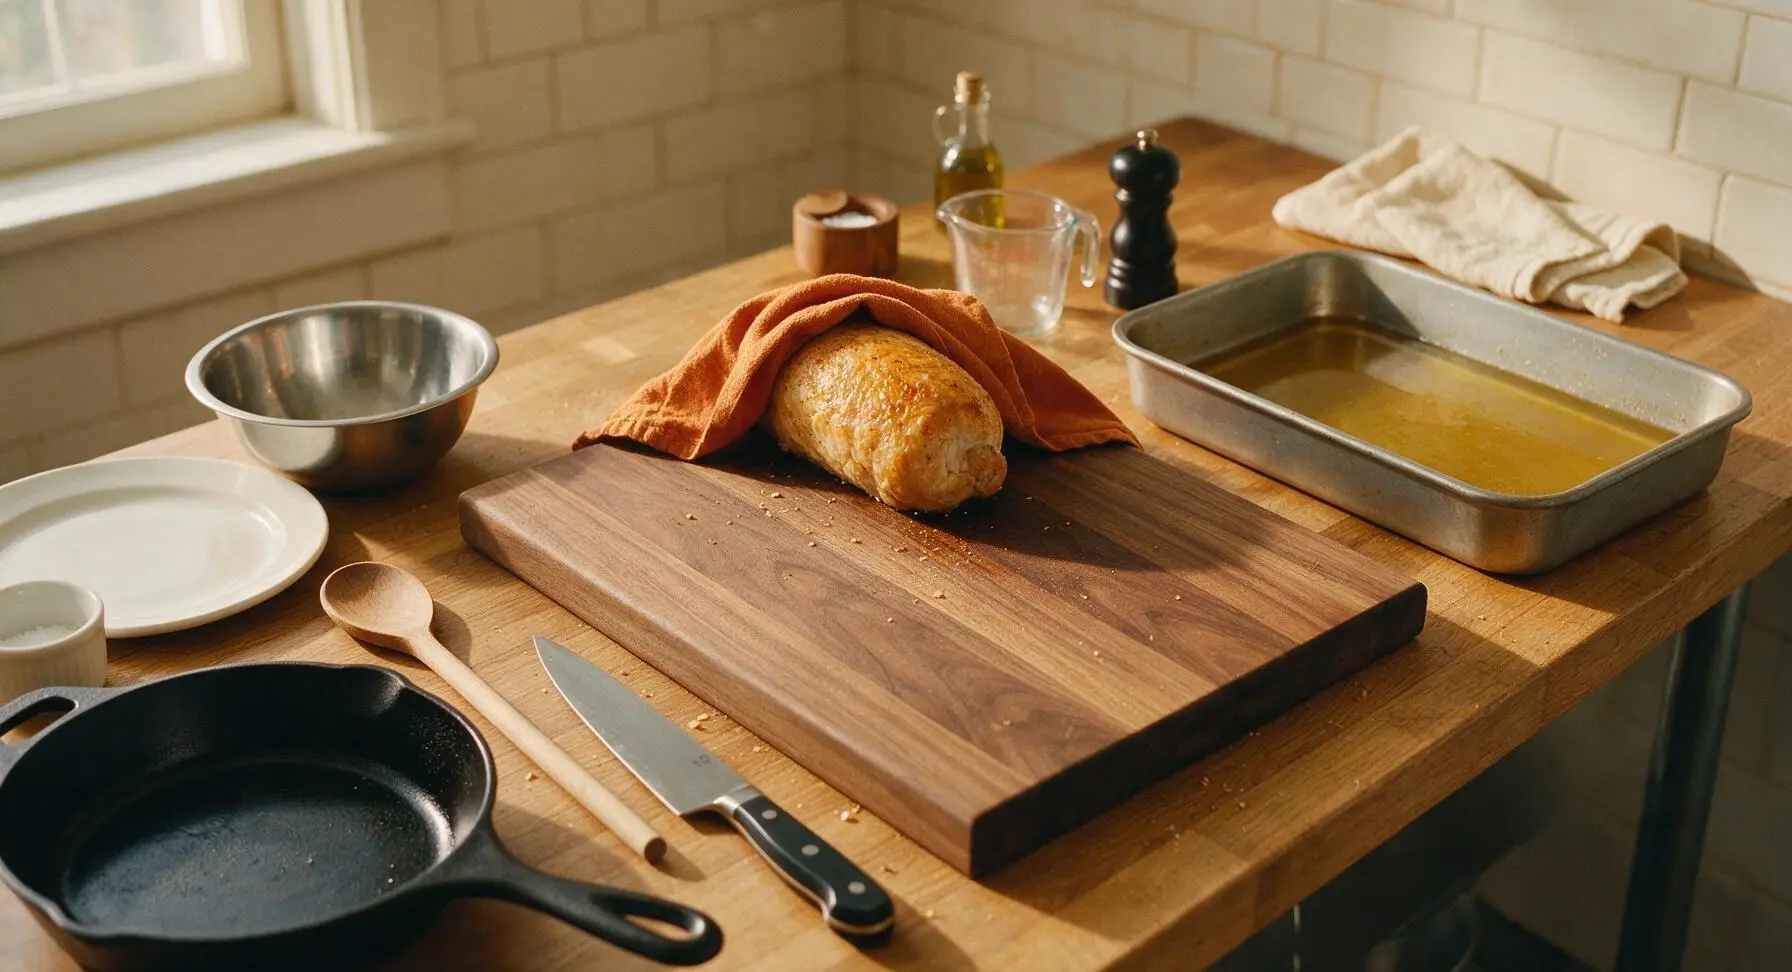
Step 6
step6:Chill for Firm Texture
7

Slice Paper-Thin Cuts

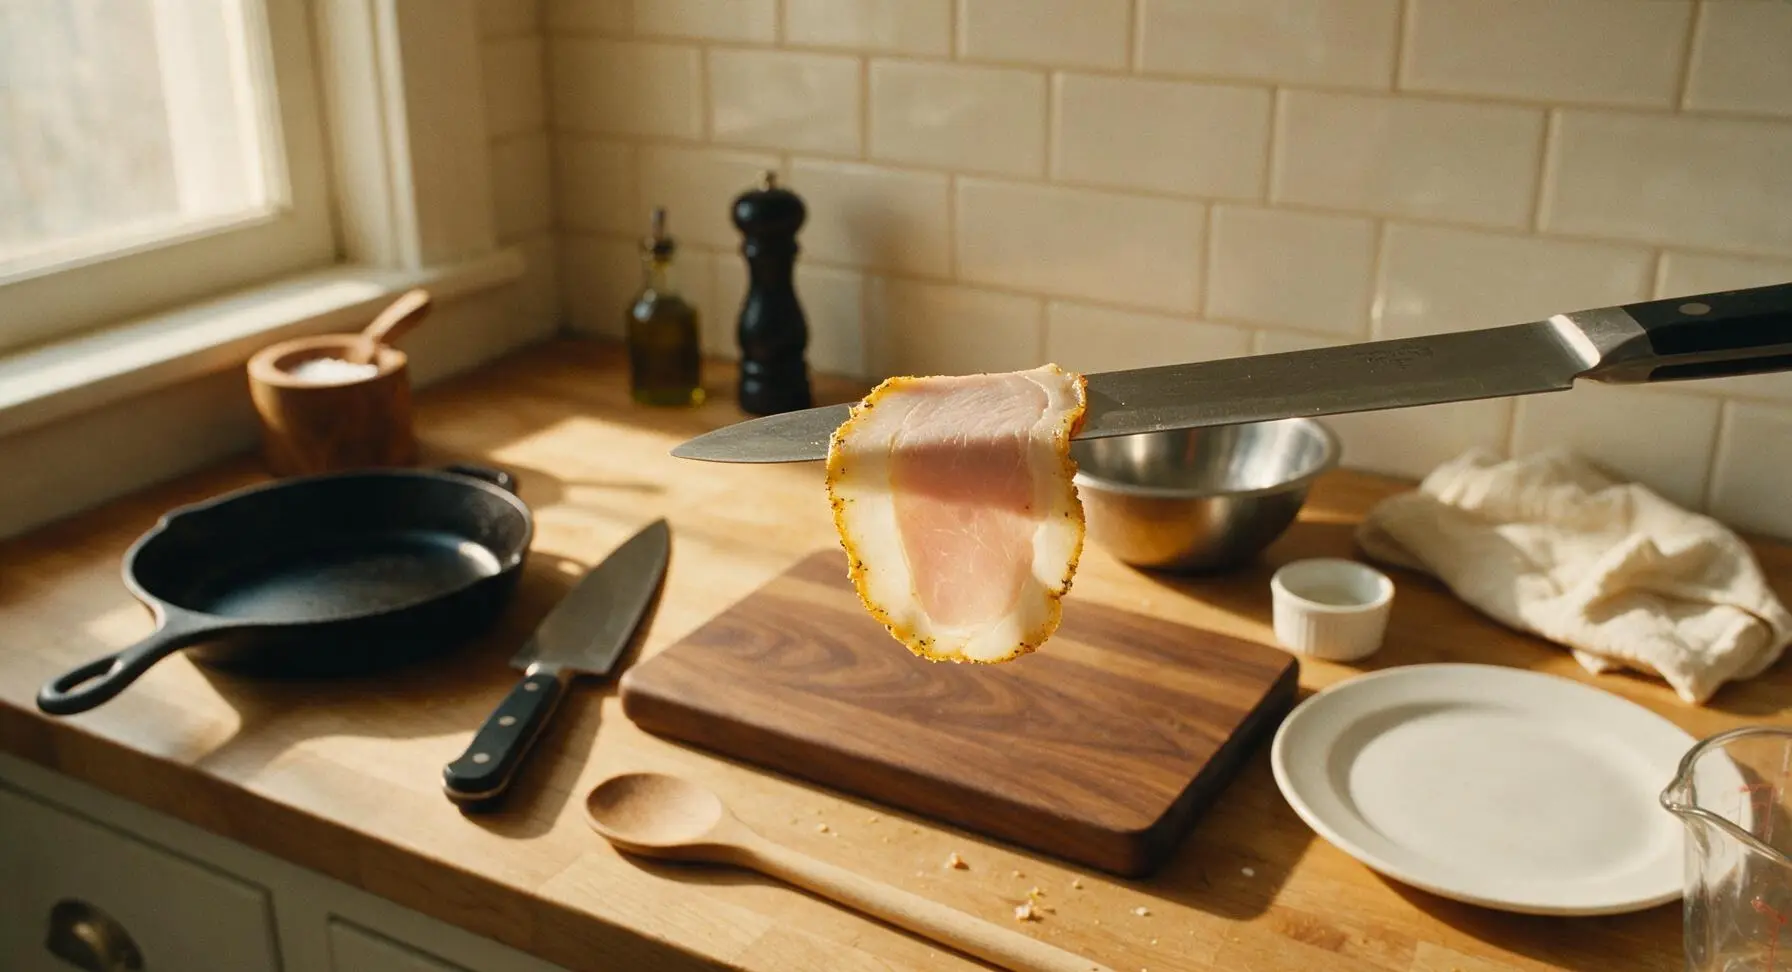
Remove the firm chilled turkey log from the refrigerator, snip and discard all butcher's twine and bay leaves. Use the 25cm flexible slicing knife to cut the log against the grain into 1-2mm thick paper-thin slices. Ideal slices will be translucent enough to see light through the golden fat cap, with a thin rim of spiced fat surrounding tender, pale pink meat.
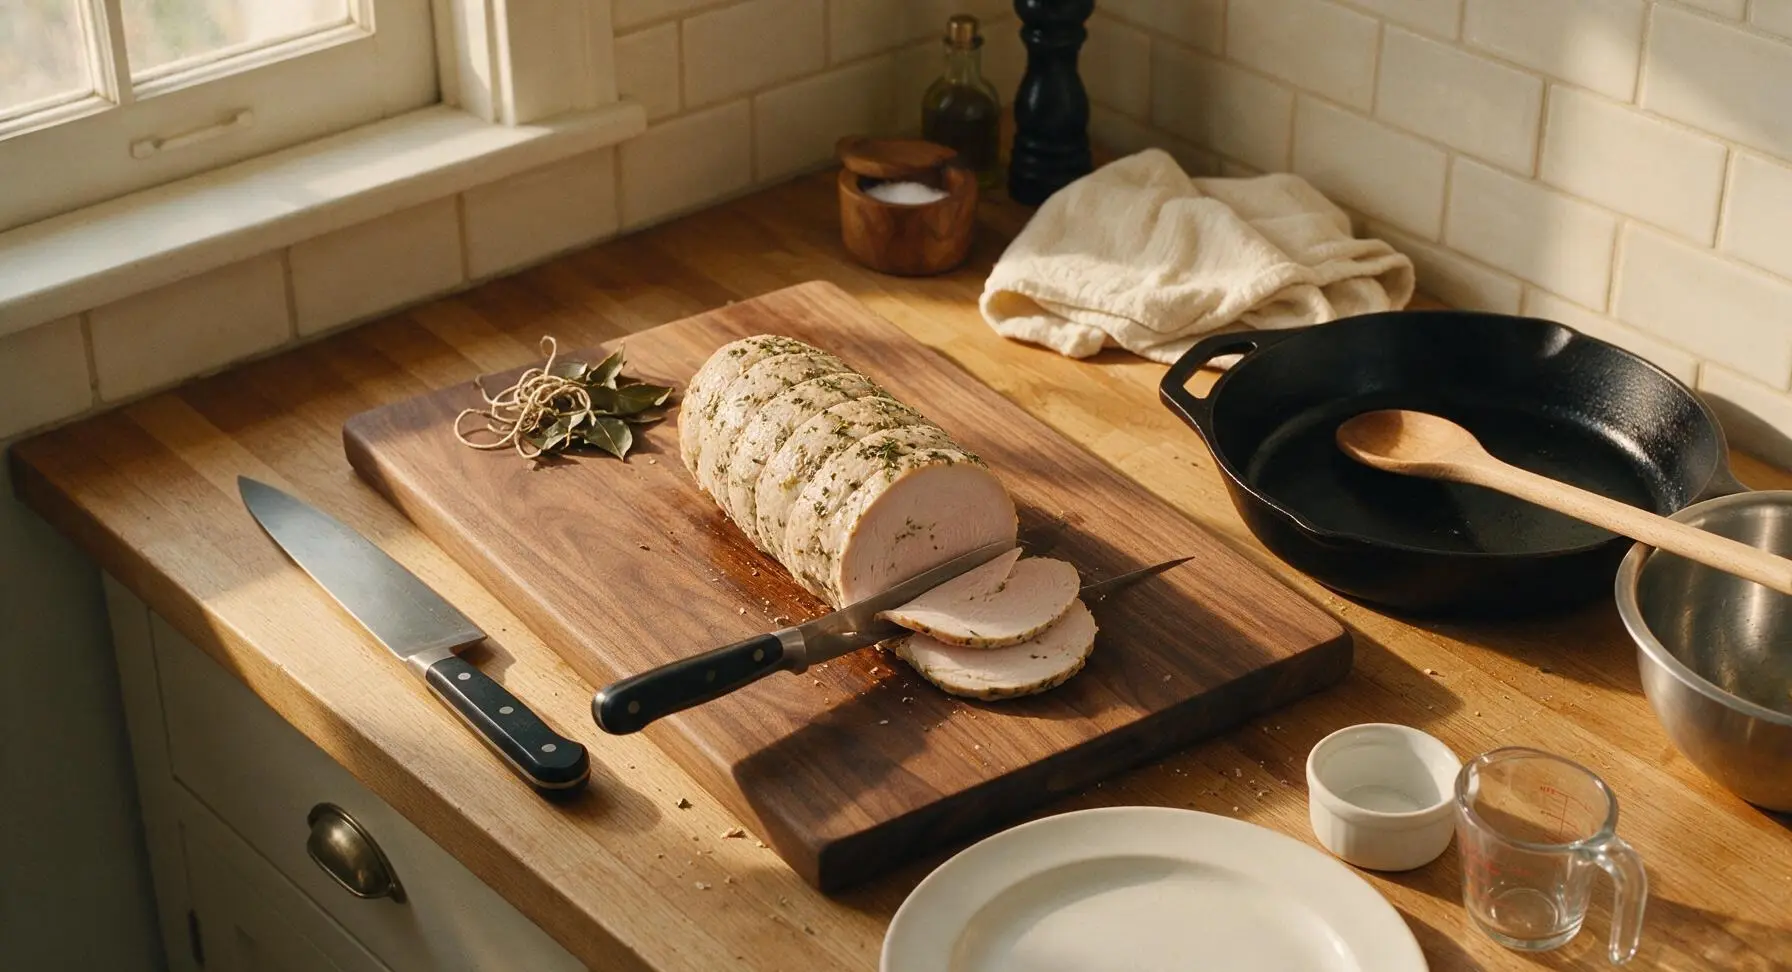
Step 7
step7:Slice Paper-Thin Cuts
Step 7
step7:Slice Paper-Thin Cuts
8

Plate and Serve

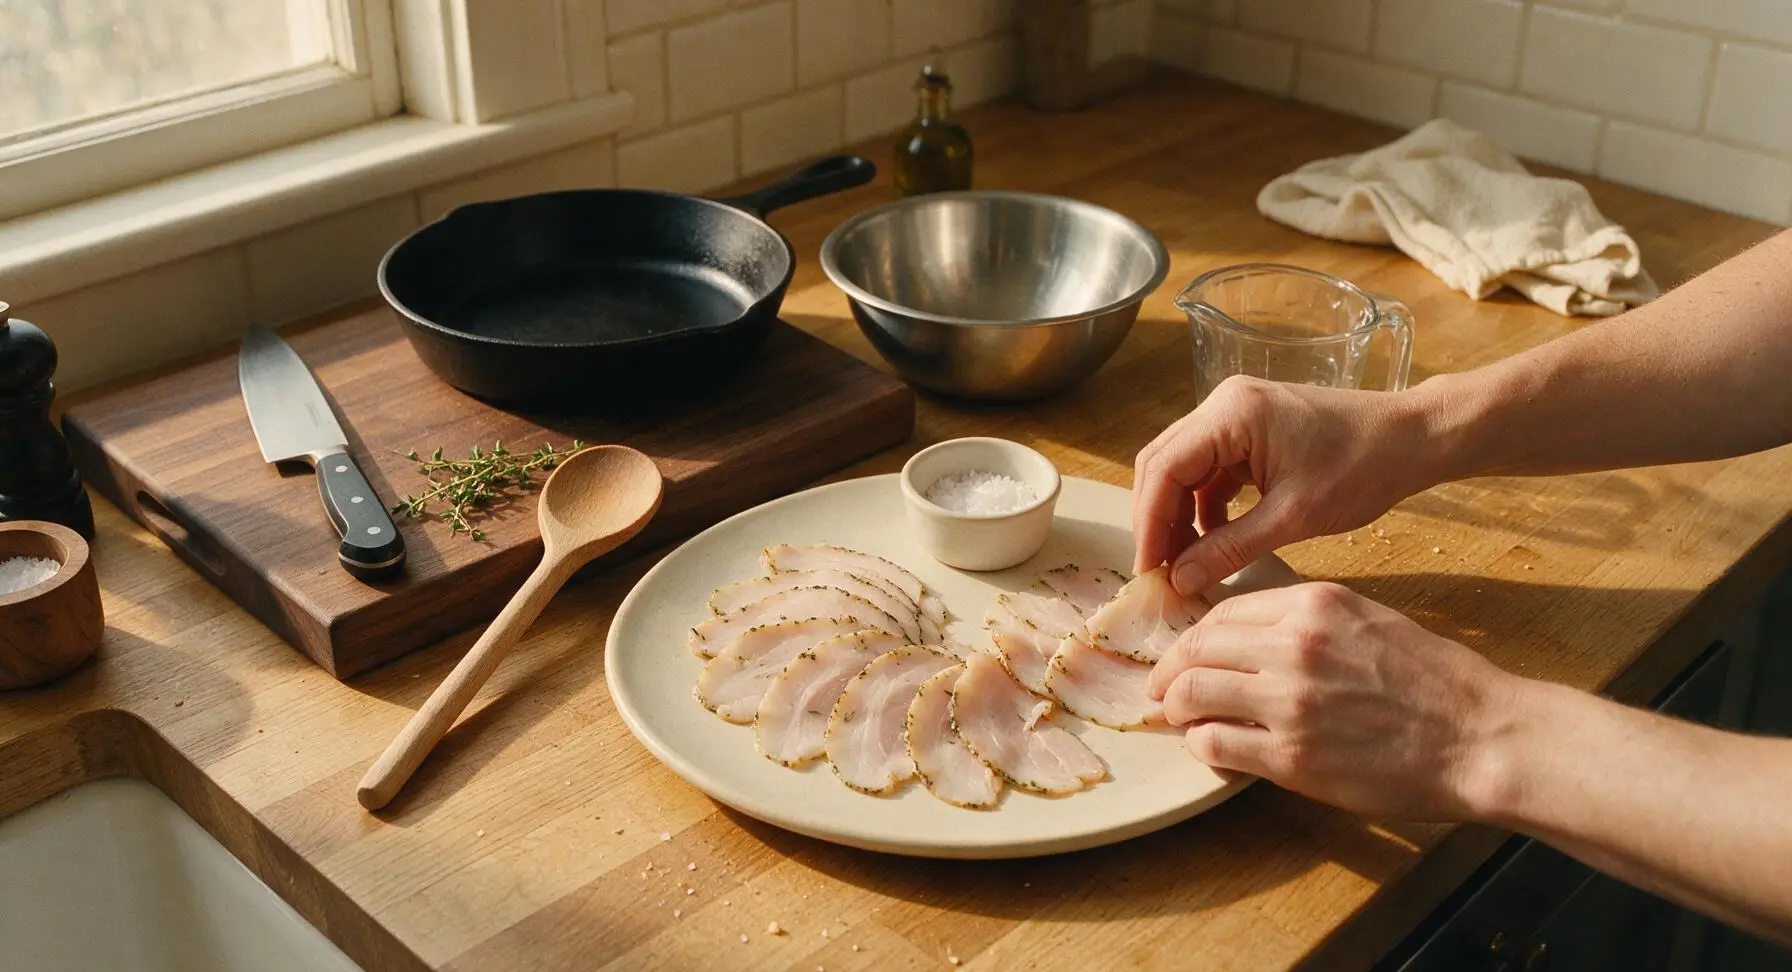
Fan the thin turkey lardo slices in overlapping layers across the matte cream ceramic serving platter. Garnish with a few fresh thyme sprigs, and place a small ramekin of flaky sea salt on the platter for sprinkling. Let the slices rest at room temperature for 5 minutes before serving to allow the fat to soften slightly and release its rich, herbal aroma; serve alongside thin crusty sourdough slices if desired.
Step 8
step8:Plate and Serve

Tips

1.Never skip the 8-hour minimum chill time: Warm or partially cooled turkey will tear, crumble, or cut into thick, uneven slices instead of the delicate, paper-thin translucent cuts that define lardo's signature melt-in-your-mouth texture.
2.Keep the fat cap trimmed to a strict 1cm thickness: A fat cap that is too thin will render out completely during slow cooking, leaving dry, tough meat, while an overly thick fat cap will feel heavy and greasy when eaten; the even 1cm layer renders slowly to create that silky, luxurious lardo mouthfeel.
3.For perfectly clean, tear-free slices, dip the flexible slicing knife in hot water and wipe it dry with the linen towel every 3-4 cuts: This warms the blade just enough to prevent cold fat from sticking to the steel, resulting in smooth, even slices without ragged edges.


✨ You May Also Like

Snacks & Appetizers
🍜 Mexico

Crispy thick-cut tortilla chips piled high with seasoned beef, melted cheese, and bright fresh toppings for a shareable, crowd-favorite bite.

⏱️ 25 minuteSnacks & Appetizers ★ 4.8
Snacks & Appetizers
🍜 United States

Crisp, sweet-tangy spiced pickled watermelon rind is a zero-waste summer staple, perfect with grilled meats, charcuterie, or eaten straight from the jar as a bright snack.

⏱️ 30 minuteSnacks & Appetizers ★ 4.6
Snacks & Appetizers
🍜 Germany

A tangy, jellied pork cold cut slow-simmered with aromatic spices, set into a firm sliceable loaf, served cold with mustard and crusty bread.

⏱️ 3 hours 4Snacks & Appetizers ★ 4.8
Snacks & Appetizers
🍜 United States

Creamy, tangy, perfectly seasoned hard-boiled egg halves filled with a rich, smooth yolk mixture, a timeless, crowd-pleasing bite for holiday and casual gatherings alike.

⏱️ 40 minuteSnacks & Appetizers ★ 4.8
Snacks & Appetizers
🍜 Russia

Silky, dill-forward no-smoke cured salmon, a Scandinavian classic with bright salty-sweet flavor, ideal for holiday starter platters and open-faced rye sandwiches.

⏱️ 48 hours Snacks & Appetizers ★ 4.7
Snacks & Appetizers
🍜 Japan

Crisp golden bottoms, juicy savory pork and vegetable filling, and tangy dipping sauce make these pan-fried gyoza a beloved shareable bite.

⏱️ 45 minuteSnacks & Appetizers ★ 4.8

Turkey Lardo:Frequently Asked Questions

1.What makes this herb-cured turkey lardo different from traditional pork lardo? ▾
This turkey take on classic Italian pork lardo uses turkey thigh with a 1cm intact fat cap for that signature silky, melt-in-your-mouth texture, but with a lighter, milder flavor that pairs beautifully with Thanksgiving spreads. It’s cured with simple warm aromatics for a luxurious bite that feels far less heavy than traditional pork lardo.
2.Why do I need to use turkey thigh with a 1cm fat cap instead of lean turkey breast? ▾
The thin, intact fat cap is non-negotiable for that signature lardo texture—lean breast has nowhere near enough fat to cure into that soft, melt-on-your-tongue consistency. A 1cm cap cures evenly, never turns tough or rubbery, and balances the savory turkey meat without feeling overly greasy or heavy on the palate.
3.Can I use regular table salt instead of kosher salt for the cure? ▾
I strongly recommend sticking to kosher salt for this recipe. Table salt is much denser with fine, uniform grains that will over-salt the lardo if you use the same volume measurement, leading to an unpalatable, briny finished product. If you only have table salt, cut the total salt amount by half to avoid over-curing.
4.How long does the curing process take from start to finish? ▾
Plan for a full 7 days of curing time in the refrigerator for the best, most even flavor and texture. No special equipment is needed: coat the thigh evenly in salt, pepper, rosemary, and garlic powder, wrap it tightly, and let it rest, flipping once every other day to ensure the cure distributes evenly.
5.Do I need special curing salts or equipment to make this safely? ▾
No fancy curing salts or specialty gear are required for this short, refrigerated cure! As long as you keep your fridge set to 40°F or below and use the recommended amount of kosher salt to inhibit bacteria growth, you can make this safely with basic kitchen supplies: a baking dish, plastic wrap, and your standard refrigerator.
6.How do I know when the lardo is fully cured and ready to use? ▾
You’ll know it’s ready when the entire thigh feels firm to the touch, with no squishy, soft raw spots in the thickest part of the meat or fat cap. The surface will feel slightly dry, and the herb and salt coating will have fully dissolved and penetrated the outer layers for an evenly seasoned, aromatic exterior.
7.What’s the best way to slice this lardo for that perfect paper-thin cut? ▾
For that signature melt-in-your-mouth texture, pop the fully cured lardo in the freezer for 30 to 45 minutes first to firm up the fat cap, which makes ultra-thin slicing far easier. Use a very sharp long slicing knife or meat slicer on the thinnest setting, and cut against the grain to avoid chewy, tough slices.
8.How should I serve herb-cured turkey lardo for Thanksgiving? ▾
It’s incredibly versatile for holiday spreads! Serve paper-thin slices on a charcuterie board with crusty sourdough, dried cranberries, and sharp cheddar, drape slices over warm roasted veggies right before serving so the fat softens, or tuck thin slices into leftover turkey sandwiches for an extra rich, herby punch.
9.Can I add other herbs or seasonings to the cure to customize the flavor? ▾
Absolutely—this simple base cure is super flexible, just don’t skimp on the core salt amount to keep the cure safe and effective. Great add-ins include dried thyme, crushed red pepper flakes for subtle heat, finely grated orange zest for brightness, or a pinch of smoked paprika for warm, cozy depth.
10.How long will finished turkey lardo stay fresh in the refrigerator? ▾
Once fully cured, wrap the uncut lardo tightly in a double layer of plastic wrap or vacuum seal it, and it will keep in your fridge for up to 3 weeks. Once sliced, store portions in an airtight container for up to 1 week, as pre-sliced lardo dries out faster and loses its silky texture when exposed to air.
11.Why is dried rosemary recommended instead of fresh rosemary for the cure? ▾
Dried rosemary works far better for this cold cure because fresh rosemary has high moisture content that can introduce excess water to the cure, leading to uneven curing or even mold growth during the 7-day rest. Dried rosemary also has a concentrated, woody flavor that penetrates fat evenly without tasting bitter.
12.What should I do if I spot mold on the lardo while it’s curing? ▾
First, don’t panic! Small, fuzzy white spots on the dry exterior of the curing meat are totally harmless—just scrape them off with a sharp knife, pat the area dry with a paper towel, and reapply a tiny pinch of salt before returning it to the fridge. Discard the batch immediately if you see slimy black or green mold with a foul off-smell.
13.Can I freeze finished turkey lardo to extend its shelf life? ▾
Yes, it freezes beautifully! Wrap the whole uncut cured block tightly in plastic wrap and a layer of aluminum foil to prevent freezer burn, and it will stay good for up to 6 months in the freezer. Thaw it in the fridge overnight before slicing, and let it temper for 10 minutes at room temp before serving to restore that silky fat texture.
14.My fat cap turned out rubbery after curing—what went wrong? ▾
A rubbery fat cap almost always stems from one of two issues: either your fridge was set too cold (below 34°F), which caused the fat to seize up and harden instead of curing soft, or you used too little salt, leaving the fat under-cured and tough. Next time, keep your fridge at a steady 36–38°F and double-check your salt measurements.
15.Is this lardo cooked, or is it safe to eat straight from the cure? ▾
This is a cold-cured product, meaning it is not cooked with heat, but it is completely safe to eat straight from the cure when made correctly. The high salt concentration and consistent cold refrigeration during curing inhibit harmful pathogen growth, just like other cured charcuterie, so no additional cooking is required.
16.Can I use skin-on turkey thigh instead of skinless thigh with a fat cap? ▾
I recommend removing the skin even if there’s a nice fat cap underneath. Turkey skin has a tough, fibrous layer of connective tissue that won’t soften during the cold curing process, leaving you with chewy, leathery bits in your finished lardo. Stick to skinless thigh with a smooth, even 1cm fat cap for the best silky texture.
17.How do I get an even 1cm fat cap if my store-bought turkey thigh is unevenly trimmed? ▾
If your store-bought thigh has a thicker or lopsided fat cap, lay it cold straight from the fridge on a cutting board, and use a sharp thin boning knife to gently trim excess fat until you have a consistent 1cm layer across the whole surface. Save the trimmed excess fat to render for roasting potatoes later—no need to toss that delicious fat!

Comments (18)

2 days ago

OMG this herb-cured turkey lardo is a total game changer! I made it for our weekend family cookout and everyone was begging for the recipe. The herb blend is so perfectly balanced, not too salty, just rich and herby. 10/10 would make again!

3 days ago

I was a little nervous to try curing something for the first time since I usually stick to quick weeknight meals, but this recipe was way easier to follow than I expected! My kids even loved it slathered on warm sourdough for after-school snacks. Only thing I did wrong was not making a double batch, it was gone in 2 days!

2 days ago

So glad you gave it a shot, Mia! The double batch tip is a must for this one, it disappears fast around our house too. Pro tip: it freezes really well if you want to stock up!

1 week ago

Made this for my backcountry meal prep last week, and let me tell you — it held up so much better than I thought it would! Sliced thin and tossed with roasted veggies and pasta on our camp stove, it was the best trail meal we had all trip. Cook time was right at 2 hours for me, perfect for a Sunday prep day.

5 days ago

Wait, how long did it keep in your cooler on the trail? I’ve been looking for high-calorie, relatively shelf-stable foods for our upcoming 5-day hike and this sounds perfect!

3 days ago

Great question Kelly! If you keep it tightly wrapped and in a cold cooler, it’ll hold for 5-7 days no problem. For longer trips, you can vac-seal slices and they’ll stay good for 2 weeks in cold temps!

5 days ago

Really solid recipe! The flavor is amazing, I brought slices to my office potluck and people were raving. I knocked off one star because the first time I made it I overcooked it just a little — wish there was a note about checking internal temp more frequently towards the end of the 2 hour cook time!

yesterday

Wait, turkey lardo? I was skeptical at first because I’ve only ever had pork lardo, but this is SO good. Way lighter than the pork version, but still has that rich, melt-in-your-mouth texture. The rosemary and thyme combo is chef’s kiss.

2 hours ago

Right?! I was skeptical too, my Italian grandma swore lardo could only be pork but she tried this and asked me to make it for our next Sunday dinner. Wild!

2 weeks ago

I’ve been making cured meats for 40+ years and this recipe is a new favorite in our house! I added a little extra garlic like I do with all my cures, and it turned out absolutely divine. My grandkids fight over the last slices every time I make it.

1 week ago

How much extra garlic did you add? I’m a total garlic fiend and I’ve been trying to figure out how much is too much for this recipe!

5 days ago

Love the extra garlic tweak! I usually say 2-3 extra cloves is perfect, but if you’re a true garlic lover you can go up to 4 without overpowering the herb notes. So happy your grandkids enjoy it!

30 minutes ago

I wanted to love this, but I think I messed up the cure ratio? Mine came out way saltier than I expected, even after following the measurements exactly. Maybe my kosher salt was coarser than the recipe calls for? I’ll give it another shot when I have more time to adjust, but first go was a miss for us.

1 week ago

Total meal prep win! I make a batch every other Sunday, slice it thin, and keep it in the fridge to add to sandwiches, eggs, even charcuterie boards for impromptu friend hangouts. The medium difficulty rating is fair, but once you get the hang of the cure step it’s super straightforward.

5 days ago

So stoked this is part of your regular meal prep rotation! It’s such a versatile ingredient, I love adding a slice to my morning avocado toast too for an extra savory kick.

2 days ago

I brought this to our neighborhood block party potluck last weekend and it was the first empty platter on the table! People kept asking if I bought it from a fancy charcuterie shop, I was so proud to say I made it myself. The herb crust is so pretty too, it looks way fancier than it is to make.

yesterday

Wait did you serve it with crackers or bread? I’m making this for our block party next month and need serving ideas!

5 minutes ago

I did both! Sourdough crostini, plain water crackers, and a little bowl of fig jam to pair with it. People went nuts for the sweet and salty combo!

5 days ago

So happy this is naturally gluten free! I’ve been missing fancy charcuterie options since so many pre-made ones have hidden gluten additives, and this fits perfectly into my diet. It’s so rich I only need a couple slices to feel satisfied, too.

2 days ago

Wait do you know if this is Whole30 compliant? I’m about to start a round and this would be such a nice treat if it fits!

just now

Made this for my roommates last night for our weekly fancy dinner night and we were all blown away. We’re all broke college kids so we thought fancy cured meat was out of our budget, but this uses super affordable turkey thigh and the herbs are just basic pantry staples. 10/10, will be making this all semester.

3 days ago

Made this for my partner’s birthday dinner charcuterie board and they said it was better than any restaurant lardo they’ve ever had! We paired it with honeycrisp apple slices, aged cheddar, and crispy crackers, and it was the star of the whole meal. The 2 hour cook time was totally manageable even with me running around decorating and making the main course.

2 days ago

This makes my day! The apple and cheddar pairing sounds incredible, I’m definitely stealing that for my next date night in. Happy belated birthday to your partner!

yesterday

Oh the apple pairing is genius! I never thought to pair lardo with crisp fruit, that cuts the richness so perfectly. Can’t wait to try that this weekend!

2 hours ago

Okay, medium difficulty is no joke, y’all. I messed up the first cure step and had to restart, but the second time I followed the directions to a T and it came out perfect! Don’t rush the curing time, that’s the key. I feel like a pro now that I’ve made my own cured meat!

30 minutes ago

So proud of you for sticking with it, Leo! The curing step definitely takes patience, but the payoff is so worth it. Can’t wait to hear what other cured recipes you try next!

1 week ago

I threw this on my pellet smoker at the end of the cook time instead of finishing it in the oven, and the light smoke flavor took it to a whole new level. If you have a smoker, I 100% recommend adding 15 minutes of light applewood smoke at the end. Absolute game changer for Sunday football snacks.

yesterday

Y’all, I used the leftover bits of this that were too small to slice nicely to make lardo roasted potatoes, and I will never make roasted potatoes any other way again. The fat melts into the potatoes and the herb bits get all crispy, it’s insane. Don’t throw out the end pieces!

2 hours ago

OH MY GOD that is the best hack I’ve seen all week. I just finished making a batch last night and have a pile of end bits I was gonna toss, now I’m making those potatoes for dinner tonight!

5 days ago

I tested this recipe early for Thanksgiving this year, and it’s going to be the star of our appetizer spread! It pairs so well with cranberry relish and leftover dinner rolls, I know my whole extended family is gonna lose their minds over it. Way more unique than the usual cheese and cracker platter I bring every year.

3 days ago

Wait how far in advance can you make this? I want to get as much Thanksgiving prep done as possible the weekend before so I’m not stressed on the day!

2 days ago

Great question Tia! You can make this up to 2 weeks in advance if you keep it tightly wrapped in the fridge. It actually gets better as the herb flavors meld over time, so making it ahead is a total win for holiday prep!

2 weeks ago

I run a small sandwich food truck in downtown Chicago, and I tested this recipe last week to add as a special add-on for our Italian subs. People went absolutely wild for it! I’ve already had three regulars ask if we can make it a permanent menu item. Incredible recipe, thank you!

1 week ago

Frank, that is so cool to hear! Nothing makes me happier than home cooks and small business owners alike getting good use out of my recipes. If it becomes a permanent menu item, you’ll have to save me a sandwich next time I’m in Chicago!

2 hours ago

Wait, has anyone tried making this with a lower fat cut of turkey? I’m trying to cut back on saturated fat but I’m obsessed with the sound of this herb cure. I don’t want to waste ingredients if it’ll come out dry!

30 minutes ago

I tried it with a leaner turkey breast once and it was definitely a little drier than when I used the thigh like the recipe says. It still tasted good, but you don’t get that melt-in-your-mouth lardo texture. Worth trying if you don’t mind that!

5 minutes ago

Ken is totally right! The higher fat content of the turkey thigh is what gives lardo its signature rich, silky texture. If you do use a leaner cut, I’d recommend basting it every 20 minutes during the cook time to help keep it moist, but it will be a slightly different end result!



