
Ukrainian Krashanky (Dyed Easter Eggs)

title 1
Ukrainian Krashanky (Dyed Easter Eggs)
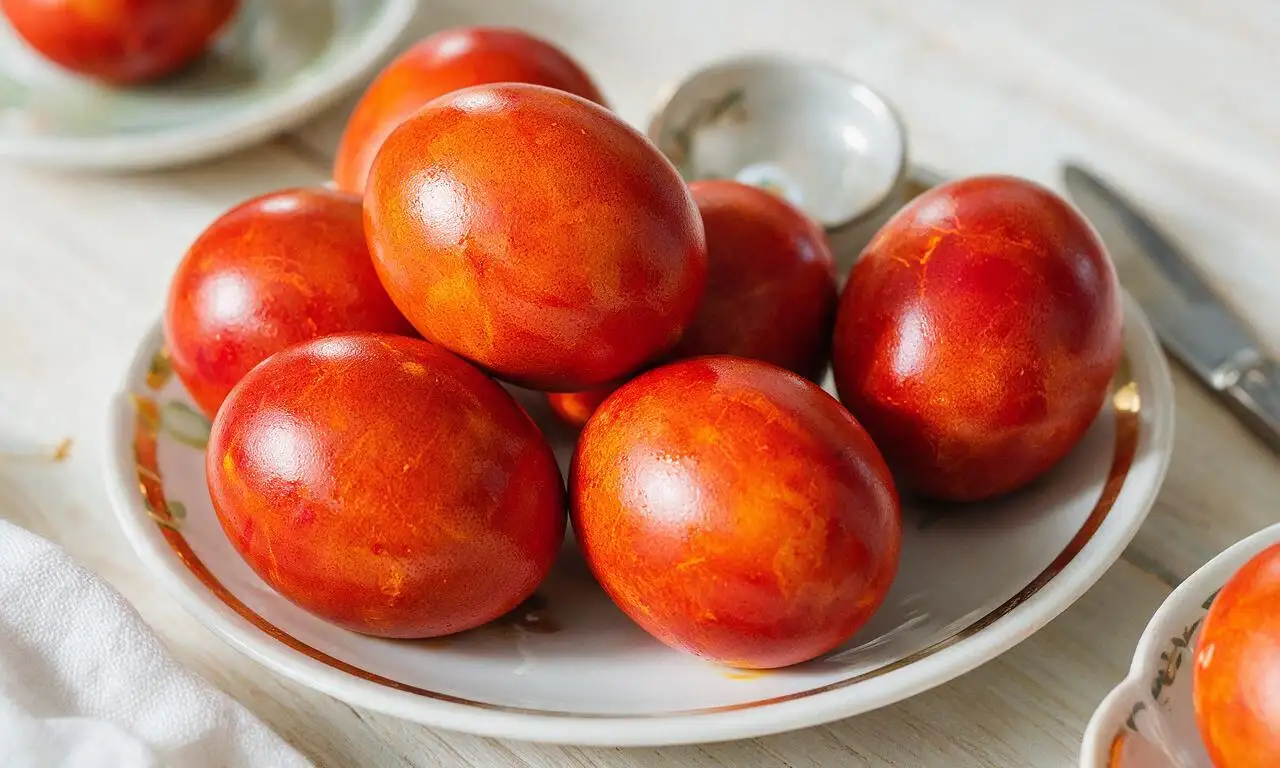
⏱️ cook time 1 hour 45 minutes
🍽️ servings 12
⚡ Difficulty easy

intro

Traditional Eastern Slavic naturally dyed hard-boiled Easter eggs, made with onion skins for a rich red hue, a beloved symbolic spring holiday staple.

Ingredients

Large white raw eggs 12 each
Dry yellow onion skins (loosely packed) 4 cups
White distilled vinegar 2 tablespoons
Cold water 1.5 L (6 cups)
Neutral vegetable oil 1 tablespoon

Steps

1

Prepare onion skin dye

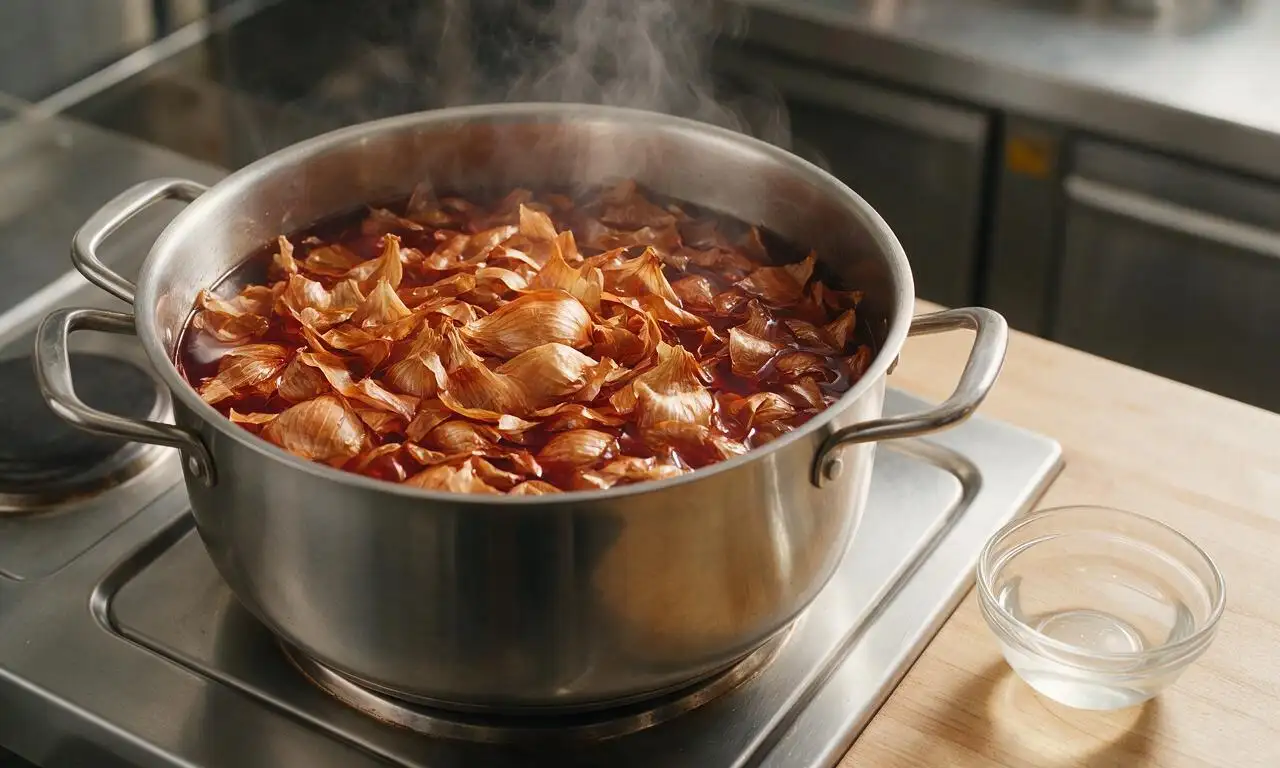
Place 4 cups of loosely packed dry yellow onion skins in a large 4L stockpot, pour in 1.5L (6 cups) of cold water and 2 tablespoons of white distilled vinegar. Bring the mixture to a rolling boil over medium-high heat, then reduce heat to low, cover, and simmer for 30 minutes to extract the deep red-brown pigment.
Step 1
step1:Prepare onion skin dye
2

Strain cooled dye liquid

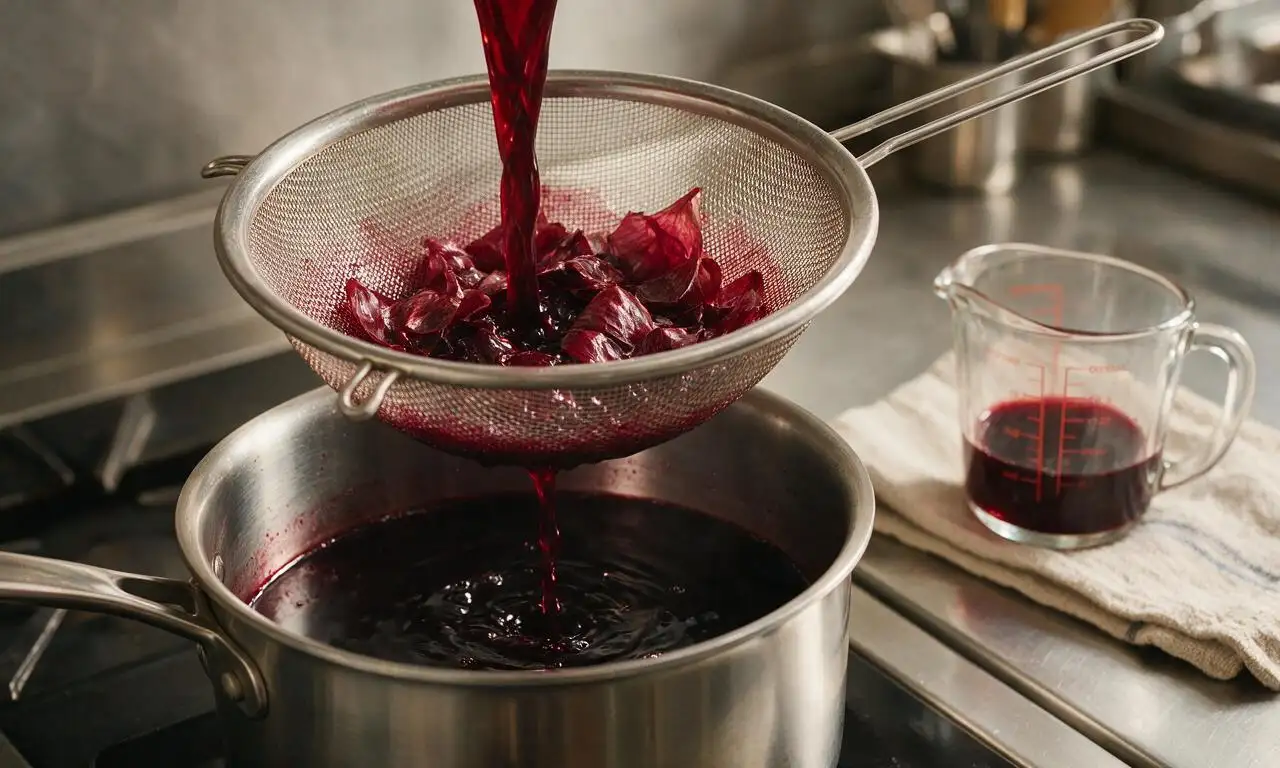
After 30 minutes of simmering, turn off the heat and let the dye liquid cool for 15 minutes until it reaches room temperature (around 21C/70F). Pour the liquid through a fine-mesh sieve to remove all onion skins, returning the smooth, sediment-free deep red dye to the clean stockpot, and discard the used skins.
Step 2
step2:Strain cooled dye liquid
3

Submerge eggs in dye

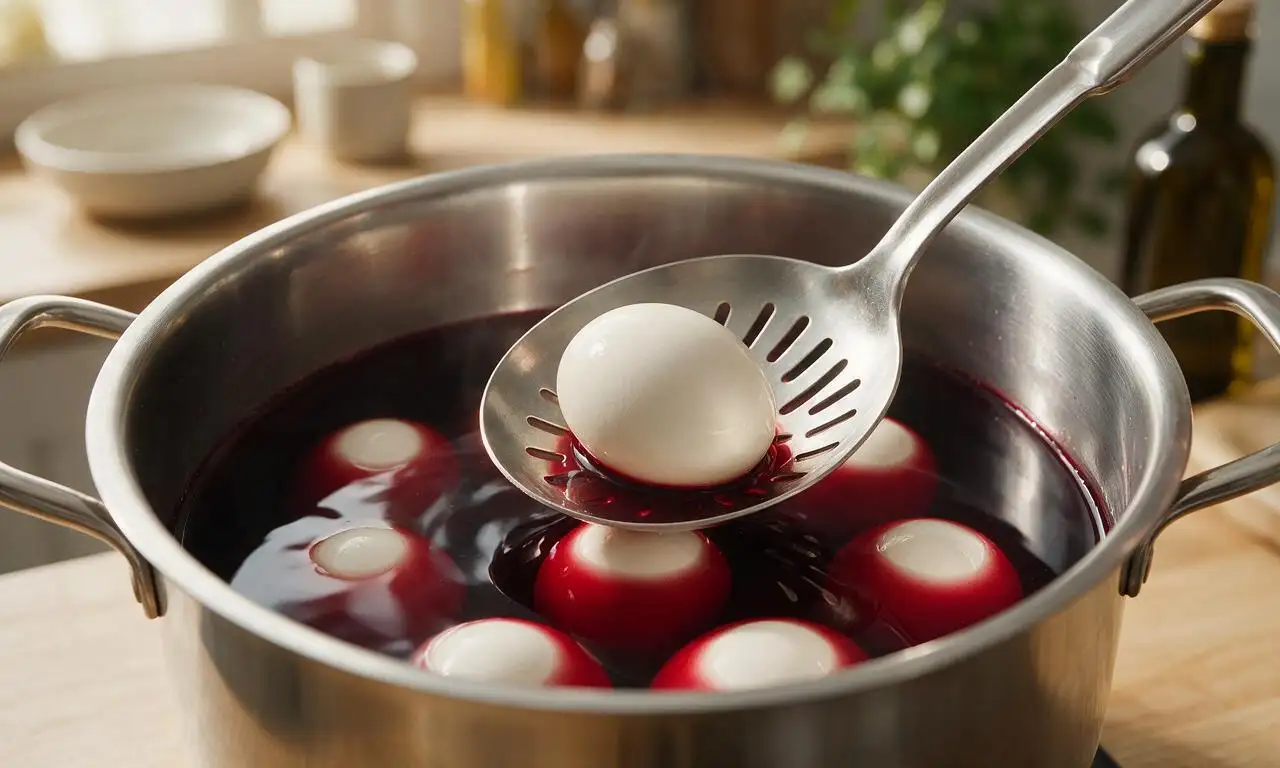
Gently lower 12 room-temperature large white eggs into the cooled red dye, ensuring all eggs are fully submerged by at least 2cm (1 inch) of liquid; top up with 2-3 tablespoons of extra cold water if needed to cover. Place the pot back on the stovetop over medium heat.
Step 3
step3:Submerge eggs in dye
4

Simmer eggs to hard-boil

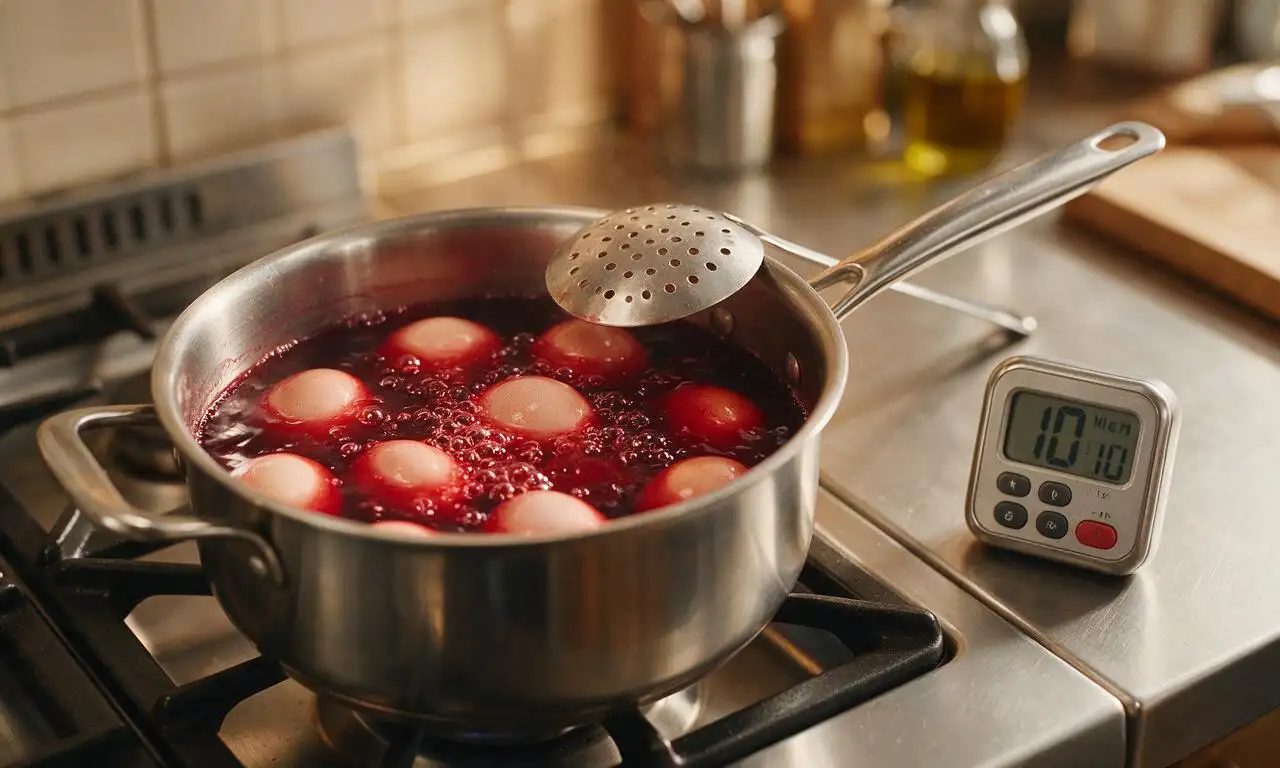
Bring the dye with eggs to a gentle rolling boil, then reduce heat to medium-low to maintain a soft, steady simmer, and cook for exactly 10 minutes to achieve fully set hard-boiled eggs with no unappetizing green ring around the yolk. Avoid a hard, violent boil to prevent egg shells from cracking from rapid temperature shock.
Step 4
step4:Simmer eggs to hard-boil
5

Steep for desired color

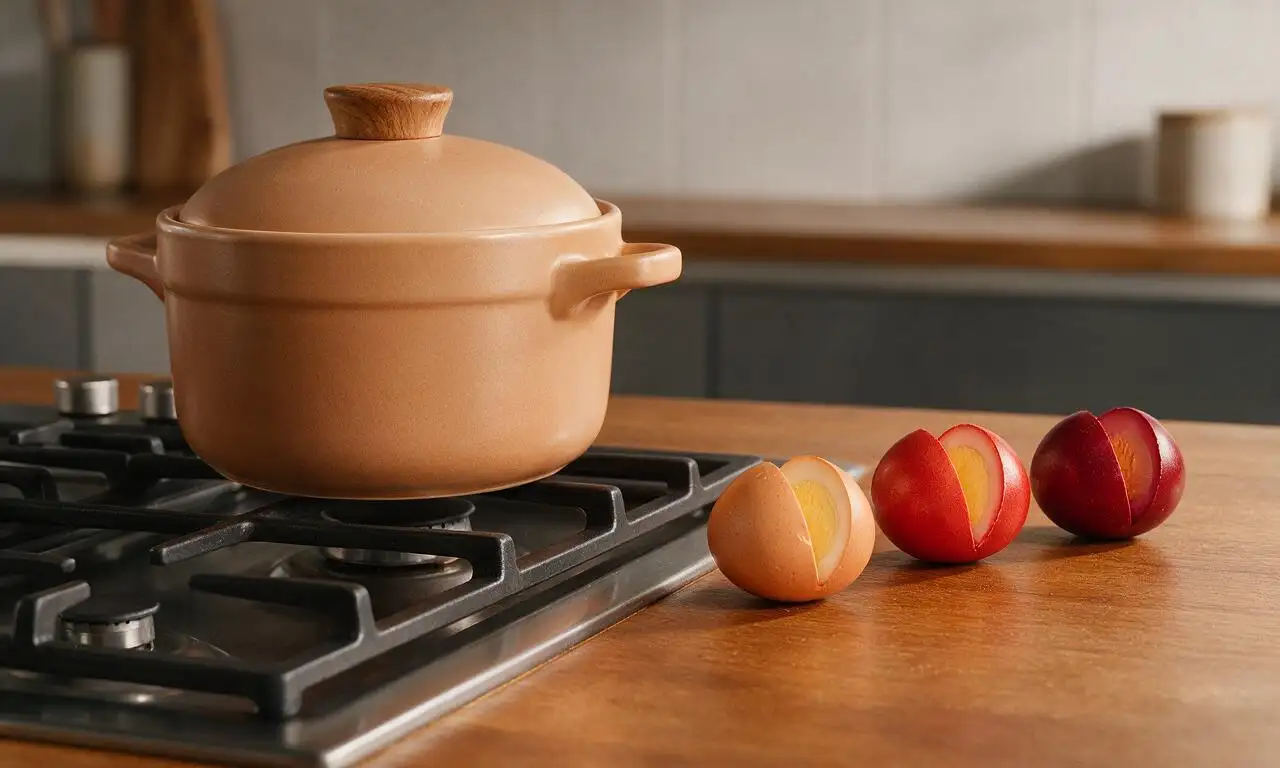
After the 10 minute boil, turn off the heat, cover the pot tightly with a lid, and let the eggs rest in the warm dye for 20 to 45 minutes, depending on your preferred shade: 20 minutes for a warm terracotta hue, 35 minutes for a bright cherry red, and 45 minutes for a deep, glossy ruby red.
Step 5
step5:Steep for desired color
6

Dry and polish eggs

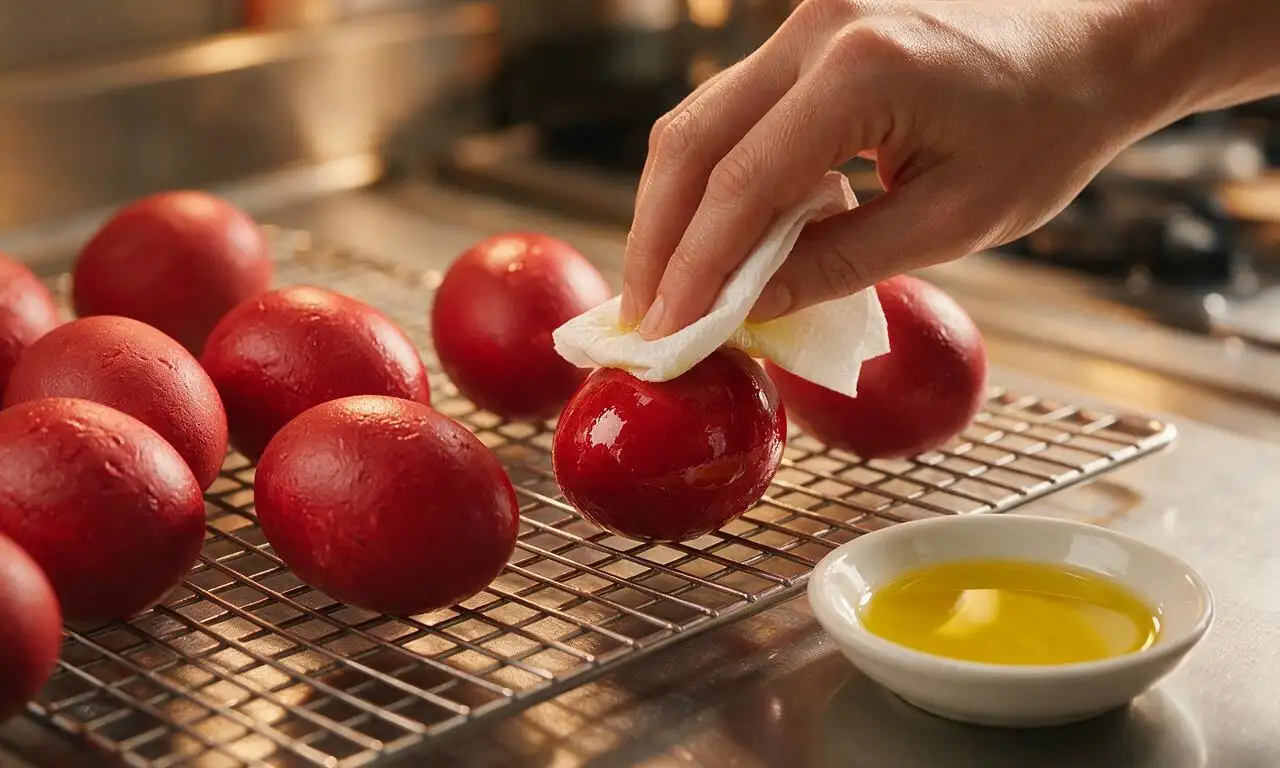
Use a slotted spoon to remove eggs from the dye, transfer them to a wire rack set over a rimmed baking sheet to air dry completely for 20 minutes at room temperature. Once fully dry, rub each egg with a thin coat of neutral vegetable oil (using 1 tablespoon total across all eggs) with a soft paper towel to create a shiny, smooth, long-lasting finish.
Step 6
step6:Dry and polish eggs

Tips

1.Always bring eggs to room temperature for 30 minutes before adding to the dye bath to prevent shell cracking from sudden temperature changes, and never boil eggs rapidly as this can cause shells to split and create uneven dye patches.
2.For decorative patterned krashanky, press small flat herb leaves (parsley, dill, or cilantro) against the egg shell, wrap tightly with a cut piece of thin nylon stocking secured with a rubber band before adding to dye, to leave delicate, lacy leaf imprints on the finished egg.
3.Store finished, unpeeled krashanky in a sealed airtight container in the refrigerator for up to 7 days; peel immediately before eating, and serve cold with salt, horseradish, or cured sausage as part of a traditional Easter spread.


✨ You May Also Like

Snacks & Appetizers
🍜 Mexico

Crispy thick-cut tortilla chips piled high with seasoned beef, melted cheese, and bright fresh toppings for a shareable, crowd-favorite bite.

⏱️ 25 minuteSnacks & Appetizers ★ 4.8
Snacks & Appetizers
🍜 United States

Crisp, sweet-tangy spiced pickled watermelon rind is a zero-waste summer staple, perfect with grilled meats, charcuterie, or eaten straight from the jar as a bright snack.

⏱️ 30 minuteSnacks & Appetizers ★ 4.6
Snacks & Appetizers
🍜 Germany

A tangy, jellied pork cold cut slow-simmered with aromatic spices, set into a firm sliceable loaf, served cold with mustard and crusty bread.

⏱️ 3 hours 4Snacks & Appetizers ★ 4.8
Snacks & Appetizers
🍜 United States

Creamy, tangy, perfectly seasoned hard-boiled egg halves filled with a rich, smooth yolk mixture, a timeless, crowd-pleasing bite for holiday and casual gatherings alike.

⏱️ 40 minuteSnacks & Appetizers ★ 4.8
Snacks & Appetizers
🍜 Russia

Silky, dill-forward no-smoke cured salmon, a Scandinavian classic with bright salty-sweet flavor, ideal for holiday starter platters and open-faced rye sandwiches.

⏱️ 48 hours Snacks & Appetizers ★ 4.7
Snacks & Appetizers
🍜 Japan

Crisp golden bottoms, juicy savory pork and vegetable filling, and tangy dipping sauce make these pan-fried gyoza a beloved shareable bite.

⏱️ 45 minuteSnacks & Appetizers ★ 4.8

Ukrainian Krashanky (Dyed Easter Eggs):Frequently Asked Questions

1.What makes Ukrainian krashanky different from other dyed Easter eggs I might make with regular food coloring? ▾
Unlike bright, artificial food coloring-dyed Easter eggs, krashanky use an all-natural onion skin dye that creates a deep, rich, long-lasting red hue tied to longstanding cultural symbolism of spring renewal. The eggs are hard-boiled directly in the dye bath instead of dipped after cooking, for deeper, more even color that won’t streak or rub off with light handling.
2.Do I have to use white eggs for this recipe, or will brown-shelled eggs work? ▾
White eggs are ideal because they create a clean, blank canvas that lets the onion skin dye develop that uniform, vivid classic red. Brown eggs will work in a pinch, but they produce a deeper, darker maroon-brown finish instead of the traditional bright red, and you may need to add 5 extra minutes of steeping time to get even color coverage.
3.Why is white vinegar added to the dye bath, and can I skip it if I don’t have any? ▾
Don’t skip the vinegar! The mild acid in white distilled vinegar etches the smooth calcium carbonate eggshell surface just enough to help onion skin pigment bind evenly and permanently, preventing splotchy, faded, or easily rubbed-off color. Apple cider vinegar works in a pinch but will add a subtle murky brown tint to your final red hue.
4.How do I keep eggs from cracking while they simmer in the onion skin dye? ▾
Start with room-temperature eggs instead of cold fridge-stored eggs to avoid thermal shock that causes cracking. Lower eggs gently into the cold dye bath before turning on the heat, keep the liquid at a soft, gentle simmer (skip rolling, violent boils), and add a pinch of salt to the water to seal any tiny, unnoticeable hairline shell cracks as they cook.
5.How long do I simmer the eggs to get that deep red color and properly hard-boiled texture? ▾
Simmer fully submerged eggs in the onion skin dye bath for 12 to 15 minutes total. That timing yields perfectly firm hard-boiled eggs with no chalky, gray ring around the yolk, while letting the onion skin pigment build to that classic deep, glossy cherry-red shell finish. For darker red, leave eggs in the turned-off covered dye bath for 30 extra minutes post-simmer.
6.What’s the point of rubbing finished krashanky with vegetable oil? ▾
That thin coat of neutral vegetable oil buffed onto fully cooled, dried dyed eggs creates the beautiful traditional glossy sheen that makes the rich red color really pop, like a polished decorative finish. It also adds a light protective layer that keeps dye from rubbing off on hands during hunts or displays, and slows shell drying during fridge storage.
7.Can I prep the onion skin dye bath ahead of time to save time on Easter weekend? ▾
Absolutely! Simmer the onion skins, water, and vinegar for 30 minutes, strain out the skins, and store the cooled concentrated dye in a sealed glass jar in the fridge for up to 1 week before you’re ready to make your krashanky. Just bring the dye back to room temperature before adding eggs to avoid thermal shock that causes cracked shells.
8.Are these naturally dyed eggs safe to eat, and how long do they stay fresh? ▾
Krashanky are completely safe to eat! The onion skin dye is all-natural, non-toxic, and won’t seep through intact shells to alter the flavor of the egg inside. Keep unpeeled hard-boiled krashanky stored in the fridge for up to 1 week, and don’t leave them out at room temperature for more than 2 hours total if you plan to eat them, per standard food safety rules.
9.Why did my first batch of krashanky come out splotchy and uneven instead of smooth red? ▾
Splotchy, uneven color almost always ties to one of three easy-to-fix issues: your eggs had leftover oily residue or the natural waxy farm-fresh bloom on shells that blocked dye, you skipped the vinegar so pigment couldn’t bind evenly, or thermal shock created tiny hidden cracks that let dye seep unevenly. Wipe raw shells with a little vinegar before cooking to fix the most common culprit.
10.Can I add other natural ingredients to the dye to make different colored krashanky? ▾
While classic krashanky are the iconic deep red from plain onion skins, you can absolutely experiment with other natural add-ins for festive holiday variety! Toss in shredded beets for bright pink-red, ground turmeric for sunny golden yellow, frozen blueberries for deep indigo, or fresh spinach for soft green—just keep the vinegar in the bath to help all pigments stick evenly.
11.How many onion skins do I need for a batch, and can I collect them gradually ahead of time? ▾
You’ll need about 4 loosely packed cups of dry yellow onion skins for 1 dozen large eggs to achieve that rich, deep traditional red. It’s totally smart to collect skins over 2 to 3 weeks ahead of time: just tuck them into a paper bag stored in a cool, dry pantry as you use onions for regular cooking, so you don’t have to buy a huge bulk bag of onions all at once.
12.Do I need to wrap eggs in onion skins with pantyhose like I see in some Easter egg tutorials? ▾
That pantyhose-and-leaf wrapping trick is used to make delicate patterned decorative eggs, a related Ukrainian Easter egg style called pysanky, not solid-color krashanky. You don’t need any wrapping for classic krashanky: just simmer eggs loose in the strained onion dye bath for a smooth, even, all-over solid red finish, no extra supplies required.
13.Are these krashanky sturdy enough to use for the traditional Easter egg tapping game? ▾
Absolutely! That’s one of the core traditional uses for krashanky! These firm, hard-boiled, evenly dyed eggs are perfectly sturdy for the classic Easter game where two players tap their eggs against each other, and the person whose uncracked egg wins earns good luck for the coming year. Just avoid overcooking eggs past 15 minutes, which makes shells brittle and prone to breaking too easily.

Comments (12)

2 days ago

OMG these turned out so much prettier than the neon drugstore dye kits I usually grab for Easter! My kids went crazy for the deep, rich colors, and we even brought a dozen to our church potluck last Sunday and so many people asked for the recipe. Total game changer for our Easter traditions from now on.

1 day ago

So glad these were a hit with your family and your church community, Molly! There’s nothing better than swapping out those artificial dye kits for these rich, traditional krashanky — hope they become a yearly staple for you guys!

1 day ago

Wait did you use the onion skin method for the deep red? I tried that last year and mine came out splotchy, wondering if I skipped a step!

30 minutes ago

Super easy even for a total cooking newbie like me! I was nervous to try a traditional Easter recipe I’d never made before, but the steps were so straightforward, no fancy equipment needed. Mine came out a perfect deep golden color from the yellow onion skins, can’t wait to show my grandma tomorrow.

2 hours ago

Wait, quick question — do I have to use white eggs for this? I only have brown eggs in my fridge right now from our backyard chickens, will the dye still show up okay?

1 hour ago

Great question, Carla! Brown eggs work beautifully for this recipe — they’ll just give you a deeper, more muted final color, which looks so lovely. Just make sure you give them an extra gentle wipe with a little vinegar before dyeing to help the color set evenly!

1 week ago

Made these for our neighborhood Easter block party last weekend and they were gone in 10 minutes flat! People kept saying they looked way too fancy to be homemade, LOL. I added a little turmeric to one batch for bright yellow and it was chef’s kiss.

5 days ago

Oh the turmeric addition is genius! I did a batch with a little beet powder for pink last year, can’t wait to mix and match this weekend!

just now

SO good, way cheaper than buying those fancy dyed eggs from the grocery store bakery. I spent like $3 total on onions and had everything else in my pantry already. 10/10 would make again, even not for Easter tbh, they’re just fun to make with my roommates.

2 weeks ago

My own baba used to make krashanky exactly like this when I was little, and I lost her recipe years ago when we moved. I tried this last night and I swear the smell of the onion skins boiling took me right back to her kitchen. I cried a little, not gonna lie. Thank you so much for sharing this.

1 week ago

Lila, this comment means the absolute world to us. Food is all about memory and family, and it makes us so happy this recipe helped you reconnect with those special memories of your baba. Sending you lots of love this Easter!

6 days ago

Same here! I’ve been looking for a no-fuss krashanky recipe to teach my own kids, and this one is exactly how my mom made them too. It’s so special to pass these traditions down 🥹

3 days ago

How long do these stay good for after dyeing? I want to make them a couple days ahead for our family dinner as part of my Easter weekend meal prep so I’m not scrambling the day of, but I don’t want them to go bad.

2 days ago

Hi Bex! If you keep them refrigerated in an airtight container, they’ll stay perfectly good for up to 1 week after you make them. Making them a couple days ahead is a great time-saver, and the color actually gets a little deeper the longer they sit in the dye, too!

5 days ago

Tried this yesterday and added a few dill seeds to the dye pot for a little subtle herby flavor on the egg whites — game. Changer. Everyone thought I was a professional chef when I brought these to my friend’s Easter brunch.

3 days ago

Wait that dill seed hack is insane, I’m absolutely stealing that! Do you toss the seeds in while the dye is boiling or wait until it cools a little?

1 week ago

I did this with my 2nd grade class for our Easter cultural lesson, and the kids were obsessed! It was so easy to walk them through the steps, no messy neon dye everywhere, and they were so proud to take their eggs home to their parents. Will definitely be doing this every year from now on.

yesterday

Wait, I messed up the first batch because I boiled the eggs too hard and half of them cracked while they were in the dye! They still tasted fine, but they had those little splotchy lines where the dye seeped in. Any tips to avoid cracking next time?

yesterday

I had the same issue my first try! Let the eggs come up to room temp before you put them in boiling water, and don’t crank the heat too high — a gentle simmer is all you need. Cut down my cracked eggs to zero after that!

5 hours ago

Hank’s tip is spot on, Nate! Room temperature eggs and a gentle simmer will help prevent almost all cracking. And for what it’s worth, those little splotchy cracked eggs are considered a lucky little bonus in a lot of Ukrainian families — we call them “krapanky” and they’re just as special!

5 minutes ago

Can I make these without using regular eggs? I want to bring a vegan option to my family’s Easter gathering, would the dye work on those plant-based hard boiled eggs they sell at the grocery store?

just now

Hi Val! The natural dye in this recipe works really well on most vegan egg alternatives, as long as you give them a quick wipe with white vinegar first to help the color adhere. I’d recommend letting them sit in the dye a little longer than regular eggs to get a rich, even color!

3 days ago

Full transparency, I didn’t even make these for Easter — I made them for a watch party for our local soccer team’s colors (blue and gold) and they were a total hit. Used a little red cabbage for the blue, onion skins for the gold, everyone thought I was so creative. 10/10 easy recipe, super versatile even if you’re not making them for a holiday.

2 days ago

Dude that is such a smart hack! I’m always looking for fun themed food for our Browns watch parties, I’m definitely stealing the red cabbage trick for orange and brown dyed eggs this fall.

1 day ago

Love this creative use for the recipe, Tim! The natural dyes work for any occasion, and the red cabbage blue is such a vibrant, fun color — we might have to steal your watch party idea for our next game day gathering!



