
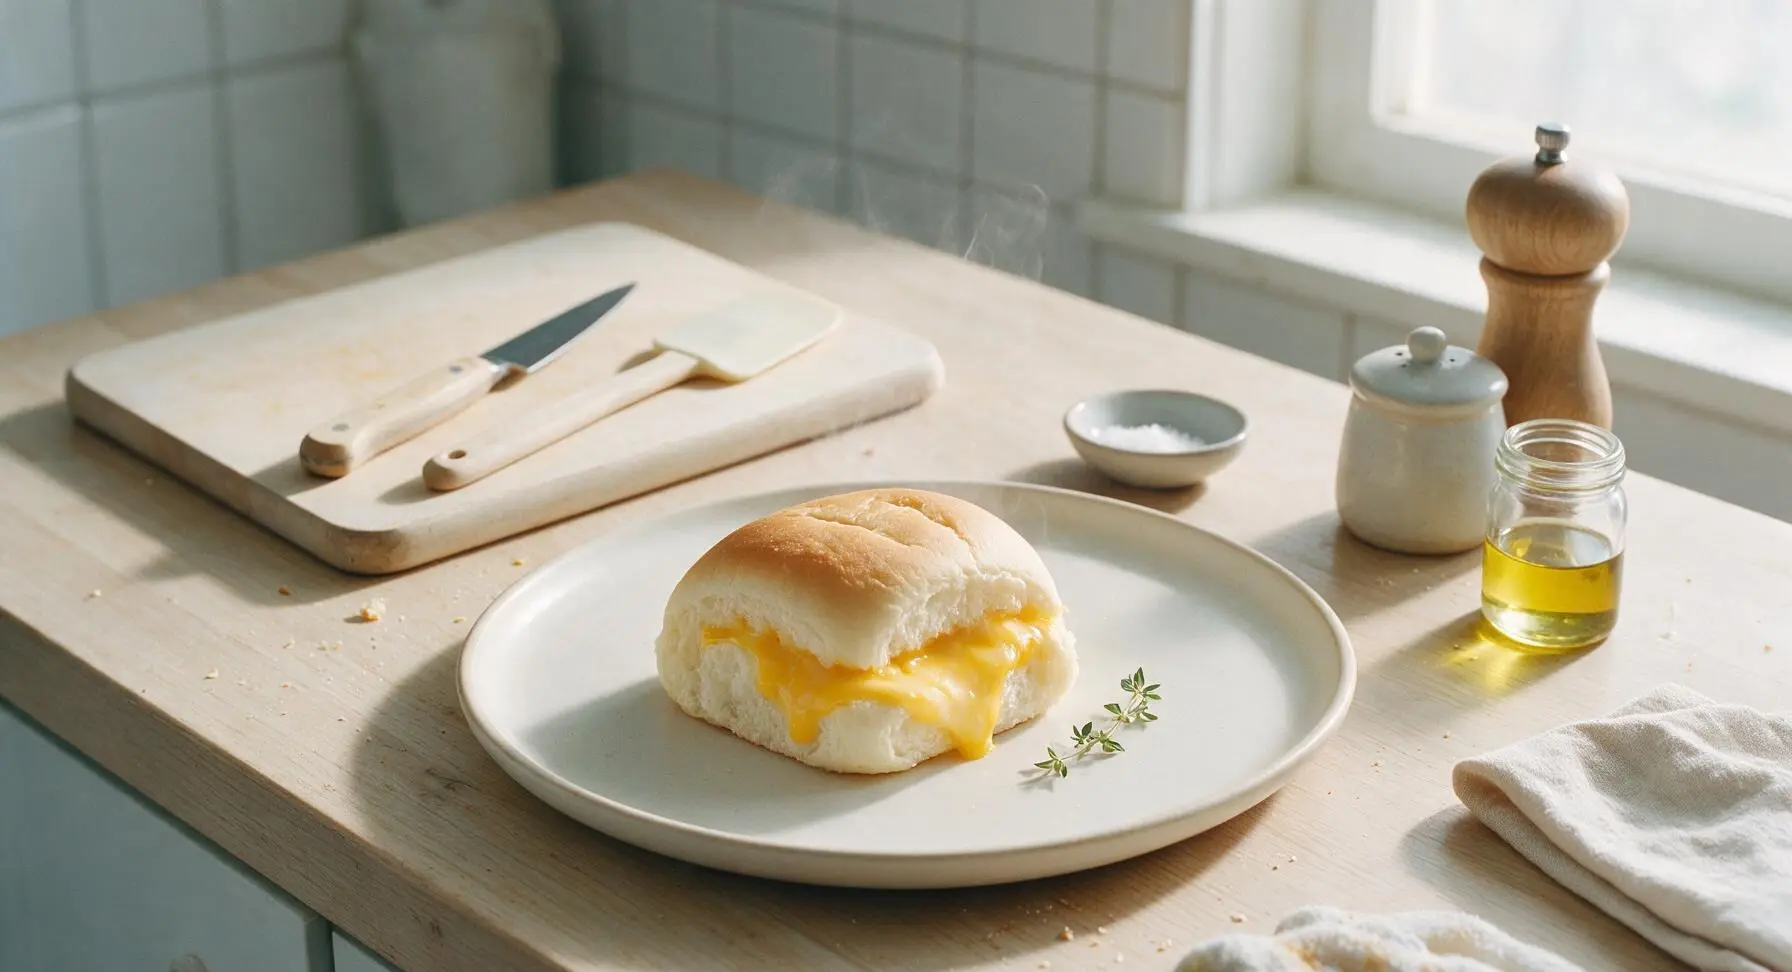
cheese zombie

title 1
cheese zombie
⏱️ cook time 1 hour 45 minutes
🍽️ servings 6
⚡ Difficulty easy

intro

Fluffy, pillowy soft white bread wrapped around oozing melted American cheese, this retro Pacific Northwest school lunch favorite is gooey, nostalgic, and perfect for game night sharing.

Ingredients
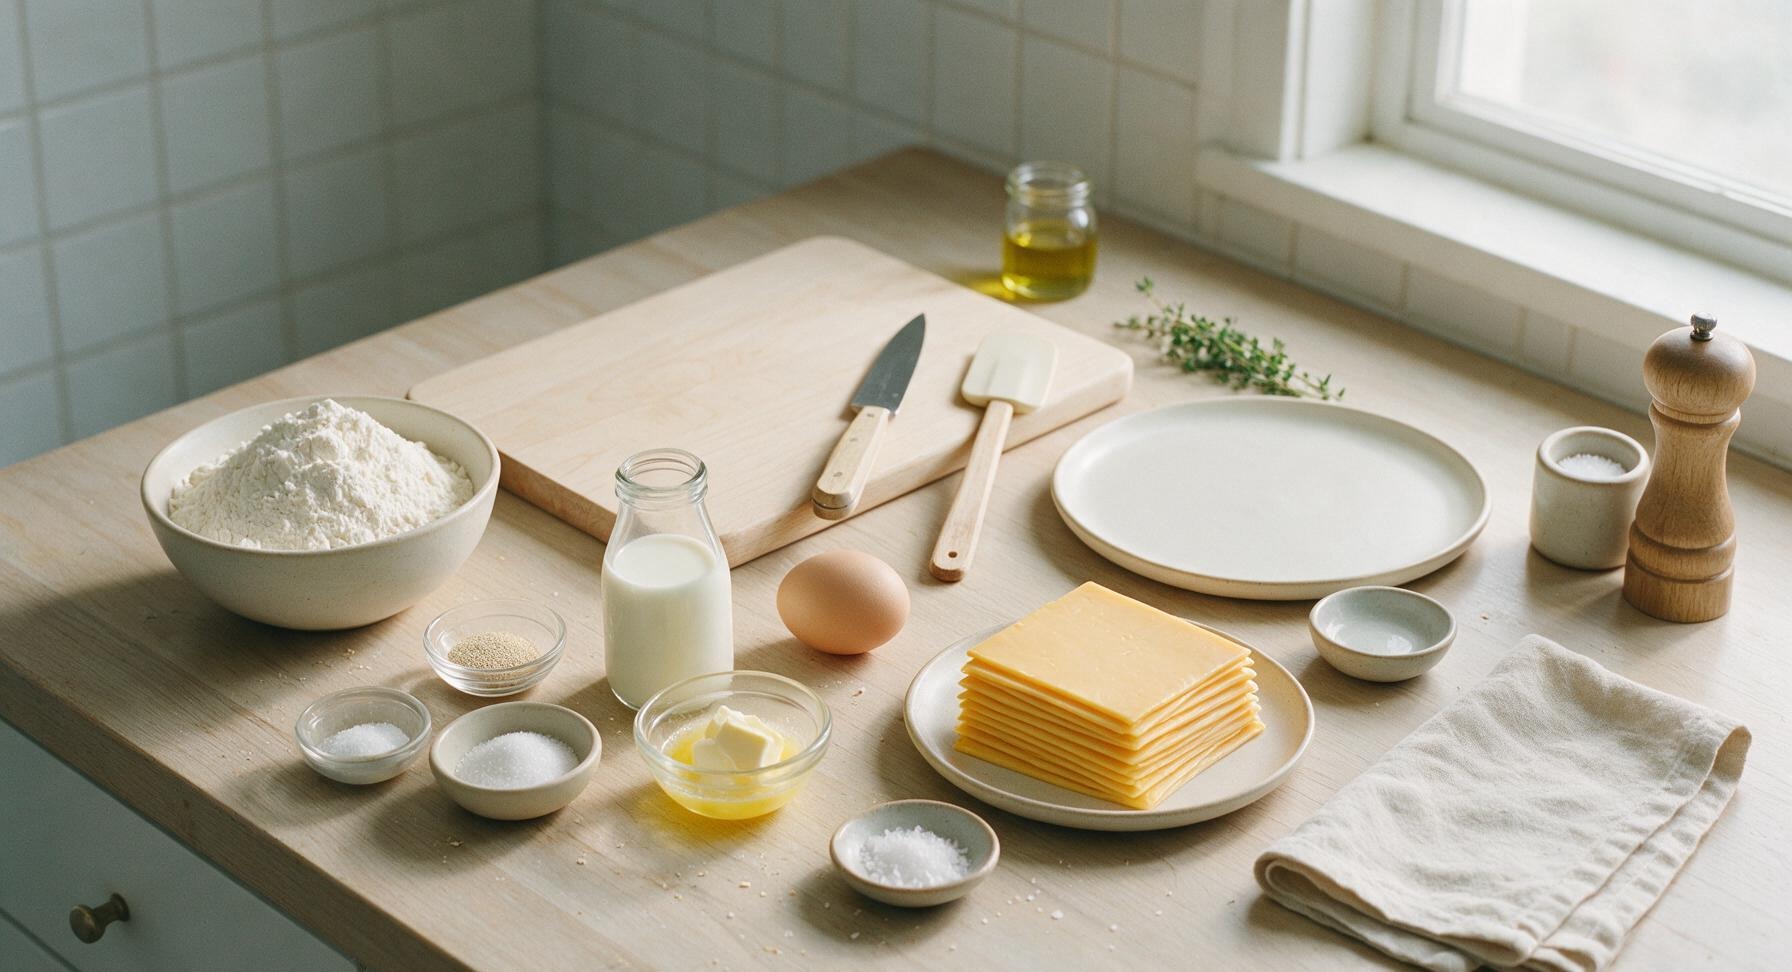
All-purpose flour 3 ½ cups (420g)
Instant dry yeast 2 ¼ tsp (7g, 1 standard packet)
Granulated sugar 1 tbsp (12g)
Kosher salt 1 ½ tsp
Whole milk, warmed to 110°F 1 ¼ cups (300ml)
Unsalted butter, melted and cooled 3 tbsp (42g), divided
Large egg, room temperature 1 each
Deli-sliced American cheese 12 slices (340g)
Flaky sea salt ¼ tsp

Steps

1

Mix Dough Base

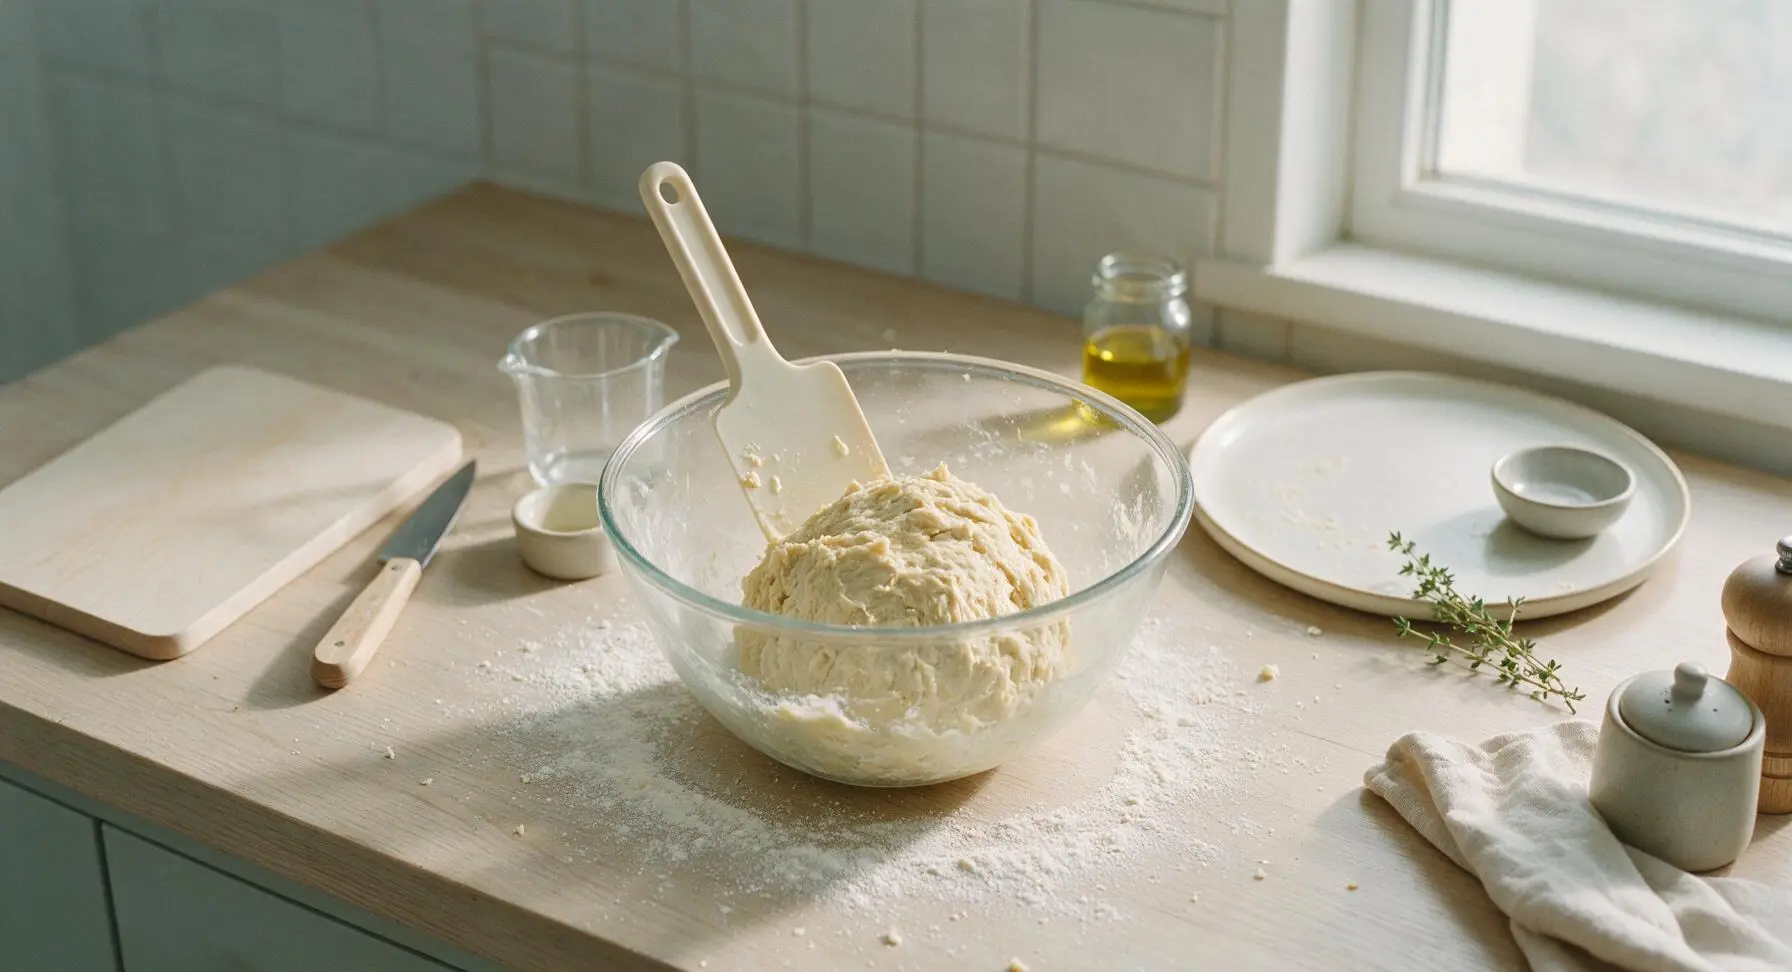
In the medium clear glass mixing bowl, combine 3 ½ cups all-purpose flour, 2 ¼ tsp instant yeast, 1 tbsp granulated sugar, and 1 ½ tsp kosher salt, stirring briefly with the silicone dough scraper to combine. Pour in 1 ¼ cups warm (110°F) whole milk, 2 tbsp of the cooled melted butter, and 1 room temperature large egg. Stir with the dough scraper until a shaggy, slightly sticky mass forms, with no dry flour pockets remaining at the bottom of the bowl.
Step 1
step1:Mix Dough Base
2

Knead and Proof Dough

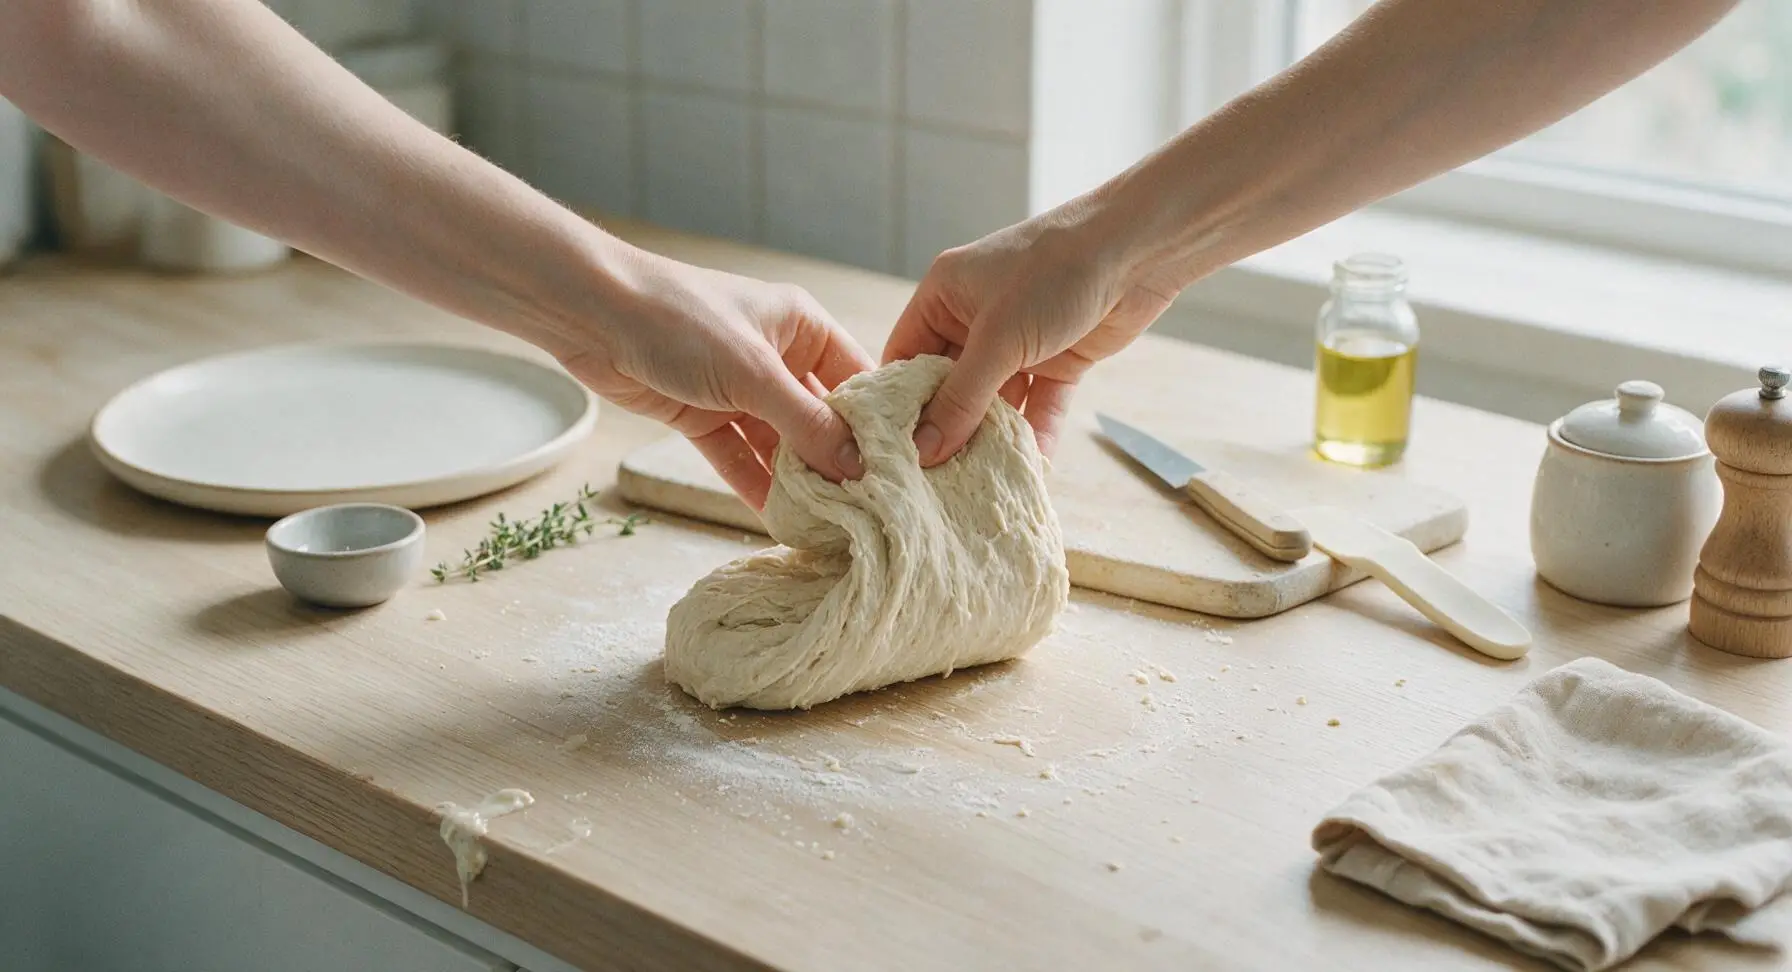
Turn the shaggy dough out onto a lightly floured section of the soapstone counter. Knead by hand for 6-8 minutes, folding the dough over itself and pushing forward with the heel of your hand, until the dough is smooth, elastic, and springs back slightly when poked with a finger. Form the dough into a tight ball, wipe out the mixing bowl lightly with oil from the amber oil bottle, place the dough back in the bowl, and cover with the burnt orange kitchen towel. Let rest in a warm spot for 1 hour, until doubled in size.
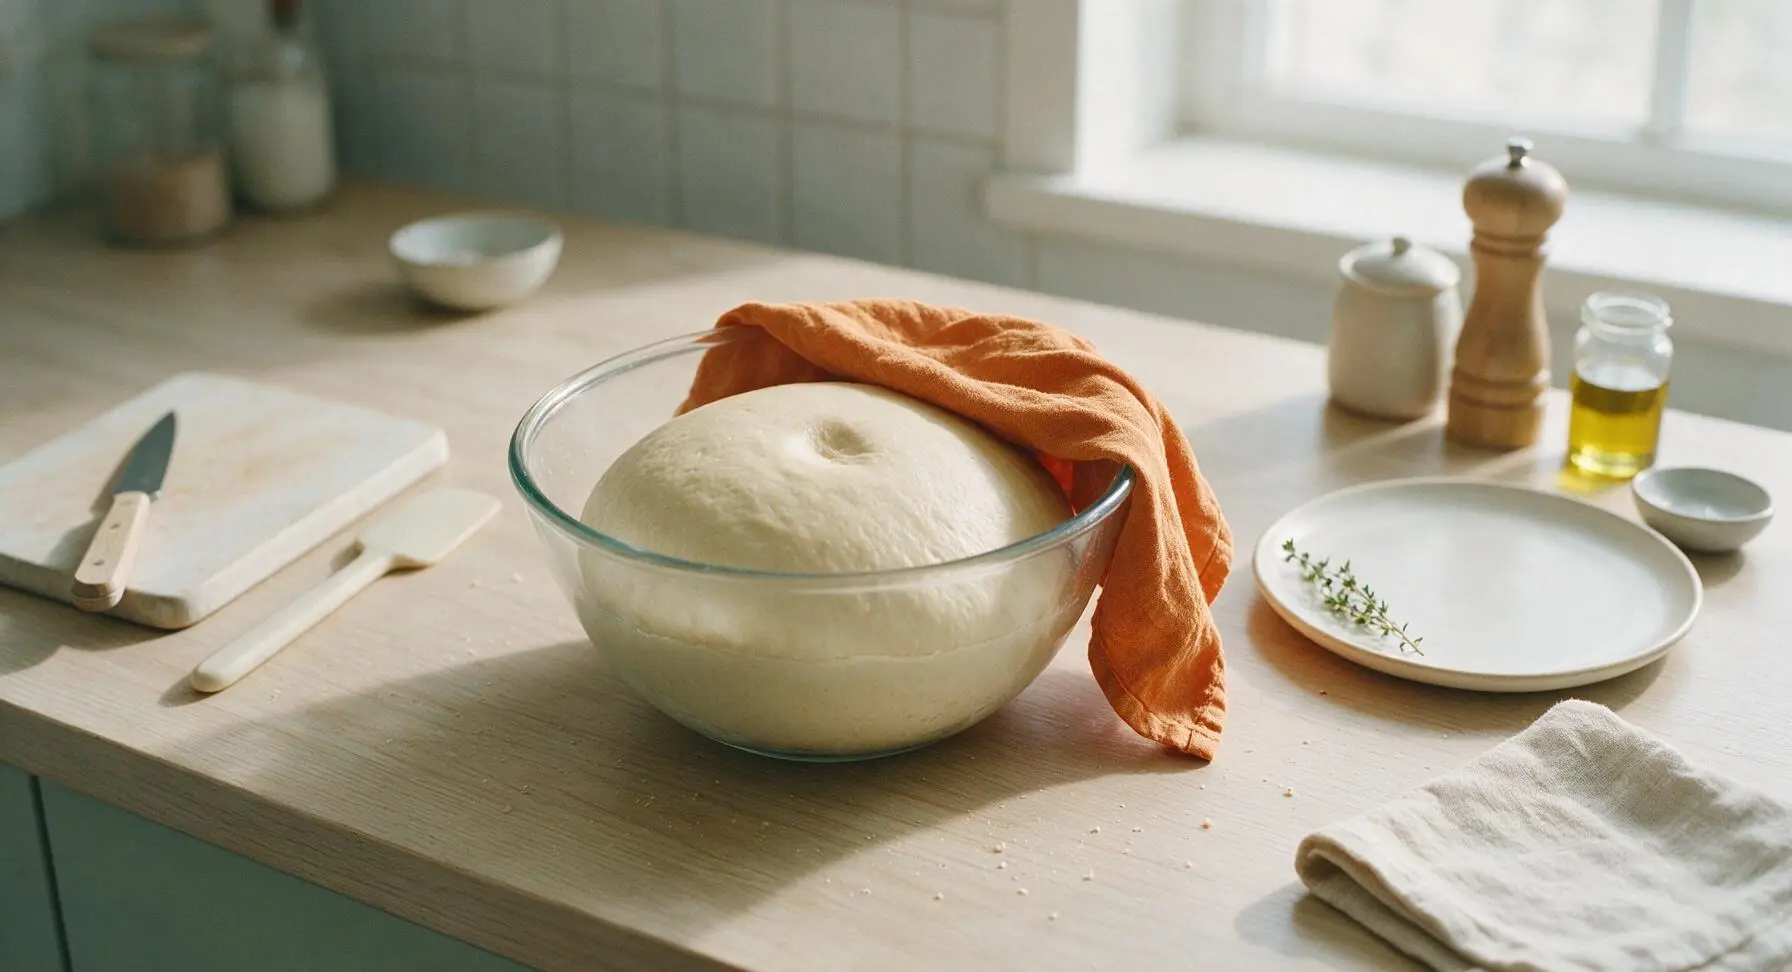
Step 2
step2:Knead and Proof Dough
Step 2
step2:Knead and Proof Dough
3

Portion Dough Pieces

Once doubled, punch the dough down firmly to release all trapped air, turning it out back onto the lightly floured counter. Use the silicone dough scraper to cut the dough evenly into 6 equal portions, each about 125g in weight. Roll each portion into a tight, smooth ball, then let rest for 10 minutes, covered loosely with the towel, to relax the gluten so it rolls easily without shrinking.
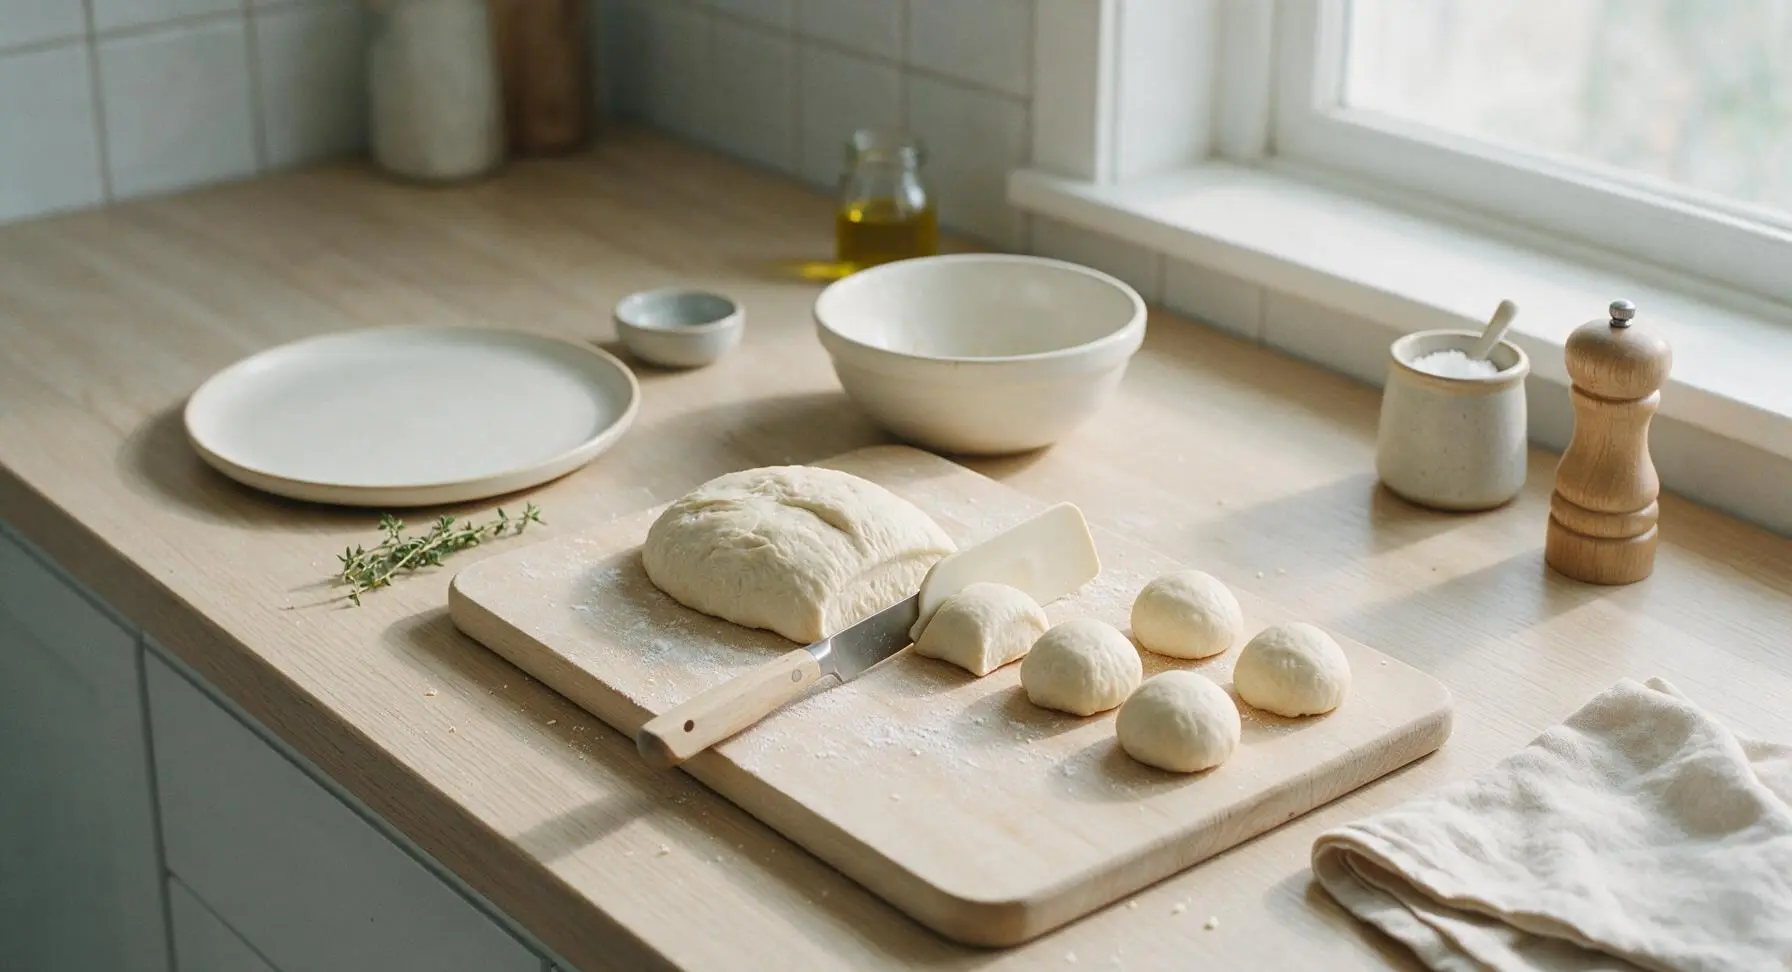
Step 3
step3:Portion Dough Pieces
4

Fill Dough with Cheese

Working one dough ball at a time, use the maple rolling pin to roll each rested dough ball into a 6-inch circle, about ¼-inch thick. Place 2 slices of American cheese stacked in the center of each dough circle, leaving a ½-inch border around the edge. Fold the dough edges up over the cheese, pinching firmly along the seam to seal completely, making sure no gaps remain where cheese can leak out during baking. Flip the sealed pocket seam-side down, patting gently to form a neat 4-inch square shape.
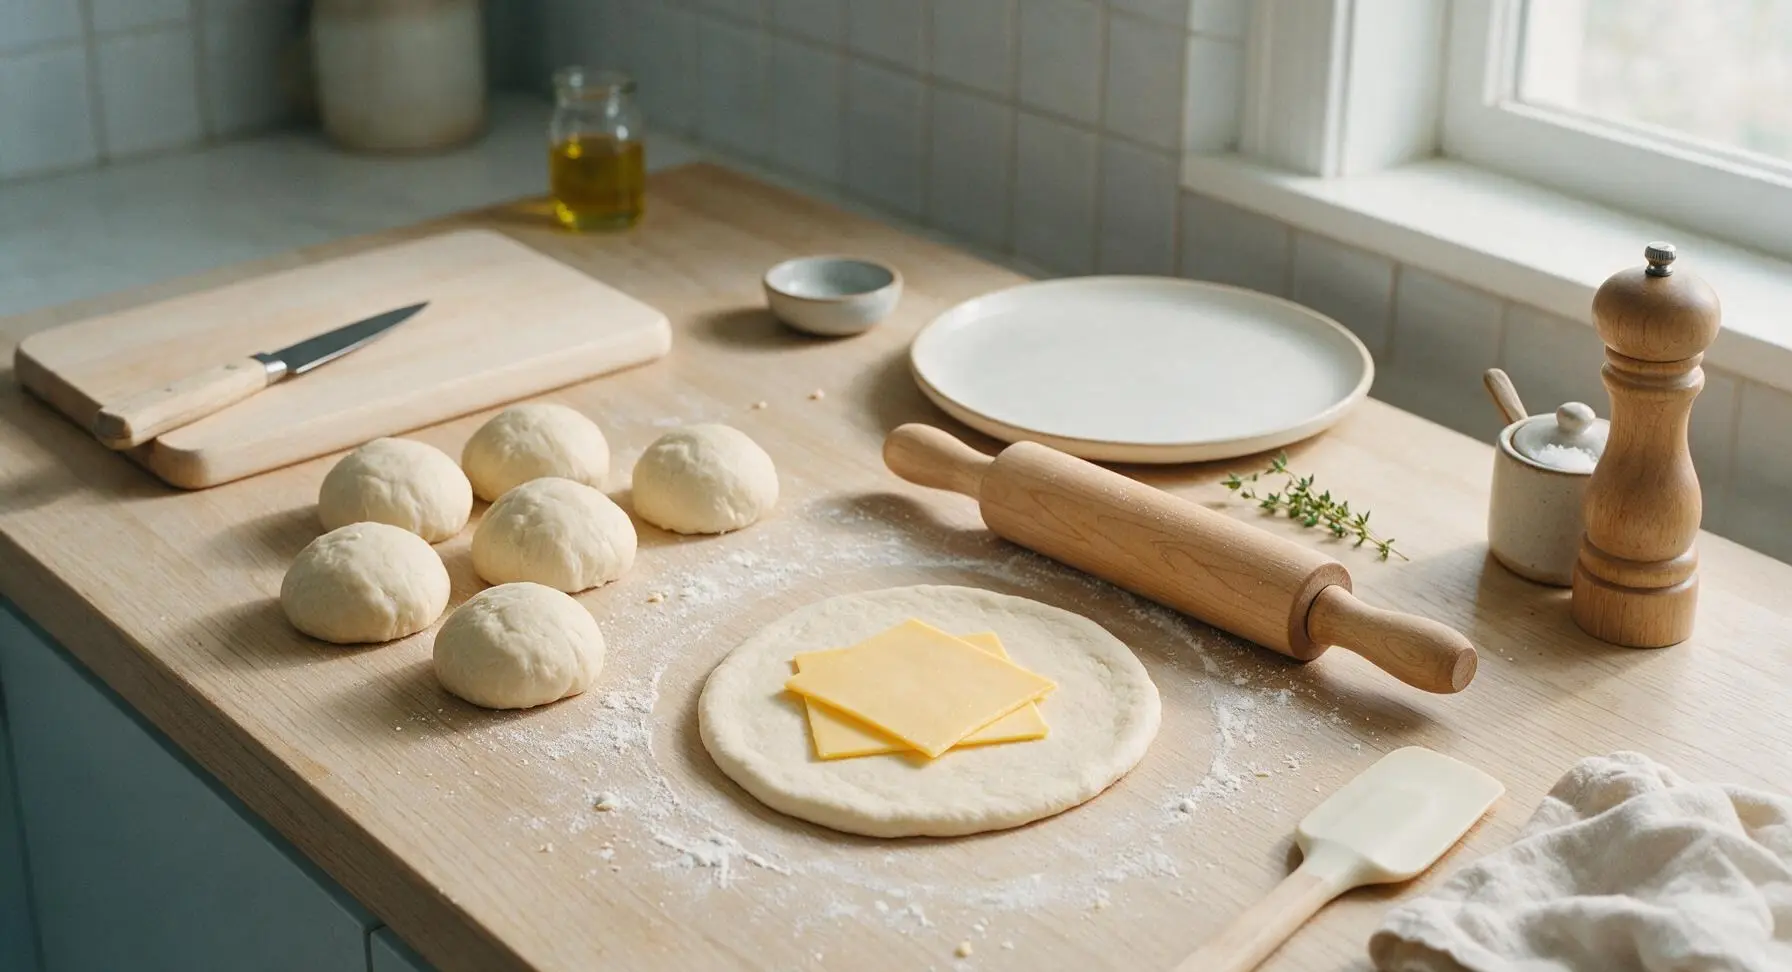
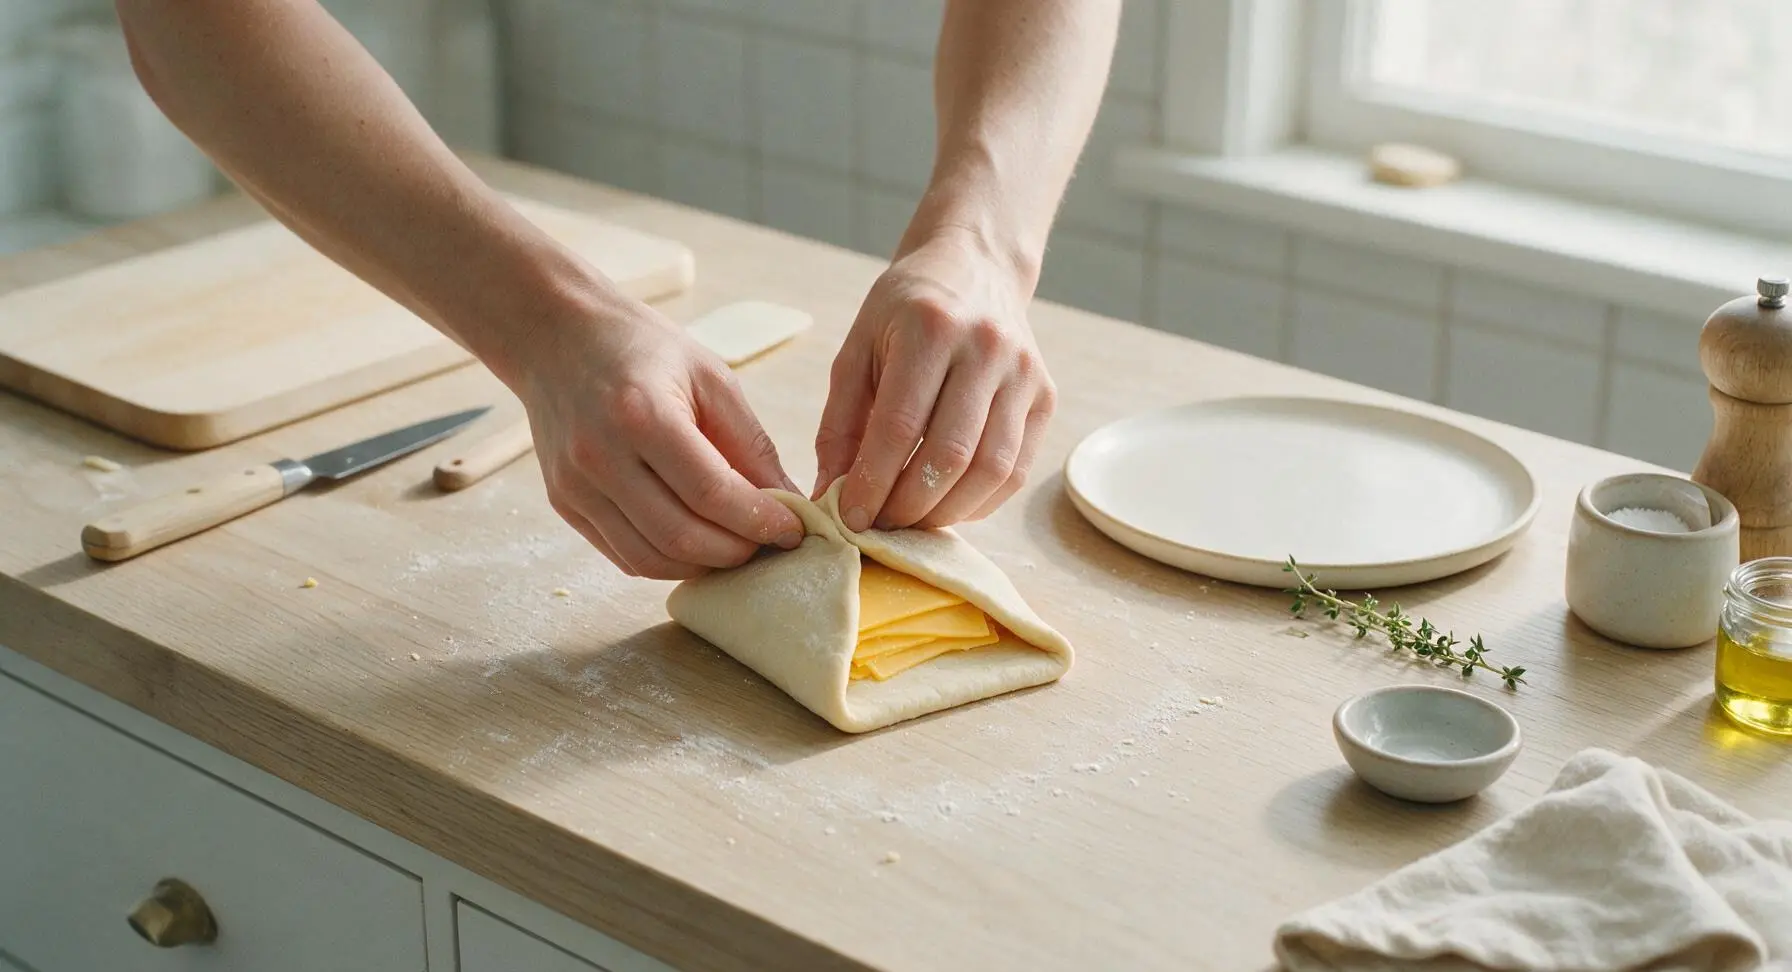
Step 4
step4:Fill Dough with Cheese
Step 4
step4:Fill Dough with Cheese
5

Prep for Second Rise

Line the rimmed aluminum half-sheet pan with the light silicone baking mat. Place all 6 sealed cheese zombies seam-side down on the mat, spacing them 2 inches apart to allow room to rise. Cover loosely with the burnt orange towel and let rest for 20 minutes, until puffed slightly and soft to the touch. While resting, preheat the oven to 375°F (190°C).
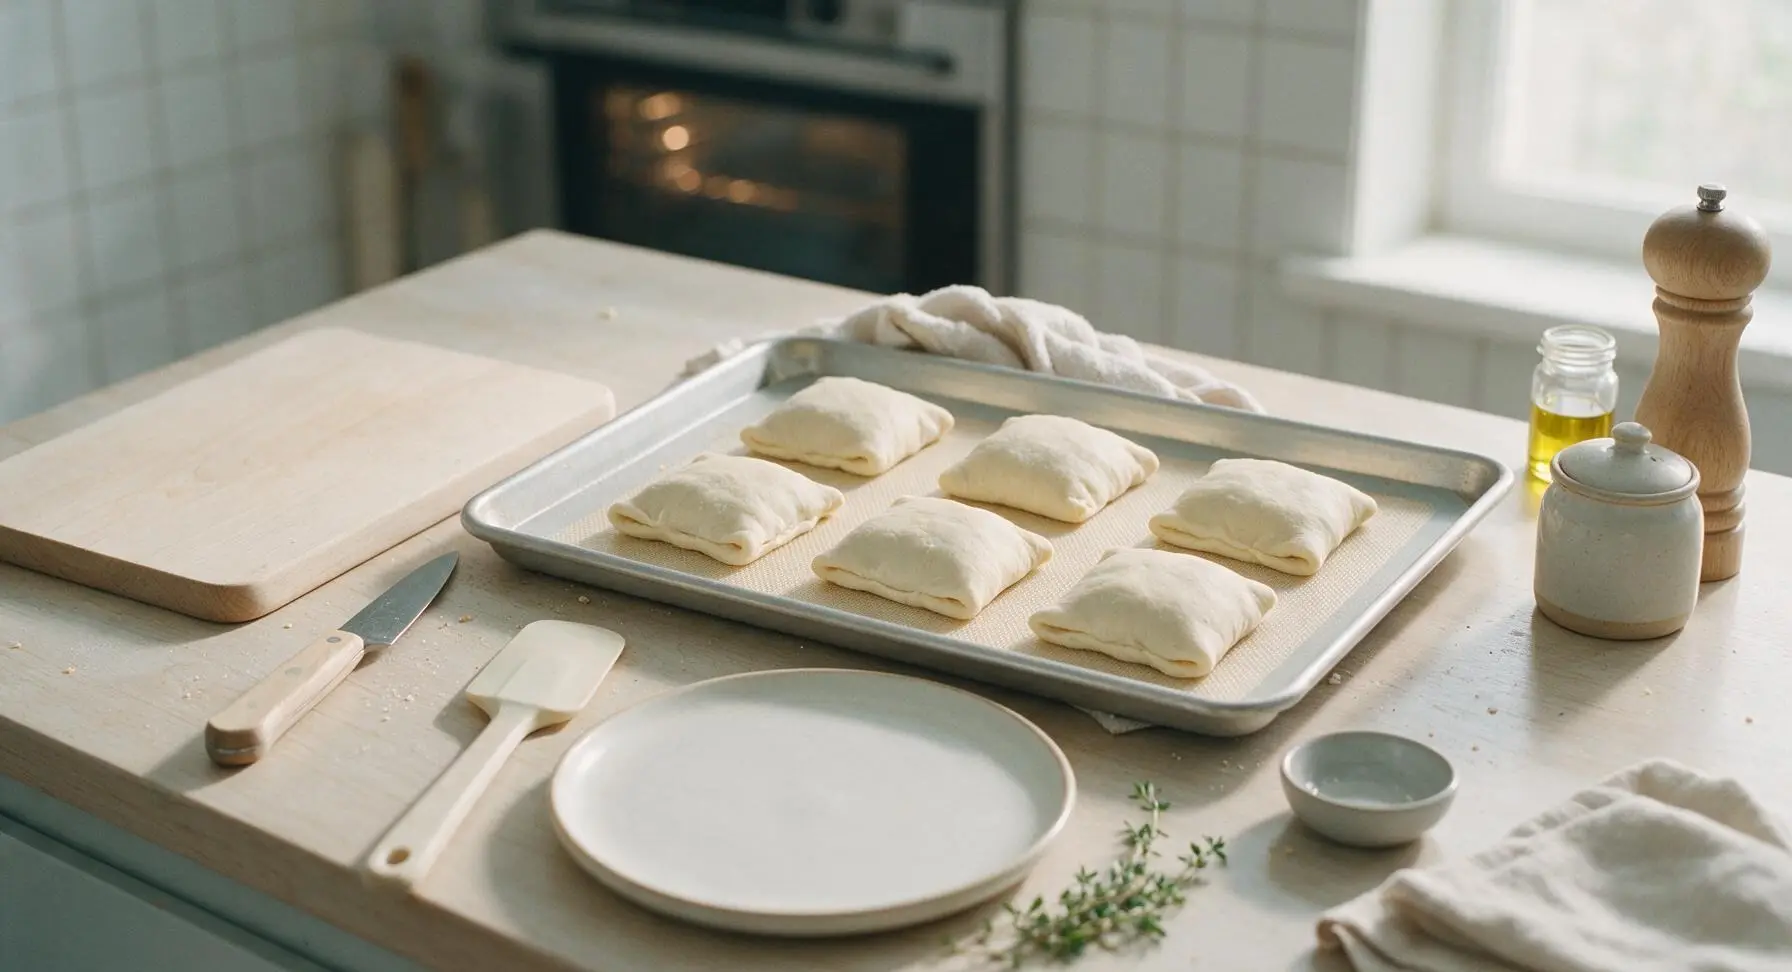
Step 5
step5:Prep for Second Rise
6

Bake Until Golden

Once the zombies are puffed, remove the towel, use the pastry brush to brush the tops of each dough pocket with the remaining 1 tbsp of melted butter. Place the baking sheet on the middle rack of the preheated 375°F oven, and bake for 22-25 minutes, until the tops are deep golden brown, and the cheese is fully melted inside (you may see a tiny bubble of cheese seeping out of a seam as a visual cue). Remove from the oven and let cool on the pan for 5 minutes.
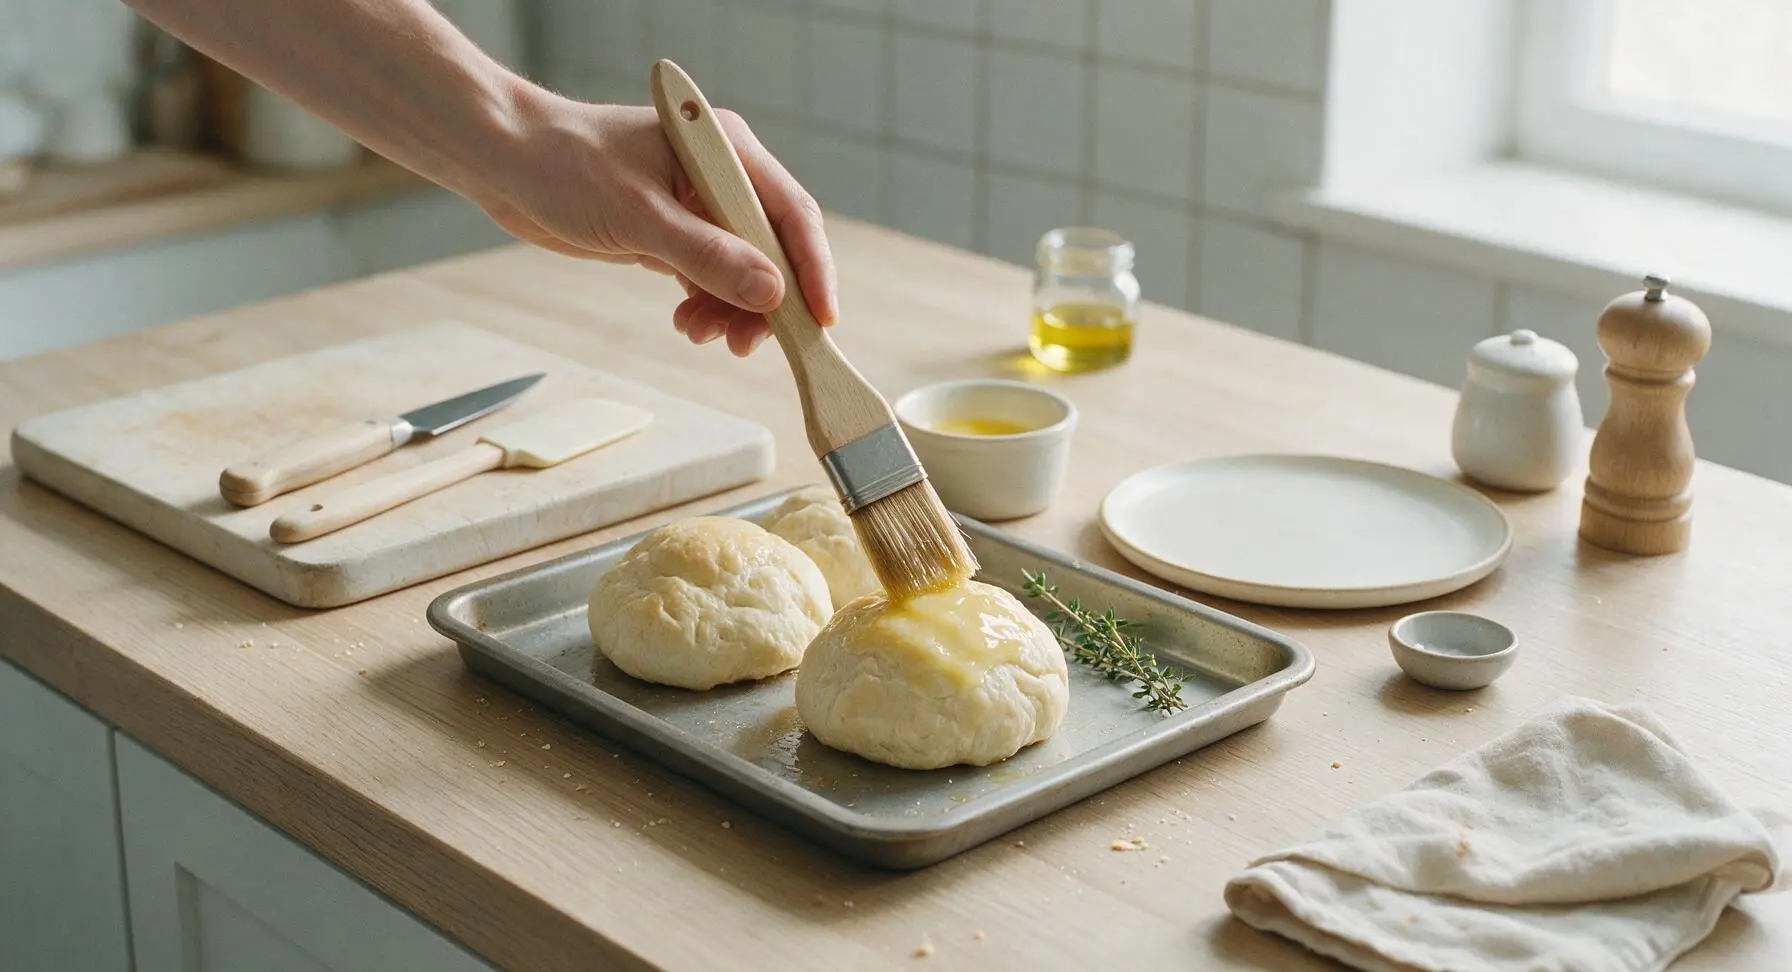
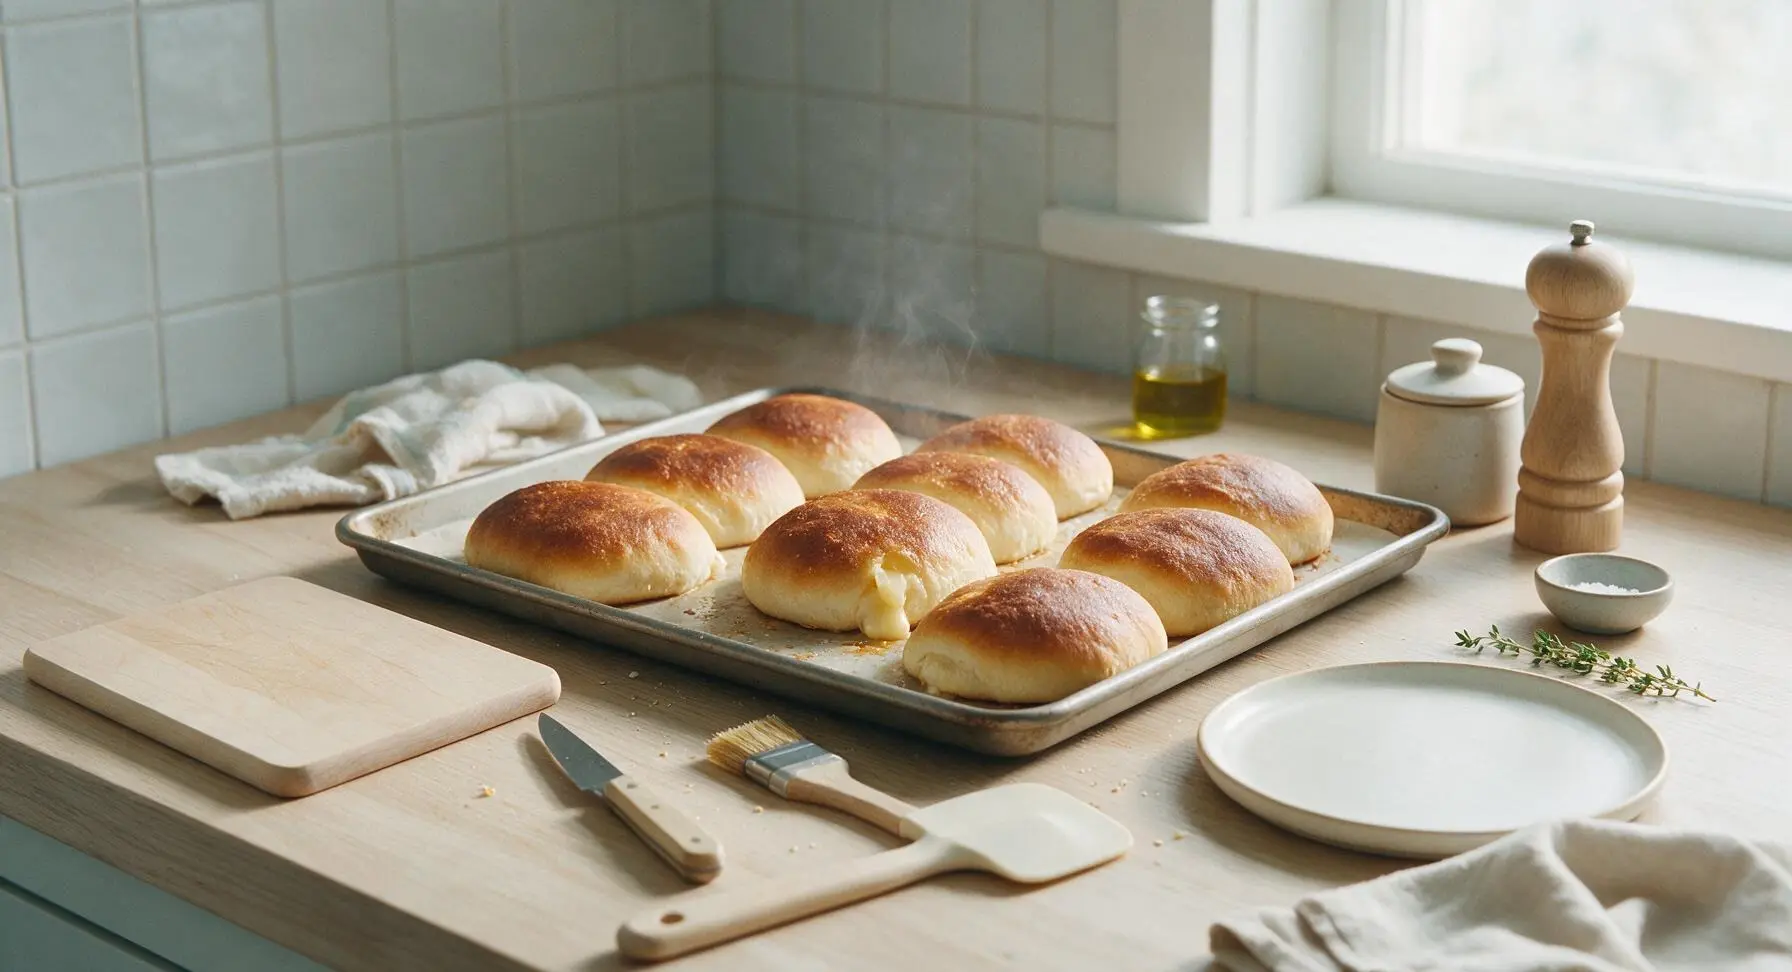
Step 6
step6:Bake Until Golden
Step 6
step6:Bake Until Golden
7

Finish and Plate

Sprinkle the tops of the warm baked cheese zombies with a light pinch of flaky sea salt. Transfer 3 of the warm zombies to the matte cream ceramic oval serving platter, leaving the remaining 3 on the pan for second helpings. Serve warm, while the cheese is still stretchy and gooey.
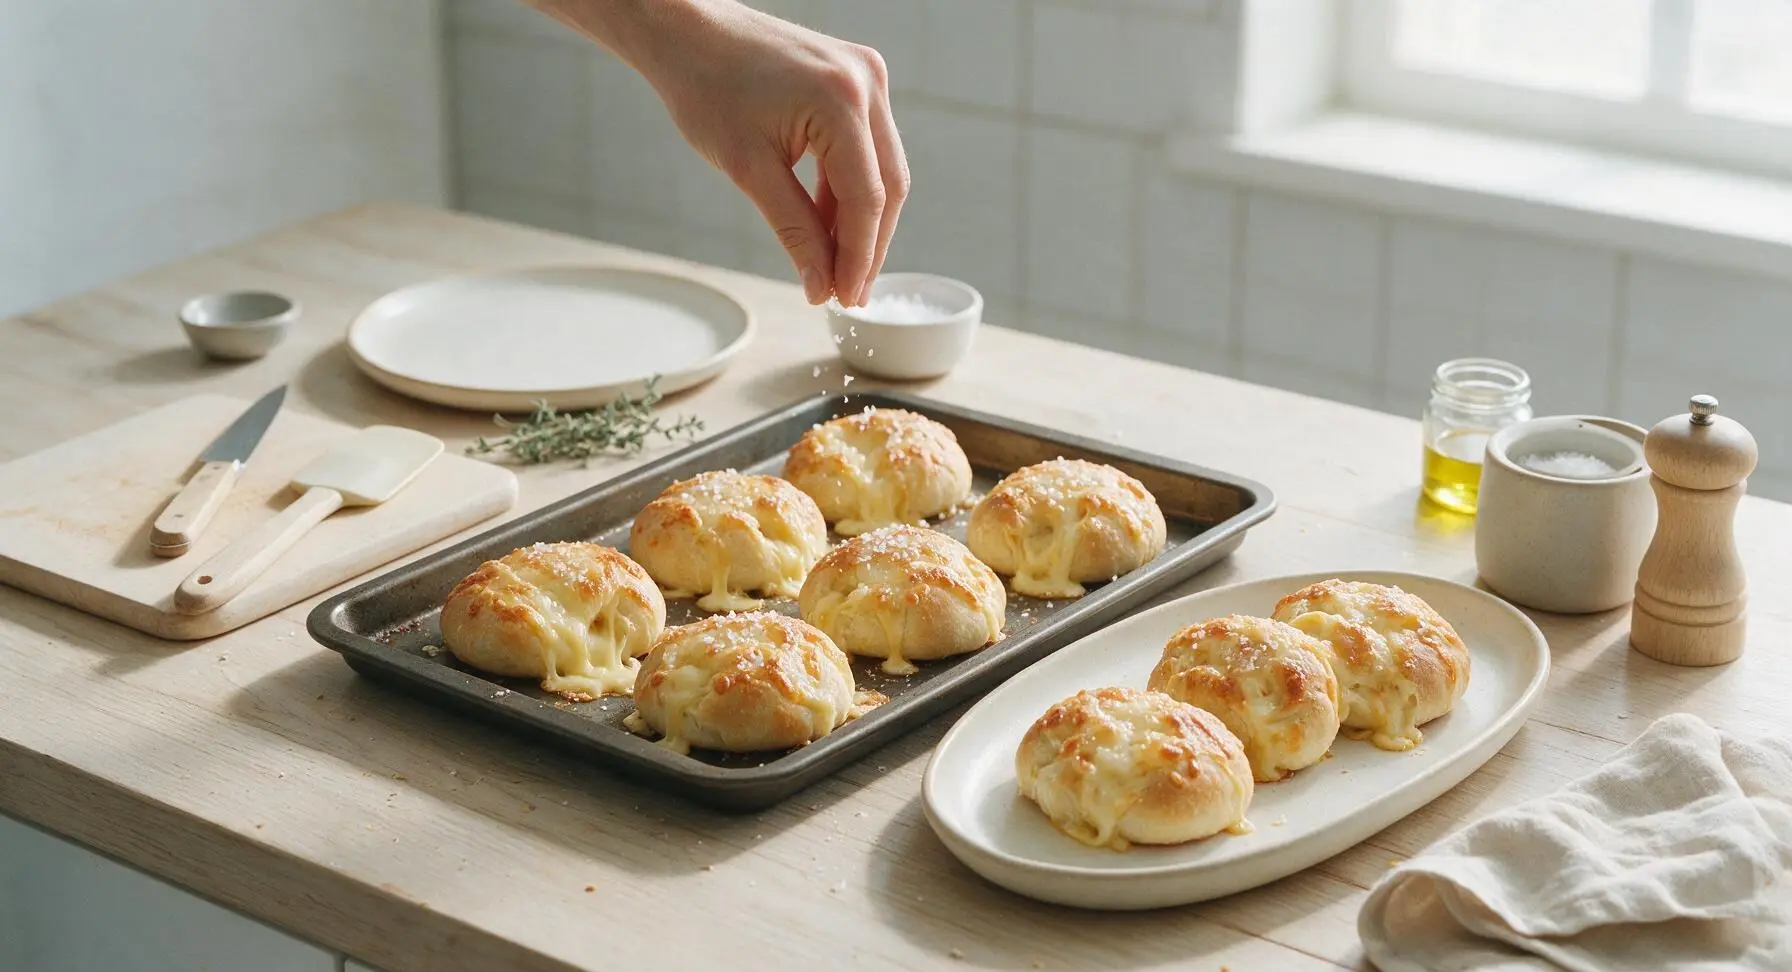
Step 7
step7:Finish and Plate

Tips

1.Pinch dough seams twice to ensure a tight seal: melted cheese will seep through even the tiniest gap during baking, leading to lost filling and burnt cheese residue on your baking mat.
2.Use deli-counter American cheese instead of pre-wrapped singles: deli American has fewer waxy stabilizers, melting into a smoother, stretchier, more nostalgic gooey filling that matches the original school lunch recipe.
3.Let portioned dough rest 10 minutes before rolling: relaxed gluten won’t shrink back as you roll, letting you create an even thin dough wrap without thick, doughy spots around the cheese.


✨ You May Also Like

Snacks & Appetizers
🍜 Mexico

Crispy thick-cut tortilla chips piled high with seasoned beef, melted cheese, and bright fresh toppings for a shareable, crowd-favorite bite.

⏱️ 25 minuteSnacks & Appetizers ★ 4.8
Snacks & Appetizers
🍜 United States

Crisp, sweet-tangy spiced pickled watermelon rind is a zero-waste summer staple, perfect with grilled meats, charcuterie, or eaten straight from the jar as a bright snack.

⏱️ 30 minuteSnacks & Appetizers ★ 4.6
Snacks & Appetizers
🍜 Germany

A tangy, jellied pork cold cut slow-simmered with aromatic spices, set into a firm sliceable loaf, served cold with mustard and crusty bread.

⏱️ 3 hours 4Snacks & Appetizers ★ 4.8
Snacks & Appetizers
🍜 United States

Creamy, tangy, perfectly seasoned hard-boiled egg halves filled with a rich, smooth yolk mixture, a timeless, crowd-pleasing bite for holiday and casual gatherings alike.

⏱️ 40 minuteSnacks & Appetizers ★ 4.8
Snacks & Appetizers
🍜 Russia

Silky, dill-forward no-smoke cured salmon, a Scandinavian classic with bright salty-sweet flavor, ideal for holiday starter platters and open-faced rye sandwiches.

⏱️ 48 hours Snacks & Appetizers ★ 4.7
Snacks & Appetizers
🍜 Japan

Crisp golden bottoms, juicy savory pork and vegetable filling, and tangy dipping sauce make these pan-fried gyoza a beloved shareable bite.

⏱️ 45 minuteSnacks & Appetizers ★ 4.8

cheese zombie:Frequently Asked Questions

1.What exactly is a Classic Cheese Zombie? ▾
It’s a beloved retro Pacific Northwest school lunch staple, not a spooky Halloween-themed treat! It features a pillowy, soft homemade white bread envelope sealed around slices of melty American cheese, baked until golden for a satisfying, gooey, handheld bite that feels like pure nostalgia for PNW natives.
2.Why is this dish called a Cheese Zombie? ▾
The name’s origin is a little fuzzy, but most PNW locals trace it back to 1950s and 60s school cafeteria menus. The most popular lore is that kids were so zombie-level focused on grabbing these cheesy, carb-heavy lunch treats that they’d tune out everything else while waiting in the serving line.
3.Do I have to use American cheese for an authentic Cheese Zombie? ▾
American cheese is non-negotiable for that signature ultra-gooey, smooth, pullable school lunch texture. Artisanal cheddar or Swiss will separate or turn greasy instead of that classic oozing melt. If you must swap, use a high-moisture, meltable grilled cheese blend to get close to the original texture.
4.I accidentally warmed my milk to over 110°F—will that ruin the recipe? ▾
Milk hotter than 120°F can kill instant dry yeast, which will stop your bread from rising to that signature fluffy texture. If you overheat it, let it cool to the 105–110°F range before mixing—this is the sweet spot where yeast activates quickly, and it should feel lukewarm, not hot, when tested on your wrist.
5.Can I substitute active dry yeast for the instant dry yeast the recipe calls for? ▾
Absolutely! For every teaspoon of instant yeast the recipe requires, use 1 ¼ teaspoons of active dry yeast. You’ll just need to proof it first: stir it into the warmed milk with a pinch of sugar for 5–7 minutes until foamy on top, then mix into your dry ingredients as normal for the same soft rise.
6.How do I keep melted cheese from leaking out of the zombies while they bake? ▾
The key to no leaky cheese is to seal your dough edges really tightly after adding the cheese filling. Crimp the pinched edges firmly with your fingers, then set the sealed seam side down on your baking sheet. Avoid overstuffing, as extra cheese will push through weak spots as it melts and expands in the oven.
7.Can I make these ahead of time for a game night gathering? ▾
Totally—they’re ideal for make-ahead game night snacks! You can assemble fully sealed, unbaked zombies the night before, cover them tightly in the fridge, then let them come to room temp for a 20-minute final rise before baking. They taste best served warm, when the cheese is still perfectly gooey.
8.How long do leftover baked Cheese Zombies stay fresh? ▾
Stored in an airtight container in the fridge, leftover zombies will stay fresh for 3–4 days. To reheat, wrap them in a paper towel and microwave for 20–30 seconds, or pop them in a 350°F oven for 5 minutes to crisp the bread back up and re-melt the cheese to its original gooey texture.
9.Can I freeze Cheese Zombies for quick future meals or snacks? ▾
Yes, they freeze beautifully either baked or unbaked! For unbaked portions, freeze sealed dough on a sheet pan then transfer to a freezer bag for up to 3 months, thawing in the fridge overnight before rising and baking. For baked, cool completely, wrap tightly, and freeze for up to 2 months.
10.My finished bread came out dense instead of soft and pillowy—what went wrong? ▾
Dense bread almost always traces back to one of three issues: your yeast was dead and failed to rise, you added too much flour making the dough too stiff, or you cut the rise time short before baking. Make sure your dough doubles in size during the first rise, and feels soft, not tough, when shaping.
11.Do I need a stand mixer to make the bread dough for this recipe? ▾
No stand mixer is required at all! You can mix the dough with a wooden spoon in a large bowl, then turn it out onto a lightly floured counter to knead by hand for 8–10 minutes until smooth and elastic. It’s a very forgiving, soft dough, so even beginner bakers can pull it off without fancy gear.
12.Can I add extra fillings like ham or jalapeños to customize my zombies? ▾
You can absolutely add mix-ins for a fun twist, just don’t overload the dough or you’ll break the seal and cause messy leaks. Thin slices of deli ham, pickled jalapeños, crispy bacon, or a thin spread of mustard all pair beautifully with melty American, as long as you keep portions small.
13.What size should I portion each individual Cheese Zombie to be? ▾
The classic school lunch version is about the size of a small paperback book, roughly 4x6 inches, made with a 4-ounce ball of dough per serving. That size bakes evenly, hits the perfect bread-to-cheese ratio, and is easy to hold while watching games or hanging out at parties without making a mess.
14.Why is there sugar in the bread dough if this is a savory, cheesy dish? ▾
The small amount of granulated sugar isn’t there to make the bread taste sweet—it feeds the yeast to help it activate and rise properly, and encourages that soft, golden-brown crust on the outside as it bakes. The finished bread will have a mild, neutral white bread flavor with no noticeable sweetness.
15.Can I use store-bought refrigerated bread dough as a time-saving shortcut? ▾
If you’re short on time, high-quality store-bought refrigerated white bread dough works as a great shortcut! Let it come to room temp, divide into even portions, roll out, seal around American cheese slices, and bake per the recipe directions. It won’t be quite as pillowy as homemade, but it still hits that nostalgic cheesy note.
16.How do I tell when my Cheese Zombies are fully done baking? ▾
Bake them at 375°F for 18–22 minutes, until the top of the bread is a deep, even golden brown and sounds hollow when you tap the bottom. You don’t need to check the internal cheese temperature—if the bread is fully baked, the cheese inside will be perfectly melted and ready for that classic stretchy pull.
17.Do I need to line or grease my baking sheet when making these? ▾
Yes, lightly grease your baking sheet with nonstick spray or a thin layer of butter, or line it with parchment paper for easy cleanup. Any small bits of cheese that leak out during baking will burn and stick to an unlined sheet, so this simple step saves you from scrubbing burnt cheese off your pan later.
18.Are Cheese Zombies meant to be served with dipping sauce? ▾
Classic school lunch versions were served completely plain, but they pair great with simple dips if you want to dress them up for game night. Warm marinara, ranch dressing, or even tomato soup for dipping all work beautifully—just stick to thicker dips so you don’t make the soft bread soggy as you eat.
19.My dough isn’t rising after the first rest period—can I fix it, or do I start over? ▾
If your dough hasn’t doubled in size after an hour in a warm spot, first check if your space is too cold: move the dough to a warmer spot (like a turned-off oven with the light on) and give it 30 more minutes. If there’s still no rise, your yeast is likely dead, and you’ll need to start over with fresh yeast for fluffy results.

Comments (18)

2 days ago

OMG I haven’t had a cheese zombie since I was in elementary school in the 90s! This recipe tasted exactly like the lunch lady ones I used to beg my mom for extra money to buy. My kids devoured 2 each after soccer practice last night, even my picky 7 year old who turns his nose up at every grilled cheese I make on the stove. SO good, already added the ingredients to my weekly meal prep rotation.

yesterday

Wait, did you add any extra fillings? I’m thinking of tossing in a little ham for my crew this weekend!

2 hours ago

So stoked these brought back great lunchroom memories for you! Adding diced ham or even a sprinkle of crispy bacon works perfectly as a fun add-in without messing up that classic cheesy texture.

3 days ago

Took these to my neighborhood block party potluck last weekend and people were asking me for the recipe before I even set the tray down! The only tweak I made was brushing the top with a little garlic butter before baking, chef’s kiss. 10/10, will be making these for every game day get together from now on.

2 days ago

That garlic butter brush is such a smart upgrade! So glad these were a hit at your block party—nothing beats a shareable cheesy snack for a crowd.

1 week ago

Total time was a little longer than I expected for an ‘easy’ recipe but honestly? Worth every single minute. The bread gets so soft and fluffy on the inside and the cheese is perfectly melted all the way through, no sad cold cheese pockets here. Tasted just like the ones I got at my high school concession stand before football games.

5 days ago

Wait, is this basically just a giant sheet pan grilled cheese? Because if so, this is the greatest college dorm meal hack I’ve ever found. I don’t even have a fancy baking sheet, I used my disposable aluminum pan from the dollar store and it still turned out fire.

3 days ago

Bro I did the exact same thing last month! Pro tip: add a handful of pickled jalapeños between the cheese layers if you like a little kick, game changer.

yesterday

I was so excited to make this until I realized the recipe uses regular white bread dough. Has anyone tried swapping this for gluten free dough? I’d love to make these for my niece who has celiac for our next family dinner.

2 hours ago

I used my go-to store bought gluten free pizza dough last week and it worked amazing! Just let it rise a little longer than the recipe says so it gets nice and fluffy.

30 minutes ago

Great question! Gluten free dough works wonderfully here, just like the user above mentioned—just add 10-15 minutes extra rise time to get that same soft, pillowy texture, and make sure your cheese doesn’t have any hidden gluten additives if you’re serving it for someone with celiac.

2 weeks ago

Made these for our lazy Sunday dinner last night with a side of tomato soup for dipping and it was the coziest meal we’ve had all month. My husband said it’s better than any fancy grilled cheese we’ve gotten at the downtown restaurants. Easy, cheap, feeds a crowd, what more could you want?

30 minutes ago

Super quick question! Do I have to let the dough rise twice like the recipe says? I’m running short on time before my kid’s birthday party and I’m wondering if I can cut that corner a little.

5 minutes ago

If you’re crunched for time, you can skip the second rise! The bread will be a little denser than the classic version, but it will still taste absolutely delicious with all that melted cheese. Hope the birthday party is a blast!

1 week ago

Game changer for weekly meal prep! I cut these into individual squares, wrapped them up, and stuck them in the fridge for quick grab-and-go lunches for work. They reheat perfectly in the air fryer in 3 minutes, no sogginess at all. Already made a second batch to keep in the freezer for busy weeks.

5 days ago

How long do these stay good in the freezer? I need easy meals for when my wife is out of town for work next month.

3 days ago

Love that you’re using these for meal prep! They’ll stay good in the freezer for up to 3 months if wrapped tightly in plastic wrap and stored in a freezer bag—just reheat straight from frozen in the air fryer at 375 for 7 minutes and they’re good to go.

2 hours ago

I used a mix of sharp cheddar and pepper jack for the filling and holy cow, that flavor combo is unreal. I thought the original was good but the little kick from the pepper jack takes it to a whole new level. 100% recommend playing around with the cheese blends if you have extra in the fridge.

30 minutes ago

Oh that sounds incredible! I’m gonna do that plus a sprinkle of red pepper flakes on top when I make these for my movie night this weekend.

5 days ago

I worked in an elementary school cafeteria for 22 years and I can confirm this recipe is dead on for the classic cheese zombies we used to serve. The secret is that little layer of butter on the top crust before baking, don’t skip that step! All the kids used to go crazy for these on Wednesdays when we’d serve them with tomato soup.

yesterday

Help! I made these last night and all my cheese oozed out the sides while baking and burned on the bottom of my pan. What did I do wrong? I followed the recipe exactly as written, I’m so sad because the bits I could salvage tasted amazing.

2 hours ago

Oh no, sorry to hear that! The most common reason cheese oozes out is if the dough seams aren’t pinched tightly enough when you seal the top layer over the cheese. Next time, crimp the edges really well like you would a pie crust, and you can even put a baking sheet under your pan to catch any stray drips just in case!

2 days ago

Brought these to my office potluck today and they were gone in 10 minutes flat. People were fighting over the last square! I didn’t even get a second piece, lmao. Next time I’m making a double batch for sure.

yesterday

Wait were you the one who brought the cheese squares to the third floor potluck? I had one and I’ve been searching for the recipe all week! No wonder they were gone so fast.

2 hours ago

That was me!!! So glad you liked them, I’m making another batch next week for the team happy hour if you wanna stop by!

1 week ago

These are the perfect post-hike snack! I wrapped a few squares up in foil and stuffed them in my pack for our hike last weekend, and they were still warm and cheesy when we stopped at the summit. Way better than granola bars, if you ask me.

5 days ago

That is such a good idea! I’m always looking for non-sugary snacks to bring on backpacking trips, these are gonna be a new staple.

3 days ago

This recipe is so affordable to make! I bought all the ingredients for under $8 and it fed my family of 4 for two nights. Way cheaper than ordering takeout, and way more satisfying too. The easy difficulty rating is no joke, even if you barely know how to turn on your oven you can pull this off.

30 minutes ago

Has anyone tried making these with vegan cheese and plant based butter? My partner is dairy free and I’d love to surprise him with this for our anniversary dinner, since he’s been talking about how much he misses cheese zombies from his childhood.

5 minutes ago

I made these with vegan cheddar slices and melted vegan butter on top last month and it was so close to the original! Just make sure you use a vegan cheese that melts well, the cheap shreds don’t get as gooey.

just now

How sweet of you to make this for your partner! As Pat mentioned, a good melting vegan cheese works perfectly here—we’ve tested it with a couple popular brands and the texture is spot on, just give the dough an extra 5 minutes in the oven if you’re using plant based cheese to make sure it’s fully melted.

2 weeks ago

Made these for the Sunday football watch party and my buddies said they’re better than the mozzarella sticks we usually order from the pizza place down the street. I served them with marinara and ranch for dipping and it was chef’s kiss. Only complaint is I wish I made more, we ran out before halftime.

1 week ago

Nothing beats watch party snacks that disappear before halftime—next time go for the double batch, trust us! The ranch dip idea is genius, we’re gonna have to try that on our next batch.

yesterday

My 10 year old is the pickiest eater on the planet and he ate three whole squares of these for dinner last night. I didn’t even have to bargain with him or bribe him with dessert, that’s a miracle in my book. This recipe is going into the permanent dinner rotation, no questions asked.

2 hours ago

Oh my gosh that’s the best review I’ve ever seen! My toddler is going through a ‘only eat chicken nuggets’ phase so I’m definitely making these tomorrow to see if he’ll go for them.

30 minutes ago

Fingers crossed it works for you! I cut mine into fun dinosaur shapes with a cookie cutter after baking and I think that helped sell it, tbh.

just now

I made these at 1am after a night out with my friends and they hit DIFFERENT. Greasy, cheesy, warm, exactly what I needed to soak up the late night snacks. 10/10, would make again during my next late night cooking spree.



