
Doritos Walking Tacos (in Bag)

title 1
Doritos Walking Tacos (in Bag)
⏱️ cook time 15 minutes
🍽️ servings 4
⚡ Difficulty easy

intro

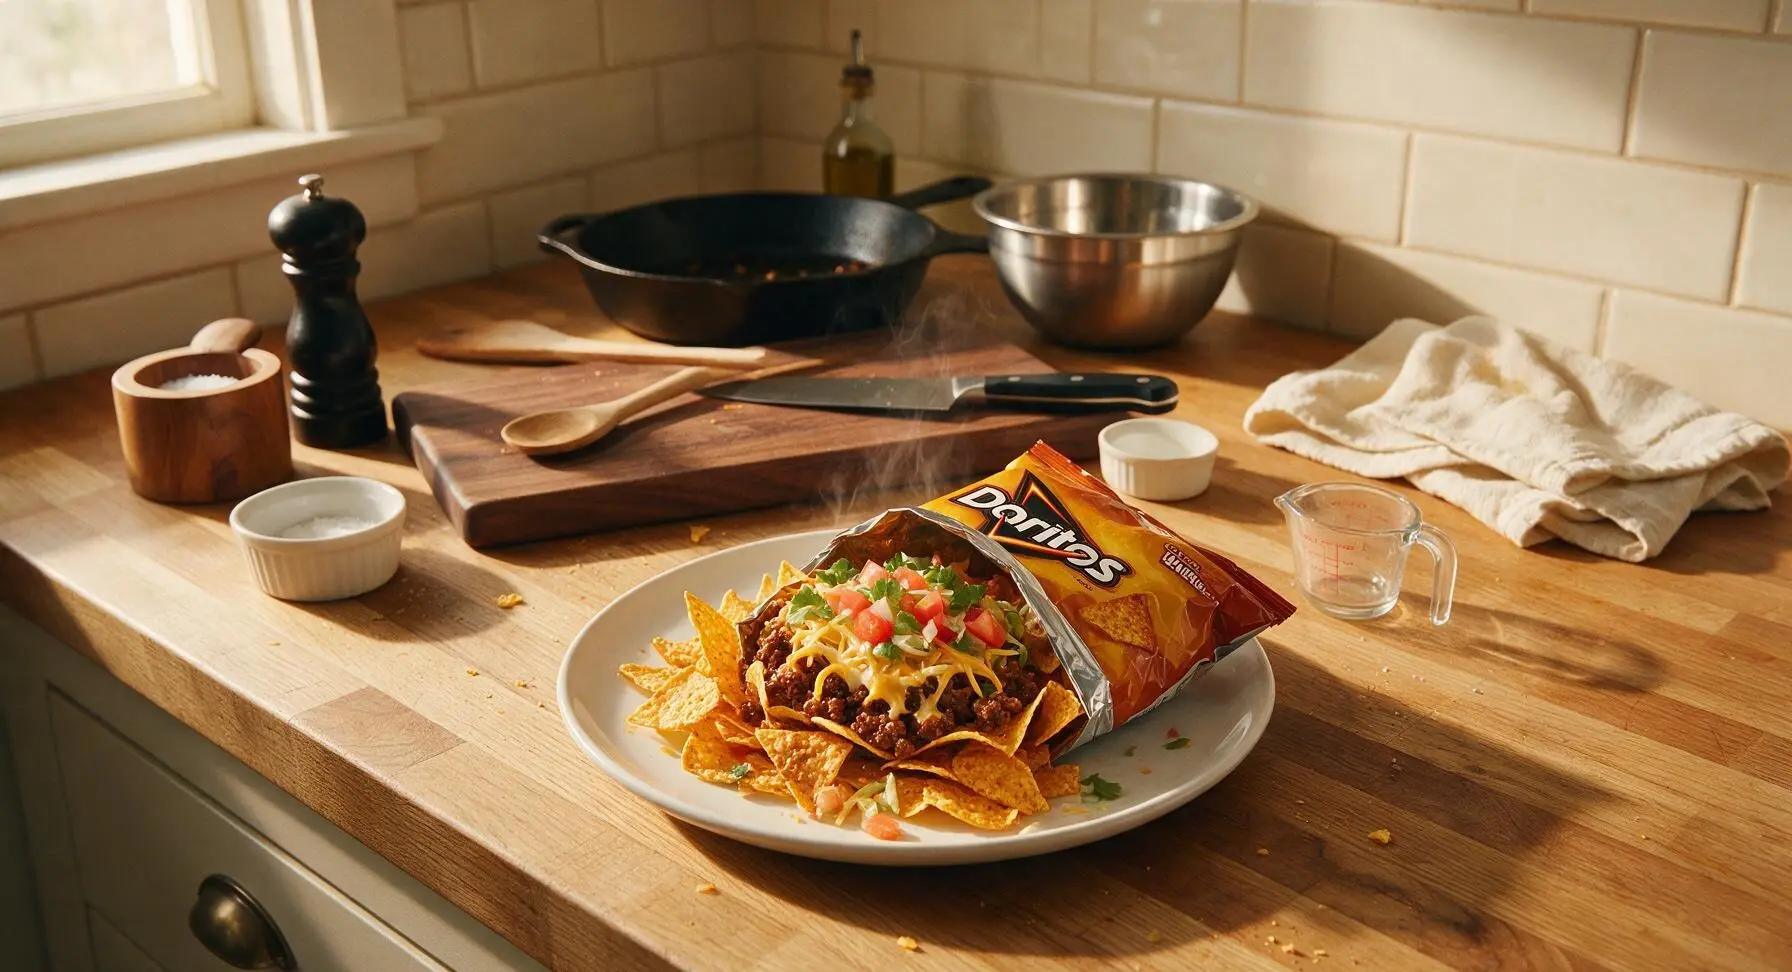
Crunchy, portable Nacho Cheese corn chip bags loaded with seasoned taco beef, melted cheese, and fresh toppings—no plates required, perfect for on-the-go tailgate eating.

Ingredients
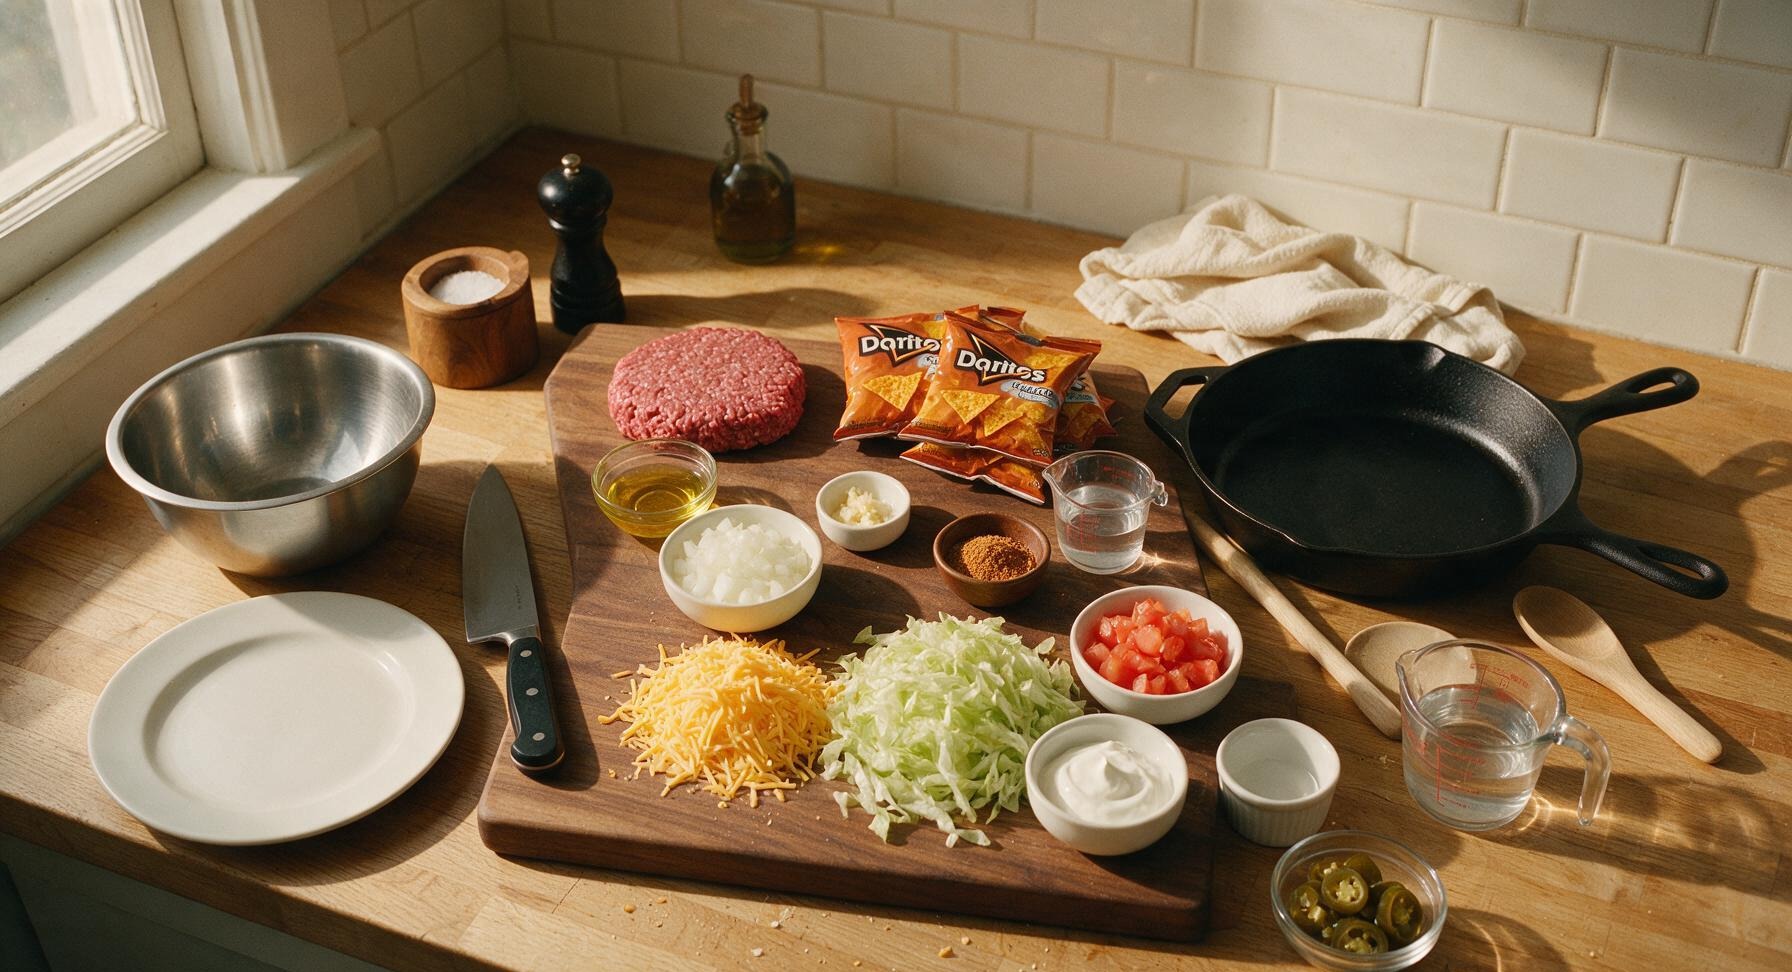
80/20 lean ground beef 450g (1lb)
Nacho Cheese flavored corn chips (snack-sized bags) 4 x 28g (1oz) bags
Canola oil 1 tbsp
Yellow onion, diced 1/2 cup (75g)
Garlic, minced 2 cloves
Taco seasoning blend 1 tbsp
Water 1/3 cup (80ml)
Shredded sharp cheddar cheese 1 cup (110g)
Iceberg lettuce, shredded 1 cup (70g)
Roma tomato, seeded and diced 1/2 cup (90g)
Sour cream 1/4 cup (60g)
Sliced pickled jalapeños 1/4 cup (40g)

Steps

1

Sauté Diced Onion

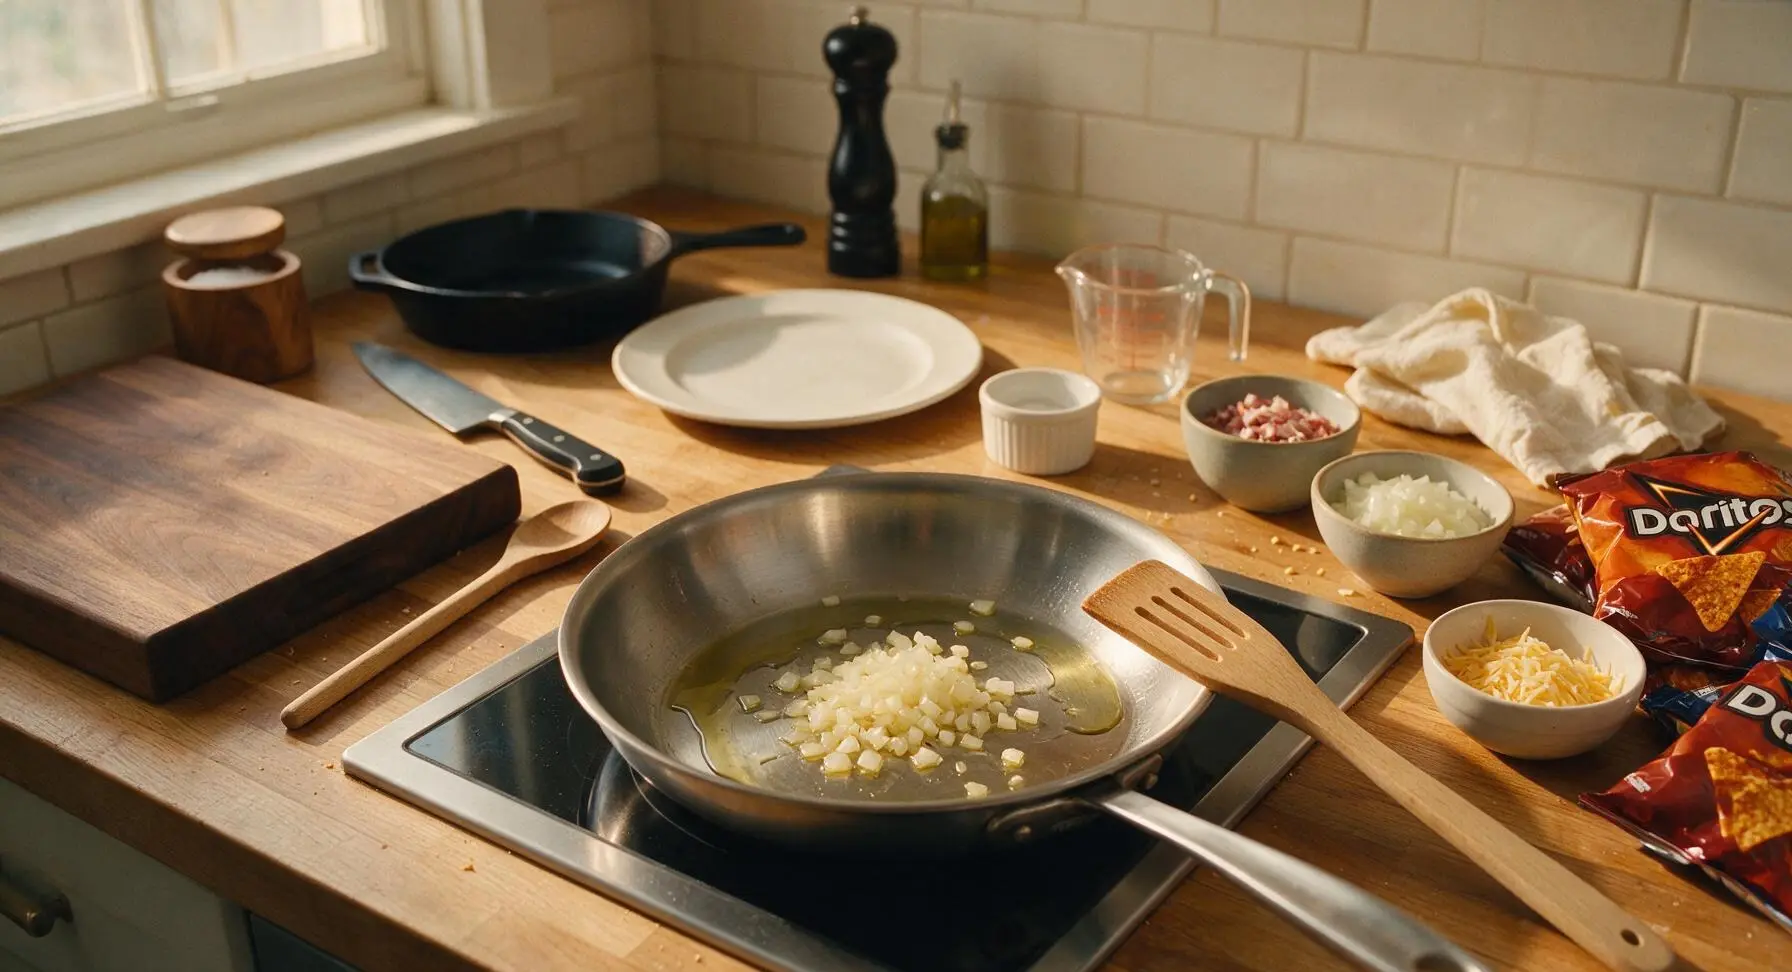
Turn the flush-mounted induction burner to medium heat, set the 10-inch brushed stainless steel skillet directly on the burner, and add 1 tablespoon of canola oil. Wait 60 seconds until the oil shimmers and moves easily across the pan surface, then add the pre-measured 1/2 cup diced yellow onion. Cook for 3 minutes, stirring occasionally with the beech wood slotted turner, until onion is soft and translucent with no dark brown edges.
Step 1
step1:Sauté Diced Onion
2

Add Garlic and Spices

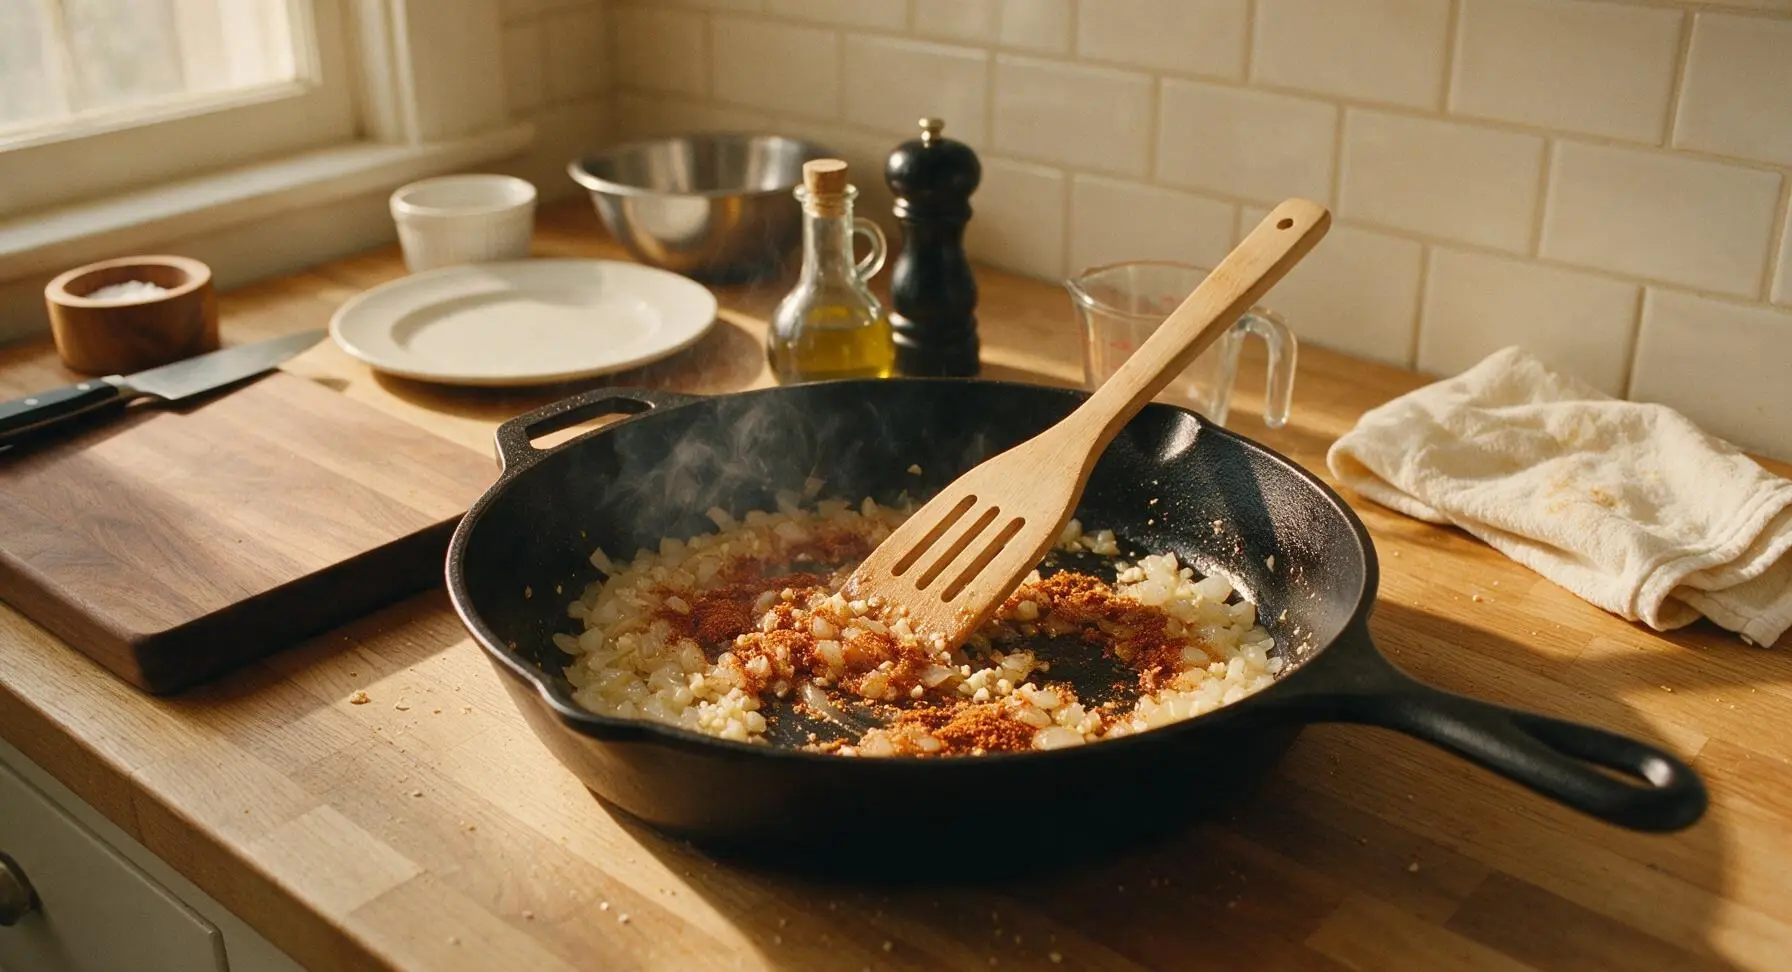
Add the 2 minced garlic cloves and 1 tablespoon taco seasoning blend to the skillet with the softened onion. Stir constantly with the slotted turner for 30 seconds, until the spices become fragrant and the garlic is soft—do not let the garlic burn, as it will turn bitter and ruin the filling flavor.
Step 2
step2:Add Garlic and Spices
3

Brown Ground Beef

Add the full 450g (1lb) of 80/20 ground beef to the skillet, breaking it apart into ½-inch small crumbles with the edge of the slotted turner as it cooks. Cook for 7-8 minutes over medium heat, stirring occasionally, until the beef is fully browned with no visible pink remaining, and small bubbles of rendered fat appear lightly around the crumbles.
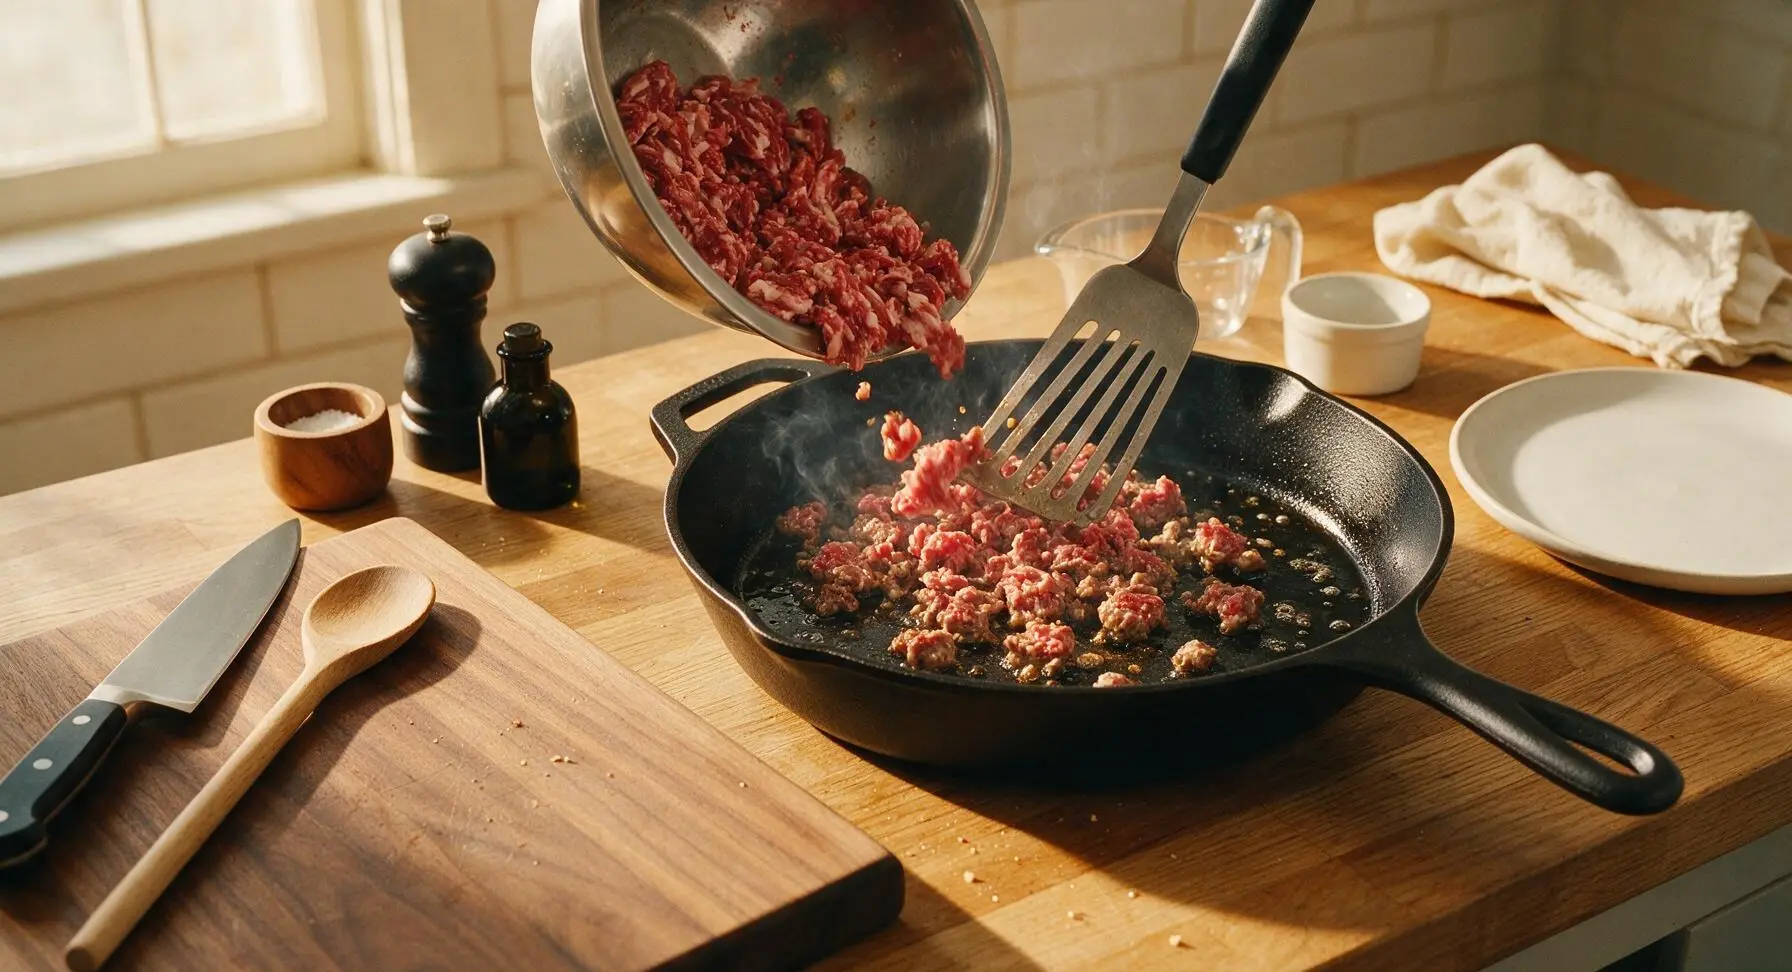
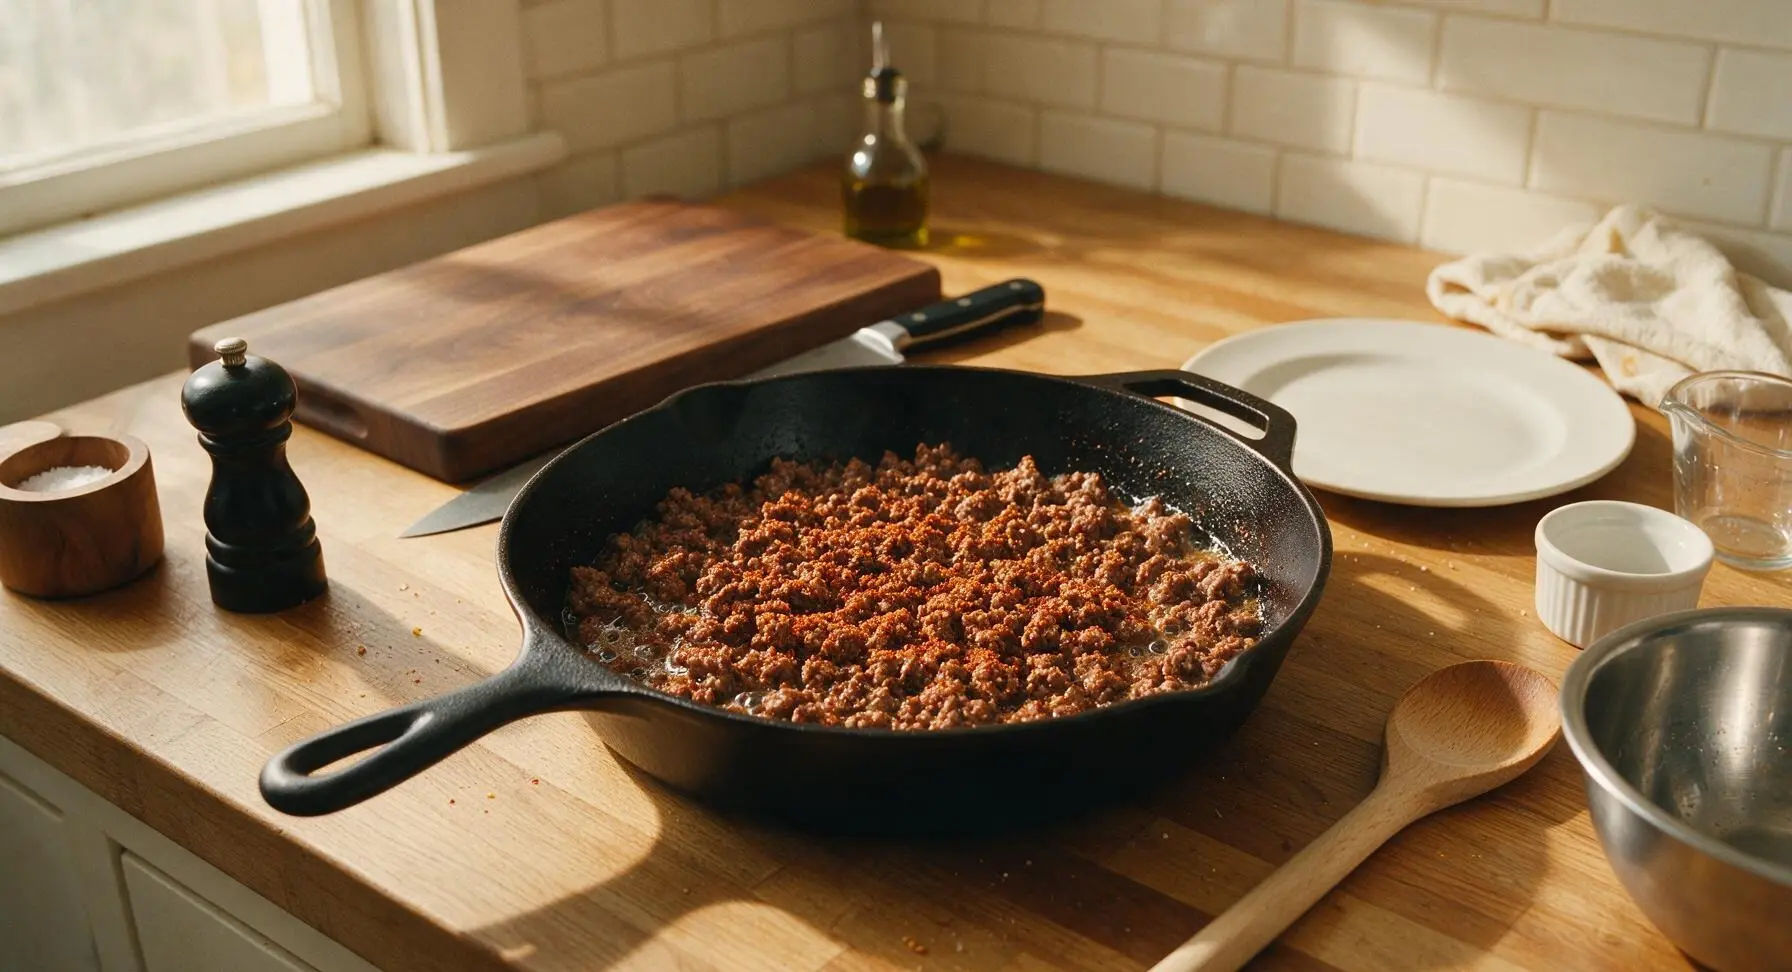
Step 3
step3:Brown Ground Beef
Step 3
step3:Brown Ground Beef
4

Simmer Taco Filling

Pour the 1/3 cup (80ml) of water into the skillet with the browned beef, stir to combine. Bring the mixture to a gentle simmer, then reduce heat to medium-low and cook for 4 minutes, stirring occasionally, until the liquid reduces to a thin, glossy coating that clings to the beef crumbles, with no pooling water left in the pan. Turn off the induction burner, then use the slotted turner to carefully move the hot skillet from the burner onto the adjacent cream ceramic trivet to cool slightly for 2 minutes.
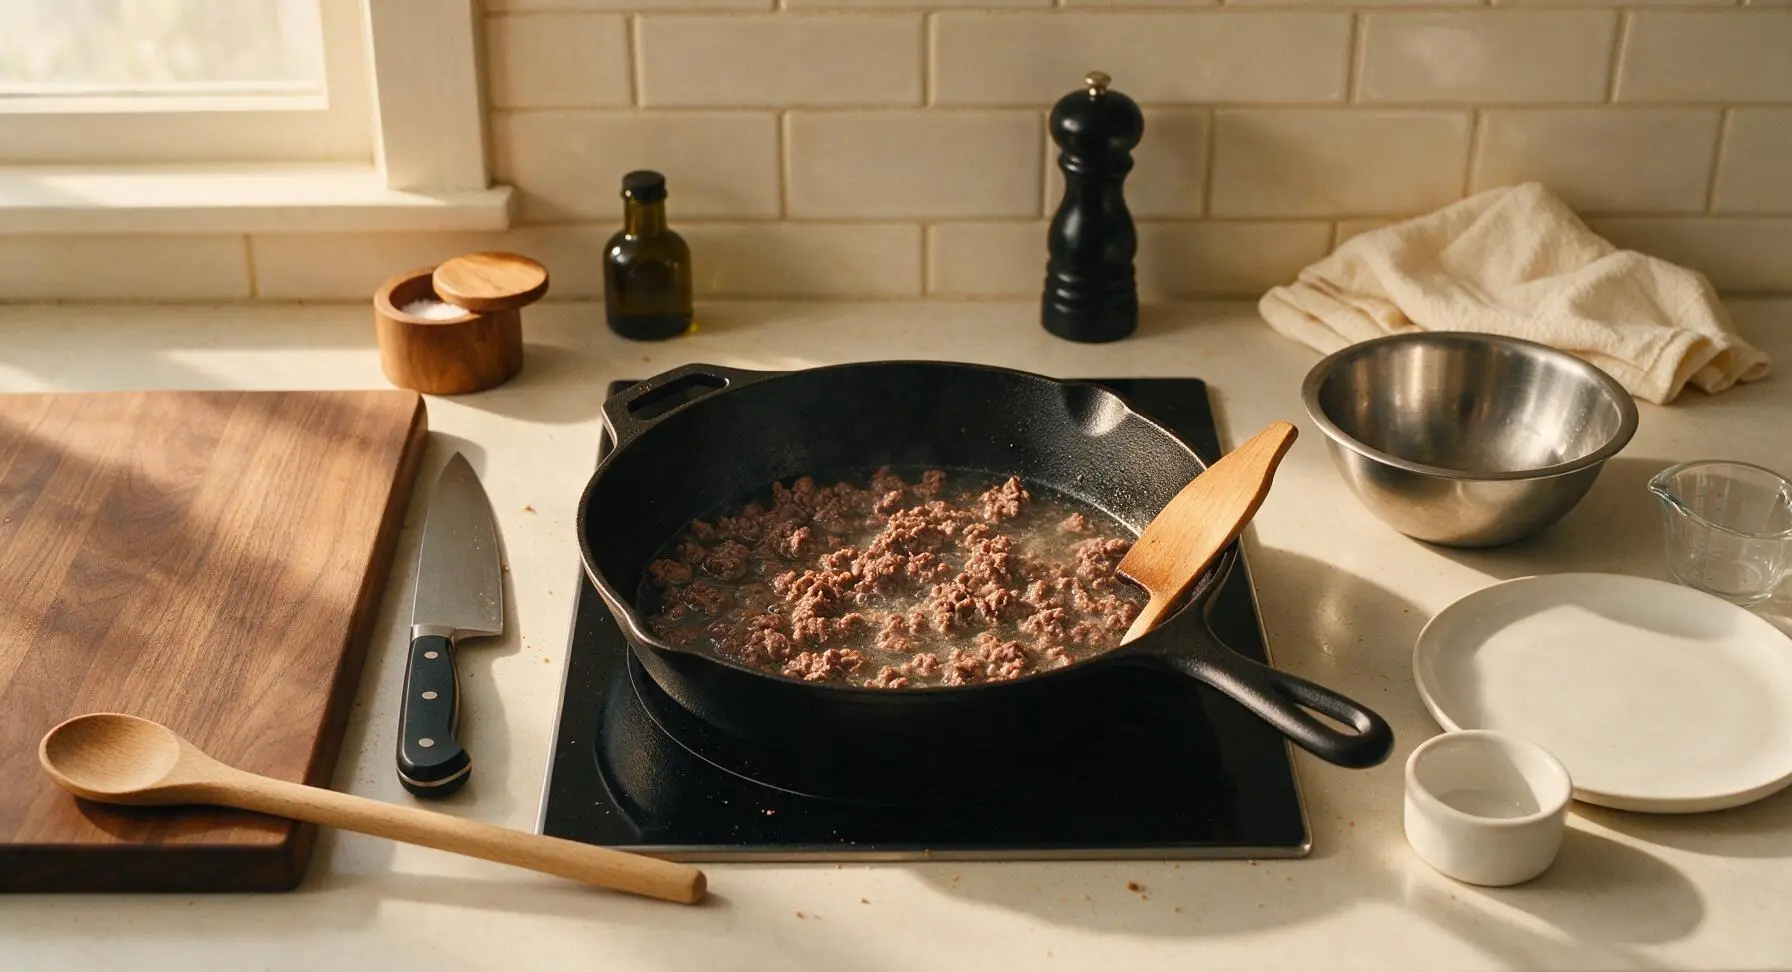
Step 4
step4:Simmer Taco Filling
5

Prep Chip Bags

Take each of the 4 x 28g (1oz) Nacho Cheese corn chip bags, and gently crush the chips inside into rough 1-inch pieces with the palms of your hands (do not over-crush into fine crumbs, as this leads to mushy tacos). Use the stainless steel kitchen shears to cut a 4-inch wide opening straight across the top seal of each bag, then fold the top 1 inch of the bag outward to create a wide, stable cuff that keeps the bag upright during filling. Arrange the open bags in a loose row in the center of the counter, in front of the trivet.
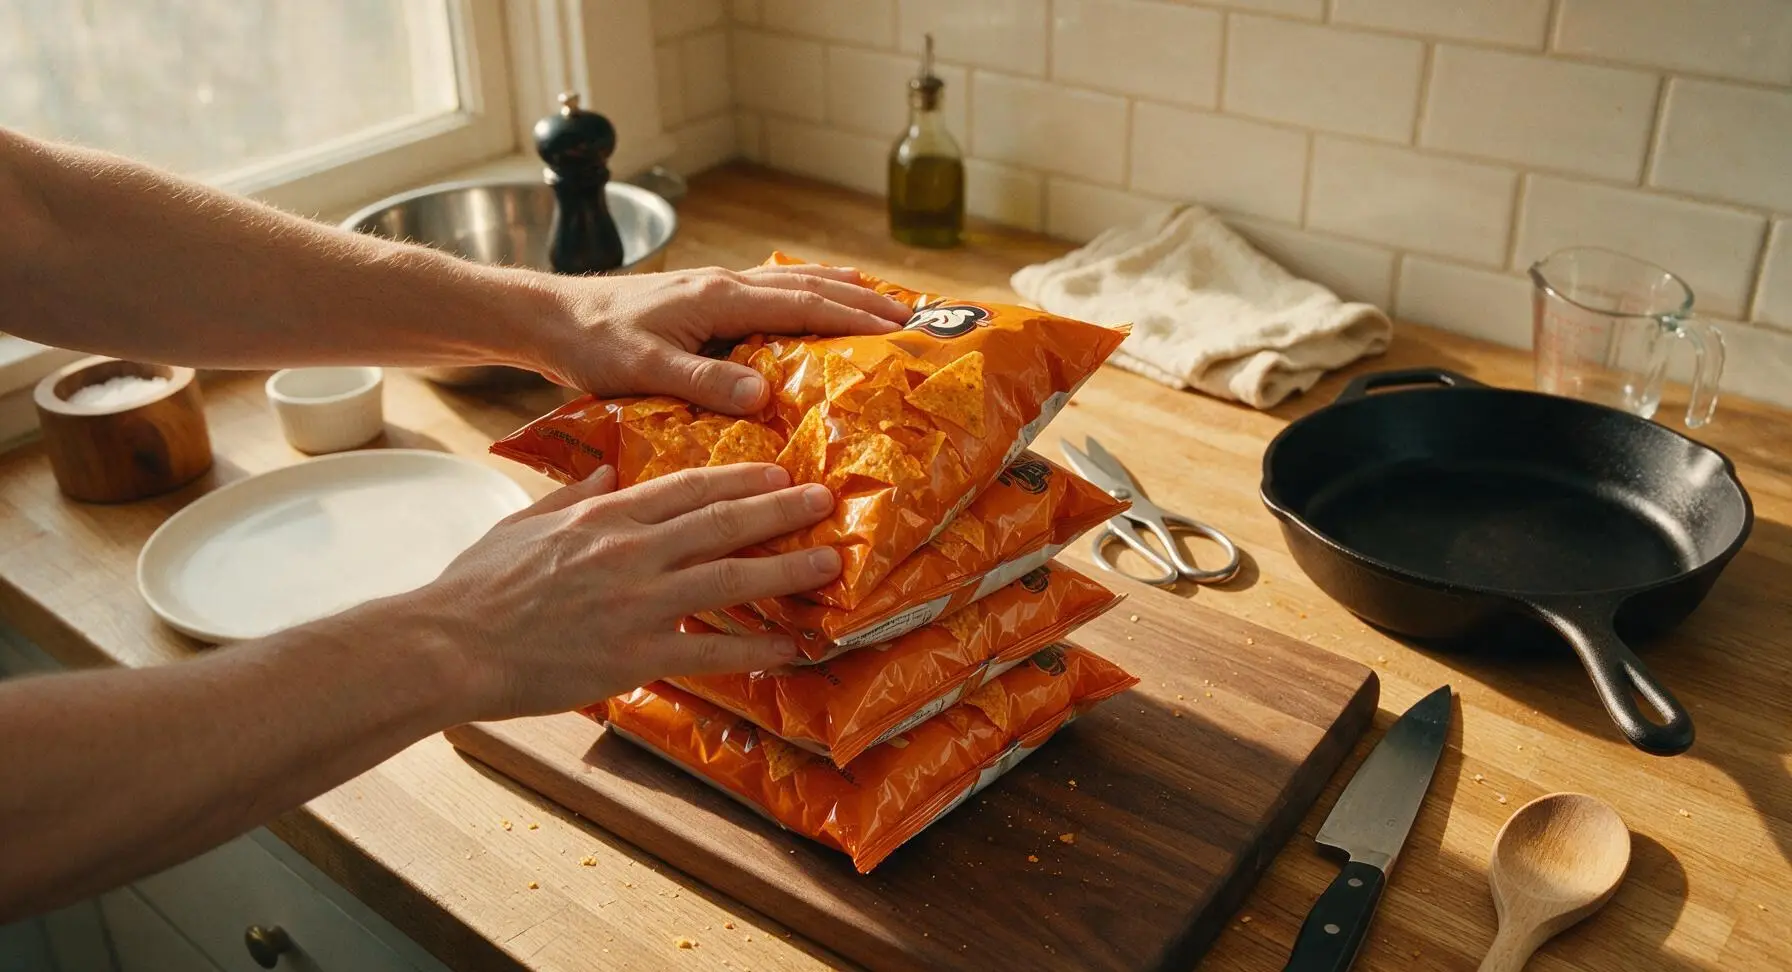
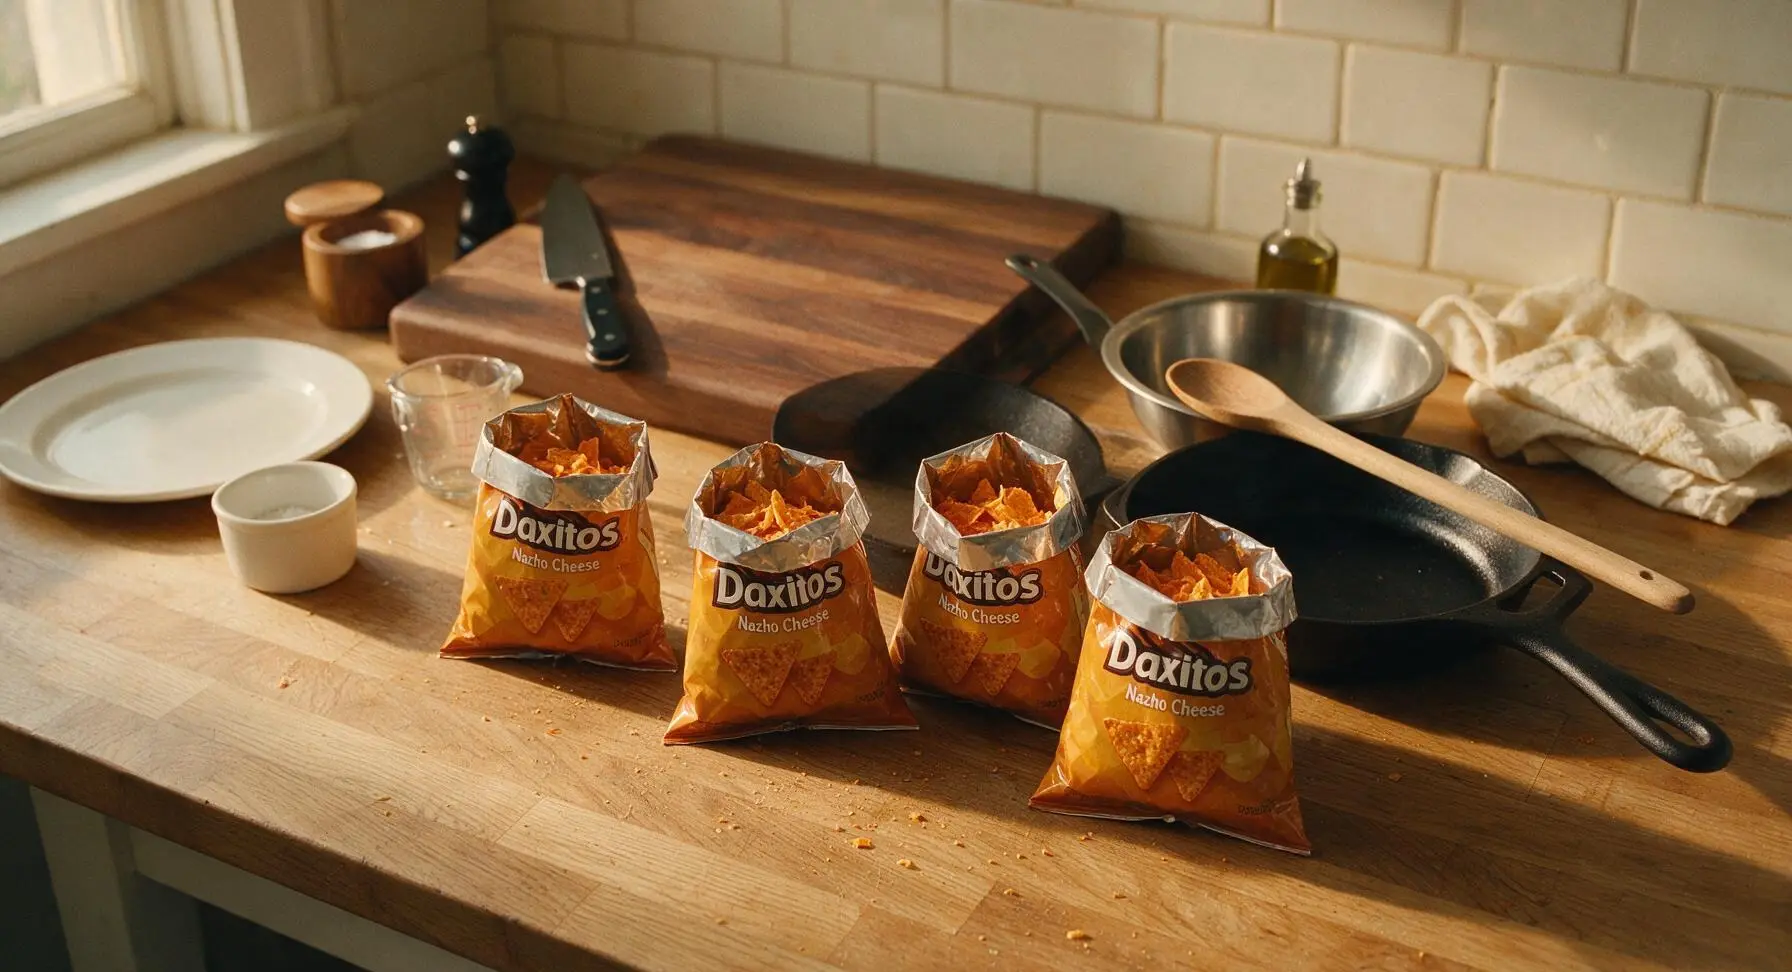
Step 5
step5:Prep Chip Bags
Step 5
step5:Prep Chip Bags
6

Layer Beef and Cheese

Spoon an equal ½-cup portion of the warm seasoned taco beef into each open chip bag, pouring directly on top of the crushed chips. Top the warm beef immediately with ¼ cup of shredded sharp cheddar per bag, so the residual heat from the beef melts the cheese slightly into the chip layer for even coverage.
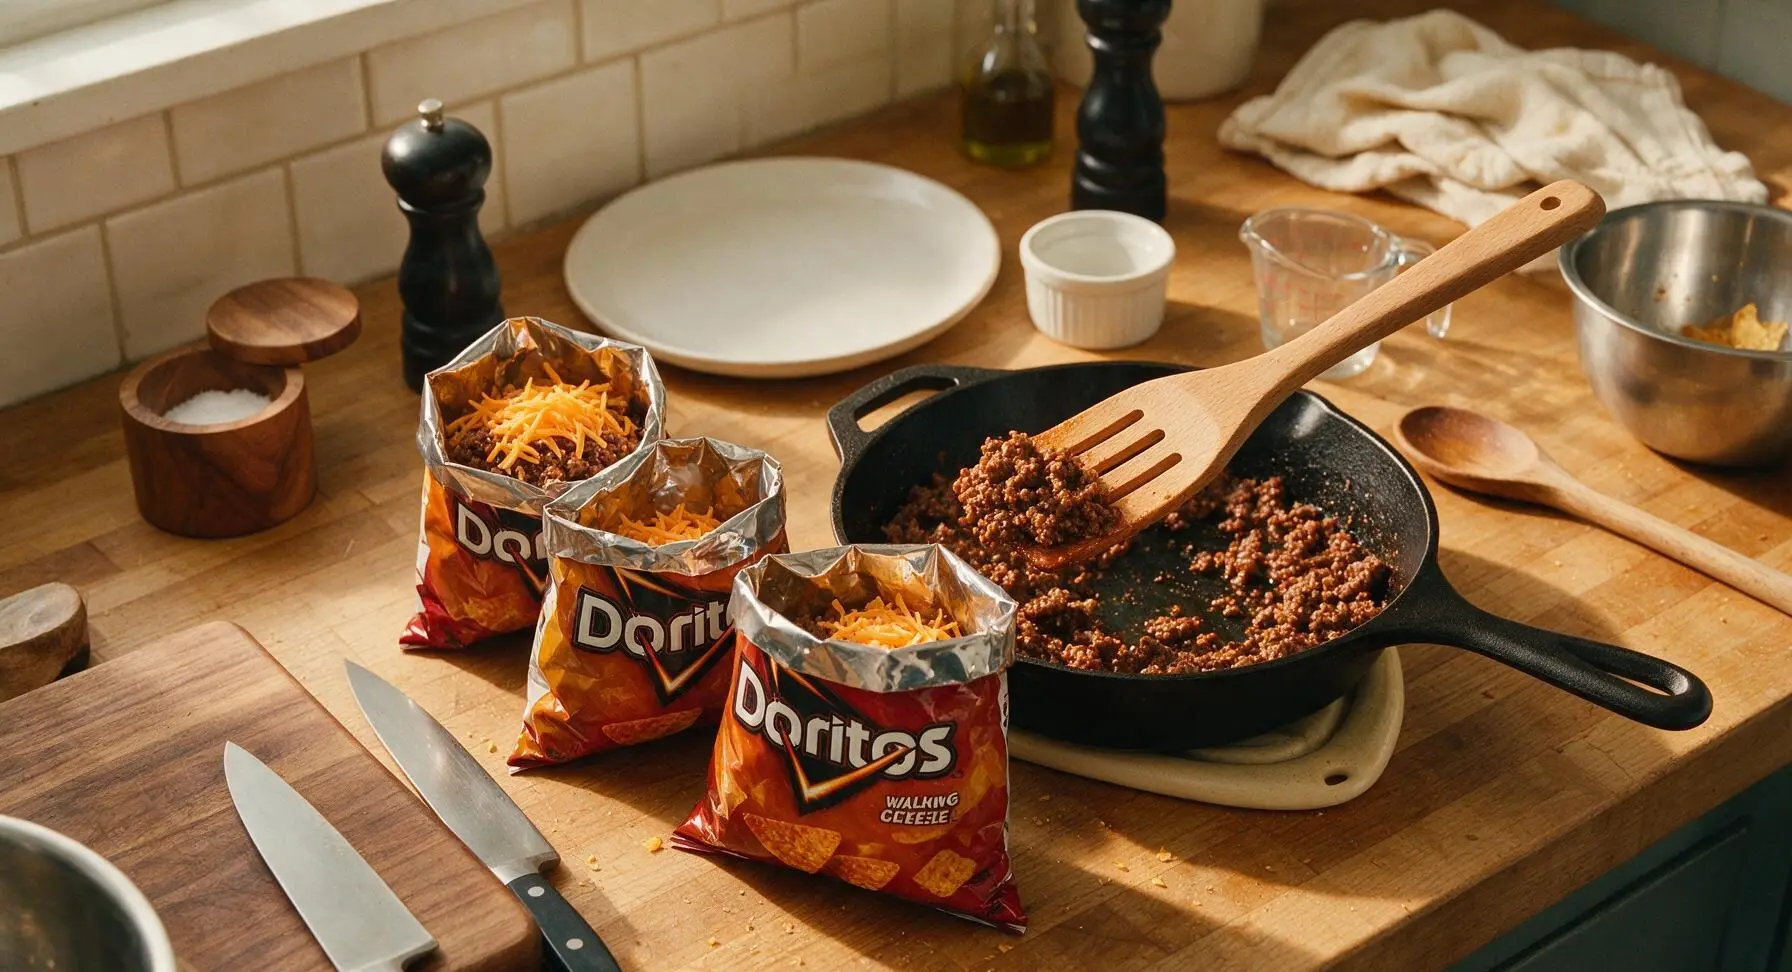
Step 6
step6:Layer Beef and Cheese
7

Add Fresh Toppings

Divide the remaining cold toppings evenly between the four bags, layering in order: ¼ cup shredded iceberg lettuce, 2 tablespoons seeded diced Roma tomato, 1 tablespoon sour cream, and 1 tablespoon sliced pickled jalapeños per bag. Do not mix the layers at this stage, to keep chip crunch intact for as long as possible.
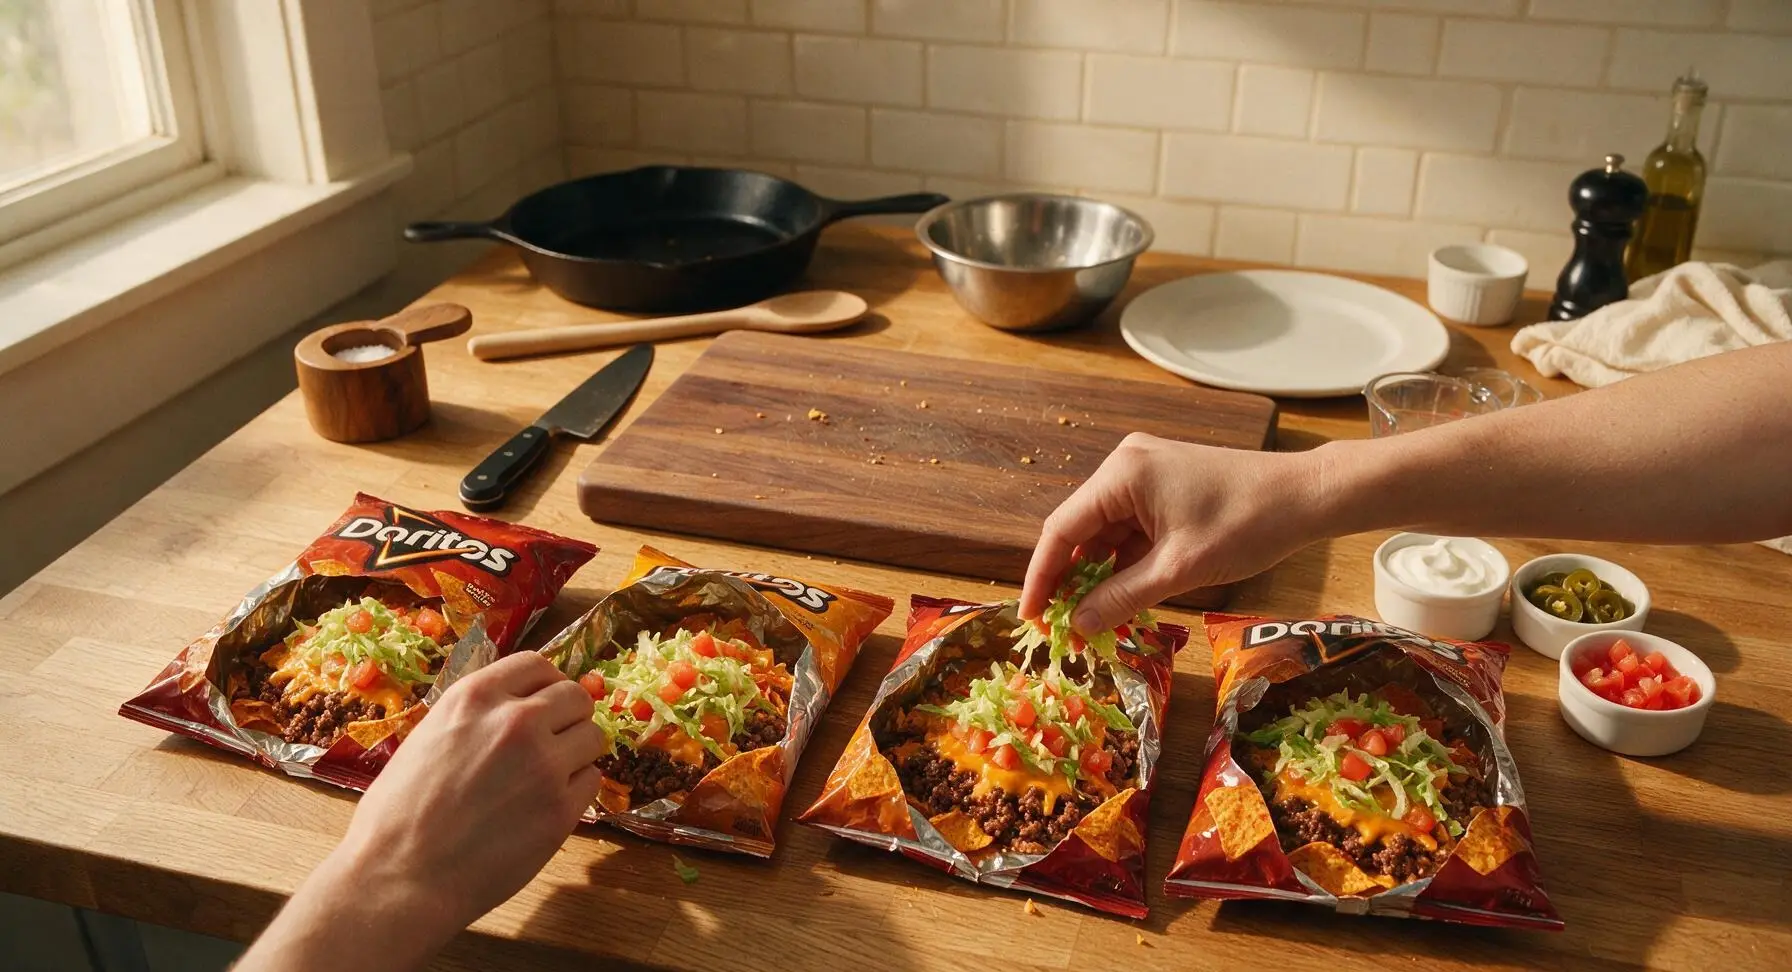
Step 7
step7:Add Fresh Toppings
8

Add Forks and Serve

Tuck one clear plastic fork 2 inches deep into each filled bag, angled so the handle sticks 5cm out of the top for easy holding. Serve immediately while the beef is warm and chips are crisp; guests can give their bag a gentle stir with the fork to combine layers right before eating, if preferred.
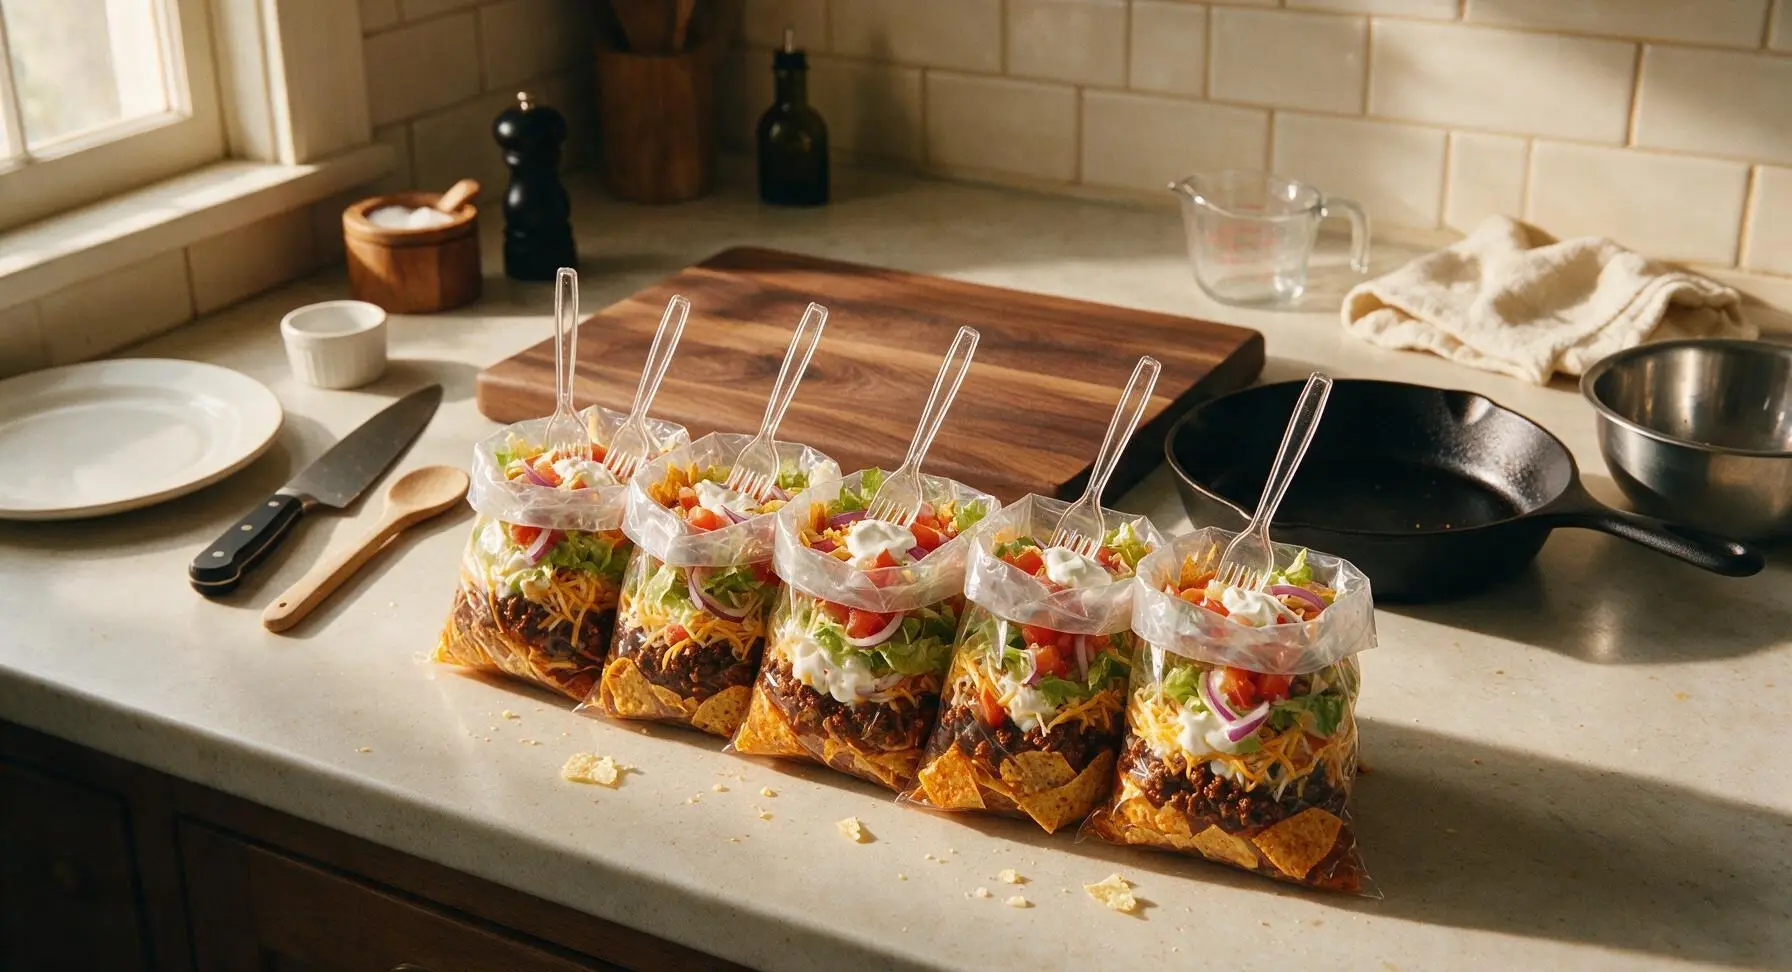
Step 8
step8:Add Forks and Serve

Tips

1.Crush chips gently while the bag is still sealed: Applying light pressure with your palms to create 1-inch chip pieces avoids messy crumb spills, and prevents over-crushing that leads to mushy texture once mixed with wet toppings.
2.Add shredded cheese directly on top of hot beef: The residual 160°F heat from the taco filling melts cheddar into a creamy, evenly distributed layer, rather than letting it clump on top of cold lettuce or sour cream.
3.Hold off on stirring until you are ready to eat: Mixing layers too early coats chips in sour cream and tomato juice, turning chips soggy in as little as 5 minutes; keeping layers separate maintains crunch for the full meal.


✨ You May Also Like

Snacks & Appetizers
🍜 Mexico

Crispy thick-cut tortilla chips piled high with seasoned beef, melted cheese, and bright fresh toppings for a shareable, crowd-favorite bite.

⏱️ 25 minuteSnacks & Appetizers ★ 4.8
Snacks & Appetizers
🍜 United States

Crisp, sweet-tangy spiced pickled watermelon rind is a zero-waste summer staple, perfect with grilled meats, charcuterie, or eaten straight from the jar as a bright snack.

⏱️ 30 minuteSnacks & Appetizers ★ 4.6
Snacks & Appetizers
🍜 Germany

A tangy, jellied pork cold cut slow-simmered with aromatic spices, set into a firm sliceable loaf, served cold with mustard and crusty bread.

⏱️ 3 hours 4Snacks & Appetizers ★ 4.8
Snacks & Appetizers
🍜 United States

Creamy, tangy, perfectly seasoned hard-boiled egg halves filled with a rich, smooth yolk mixture, a timeless, crowd-pleasing bite for holiday and casual gatherings alike.

⏱️ 40 minuteSnacks & Appetizers ★ 4.8
Snacks & Appetizers
🍜 Russia

Silky, dill-forward no-smoke cured salmon, a Scandinavian classic with bright salty-sweet flavor, ideal for holiday starter platters and open-faced rye sandwiches.

⏱️ 48 hours Snacks & Appetizers ★ 4.7
Snacks & Appetizers
🍜 Japan

Crisp golden bottoms, juicy savory pork and vegetable filling, and tangy dipping sauce make these pan-fried gyoza a beloved shareable bite.

⏱️ 45 minuteSnacks & Appetizers ★ 4.8

Doritos Walking Tacos (in Bag):Frequently Asked Questions

1.Do I have to use Nacho Cheese Doritos, or can I swap for other chip flavors? ▾
You absolutely don’t have to stick to Nacho Cheese Doritos, though that’s the iconic, nostalgic pick! Cool Ranch, Spicy Nacho, or even Fiery Lime Doritos work beautifully—just stick to 1–1.5oz snack-sized bags to keep the chip-to-topping ratio balanced, and skip extra-thick tortilla chips that won’t soak up taco seasoning well.
2.Why do you recommend 80/20 ground beef instead of a leaner blend? ▾
80/20 ground beef has the perfect fat ratio to keep taco filling rich and moist without drying out as it simmers, which is extra important for portable serving with no extra sauce pooling at the bag bottom. Leaner blends like 90/10 turn crumbly and dry fast, even with added oil, and won’t stick to chips as nicely.
3.How do I prep the chip bag so the chips don’t get soggy right away? ▾
First, gently crush the chips before opening the bag to break them into bite-sized pieces—don’t pulverize them to dust. Right before serving, open the bag along the top long edge, fold the sides out slightly to make a wide opening, and add hot beef and toppings right as you’re ready to eat, never more than 10 minutes in advance.
4.Can I make the taco beef ahead of time for a tailgate or party? ▾
Absolutely! Cook the seasoned onion, garlic, and ground beef fully 2–3 days ahead, store it in an airtight container in the fridge, and reheat it in a slow cooker on low or portable camp stove right before serving. Hold it at 165°F for food safety, and never add it to chip bags early, as that causes quick sogginess.
5.What toppings work best without turning the chips soggy? ▾
Stick to drained, low-moisture toppings for maximum crunch: shredded cheddar or pepper jack (which melts perfectly against hot beef), drained diced tomato, sliced pickled jalapeños, shredded iceberg lettuce, a dollop of sour cream, and a sprinkle of cilantro. Skip watery fresh salsa with excess juice or runny guacamole that turns chips mushy fast.
6.Do I need plates or special utensils to eat these walking tacos? ▾
That’s the best part of this recipe—no plates required at all! Once you’ve loaded your toppings into the bag, eat straight out of the opening with a disposable fork, the easiest method for walking around a tailgate or block party. You can also give the sealed bag a gentle shake to distribute toppings evenly before digging in for zero extra cleanup.
7.Can I make a vegetarian version of these Doritos walking tacos? ▾
You totally can! Swap the 80/20 ground beef for plant-based ground crumbles seasoned with your usual taco spices, or well-drained, seasoned black beans patted dry to cut down on excess moisture. Follow all the same prep and assembly steps, and you’ll get the same crunchy, portable, savory bite without the meat.
8.How much canola oil do I actually need to cook the beef and aromatics? ▾
You only need 1 teaspoon of canola oil for a full 1-pound batch of 80/20 ground beef, since the beef will render its own rich fat as it cooks. Use that small amount of oil to sauté the diced onion and minced garlic for 2–3 minutes until soft before adding beef, so the aromatics don’t stick to the pan as they cook.
9.Will the shredded cheese melt properly if I just add it on top of the hot beef? ▾
Yes, as long as you add shredded cheese immediately after spooning the hot, simmered taco beef into the chip bag. The residual heat from the beef will melt the cheese into gooey, stretchy strands in 30–60 seconds, no extra heating required. For extra melt, give the bag a gentle toss with a fork to spread cheese through the warm beef and chips.
10.How many servings does one snack-sized Doritos bag make? ▾
One standard 1–1.5oz snack-sized Doritos bag makes a perfect single serving for teens and adults, especially when loaded with ¼ cup of cooked taco beef and your go-to toppings. For younger kids, you can split one bag between two small eaters to cut down on waste, since the portion is pretty filling once all toppings are added.
11.Can I use a family-sized Doritos bag to make these for a crowd instead of individual snack bags? ▾
You can, but you’ll lose the fun, no-mess portable factor that makes walking tacos great! If you do use a family-sized bag, crush the chips first, add beef and toppings, toss well, and serve portions in disposable cups with forks so people can still walk around. Note that chips in the larger bag will get soggier faster once toppings are added.

Comments (13)

2 days ago

OMG these were such a hit at my son’s 8th grade soccer team potluck last weekend! I didn’t even have to dirty a single serving dish, which is a total win for post-potluck cleanup. All the kids went back for seconds, even the picky eaters! SO easy to throw together too, 15 minutes flat and we were out the door.

3 days ago

Game changer for our tailgate last Saturday! I brought all the toppings in separate little containers, crushed up the Doritos right in the bag, and everyone got to build their own. Way less messy than regular tacos, no plates blowing away in the stadium wind. 10/10 will make every home game from now on.

1 week ago

Made these for a quick weeknight dinner when I forgot to meal prep, and my kids went crazy for them. Only knock is I wish I’d bought extra Nacho Cheese Doritos because my oldest ate two full bags before I even got my own serving. Easy, cheap, total crowd pleaser.

just now

Bro this is the easiest dorm meal ever. No fancy kitchen equipment needed, just a microwave for the taco meat and a bag of Doritos. I added a little extra hot sauce and sour cream and it tasted better than the taco truck down the street for half the price.

yesterday

I brought these to our neighborhood block party and people were asking me for the recipe before I even set the table down! I used Cool Ranch Doritos for half the batch and Nacho Cheese for the other, both were gone in 20 minutes flat.

2 hours ago

So glad the mix of Doritos flavors was a hit! Offering different flavor options is such a fun, easy way to customize these for groups, I’ll have to note that in the recipe tips soon!

2 weeks ago

As someone who’s gluten free, this is such a perfect taco night alternative! No hard or soft taco shells to worry about cross-contamination, I just grabbed my favorite GF Doritos (the Nacho Cheese ones are certified GF fyi!) and loaded them up with all my usual taco toppings. Game changer for my family taco Tuesdays.

1 week ago

Great callout about the certified gluten free Doritos! That’s such an important tip for folks with dietary restrictions, I’m so glad this recipe worked for your taco nights!

3 days ago

Made these on our recent camping trip and they were chef’s kiss, just wish I’d thought to pre-cook the taco meat at home and keep it in the cooler instead of trying to cook it over the campfire. Still turned out great, zero dish cleanup which is ideal when you’re camping with no running water.

2 days ago

Total pro tip! I pre-cook and freeze my taco meat before camping trips, it thaws in the cooler and keeps everything else cold too. Works perfectly for these walking tacos!

30 minutes ago

Just made these for my two teens after school and they didn’t even complain about ‘another easy dinner’! I added black beans and corn to the taco meat to sneak in some extra veggies and they didn’t even notice. 15 minutes total start to finish, can’t beat that on a busy school night.

5 minutes ago

Love the veggie hack! Adding black beans and corn is such a smart way to bulk up the meat and add extra nutrition without any extra work, that’s brilliant.

1 week ago

This recipe saved me this week when my grocery budget was stretched super thin. I already had ground beef in the freezer, taco seasoning in the pantry, and grabbed a few bags of Doritos on sale for $1 each. Fed me and my two roommates for under $10 total, no waste.

5 days ago

Wait that’s such a good cheap meal idea! I’m tired of eating ramen every night when my paycheck runs low, I’m grabbing these ingredients on my way home from work tomorrow.

2 weeks ago

These were really tasty, but I made the mistake of crushing the Doritos too much before adding the toppings, so it turned into more of a taco mush than anything else. Still ate the whole thing, but next time I’ll go lighter on the crushing!

1 week ago

Oh I did the exact same thing the first time I made these! Now I just give the bag 2 or 3 light crunches right before I add the meat, keeps the chips nice and crunchy.

5 days ago

Great tip from Luna! I always recommend giving the bag just a few gentle squeezes to break up the chips a little — you want big enough pieces to hold onto the toppings, no mushy taco mess! I’ll add that note to the recipe steps for future makers.

5 days ago

I set up a walking taco bar for my daughter’s birthday party and it was the easiest party food I’ve ever done! I had shredded cheese, sour cream, guac, diced tomatoes, jalapeños, hot sauce, and three different Doritos flavors out for people to pick from. Zero clean up, everyone raved.

3 days ago

How old is your daughter? I’m planning my 10 year old’s birthday next month and was debating between pizza and these, this makes me want to go with the walking taco bar!

2 days ago

She turned 9! It was perfect for that age group, all the kids thought it was so cool to eat right out of the chip bag, no plates to throw away either. Way cheaper than ordering pizza for 20 kids too!

2 days ago

These slapped, but I upgraded mine with the Spicy Nacho Doritos and a handful of pickled jalapeños on top. Only reason it’s not a 5 is I wish I’d added a drizzle of queso too, that would’ve put it over the top.

yesterday

The Spicy Nacho upgrade sounds incredible! Queso drizzle is such a good call, I might have to test that variation this weekend for my own taco night.

2 hours ago

Queso on these is a GAME CHANGER. I used the cheap jarred queso from the grocery store, warmed it up for 30 seconds in the microwave, and drizzled it right in the bag. 10/10, no notes.

1 week ago

Wait, has anyone tried prepping these ahead for work lunches? I feel like if I keep the toppings separate from the Doritos until I’m ready to eat, it would hold up all week, but I don’t want soggy chips.

5 days ago

I do this every week! I keep the taco meat in a meal prep container, all my toppings in little reusable cups, and keep a bag of Doritos in my desk drawer. Assemble at lunch time, zero sogginess, so much better than the office cafeteria food.

3 days ago

That’s such a great meal prep hack! As long as you keep the chips dry and separate from the wet toppings/meat until you’re ready to eat, these work perfectly for quick work lunches. Thanks for sharing that tip!



