

Elephant Ear

title 1
Elephant Ear
⏱️ cook time 40 minutes total
🍽️ servings 4
⚡ Difficulty easy

intro

Crispy, golden fried dough discs dusted with cinnamon sugar, a beloved North American fair treat that’s light, flaky, and perfectly sweet for casual summer gatherings.

Ingredients

All-purpose flour 2 cups (240g)
Whole milk (warmed to 110°F/43°C) 3/4 cup (180ml)
Active dry yeast 1 1/4 tsp (4g)
Granulated sugar (for dough) 1 tbsp (12g)
Fine table salt 1 tsp (5g)
Unsalted butter (melted, cooled) 2 tbsp (28g)
Neutral vegetable oil (canola or peanut, for frying) 4 cups (960ml)
Granulated sugar (for topping) 1/2 cup (100g)
Ground cinnamon 2 tsp (5g)

Steps

1

Prepare Yeast Mixture

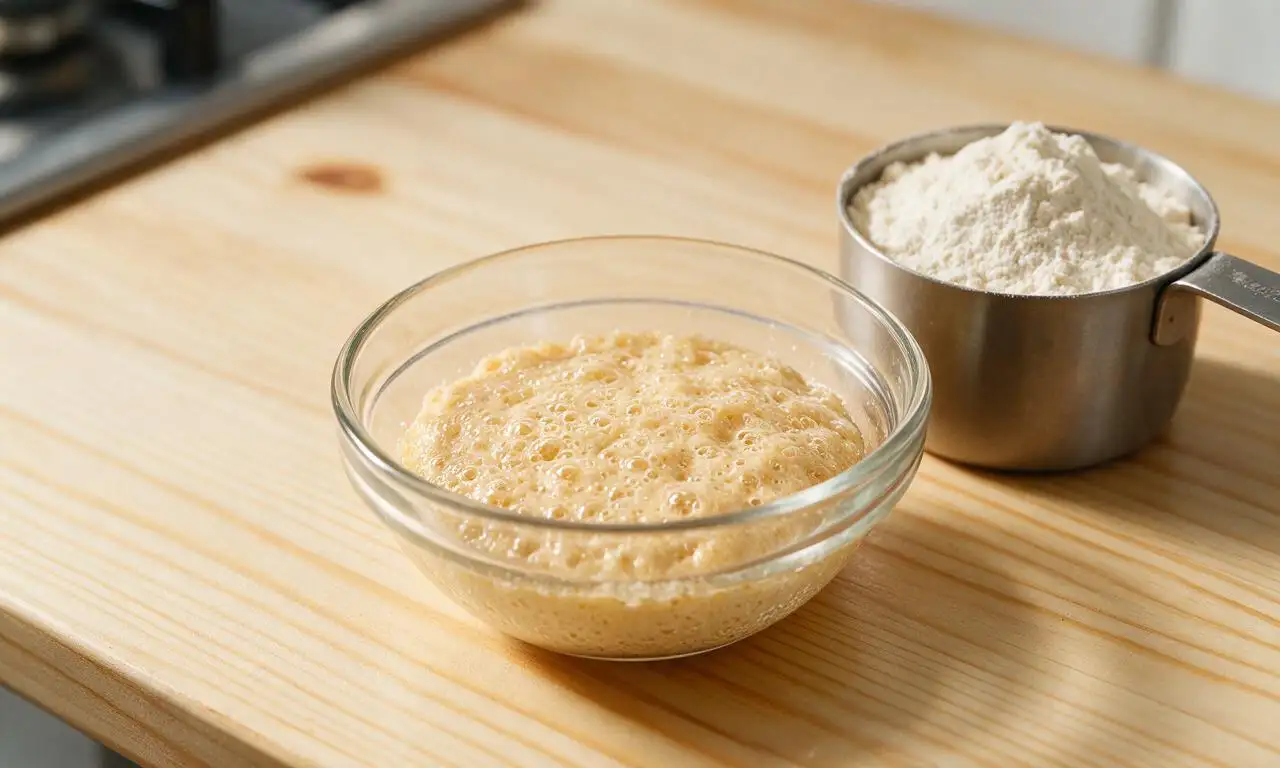
In a small mixing bowl, combine 3/4 cup (180ml) of whole milk warmed to 110°F (43°C), 1 tbsp (12g) of granulated sugar (dough portion), and 1 1/4 tsp (4g) active dry yeast. Stir gently once to combine, then let rest for 5 minutes at room temperature until the mixture turns foamy and smells distinctly yeasty. If no foam forms after 7 minutes, replace your yeast as it is inactive.
Step 1
step1:Prepare Yeast Mixture
2

Mix Dough Ingredients

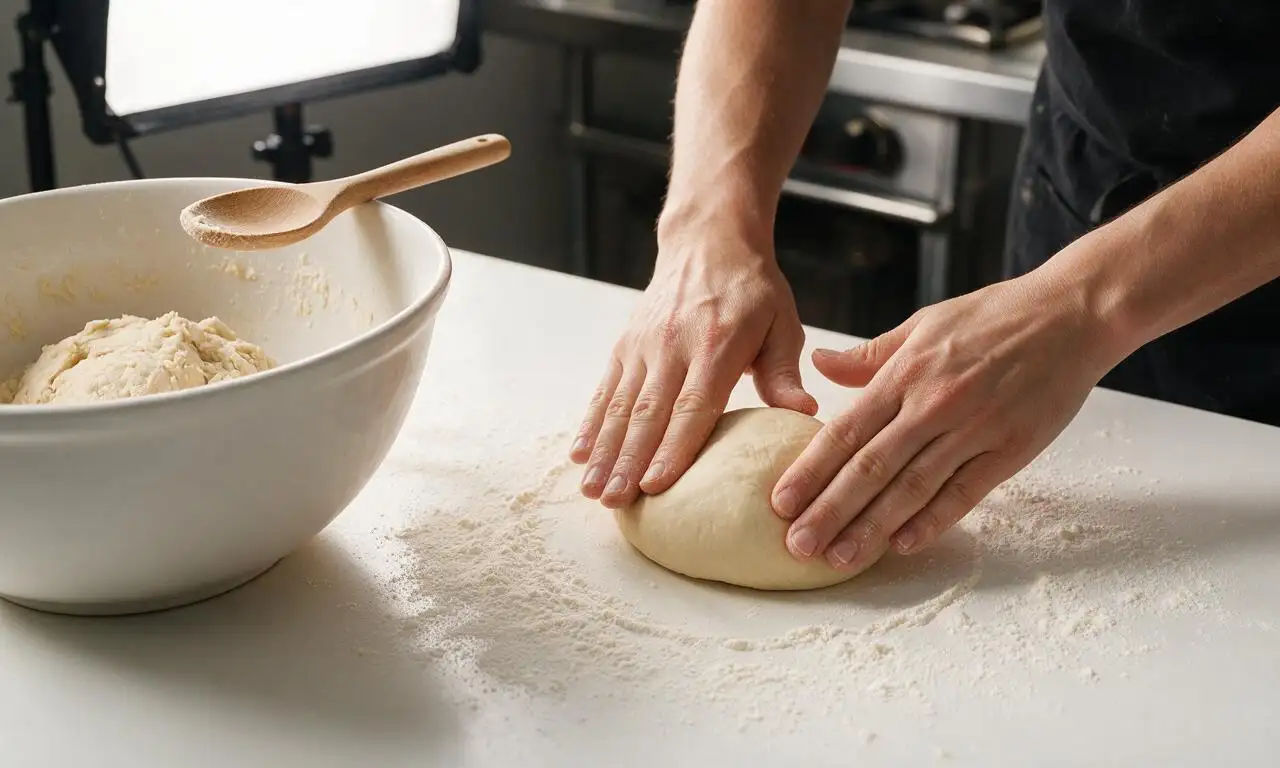
In a large mixing bowl, whisk together 2 cups (240g) all-purpose flour and 1 tsp (5g) fine table salt. Pour in the foamy yeast mixture and 2 tbsp (28g) cooled melted unsalted butter, stirring with a wooden spoon until a shaggy, soft dough forms. Turn the dough out onto a lightly floured counter and knead steadily for 4 minutes until it is smooth, elastic, and no longer sticky to the touch.
Step 2
step2:Mix Dough Ingredients
3

Let Dough Rest Covered

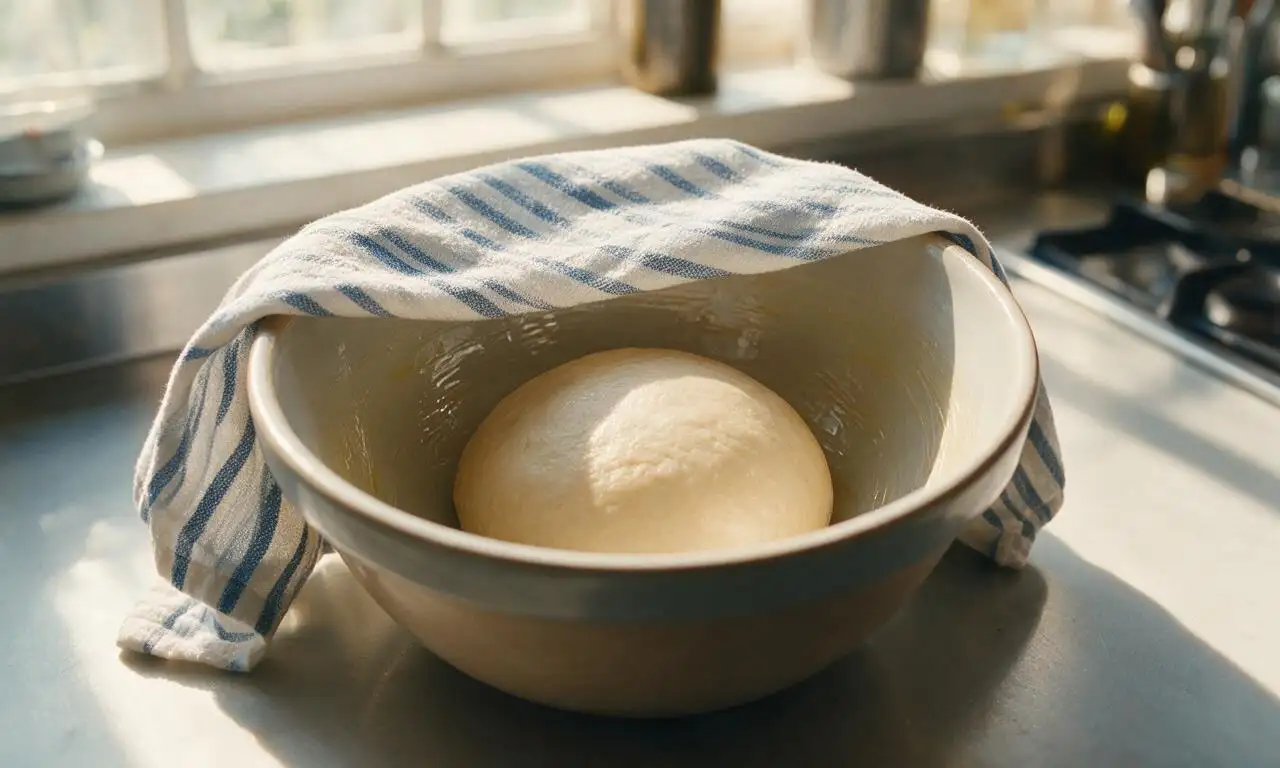
Form the kneaded dough into a tight, smooth ball, place it back into the large mixing bowl lightly greased with nonstick spray, and cover with a clean damp cotton kitchen towel. Let it rest in a warm, draft-free 75°F (24°C) spot for 20 minutes until it puffs to 1.5 times its original size; it does not need to double fully for this recipe.
Step 3
step3:Let Dough Rest Covered
4

Preheat Frying Oil

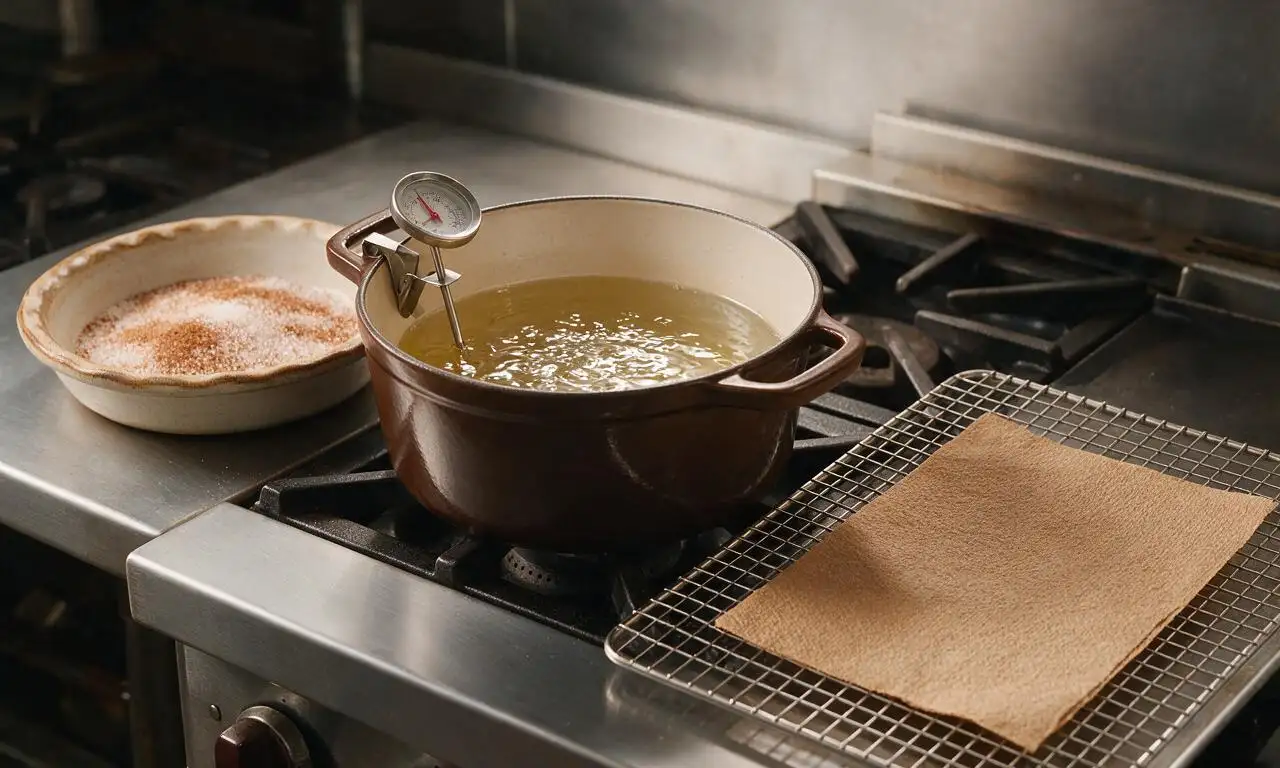
While the dough rests, heat 4 cups (960ml) of neutral canola or peanut oil in a deep, heavy-bottomed 5-quart Dutch oven over medium heat until it reaches a steady 375°F (190°C) on a clip-on candy thermometer. In a shallow 9-inch pie plate, mix 1/2 cup (100g) granulated sugar (topping portion) and 2 tsp (5g) ground cinnamon until evenly blended, and set a wire rack lined with 2 layers of paper towels next to the stovetop for draining finished pastries.
Step 4
step4:Preheat Frying Oil
5

Roll Dough Portions Thin

Once the dough finishes resting, punch it down firmly in the center to release all trapped air, then divide it into 4 equal 100g portions. Roll each portion out on a lightly floured surface to a very thin 8-inch (20cm) irregular circle, pulling the edges gently as you roll to create the signature ruffled, uneven "elephant ear" shape; the dough should be almost translucent in thin spots for maximum crispiness.

Step 5
step5:Roll Dough Portions Thin
6

Fry Dough in Hot Oil

Carefully lower one rolled dough circle into the 375°F (190°C) oil, pressing it down gently with a slotted metal spoon to keep it fully submerged for the first 10 seconds. Fry for 45 seconds on the first side until deep golden brown and puffed, then flip with the slotted spoon and fry for another 30-40 seconds on the second side. Fry only one pastry at a time to avoid dropping the oil temperature and causing greasy results.
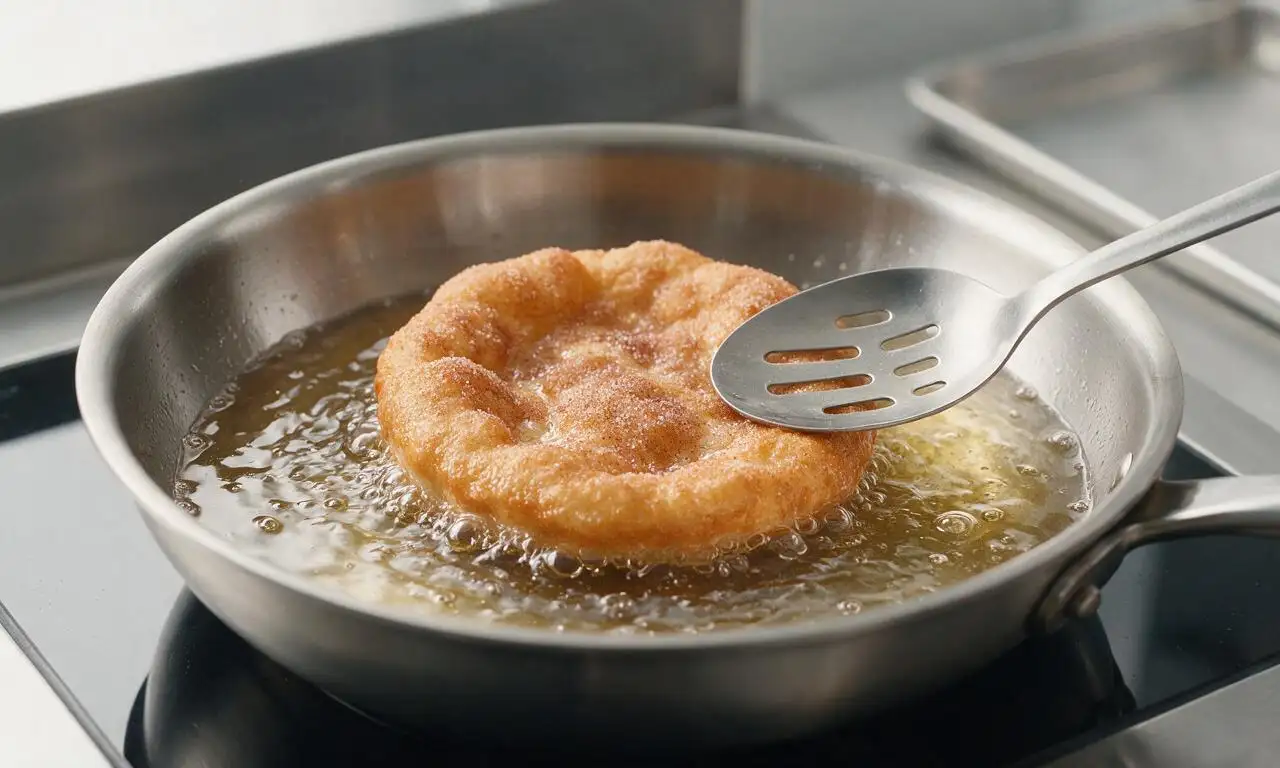
Step 6
step6:Fry Dough in Hot Oil
7

Drain and Coat Elephant Ears

Lift the finished fried elephant ear out of the oil with the slotted spoon, holding it above the pot for 5 seconds to let excess oil drip back into the pot, then immediately place it in the cinnamon sugar mixture. Toss the warm pastry to coat both sides fully with sugar, then transfer it to the prepared wire rack. Repeat rolling, frying, and coating with the remaining dough portions, checking oil temperature between batches to maintain 375°F (190°C). Serve warm.

Step 7
step7:Drain and Coat Elephant Ears

Tips

1.Always use a clip-on candy thermometer to monitor oil temperature: oil above 390°F (199°C) will burn the pastry exterior before the interior cooks, while oil below 360°F (182°C) will produce greasy, soggy elephant ears.
2.Do not over-knead the dough: over-kneading develops excess gluten, which leads to tough, chewy pastries instead of the light, crisp texture classic to this treat.
3.Customize your toppings to taste: add 1/4 tsp freshly grated nutmeg to the cinnamon sugar, or drizzle finished warm ears with melted milk chocolate, salted caramel, or a dusting of powdered sugar for extra indulgence.


✨ You May Also Like

Snacks & Appetizers
🍜 Mexico

Crispy thick-cut tortilla chips piled high with seasoned beef, melted cheese, and bright fresh toppings for a shareable, crowd-favorite bite.

⏱️ 25 minuteSnacks & Appetizers ★ 4.8
Snacks & Appetizers
🍜 United States

Crisp, sweet-tangy spiced pickled watermelon rind is a zero-waste summer staple, perfect with grilled meats, charcuterie, or eaten straight from the jar as a bright snack.

⏱️ 30 minuteSnacks & Appetizers ★ 4.6
Snacks & Appetizers
🍜 Germany

A tangy, jellied pork cold cut slow-simmered with aromatic spices, set into a firm sliceable loaf, served cold with mustard and crusty bread.

⏱️ 3 hours 4Snacks & Appetizers ★ 4.8
Snacks & Appetizers
🍜 United States

Creamy, tangy, perfectly seasoned hard-boiled egg halves filled with a rich, smooth yolk mixture, a timeless, crowd-pleasing bite for holiday and casual gatherings alike.

⏱️ 40 minuteSnacks & Appetizers ★ 4.8
Snacks & Appetizers
🍜 Russia

Silky, dill-forward no-smoke cured salmon, a Scandinavian classic with bright salty-sweet flavor, ideal for holiday starter platters and open-faced rye sandwiches.

⏱️ 48 hours Snacks & Appetizers ★ 4.7
Snacks & Appetizers
🍜 Japan

Crisp golden bottoms, juicy savory pork and vegetable filling, and tangy dipping sauce make these pan-fried gyoza a beloved shareable bite.

⏱️ 45 minuteSnacks & Appetizers ★ 4.8

Elephant Ear:Frequently Asked Questions

1.Why does the recipe call for warming whole milk to exactly 110°F/43°C? ▾
That temperature is the ideal sweet spot to activate active dry yeast without damaging it. If the milk is too cold, the yeast won’t wake up to create light, airy dough; if it’s over 120°F, it will kill the yeast, leading to dense, flat fried treats. Use a quick-read thermometer to check, or aim for bath-water warm with no sharp hot sting on your wrist.
2.Can I use instant yeast instead of active dry yeast for this recipe? ▾
Absolutely! Swap active dry yeast for instant yeast at a 1:0.75 ratio (¾ teaspoon instant for every 1 teaspoon active dry called for). You won’t need to proof it in warm milk first—just mix it straight into the dry ingredients to cut 10 minutes off prep time, with no loss of that signature light, fluffy, crisp texture.
3.How thin should I roll the dough to get that classic crispy elephant ear texture? ▾
Aim for ⅛-inch thick, roughly 6- to 7-inch wide discs made from the kneaded all-purpose flour base before frying. If the dough is too thick, it will puff into dense, bready fry bread instead of the light, flaky fair-style treat. Let rolled discs rest 5 minutes before frying so they don’t shrink back the second they hit the hot oil.
4.What oil is best for frying elephant ears to avoid soggy, greasy results? ▾
Reach for a neutral, high-smoke-point oil like canola, vegetable, or peanut oil, heated to a steady 375°F. If oil is too cool, dough will soak up excess grease and turn soggy; if it’s too hot, the outside will burn before the interior cooks through. Use a fry thermometer to keep temperature consistent between batches.
5.How do I get the cinnamon sugar coating to stick evenly to the fried dough? ▾
Toss freshly fried elephant ears in cinnamon sugar within 10 seconds of pulling them from the oil! The residual surface heat and light oil coating acts as a natural glue so the sugar mix doesn’t slide off. I keep a shallow paper bag half-filled with cinnamon sugar handy to shake ears one at a time for fast, even coverage.
6.Can I make the dough ahead of time for a summer cookout or gathering? ▾
Definitely! Mix and knead the dough (including the small portion of granulated sugar for the dough base), let it complete its first rise, then punch it down, seal tightly in an airtight container, and store it in the fridge for up to 24 hours. When you’re ready to fry, pull the dough out, let it come to room temperature for 30 minutes, then roll, cut, and fry as normal for fresh, hot treats.
7.Why is fine table salt included in the dough when this is a sweet treat? ▾
That small amount of fine table salt is non-negotiable! It cuts through the cloying sweetness of the cinnamon sugar coating, balances the rich fried dough flavor, and even helps strengthen gluten for a better, lighter texture. You won’t taste a salty flavor at all—you’ll just notice the cinnamon sugar tastes brighter and more well-rounded.
8.Why did my elephant ears turn out dense and chewy instead of light and flaky? ▾
Dense, chewy results usually stem from three common missteps: your yeast was expired and failed to leaven the dough, you rolled the dough too thick, or your frying oil was too cool, making the dough soak up excess grease. Double-check yeast freshness, roll to ⅛-inch thickness, and hold oil steady at 375°F for best results.
9.What ratio of cinnamon to sugar works best for the outer coating? ▾
My go-to balanced ratio, which isn’t too spicy or too bland, is 1 tablespoon of ground cinnamon for every 1 cup of granulated sugar. Whisk the two together really well to eliminate cinnamon clumps. If you love extra warm spice, you can bump that up to 1.5 tablespoons per cup, but more than that will make the coating taste bitter.
10.Do I need any special equipment to make these at home? ▾
No fancy specialty gear is required! You’ll just need a large heavy-bottomed pot or Dutch oven for frying (no dedicated deep fryer needed), a rolling pin, a quick-read thermometer to check milk and oil temperatures, and a slotted spider or spoon to lift finished ears out of the oil. Line a tray with paper towels nearby to drain excess oil.
11.How should I store leftover elephant ears to keep them as crisp as possible? ▾
Leftovers will keep for up to 2 days stored in an airtight container at room temperature, though they will lose some crispness as they sit. To bring back that fresh shattery crunch, pop them on a baking sheet in a 350°F oven for 3 to 4 minutes. Skip the microwave, which turns the dough chewy and soggy in seconds.
12.How long should I let the dough rise before rolling it out to fry? ▾
Let the kneaded dough rise in a warm, draft-free spot for 1 to 1.5 hours, until it doubles in size. If your kitchen is on the cool side (under 70°F), this may take a little longer—don’t rush the process! That slow rise creates the light air pockets that make fried dough crisp and flaky instead of tough and bready.
13.Can I add custom mix-ins or toppings to change up the classic flavor? ▾
Absolutely! The base cinnamon sugar version is a beloved fair classic, but you can stir a pinch of nutmeg or cardamom into the sugar mix, drizzle finished ears with melted chocolate or salted caramel, or add a light dusting of powdered sugar on top. Just avoid adding heavy, wet toppings too early, or they’ll make the crispy dough turn soggy.

Comments (11)

2 weeks ago

My kids are obsessed with these! I added a tiny pinch of nutmeg to the cinnamon sugar mix and it gave such a warm, cozy flavor that paired so well with the crispy dough. Even my super picky 7 year old ate two without complaining.

1 week ago

Oh the nutmeg addition sounds chef’s kiss! I’m definitely stealing that hack next time I make these—bet a tiny bit of cardamom would be good too!

1 week ago

I’m 16 and this is the first baked good I’ve ever made completely on my own that didn’t come out burnt or lumpy!! My whole family said they tasted like they came from a bakery, I was so proud. I even added a little extra cinnamon because that’s my favorite.

6 days ago

Yay, that’s such an awesome first bake win! Elephant ears are such a great beginner recipe because they’re forgiving but feel super impressive when they turn out. Keep baking, you’re doing great!

5 days ago

This is exactly why we love sharing easy, approachable recipes! Huge congrats on nailing your first solo bake—adding extra cinnamon is always a good call in our book. Can’t wait to hear what you make next!

5 days ago

Made these for our family brunch last Sunday and they were the star of the table! I served them with a side of warm caramel dip for drizzling and it was such a good combo. Even my mother-in-law, who critiques everything I cook, asked for the recipe.

3 days ago

The warm caramel dip idea is genius! I’ve been serving these plain but that’s such an easy upgrade for when we have guests over. Can’t wait to try it this weekend!

3 days ago

Super easy to make in my tiny dorm kitchen! I didn’t have a rolling pin so I used a canned soda to flatten the dough and it still turned out perfect. My roommates are already begging me to make another batch this weekend. Total game changer, way better than the overpriced fair version tbh.

2 days ago

OMG I have been chasing the perfect county fair elephant ear recipe for YEARS and this is IT!!! Exactly the crispy, cinnamon-sugary goodness I remember from going to the fair as a kid, and so much cheaper than buying them there. I’m never waiting for fair season again!

2 days ago

Right?! I was so skeptical because fair food always feels impossible to replicate at home, but these taste identical. I even dusted mine with a little powdered sugar at the end just like the fair booth does and my family lost their minds.

1 day ago

That makes us so happy to hear! We love classic fair food and wanted to make a version that’s easy to pull off at home without any fancy equipment. So glad it hit that nostalgic note for you!

2 days ago

Brought these in for my team’s Friday snack day and everyone thought I ordered them from a fancy bakery downtown. Joke’s on them, it only took me 40 minutes total to make a double batch! The crispy edges are *chef’s kiss*. Only note is I would make a little extra cinnamon sugar to sprinkle on top right after they come out of the oven.

1 day ago

Wait a double batch for the team? You’re the real MVP! I’ve been looking for something easy to bring to our next team meeting, these are definitely going on my list. Extra cinnamon sugar noted!

1 day ago

Love the double batch hack! We totally agree that a little extra cinnamon sugar right out of the oven is never a bad idea— it melts into the warm dough and creates that perfect sweet crust. So glad your team loved them!

yesterday

Made these for my daughter’s post-game snack spread yesterday and they were gone in 10 minutes flat! The cinnamon sugar ratio is perfect, not overpowering at all, and they got so crispy even when I let them cool on the counter for 20 minutes. My kids loved them, 10/10 will be making these weekly.

2 hours ago

I tried making these last night but mine came out a little chewy instead of crispy. Did I roll the dough too thick? I followed the cook time but maybe my oven runs hot? Any tips would be awesome!

1 hour ago

Sorry to hear they came out chewy! The most common culprit is dough that’s rolled too thick—aim for about 1/8 of an inch thickness when rolling out. If your oven runs hot, try lowering the temp by 25 degrees and adding 2-3 minutes of cook time, and make sure you’re not crowding the baking sheet! That should help get that perfect crisp next time.

30 minutes ago

I made a test batch of these last night and they are incredible! How well do these store? I’d love to make a big batch on Sunday to pack in my kids’ school lunches for the week. Do they stay crispy in an airtight container?

20 minutes ago

I made a batch last week and stored them in an airtight container with a small piece of paper towel to absorb moisture, and they stayed crispy for 3 whole days! Perfect for school lunches, my kid took one every day.

10 minutes ago

Great tip from LunchBoxQueen! Stored properly in an airtight container at room temp, these stay crispy for 3-4 days. I don’t recommend refrigerating them, as that will make them go soggy fast. They’re perfect for lunch boxes!

5 minutes ago

Wait, quick question—can I use pre-made puff pastry for this if I don’t have time to make the dough from scratch? I’m hosting book club tomorrow and these look perfect but I’m short on time tonight!

just now

Great question! Pre-made puff pastry works absolutely beautifully here—just make sure to thaw it according to package directions before rolling, and you’ll get that same perfect crispy texture. Hope your book club loves them!

just now

I brought these to our neighborhood block party potluck and I lost count of how many people asked where I bought them! SO good, so simple to throw together last minute, I even prepped the cinnamon sugar mix the night before to save time. Absolute crowd pleaser.



