
fried chicken fillet

title 1
fried chicken fillet
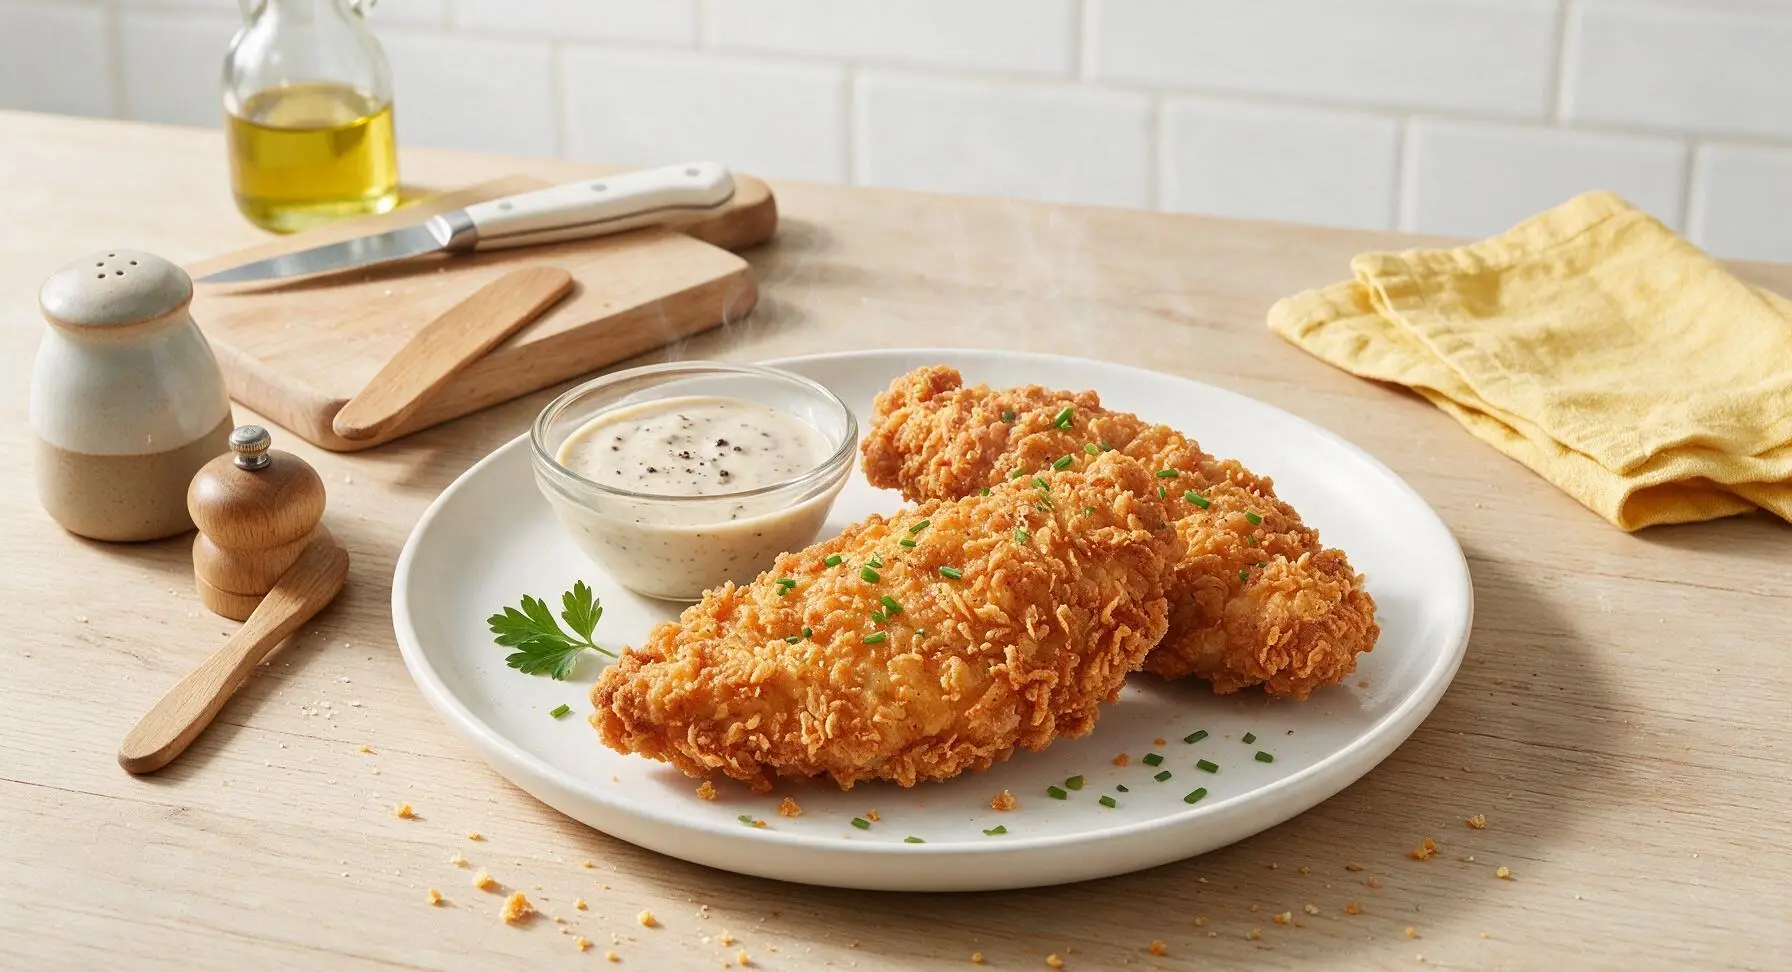
⏱️ cook time 18 minutes
🍽️ servings 4
⚡ Difficulty medium

intro

Juicy, tender chicken fillets with a shatteringly crisp golden crust, brined in tangy buttermilk and double-fried for lasting crunch. Perfect for casual sharing with a creamy pepper dipping sauce.

Ingredients
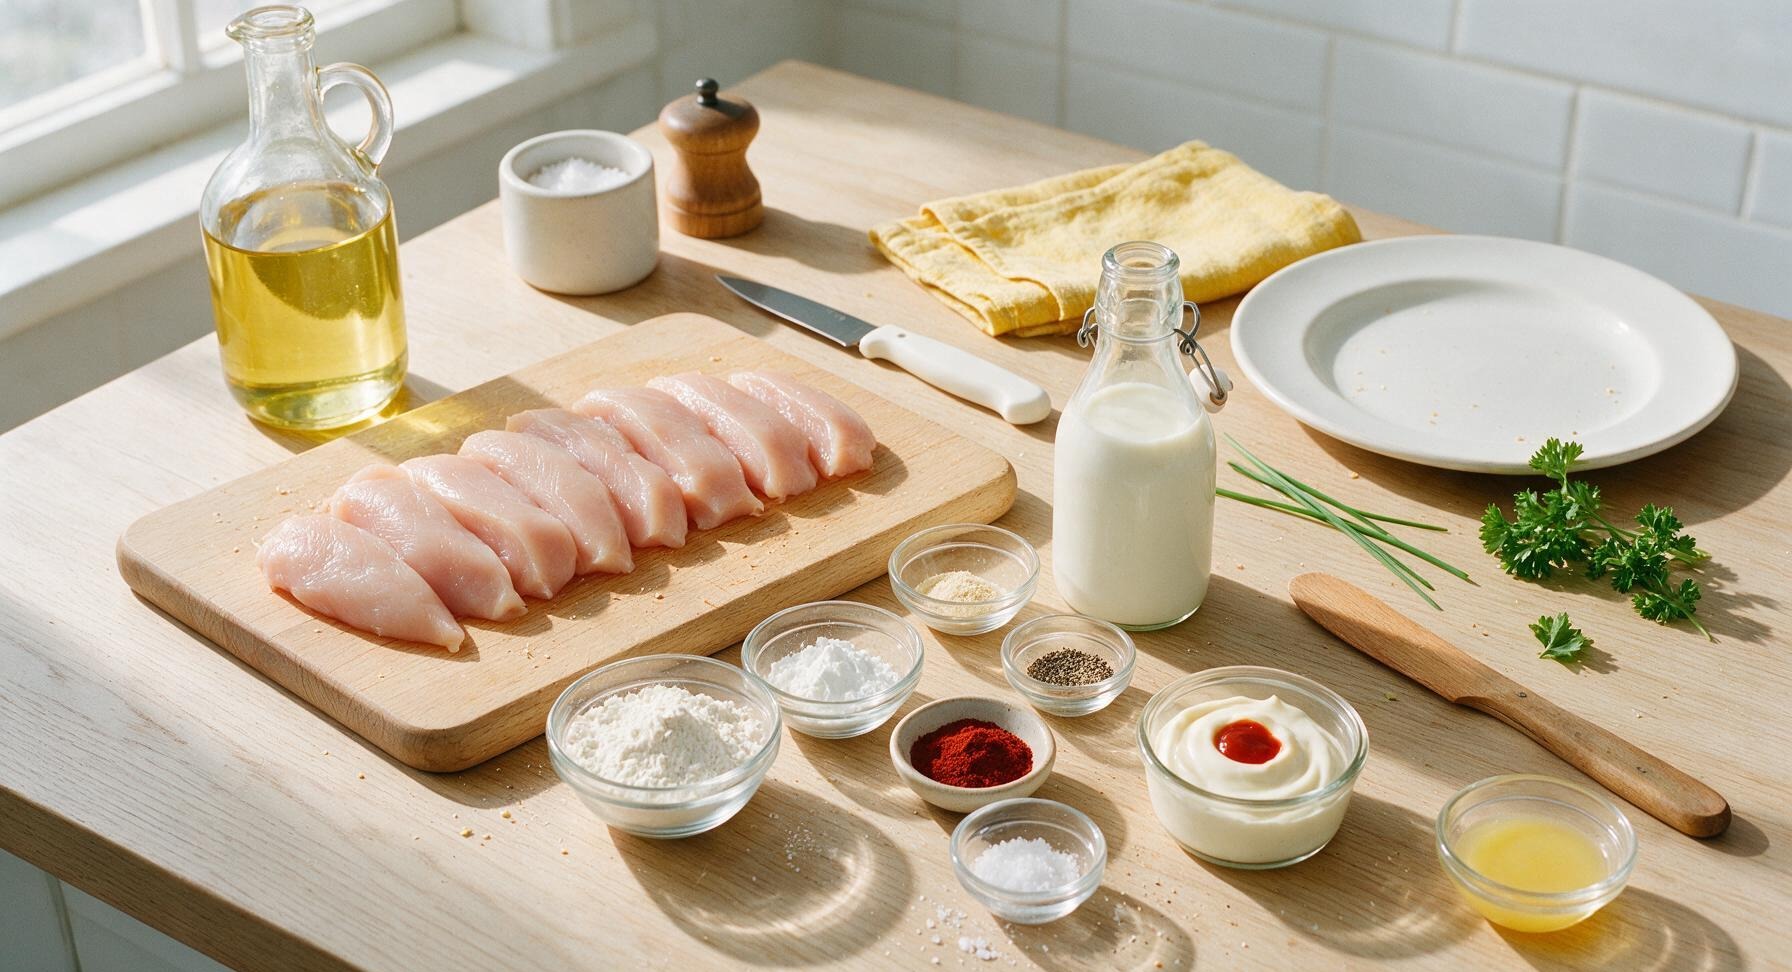
Boneless skinless chicken breast 600g, cut into 1.5cm thick fillets
Buttermilk 2 cups (480ml)
All-purpose flour 1.5 cups (180g)
Cornstarch 1/4 cup (30g)
Kosher salt 2 tsp, divided
Freshly ground black pepper 1 tsp
Garlic powder 1 tsp
Onion powder 1 tsp
Smoked paprika 1 tbsp
Canola oil 1 quart (950ml), for frying
Mayonnaise 1/4 cup (60g), for dipping sauce
Hot sauce 1 tsp, for dipping sauce
Fresh curly parsley 2 sprigs, for garnish

Steps

1

Pound Chicken Fillets

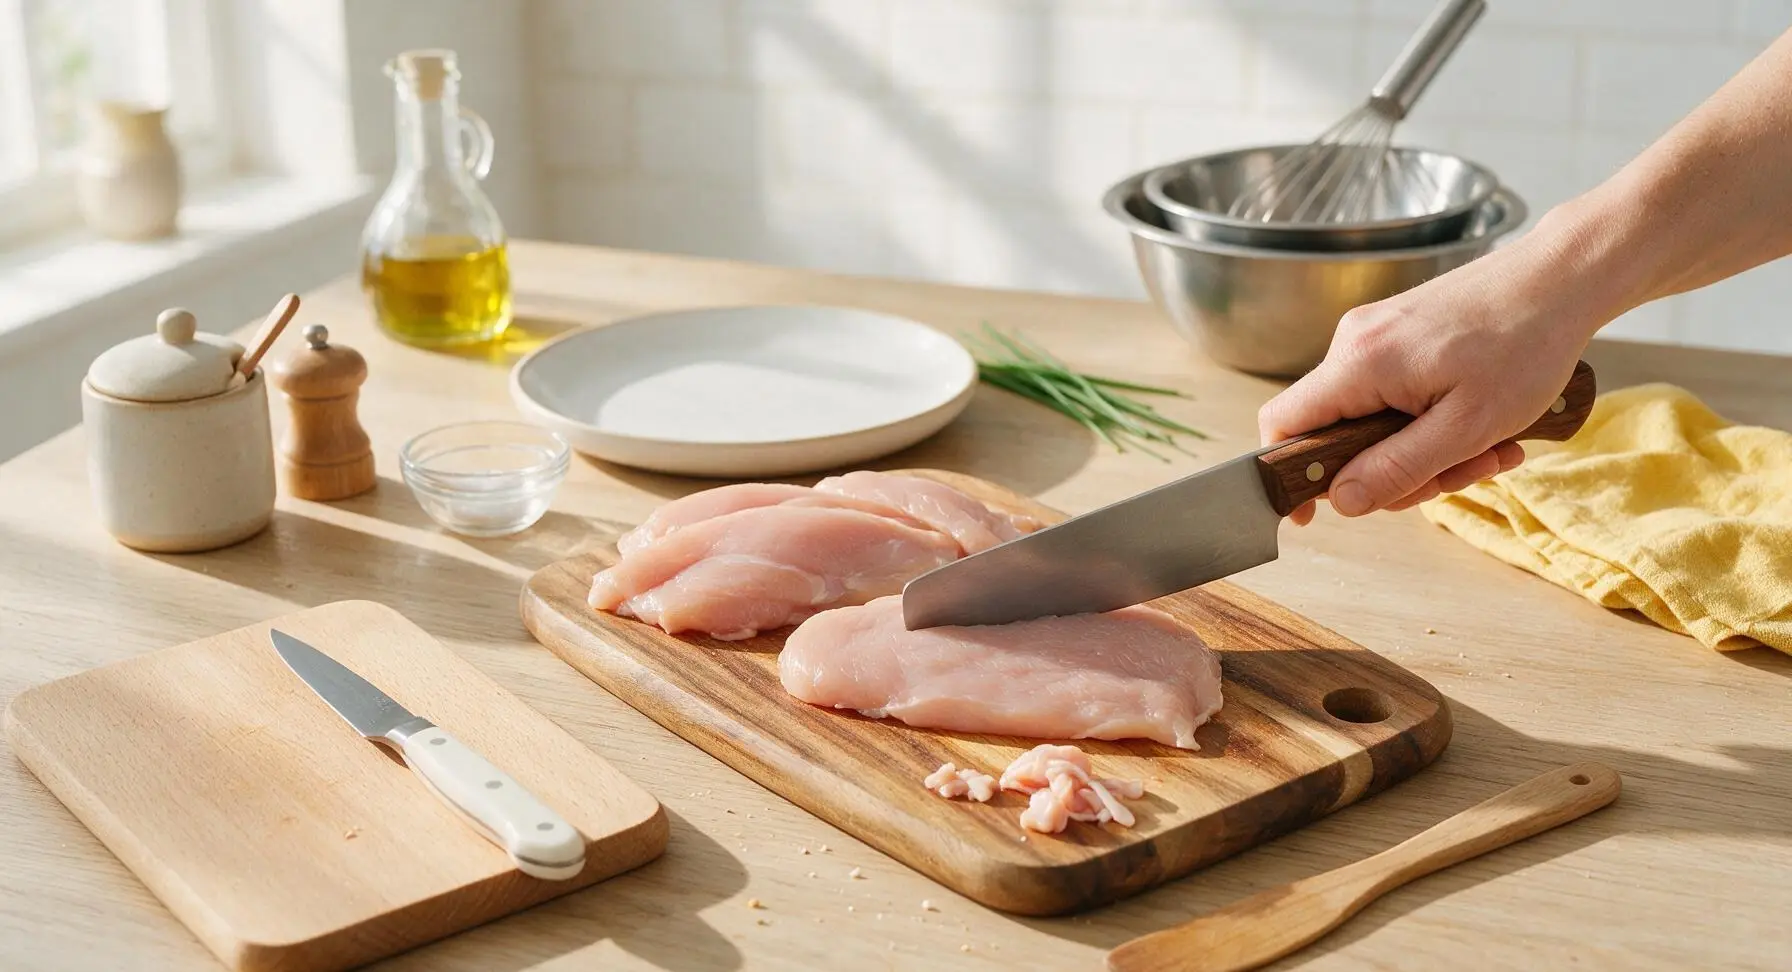
Place the raw chicken breasts on the acacia wood cutting board. Use the chef knife to slice each breast horizontally into even 1.5cm thick fillets, trimming away any visible white sinew or excess fat from the edges. Cover fillets with a small sheet of parchment paper, then use the flat side of the chef knife to gently pound each fillet to a uniform 1cm thickness. This ensures no thick, undercooked spots and even crisping across the entire surface.
Step 1
step1:Pound Chicken Fillets
2

Brine in Buttermilk

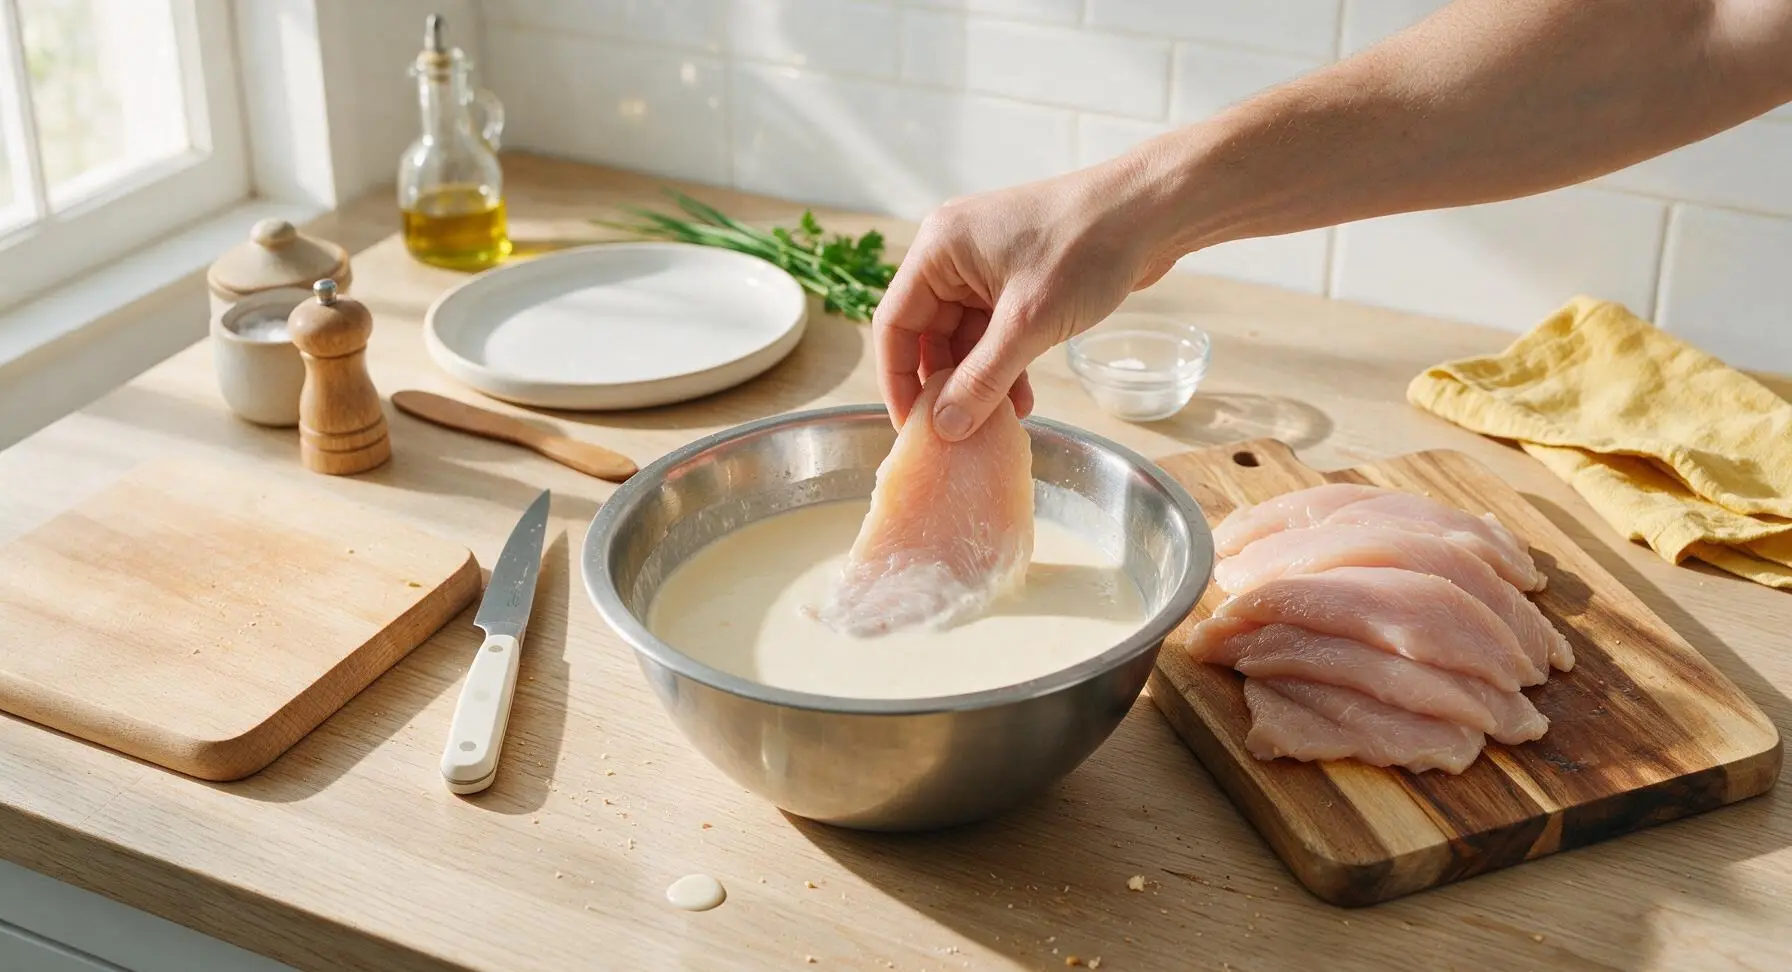
Pour 2 cups of buttermilk into the largest 24cm stainless steel mixing bowl, stirring in 1 tsp of kosher salt until fully dissolved. Add all the pounded chicken fillets, pressing down to submerge every piece completely in the tangy buttermilk. Let rest at room temperature for 30 minutes (or refrigerate for up to 2 hours for extra tender results); the lactic acid in buttermilk breaks down tough muscle fibers without making the chicken mushy.
Step 2
step2:Brine in Buttermilk
3

Mix Seasoned Dredge

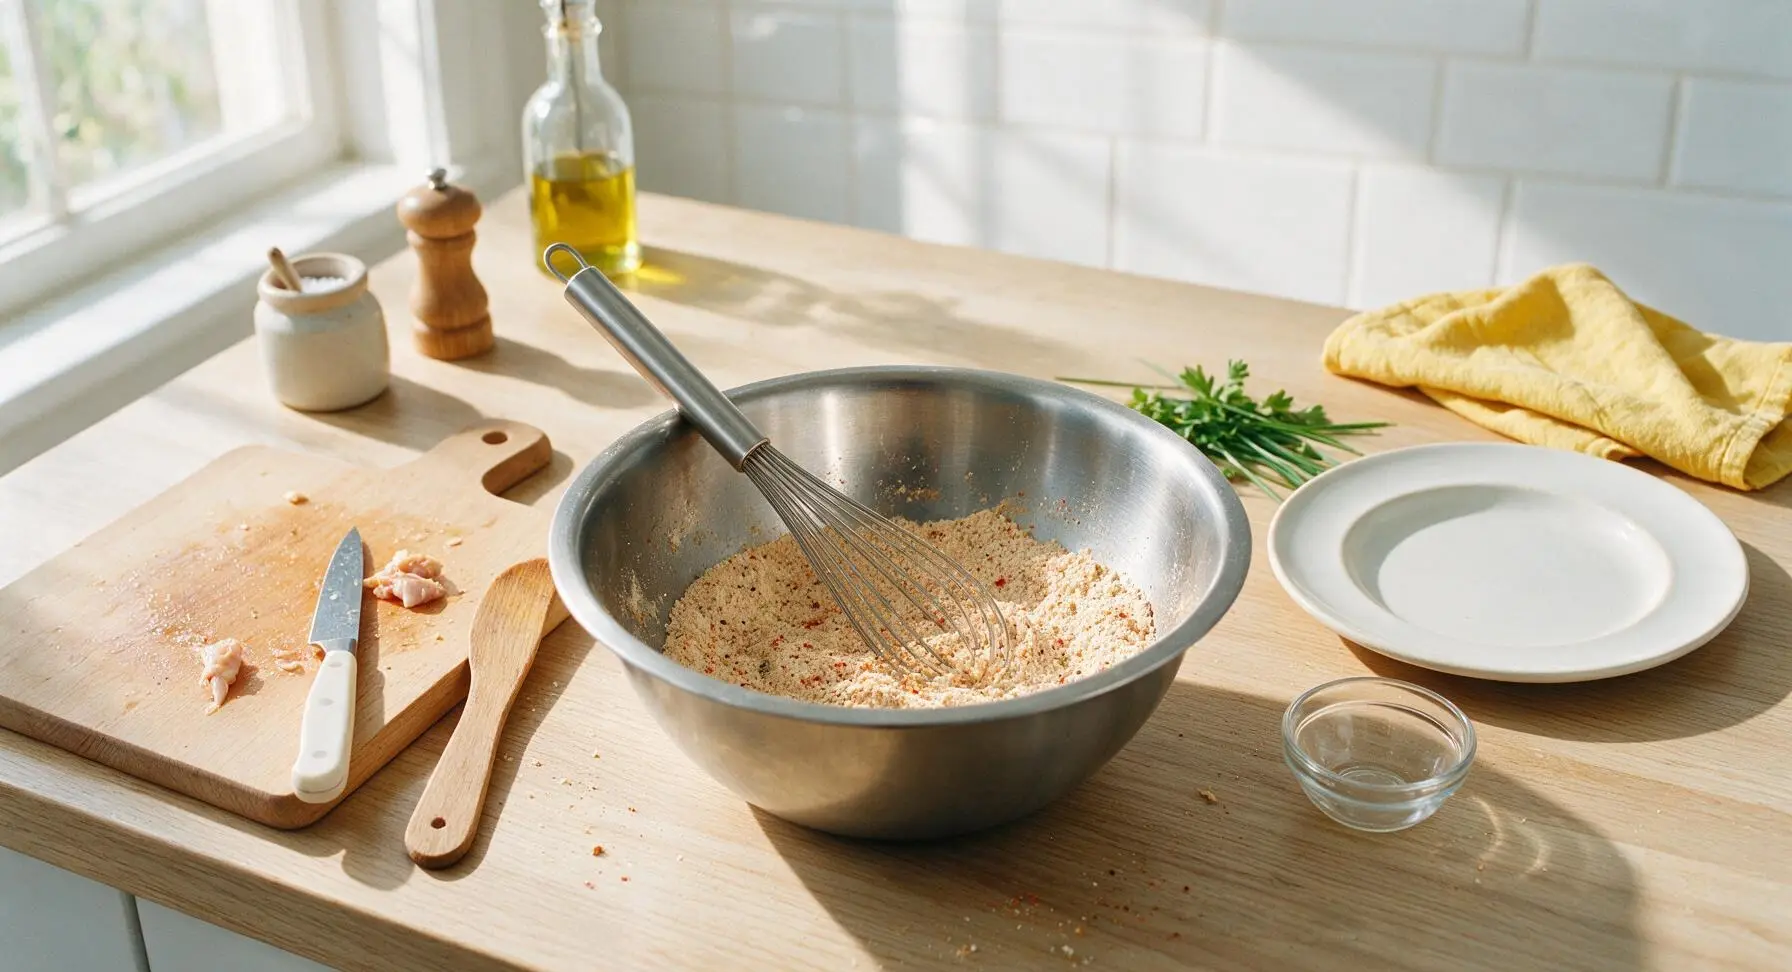
In the mid-sized 20cm stainless steel mixing bowl, combine 1.5 cups all-purpose flour, 1/4 cup cornstarch, remaining 1 tsp kosher salt, 1 tsp black pepper, 1 tsp garlic powder, 1 tsp onion powder, and 1 tbsp smoked paprika. Use the wire whisk to mix thoroughly for 30 seconds, until all spices are evenly distributed with no clumps of paprika or starch visible. The added cornstarch creates a lighter, shatterier crust than flour alone.
Step 3
step3:Mix Seasoned Dredge
4

Heat Frying Oil

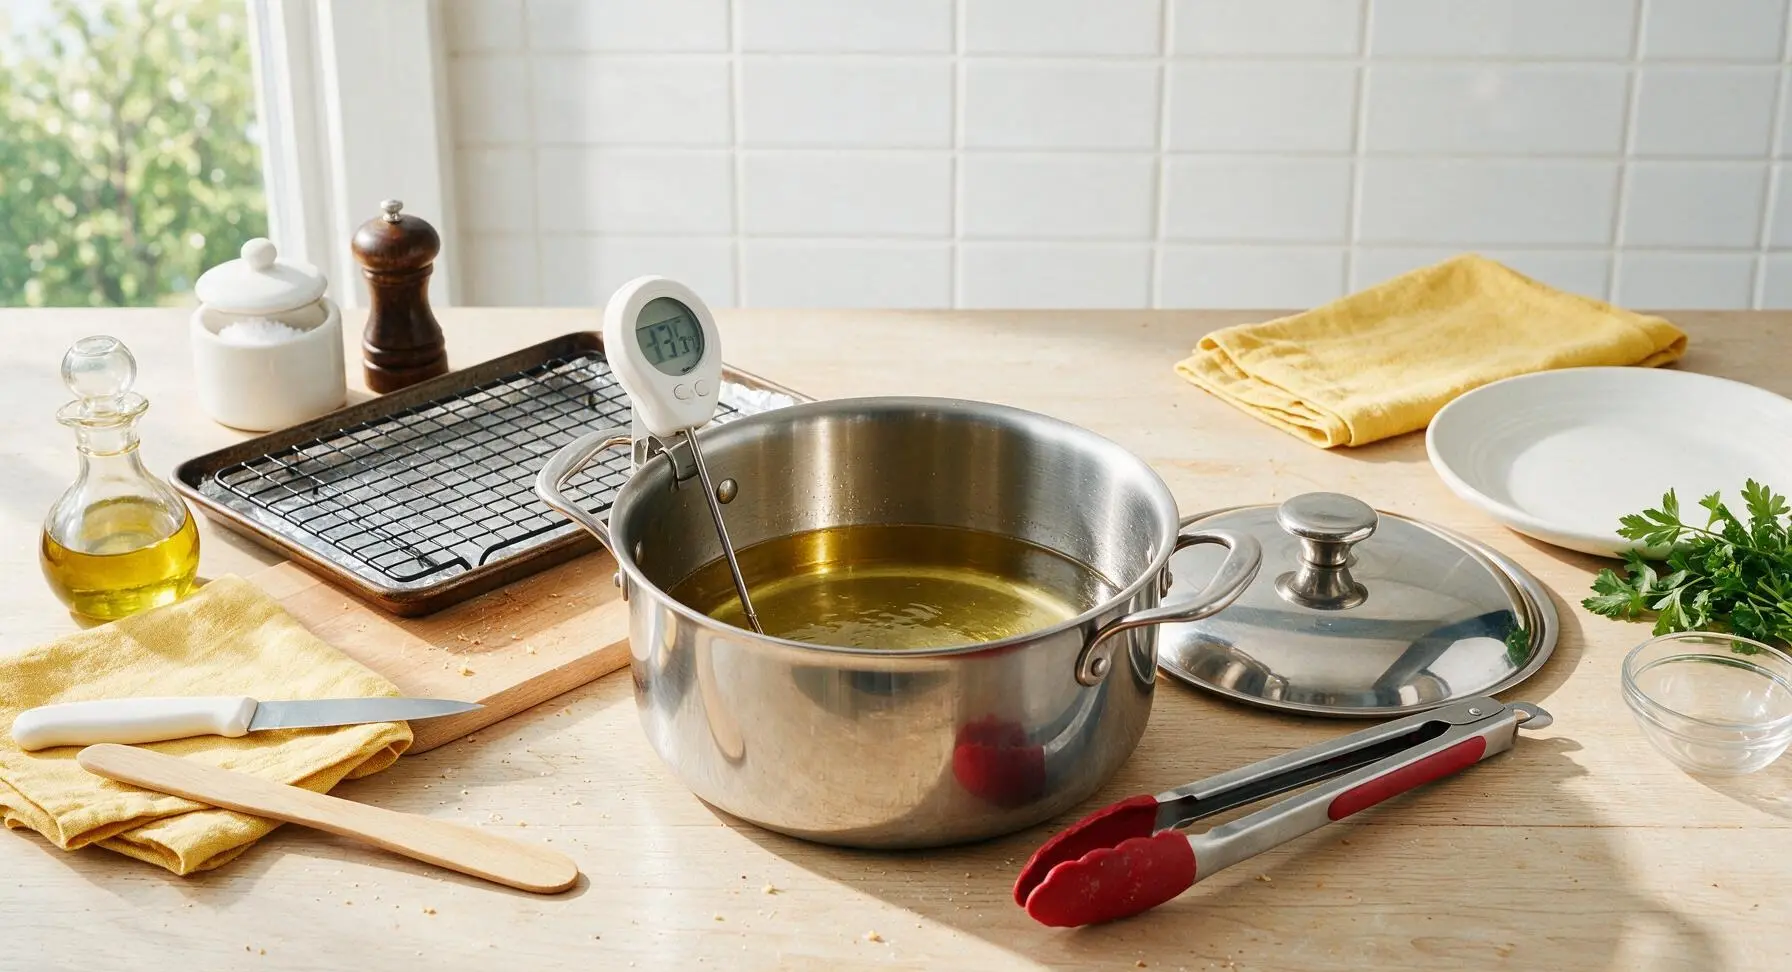
Move the acacia cutting board to the left side of the counter to make space, then set the 5L stainless steel Dutch oven in the center of the work area. Pour 1 quart of canola oil into the pot to reach a 5cm depth, then clip the digital instant-read thermometer to the pot rim. Heat oil over medium heat until it reaches a steady 175C (350F); do not let oil exceed 180C at this stage, as it will burn the crust before the chicken cooks through.
Step 4
step4:Heat Frying Oil
5

Dredge Chicken Fillets

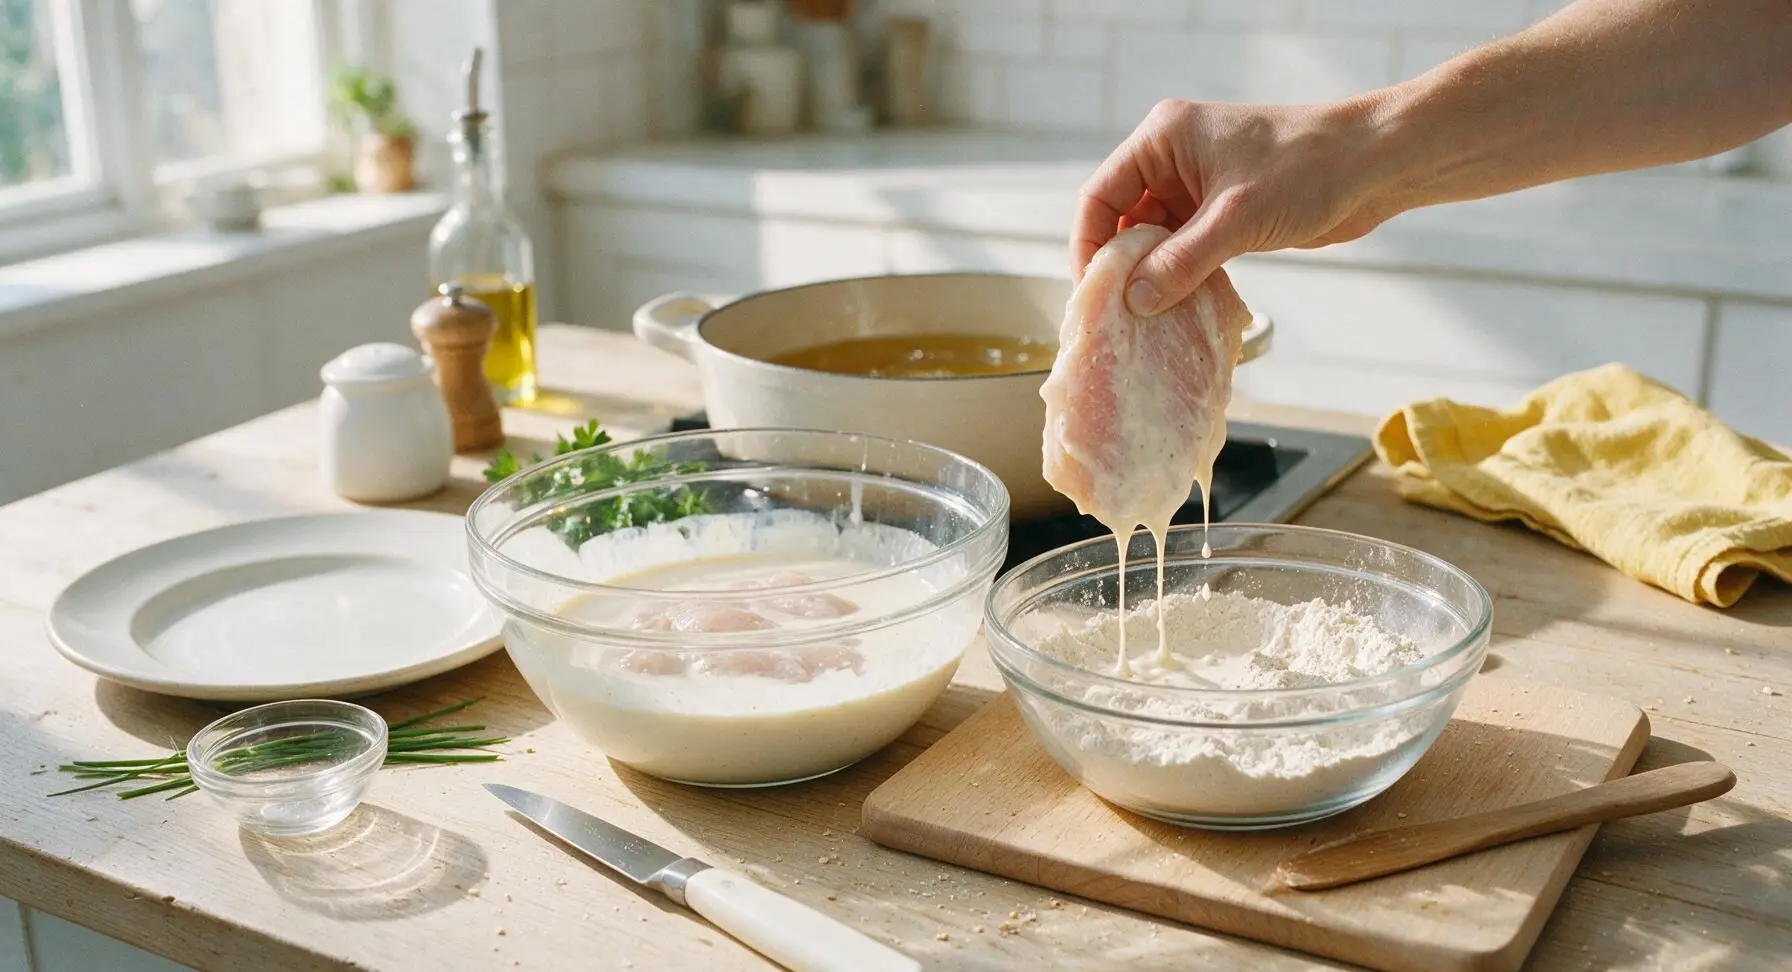
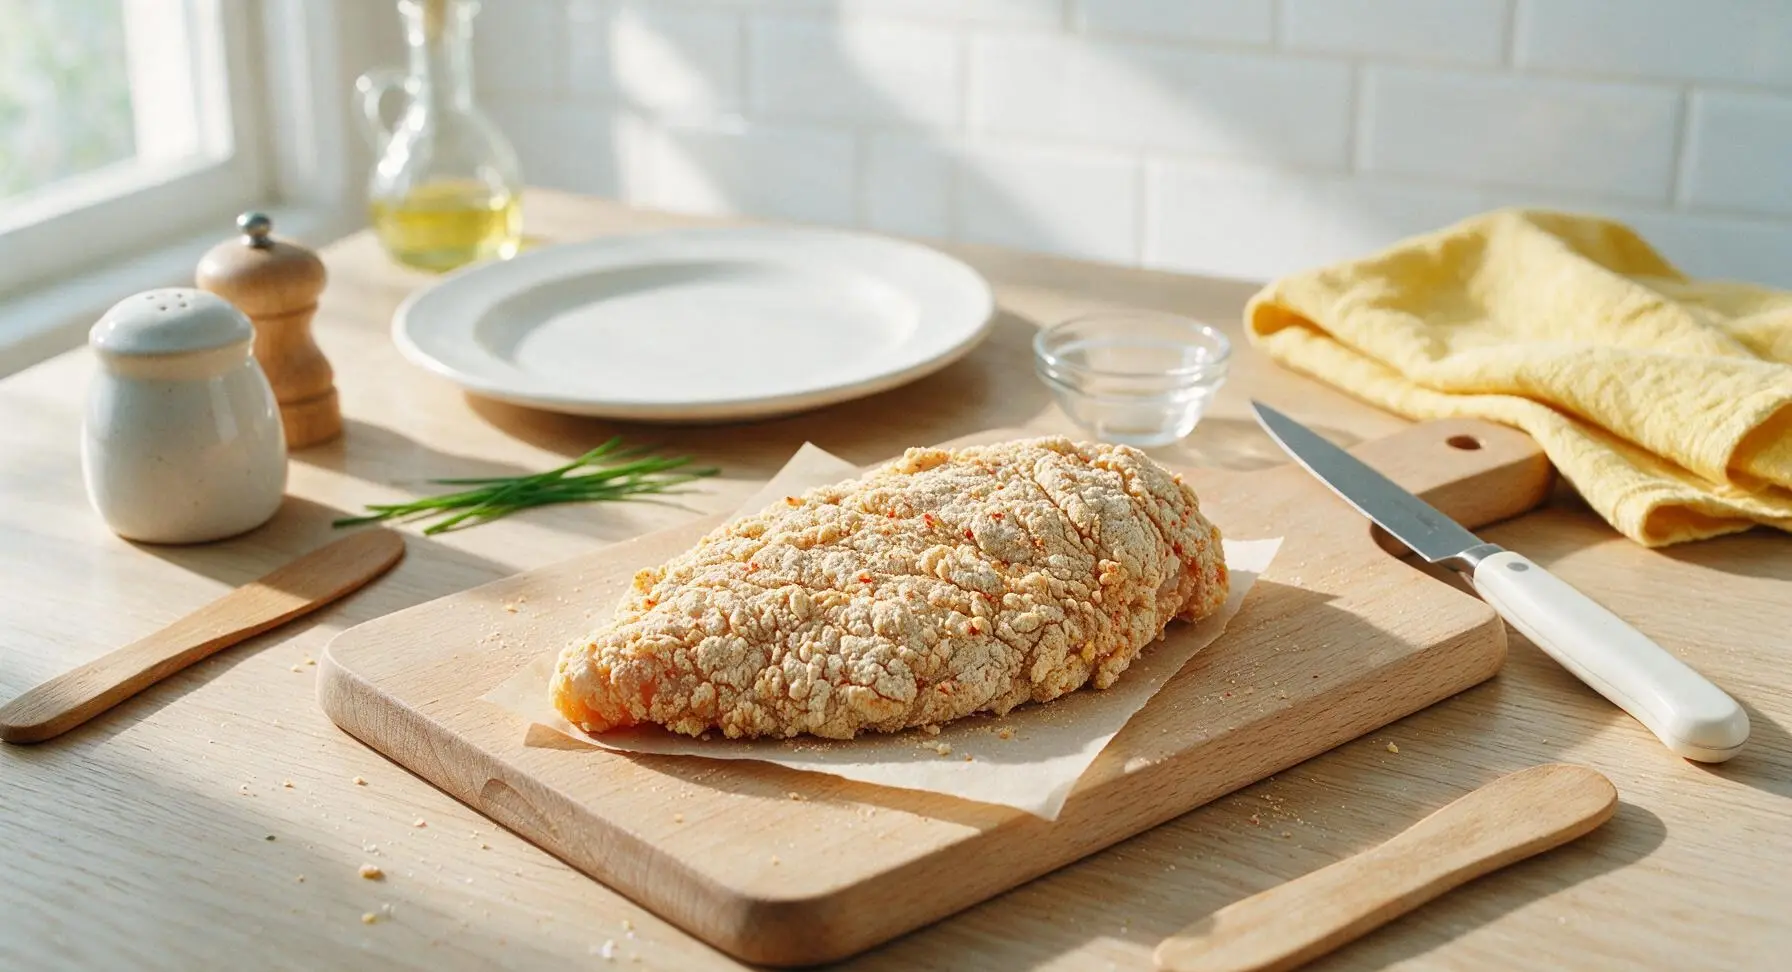
Working one fillet at a time, lift chicken from the buttermilk brine, letting excess buttermilk drip off for 2 full seconds. Press the fillet firmly into the seasoned flour dredge, coating every side completely, then lift and press a second time to create thick, craggy patches of flour on the surface. Set dredged fillets on a small sheet of parchment paper for 5 minutes before frying to let the crust set; this prevents breading from sliding off into the hot oil.
Step 5
step5:Dredge Chicken Fillets
Step 5
step5:Dredge Chicken Fillets
6

First Fry Fillets

Once oil holds a steady 175C (350F), use the silicone-tipped tongs to carefully lower 2-3 dredged fillets into the oil—do not overcrowd the pot, as this drops oil temperature rapidly and leads to soggy, oil-soaked crust. Fry for 6 minutes total, flipping each fillet once at the 3 minute mark, until fillets are pale golden and reach an internal temperature of 70C (160F). Remove fillets from oil and place on the wire rack to drain for 4 minutes.
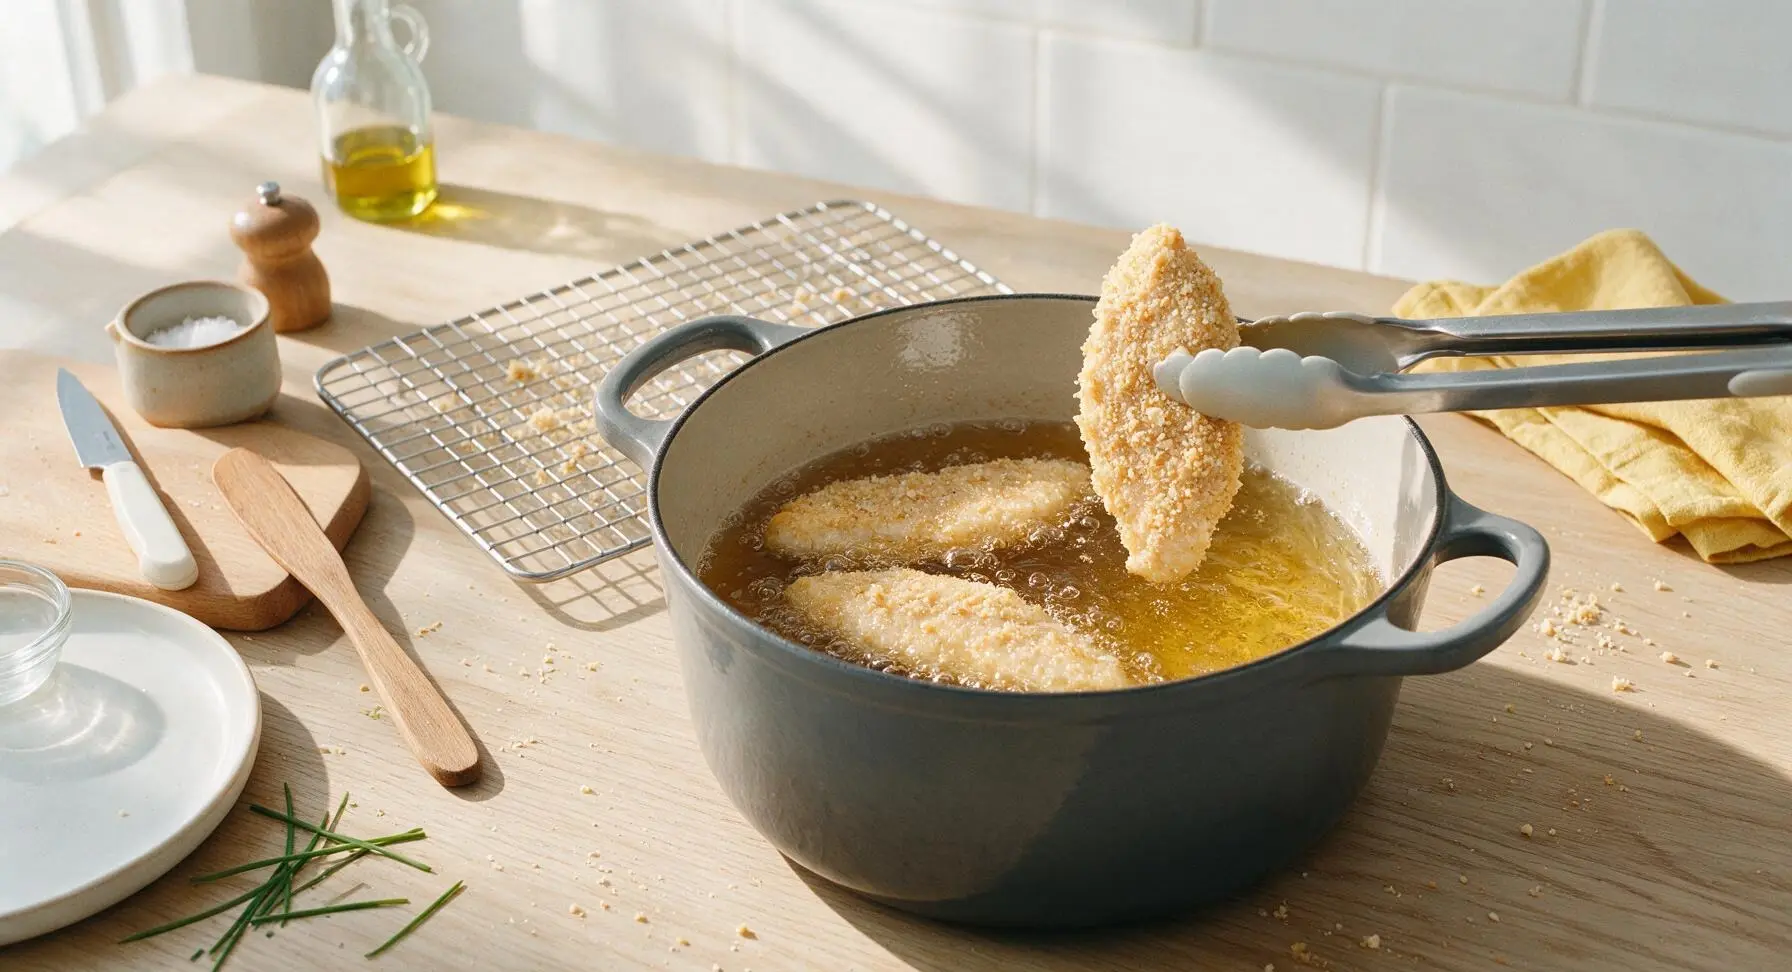
Step 6
step6:First Fry Fillets
7

Second Fry for Crunch

After the 4 minute drain period, increase heat under the Dutch oven to bring oil temperature up to 190C (375F). Return par-fried fillets to the oil in batches of 2-3, frying for 2-3 minutes until the crust is deep golden brown, shattery, and crisp when tapped with the tongs. Remove fillets back to the wire rack, sprinkling each with a tiny pinch of extra kosher salt immediately while the crust is still hot and oily. This double-fry method creates a crust that stays crispy for 30+ minutes as the chicken rests.
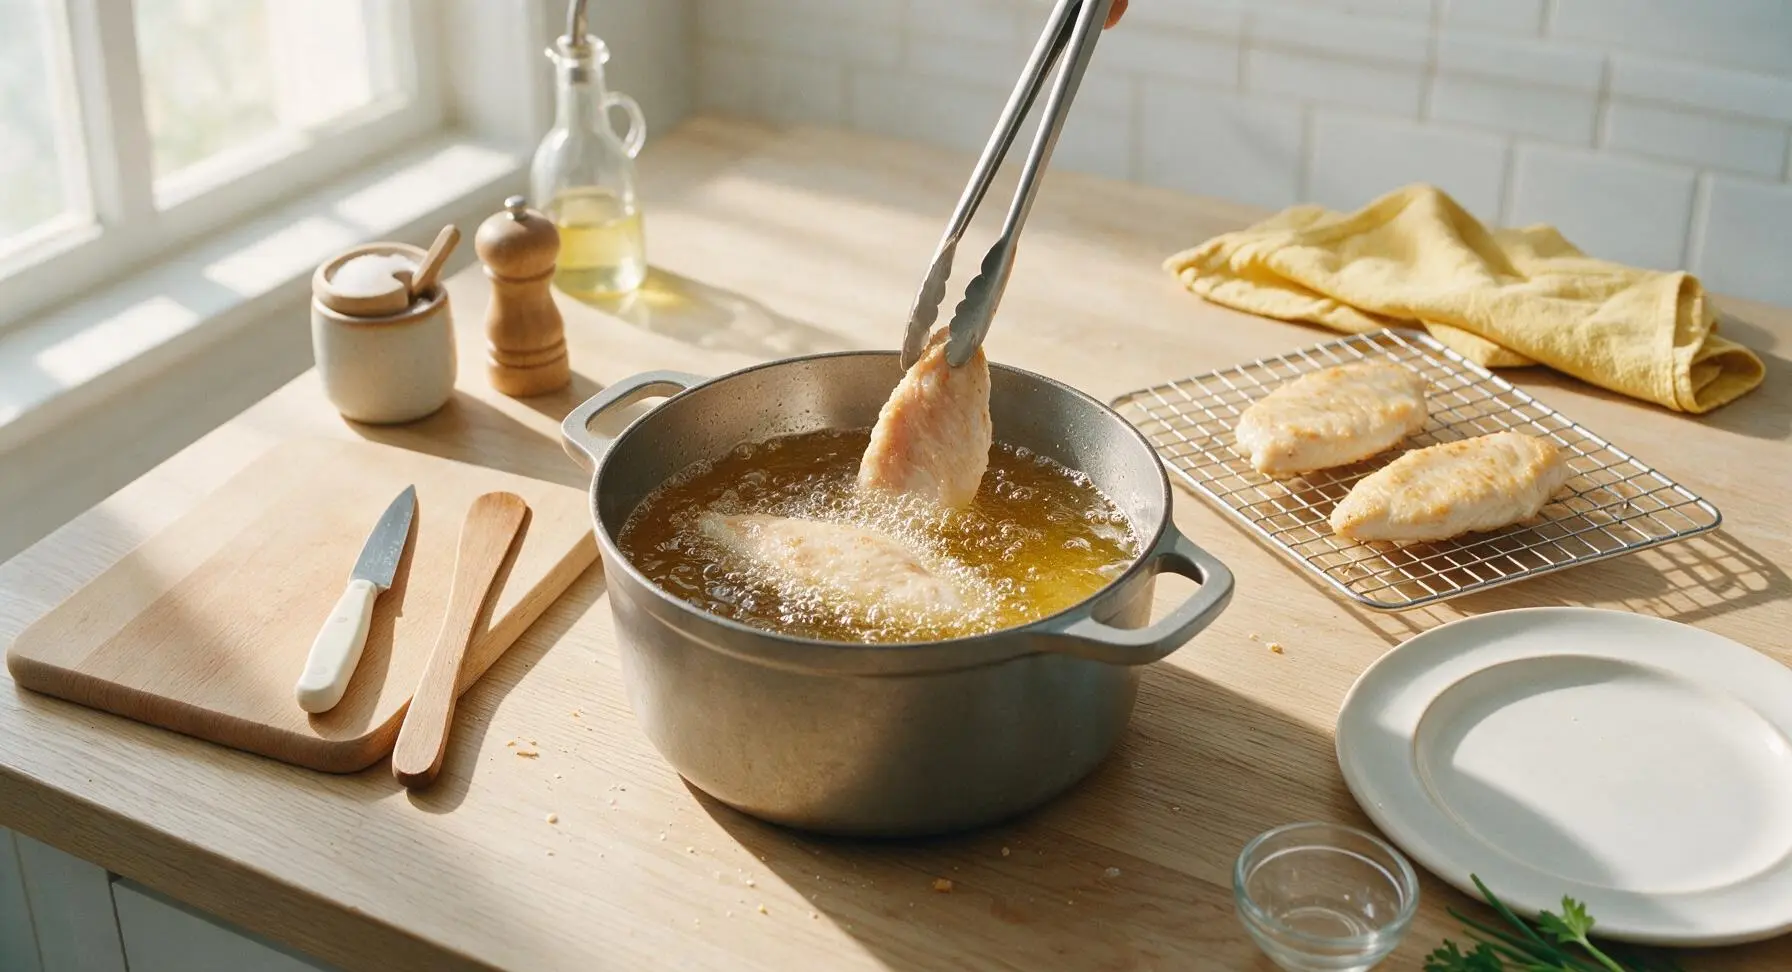
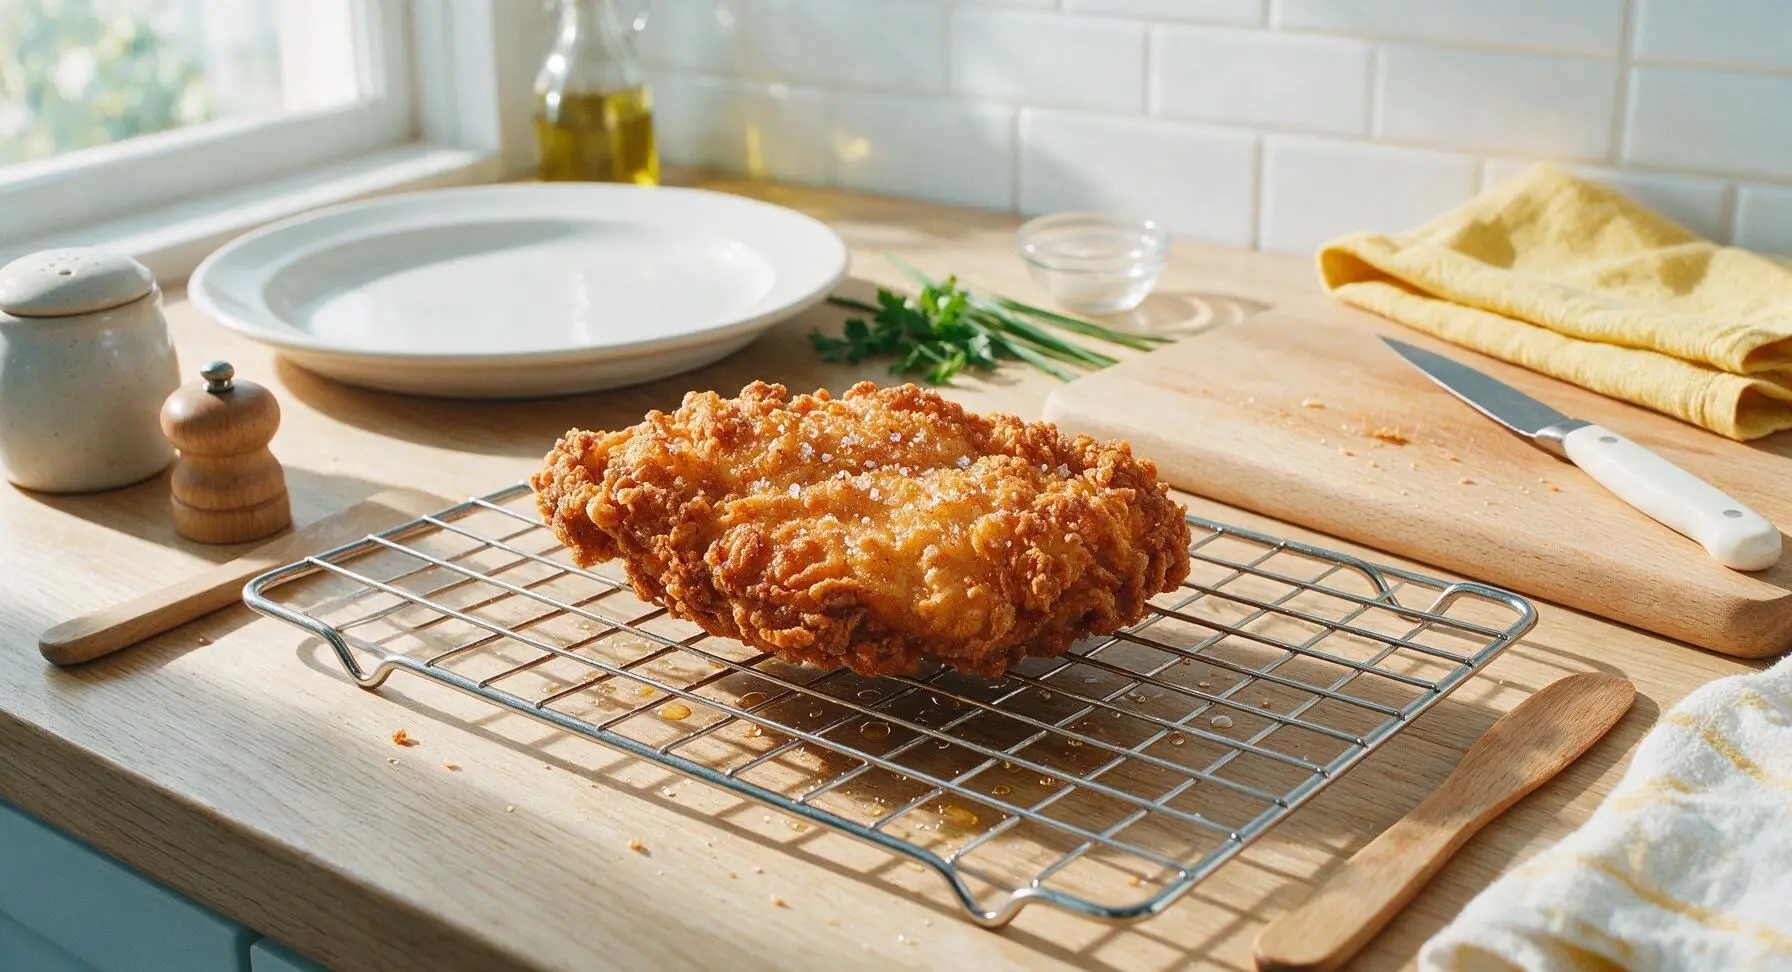
Step 7
step7:Second Fry for Crunch
Step 7
step7:Second Fry for Crunch
8

Plate and Serve

Let fried fillets rest for 2 minutes to let excess oil drain. While resting, stir 1/4 cup mayonnaise and 1 tsp hot sauce together in the small matte white ceramic ramekin until smooth and evenly pale orange. Arrange the hot crispy fillets on the matte cream ceramic dinner plate, tuck a sprig of fresh parsley next to them for a bright green garnish, and serve immediately with the dipping sauce.
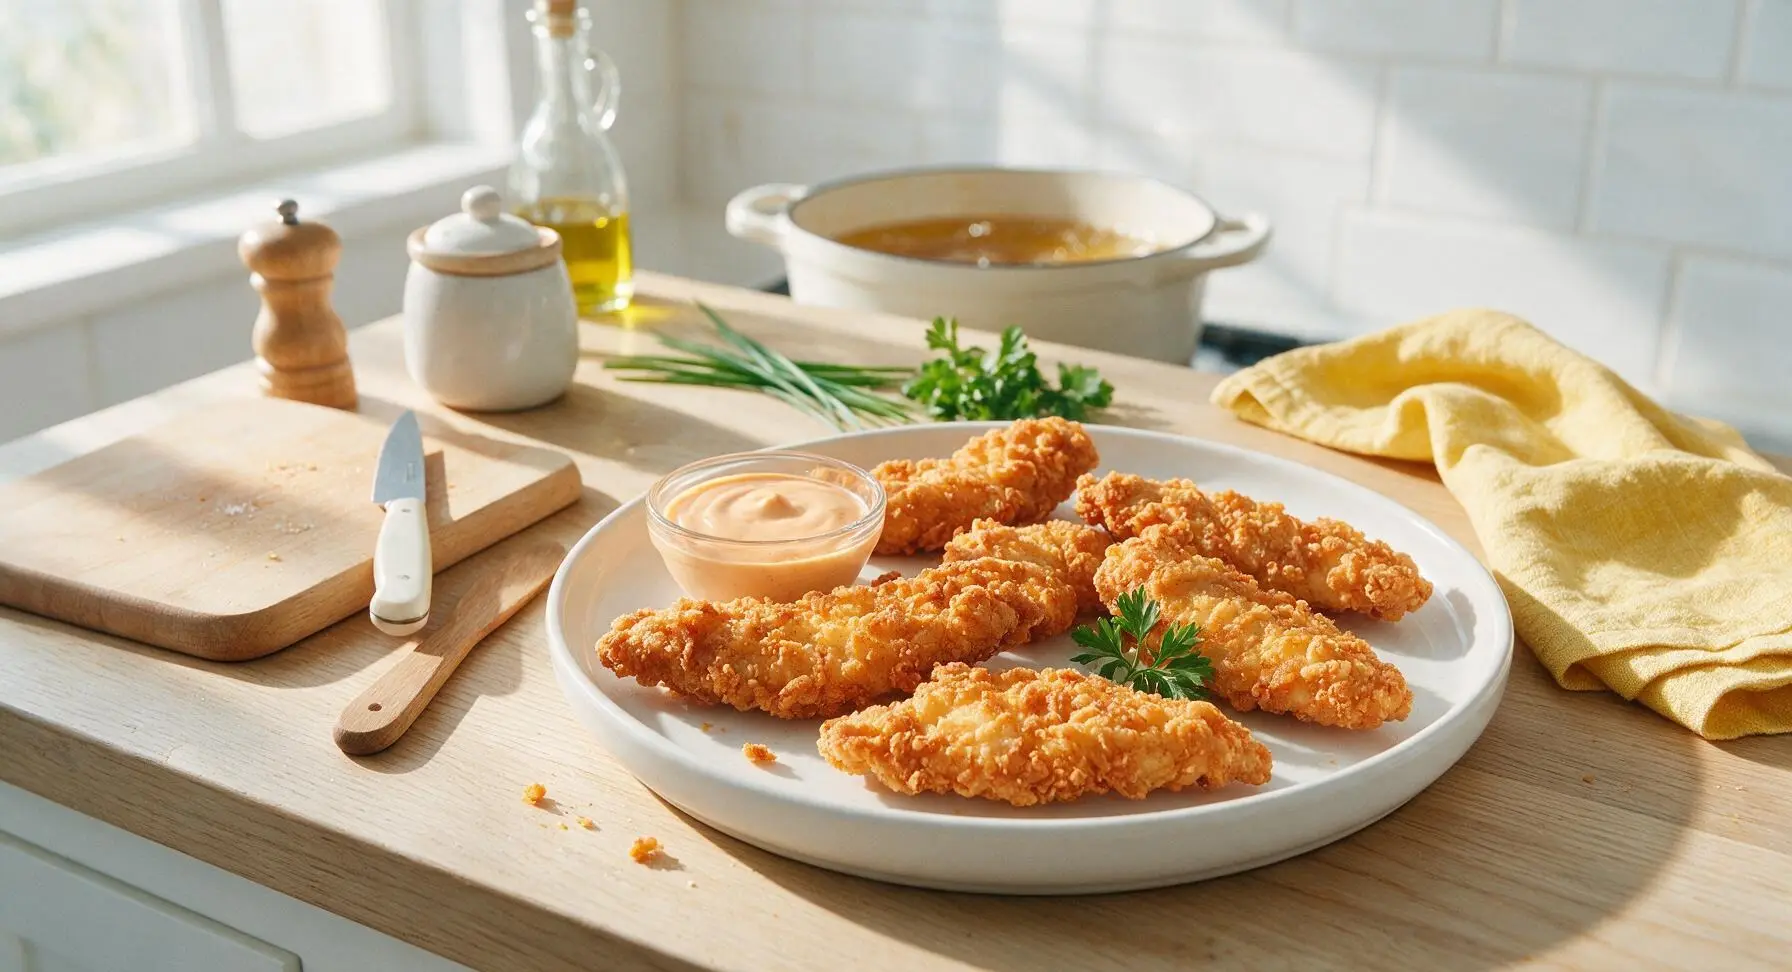
Step 8
step8:Plate and Serve

Tips

1.Never skip the 5-minute rest after dredging: this resting period lets the flour absorb moisture from the buttermilk to form a sticky, adherent coating that stays attached to the chicken during frying, instead of sliding off into the oil and leaving bare spots.
2.Wait for oil temperature to recover between batches: adding cold chicken drops oil temperature by 10-15C, so pause 1-2 minutes after removing each batch to let the oil climb back to the target temperature, which prevents soggy, grease-logged crust.
3.Salt chicken immediately after the second fry: the hot, oil-moistened crust surface dissolves and holds salt crystals evenly, creating a perfectly seasoned bite, rather than salt bouncing off a cool, dry crust later.


✨ You May Also Like

Snacks & Appetizers
🍜 Mexico

Crispy thick-cut tortilla chips piled high with seasoned beef, melted cheese, and bright fresh toppings for a shareable, crowd-favorite bite.

⏱️ 25 minuteSnacks & Appetizers ★ 4.8
Snacks & Appetizers
🍜 United States

Crisp, sweet-tangy spiced pickled watermelon rind is a zero-waste summer staple, perfect with grilled meats, charcuterie, or eaten straight from the jar as a bright snack.

⏱️ 30 minuteSnacks & Appetizers ★ 4.6
Snacks & Appetizers
🍜 Germany

A tangy, jellied pork cold cut slow-simmered with aromatic spices, set into a firm sliceable loaf, served cold with mustard and crusty bread.

⏱️ 3 hours 4Snacks & Appetizers ★ 4.8
Snacks & Appetizers
🍜 United States

Creamy, tangy, perfectly seasoned hard-boiled egg halves filled with a rich, smooth yolk mixture, a timeless, crowd-pleasing bite for holiday and casual gatherings alike.

⏱️ 40 minuteSnacks & Appetizers ★ 4.8
Snacks & Appetizers
🍜 Russia

Silky, dill-forward no-smoke cured salmon, a Scandinavian classic with bright salty-sweet flavor, ideal for holiday starter platters and open-faced rye sandwiches.

⏱️ 48 hours Snacks & Appetizers ★ 4.7
Snacks & Appetizers
🍜 Japan

Crisp golden bottoms, juicy savory pork and vegetable filling, and tangy dipping sauce make these pan-fried gyoza a beloved shareable bite.

⏱️ 45 minuteSnacks & Appetizers ★ 4.8

fried chicken fillet:Frequently Asked Questions

1.How long should I brine the chicken fillets in buttermilk for the juiciest results? ▾
Aim for a minimum of 4 hours, and up to 24 hours, stored covered in the fridge. The mild lactic acid in buttermilk tenderizes chicken gently without making it mushy, and locks in moisture to prevent dryness during frying. Skip brining longer than 24 hours, as that can soften the chicken surface too much for a crisp crust to stick properly.
2.Can I use a buttermilk substitute if I don’t have any on hand? ▾
Absolutely! For every 1 cup of regular whole milk, stir in 1 tablespoon of white vinegar or fresh lemon juice, then let it sit 5-10 minutes at room temperature until it thickens and curdles slightly. It won’t have the exact tang of cultured buttermilk, but it will tenderize chicken and deliver very similar flavor and texture.
3.Why do you use a mix of all-purpose flour and cornstarch for the coating? ▾
That blend is the secret to that signature shatteringly crisp crust! All-purpose flour builds structure and a savory, golden base, while cornstarch cuts down on gluten development to keep the crust light, extra crunchy, and less likely to turn soggy, even 15-20 minutes after frying. Using only flour creates a tougher, chewier crust.
4.How thick should I cut the chicken fillets for even cooking? ▾
Pound or cut your boneless skinless chicken breasts to a uniform ½-inch thickness. If fillets are thicker in spots, the outside will burn before the inside reaches a safe 165°F, and if they’re too thin, they’ll dry out fast. Cut large breasts in half horizontally first, then gently pound thick edges to match the rest of the fillet.
5.What’s the purpose of double-frying the chicken fillets? ▾
Double frying is what makes the crunch last long after you pull chicken out of the oil! The first lower-temperature fry cooks the chicken through and sets the initial coating, and the second higher-temperature fry crisps the crust to perfect golden shatter, drives off excess oil, and prevents sogginess as the chicken cools.
6.What oil is best for frying these chicken fillets? ▾
Reach for a neutral, high-smoke-point oil like canola, vegetable, peanut, or refined avocado oil. These won’t burn or develop bitter, off flavors at the high frying temperatures we use, and they won’t add competing strong flavors to the chicken. Avoid olive oil or butter, which have low smoke points and burn easily at frying heat.
7.What temperature should the oil be for each fry stage? ▾
For the first fry, heat your oil to 325°F, and cook fillets 4-5 minutes until just cooked through and pale golden. For the second fry, crank the oil up to 375°F, and cook 1-2 minutes per batch until the crust is deep golden and ultra crispy. Use a clip-on thermometer to track temp, and don’t overcrowd the pot, which drops oil temp fast.
8.How do I get that craggy, crispy crust texture instead of a smooth, hard coating? ▾
After dredging each buttermilk-soaked fillet in the flour-cornstarch mix, press the coating firmly into the chicken on all sides, then lift the fillet and let excess flour fall off before letting it rest 5-10 minutes on a wire rack before frying. That rest time lets the coating hydrate slightly, so it puffs up into craggy, crisp bits in hot oil.
9.Do I need to season the flour coating, or is the buttermilk brine salty enough? ▾
Don’t skip seasoning the coating! The buttermilk brine gets a good dose of kosher salt to season the chicken itself, but you’ll want to add extra kosher salt, plus any favorite seasonings (paprika, garlic powder, black pepper) directly to the flour mix, so the crust has plenty of flavor instead of tasting like plain starchy coating.
10.Can I prep these chicken fillets ahead of time for a party? ▾
You can brine the chicken in buttermilk up to 24 hours ahead, and mix your dry coating 2-3 days ahead stored in an airtight container at room temperature. Wait to dredge and fry fillets until 30-40 minutes before serving, though—even with the double-fry method, the crust will soften if left sitting for more than an hour.
11.Why is my crust falling off the chicken when I fry it? ▾
That almost always comes down to one of two issues: either you didn’t let the dredged chicken rest before frying, so the coating didn’t have time to adhere, or your oil temperature was too low, which makes the coating soak up oil and slide off instead of setting instantly. Press the coating firmly, rest 5 minutes, and keep oil at the correct temp.
12.How do I know when the chicken is fully cooked without cutting into it? ▾
The most reliable method is to use an instant-read thermometer stuck into the thickest part of the fillet—you’re looking for an internal temp of 165°F. If you don’t have a thermometer, poke a fillet gently after the first fry: juices should run clear, not pink, and the meat should feel firm, not squishy, at the center.
13.Can I make these in an air fryer instead of deep frying? ▾
You can, though the crust won’t be quite as shatteringly crisp as the deep-fried version. Dredge fillets as directed, spray both sides generously with neutral oil, then air fry at 380°F for 12-15 minutes, flipping halfway, until internal temp hits 165°F and the crust is golden. You won’t need the double-fry step for air fryer prep.
14.What’s in the creamy pepper dipping sauce mentioned in the recipe intro? ▾
It’s a super simple, tangy mix that pairs perfectly with crispy chicken! Stir together ½ cup mayonnaise, 2 tablespoons buttermilk, 1 teaspoon freshly cracked black pepper, ¼ teaspoon garlic powder, a pinch of kosher salt, and a tiny squeeze of lemon juice. Add a dash of hot sauce if you want a little extra zesty kick.
15.Should I put fried chicken on paper towels after frying to drain? ▾
Skip the paper towels! Letting fried chicken sit directly on paper towels traps steam against the crust, which makes it turn soggy fast. Instead, set a wire rack over a baking sheet, and place freshly fried fillets on the rack to drain for 2-3 minutes. Sprinkle a little extra flaky salt on them right when they come out of the oil, too.
16.Can I use boneless chicken thighs instead of chicken breast for this recipe? ▾
Absolutely! Boneless, skinless chicken thighs work beautifully here, and many people prefer their richer, juicier flavor. Cut or pound them to the same ½-inch thickness as the breast fillets, keep the brine and coating process identical, and add 1-2 minutes to the first fry time to make sure they cook through evenly.
17.How do I keep the chicken warm and crisp if I’m frying multiple batches? ▾
Set your oven to 200°F, and place the wire rack of drained, freshly fried fillets directly on the middle oven rack while you cook remaining batches. The low, dry oven heat will keep chicken at a safe serving temperature without making the crust soggy, and it won’t overcook the tender chicken inside.
18.My crust gets too dark before the chicken is cooked through—what am I doing wrong? ▾
That’s almost always a sign your oil temperature is too high, or your fillets are too thick. If oil is over 350°F for the first fry, the coating will brown and burn fast before the chicken inside cooks. Double check oil temp with a thermometer, and make sure all fillets are a uniform ½-inch thick for even cooking.
19.Can I freeze leftover fried chicken fillets for later? ▾
Yes! Let leftover fillets cool completely, then wrap them tightly in plastic wrap and store in a freezer-safe bag for up to 3 months. To reheat, place them on a wire rack over a baking sheet and bake at 375°F for 15-20 minutes until heated through and crust crisps back up—skip the microwave, which makes crust rubbery and chicken soggy.

Comments (11)

2 days ago

OMG this fried chicken is a GAME CHANGER for our Sunday family dinners! The crust was so shatteringly crisp, even after I let it sit on the wire rack for 10 minutes while I finished the mac and cheese. My 3 kids practically fought over the last fillet, and my husband asked when I’m making it again. 10/10 no notes!

yesterday

Wait did you brine the chicken extra in the buttermilk? I’m making this for our church potluck next weekend and want it to be perfect!

yesterday

So glad your family loved it! For potlucks, a 12-24 hour buttermilk soak in the fridge gives extra juiciness, and you can re-crisp fillets in a 400F oven for 5 minutes right before serving if needed!

3 days ago

As someone who’s burned every fried chicken attempt I’ve ever made, this recipe was so easy to follow! The 18 minute cook time was spot on, no raw chicken in the middle and no burnt crust. My roommates are convinced I’m a secret chef now lmao. Only thing I added was a little extra paprika to the flour mix for a tiny kick.

2 days ago

How does this hold up for meal prep? I’m trying to add easy protein options for my work lunches this week

2 days ago

Love the extra paprika add! For meal prep, store fillets in an airtight container in the fridge for up to 3 days, and reheat in an air fryer or oven to keep the crisp—microwaving will make the crust soggy!

1 week ago

Made this for my kid’s soccer team potluck last weekend and every single fillet was gone in 10 minutes. Multiple parents asked for the recipe, I felt like a celebrity. The crisp level is insane, way better than the fast food fried chicken we usually grab on busy nights. Will absolutely be making this biweekly from now on.

5 days ago

Did you cut the fillets into smaller strips for the potluck? I’m making this for my block party and debating if strips are easier for people to grab!

5 days ago

We’re so flattered it was a potluck hit! Cutting into strips cuts the cook time down by about 4-5 minutes, so just keep an eye on internal temp (165F!) if you go that route for your block party.

5 days ago

Made this for my husband for our first married date night in and he said it’s better than the fancy fried chicken we had at our wedding reception! I was nervous about frying at home since I never have before, but the step by step instructions were so clear. The buttermilk tang is *chef’s kiss*.

3 days ago

Congratulations on your marriage! That means the world to us—so glad you two had a perfect date night in. Don’t be afraid to play around with seasoning blends to make it your own over time!

30 minutes ago

Tried this last night and WOW. The crust actually sticks to the chicken?? I can’t tell you how many fried chicken recipes I’ve tried where half the breading falls off in the oil. The tip about pressing the flour mix into the fillets and letting them rest before frying is genius. Absolute keeper. Only reason it’s not 5 stars is I over-salted my first batch, totally my fault though, not the recipe’s.

5 minutes ago

Wait how long did you let them rest before frying? I had the breading fall off last time I made fried chicken so I’m paranoid!

2 weeks ago

Made these to pack for a day hike with my buddies and they held up perfectly! No soggy crust even after being wrapped in foil for 3 hours in my pack. Super filling, great protein for the trail. I added a little cayenne and garlic powder to the dredge and it was chef’s kiss.

1 week ago

Love that these worked for your hike! The cayenne and garlic powder additions sound delicious—we love seeing people tweak the recipe to fit their tastes.

yesterday

I was worried this wouldn’t live up to my grandma’s fried chicken recipe but holy cow it’s SO good. I used a gluten free all purpose flour blend for my son who has celiac and it still got just as crispy as the regular flour version! He was so excited to have fried chicken that didn’t come from a frozen box.

2 hours ago

Oh thank you for sharing the GF flour swap! My daughter has a wheat allergy and I’ve been searching for a crispy fried chicken recipe that works for her, can’t wait to try this.

2 hours ago

This is my new go-to weeknight dinner! 18 minutes cook time is perfect for when I get home from work and don’t want to spend hours in the kitchen. I served it with coleslaw and roasted potatoes and my partner went back for seconds. Even the leftover cold piece I ate for lunch today was chef’s kiss.

30 minutes ago

Omg serving it with coleslaw and roasted potatoes is such a good idea! I’ve been making mine with fries but I need to try the roasted potato side next time, way healthier.

5 minutes ago

Made these for football watch party yesterday and they were a total touchdown. I made a quick spicy honey dip to go with them and people were drizzling it on every bite. Crispy, juicy, perfectly seasoned — what more could you want for game day? Will be on my rotation for every watch party this season.

just now

Okay I was so scared to try frying for the first time but this recipe made it so low stress! I used a candy thermometer to keep the oil temp steady like the recipe said and it turned out perfect. No oil splatters all over my stove, no undercooked chicken, just super crispy juicy fillets. I’m so proud of myself lol.

1 week ago

I’ve been making fried chicken for 40+ years and I have to say, this recipe nails the crisp factor. I was skeptical about the buttermilk soak ratio but it really does tenderize the chicken perfectly without making the breading soggy. My grandkids are already begging for me to make it again when they visit next month.



