
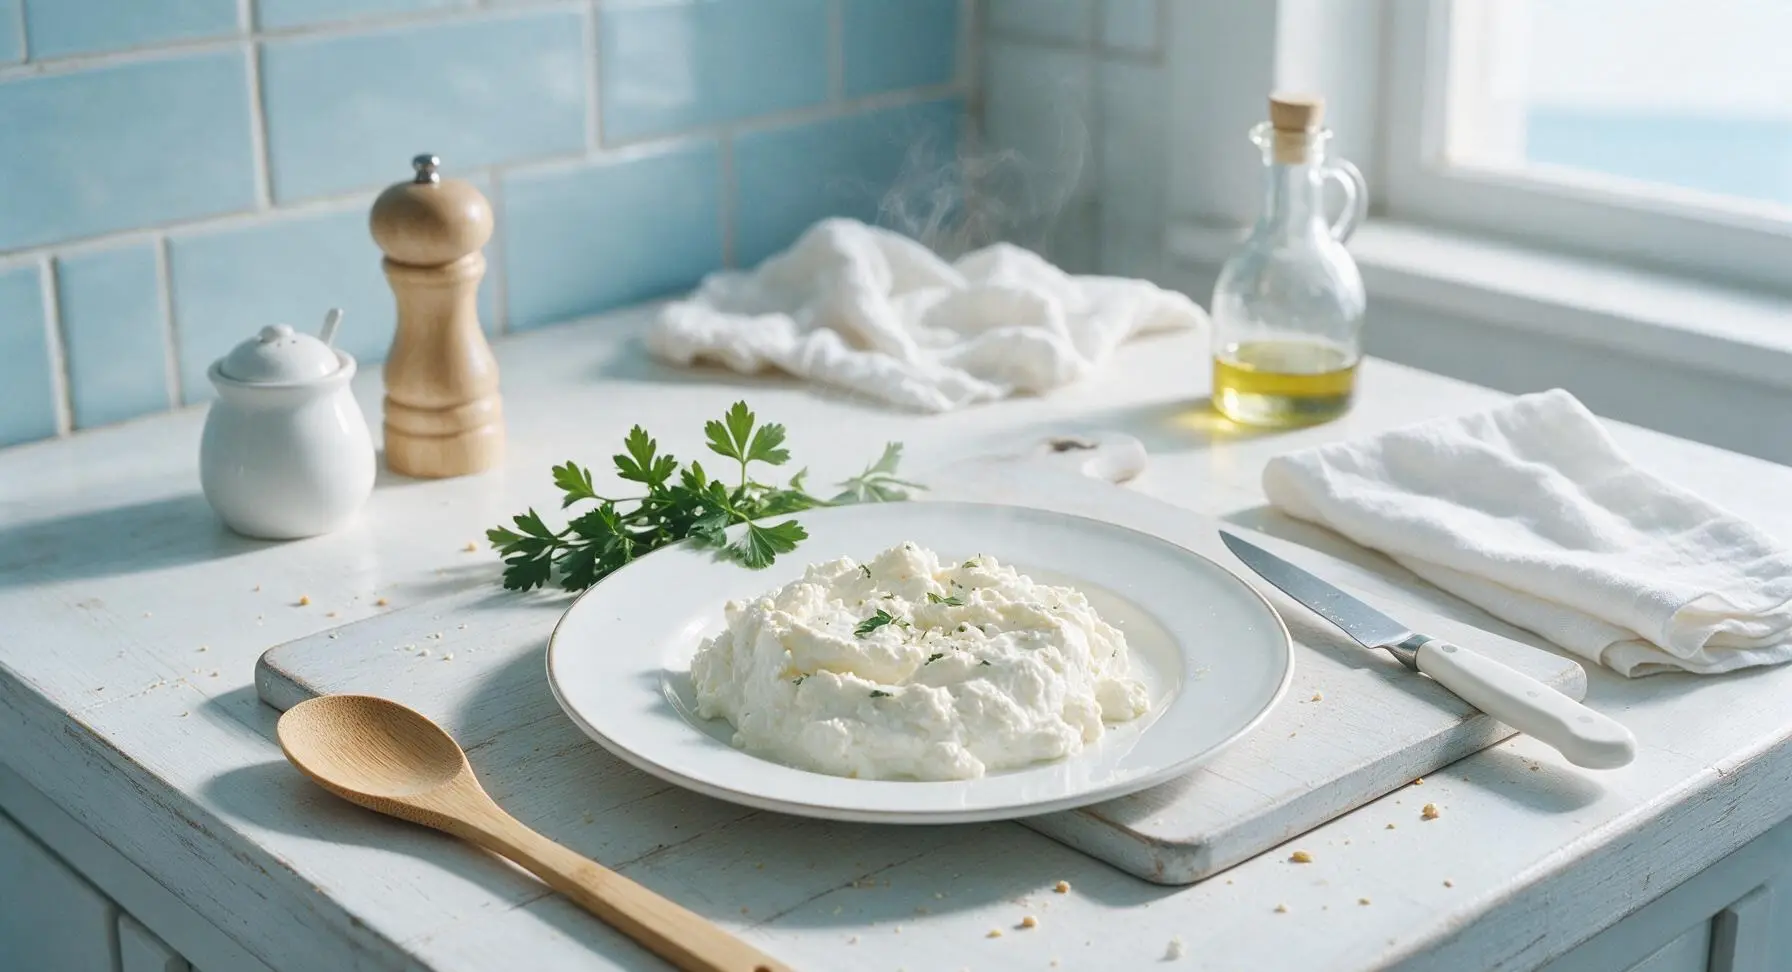
homemade cheese

title 1
homemade cheese
⏱️ cook time 1 hour 20 minutes (1 hour inactive pressing time)
🍽️ servings 6
⚡ Difficulty easy

intro

Creamy, mild fresh homemade cheese made with 5 simple ingredients, perfect for spreading on crusty bread, pairing with spring fruit, or adding to salads. No special cheesemaking equipment required for this beginner-friendly project.

Ingredients
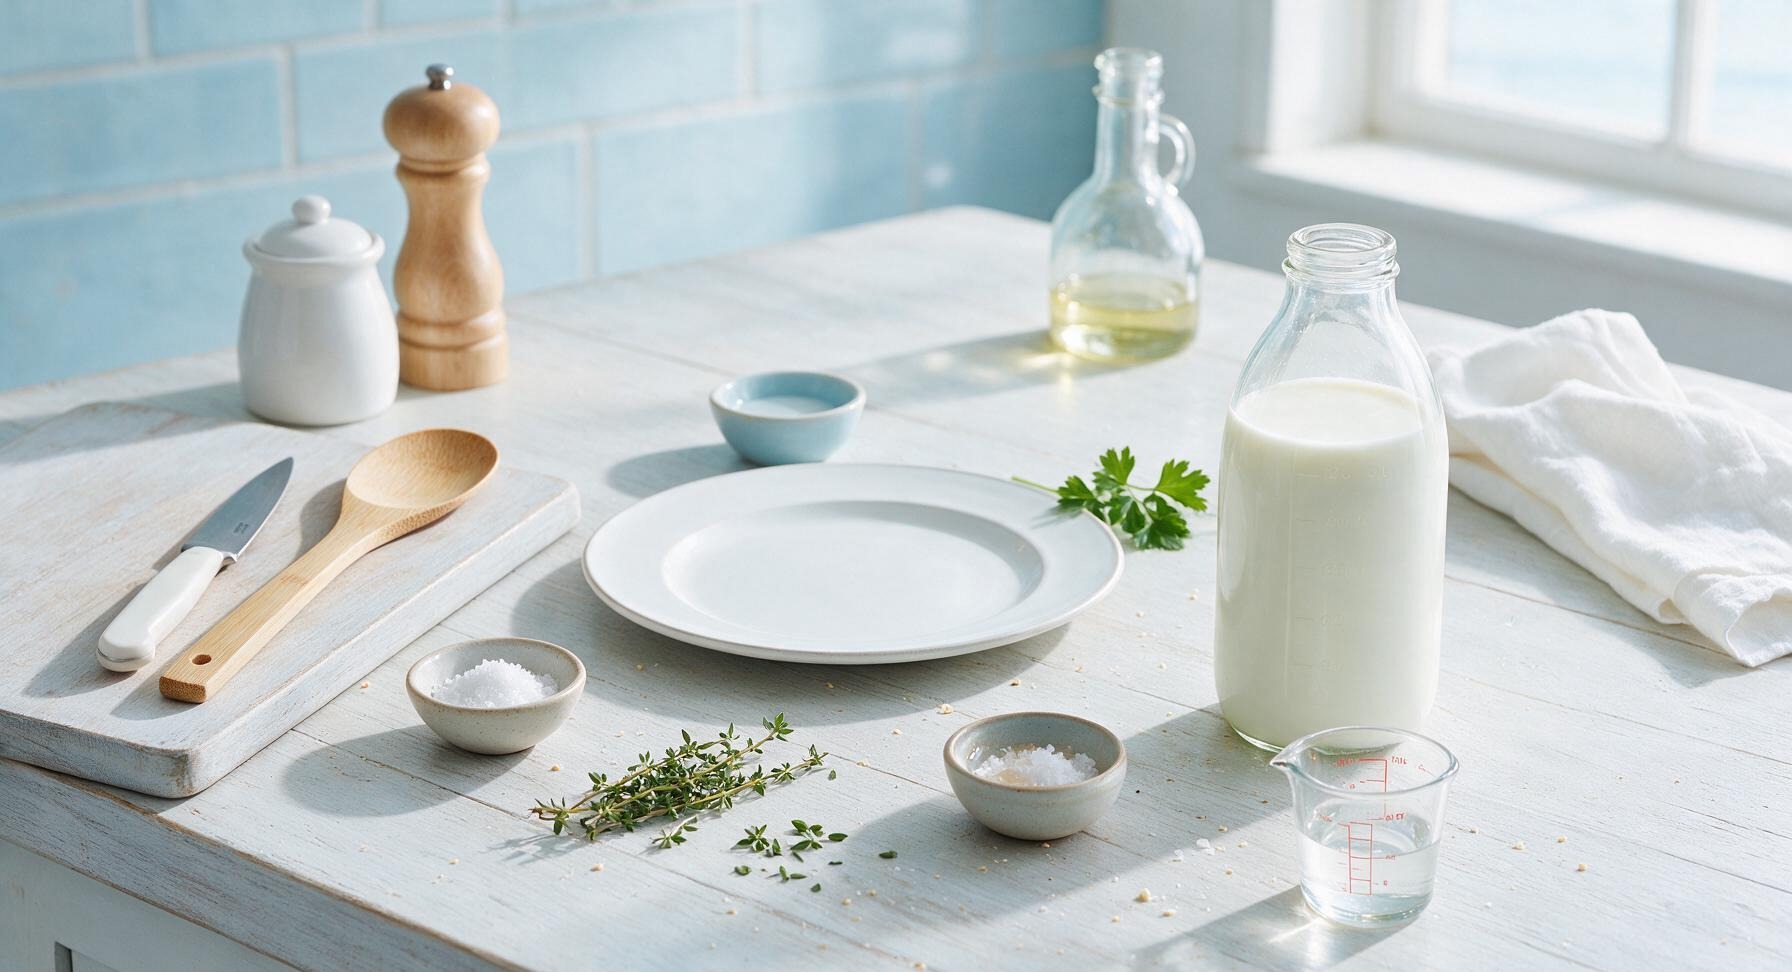
Whole cow's milk (not ultra-pasteurized) 2L
White distilled vinegar 60ml
Fine sea salt 1 tsp
Fresh thyme sprigs 3 sprigs (1 tbsp leaves)
Flaky sea salt 1/4 tsp
Raw wildflower honey (for serving) 2 tbsp

Steps

1

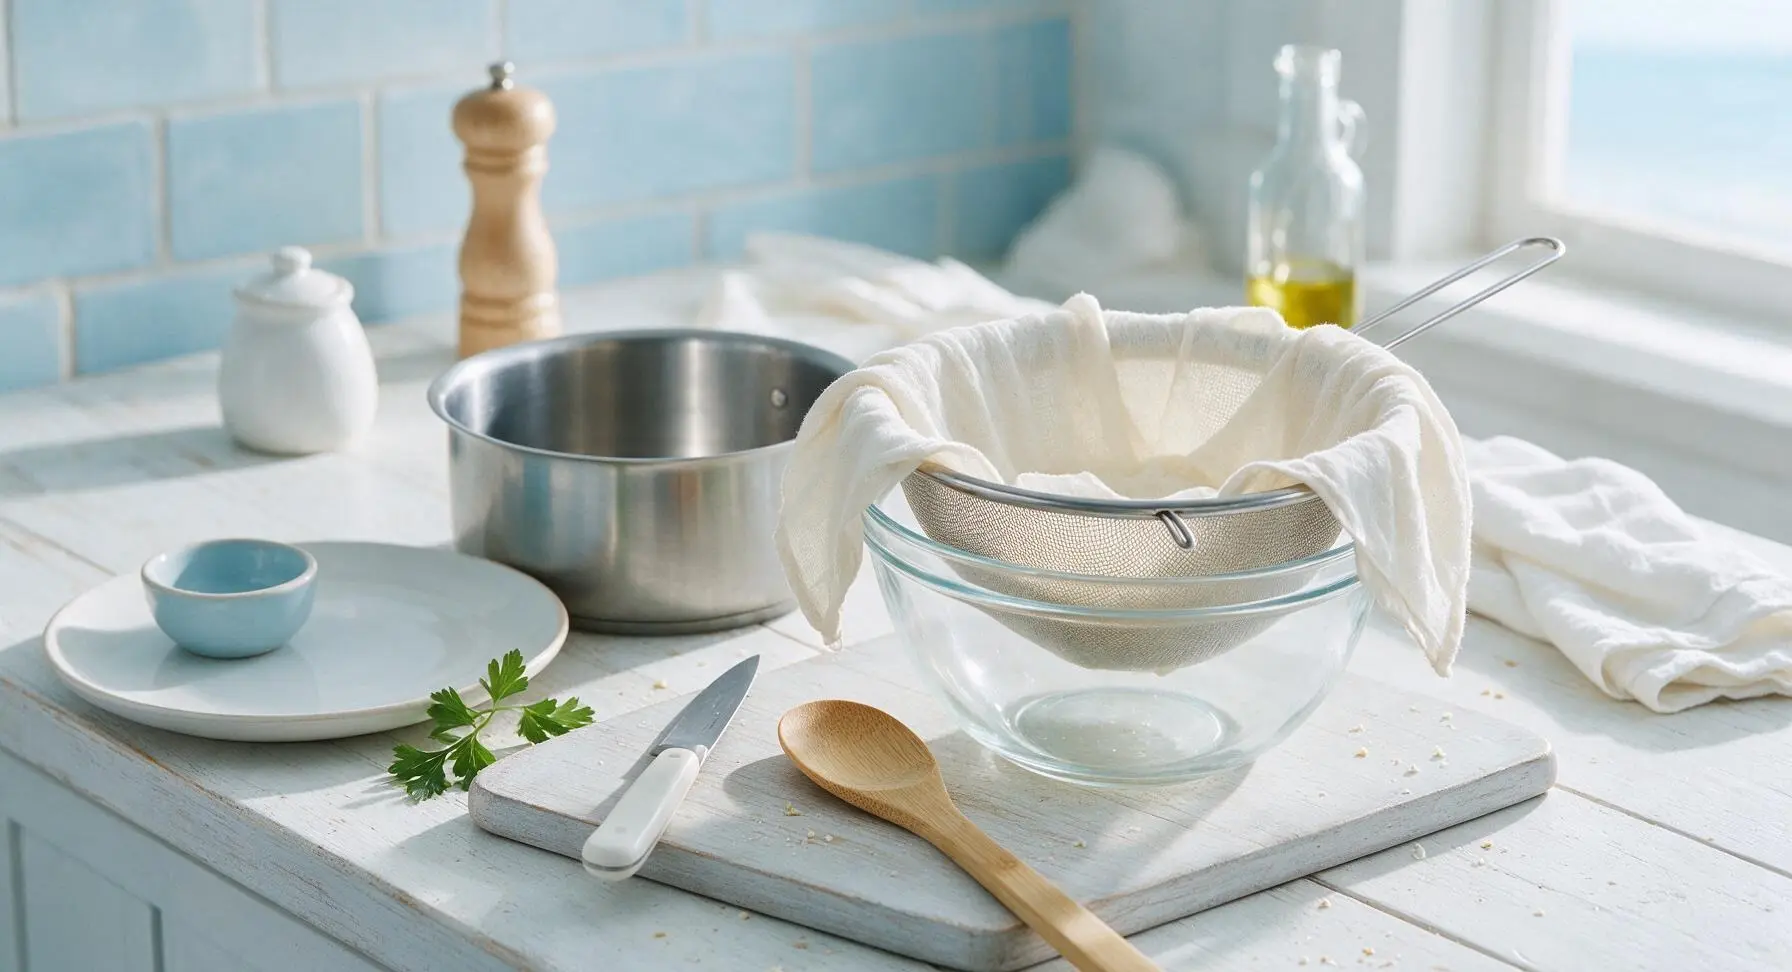
Prep Draining Station

Line the 20cm fine-mesh stainless steel sieve with 2 layers of the natural off-white cotton cheesecloth, leaving 5cm of cheesecloth overhang around all sieve edges. Set the lined sieve inside the 4L clear glass heatproof mixing bowl, so the sieve sits 5cm above the bowl bottom to catch drained whey. Keep this assembled setup in its fixed center-right position on the counter.
Step 1
step1:Prep Draining Station
2

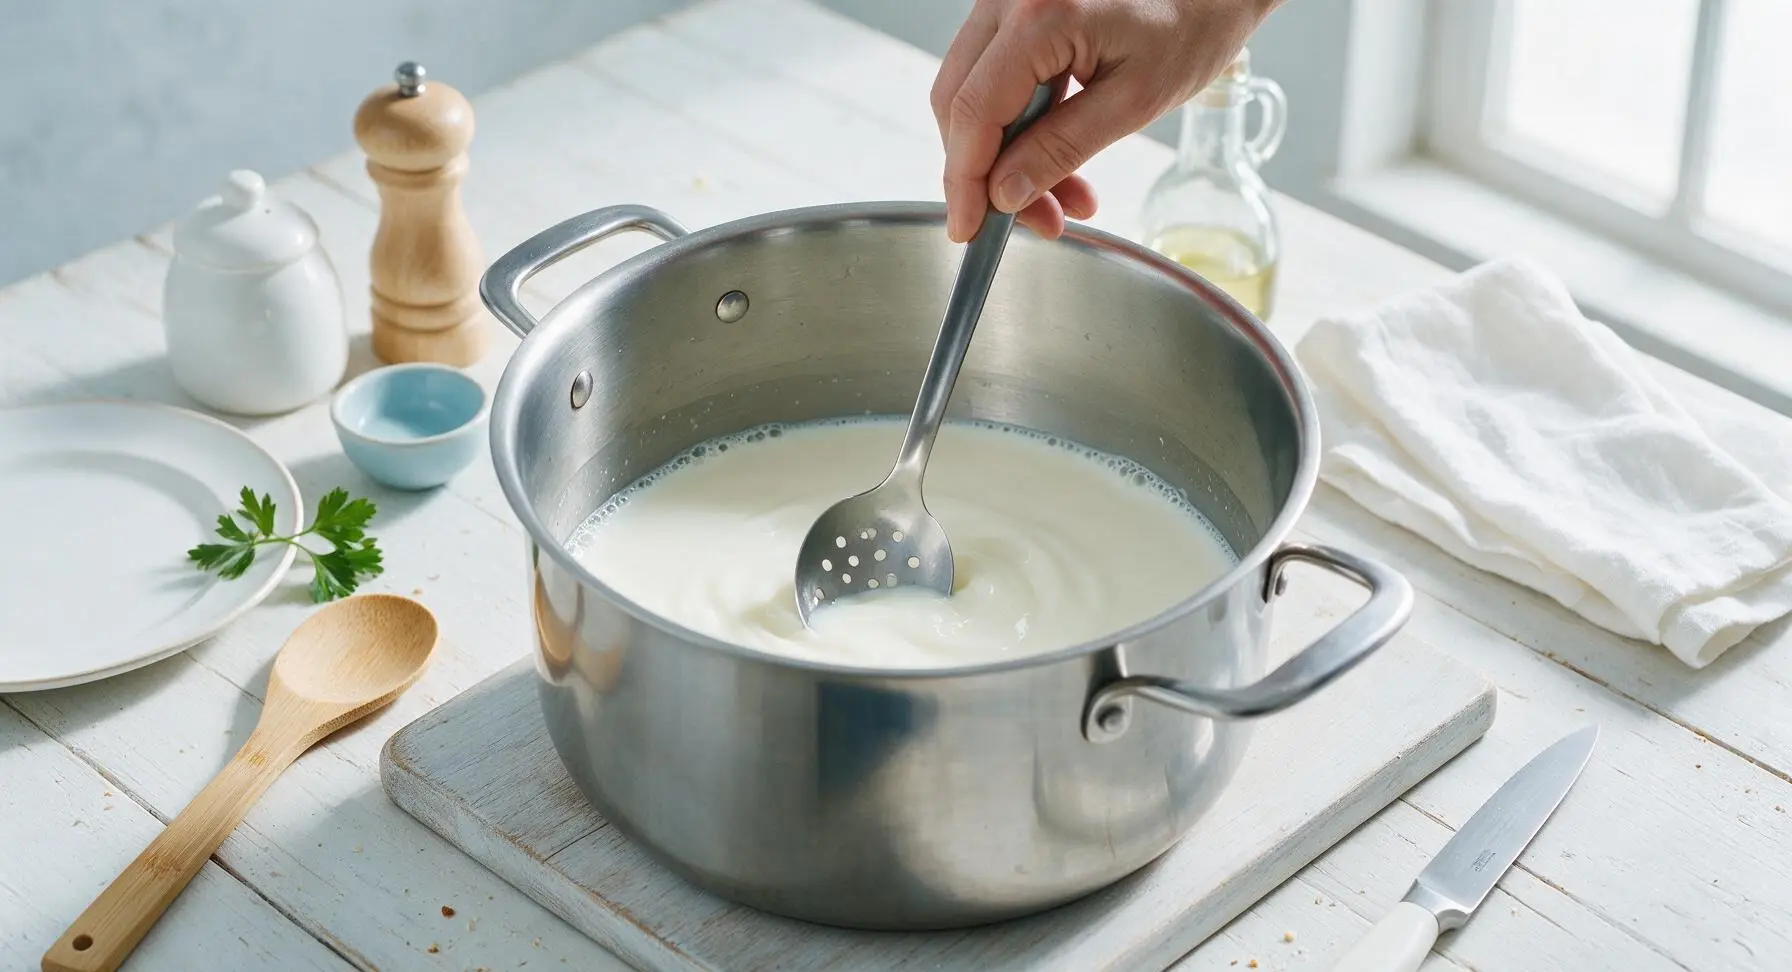
Heat Milk Slowly

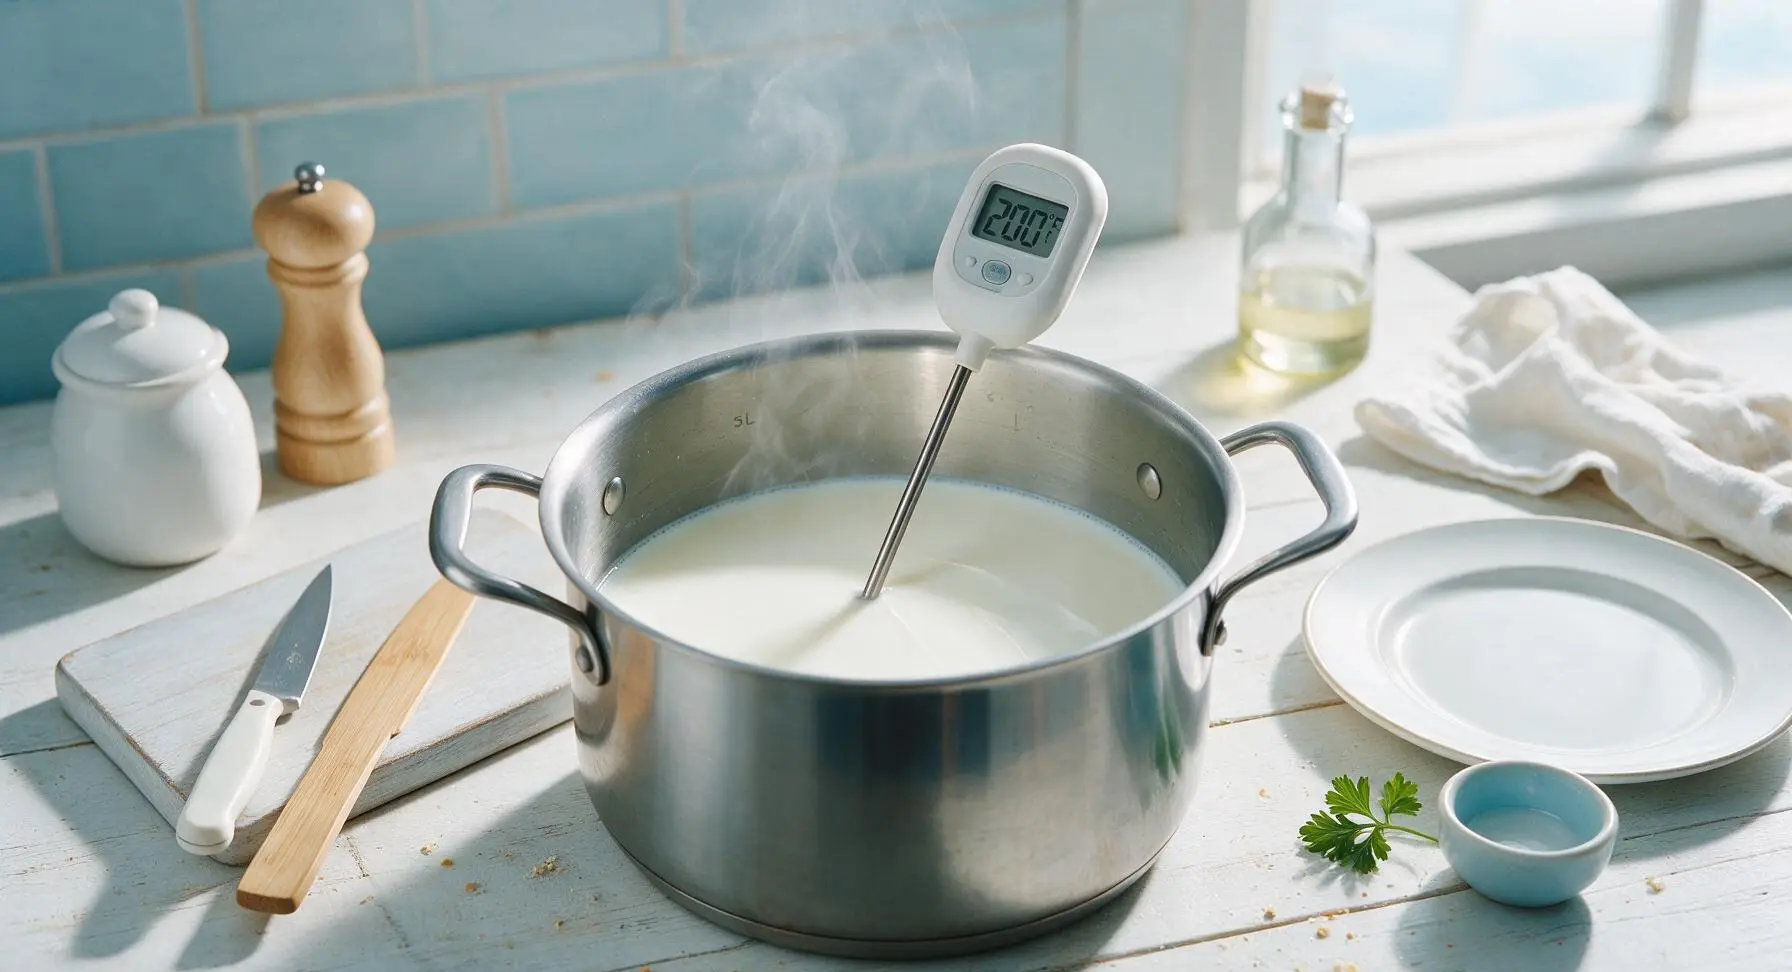
Pour 2L of whole (non-ultra-pasteurized) cow's milk into the 5L stainless steel stockpot. Set over medium-low heat, stirring slowly and regularly with the long-handled slotted stainless steel spoon to prevent milk from scalding on the pot bottom. Heat the milk until it reaches a steady 93°C (200°F), verified with the digital instant-read thermometer held in the center of the milk (do not touch the pot bottom with the probe, as this will give an inaccurate high reading). Do not allow the milk to reach a rolling boil, as high heat creates tough, rubbery curds.
Step 2
step2:Heat Milk Slowly
Step 2
step2:Heat Milk Slowly
3

Add Acid to Curdle

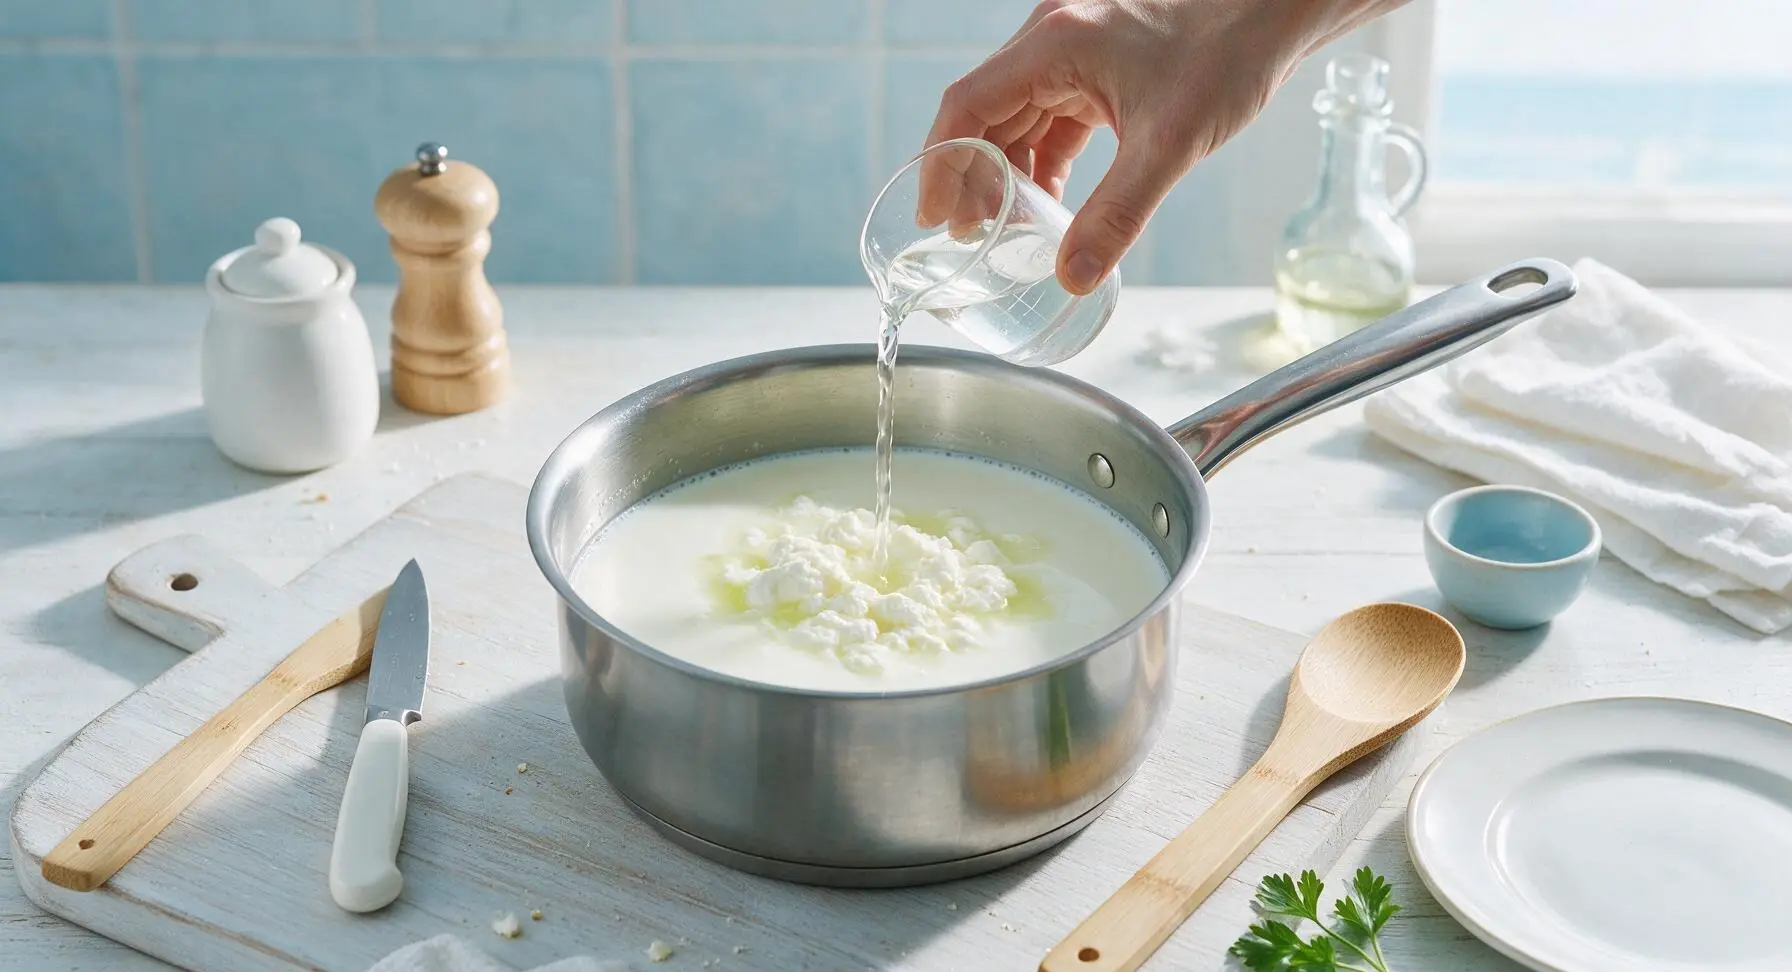
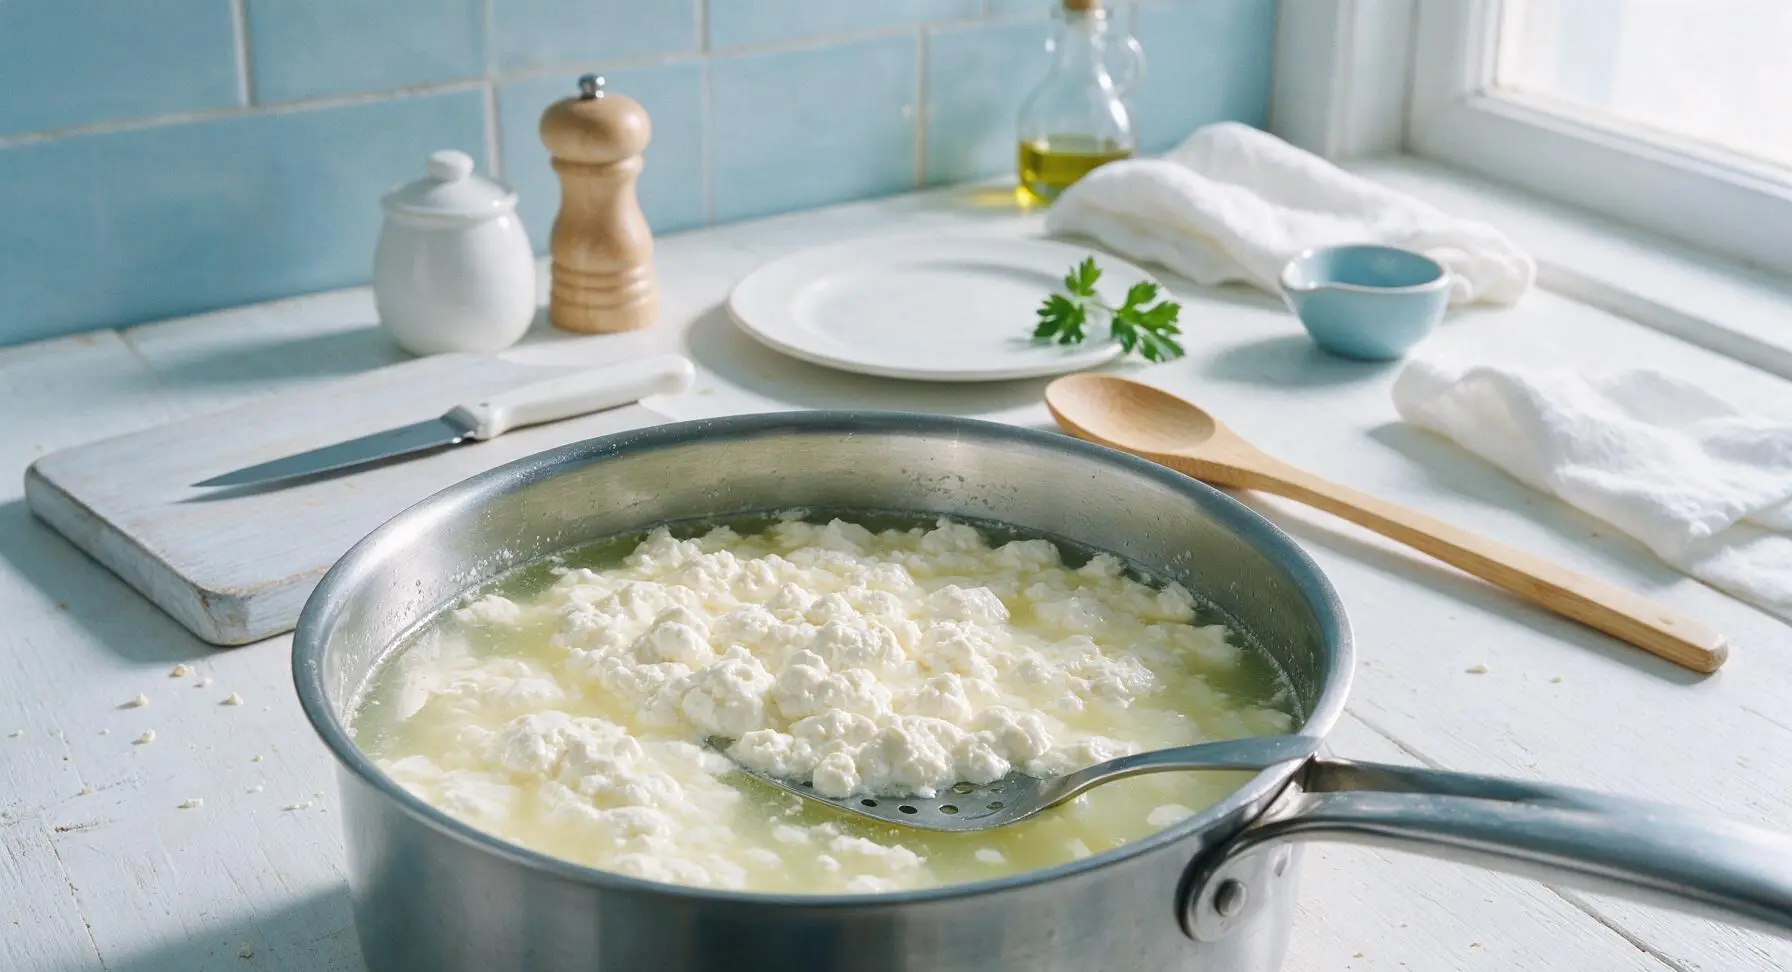
Turn off the heat under the pot. Pour the 60ml of white distilled vinegar from the small glass measuring cup into the hot milk, stirring slowly and gently with the slotted spoon for 10 seconds to distribute the acid evenly. You will immediately see soft white curds begin to separate from the pale, translucent yellow-green whey. Let the mixture rest, undisturbed, for 10 minutes to allow curds to fully form and firm up slightly.
Step 3
step3:Add Acid to Curdle
Step 3
step3:Add Acid to Curdle
4

Strain Curds from Whey

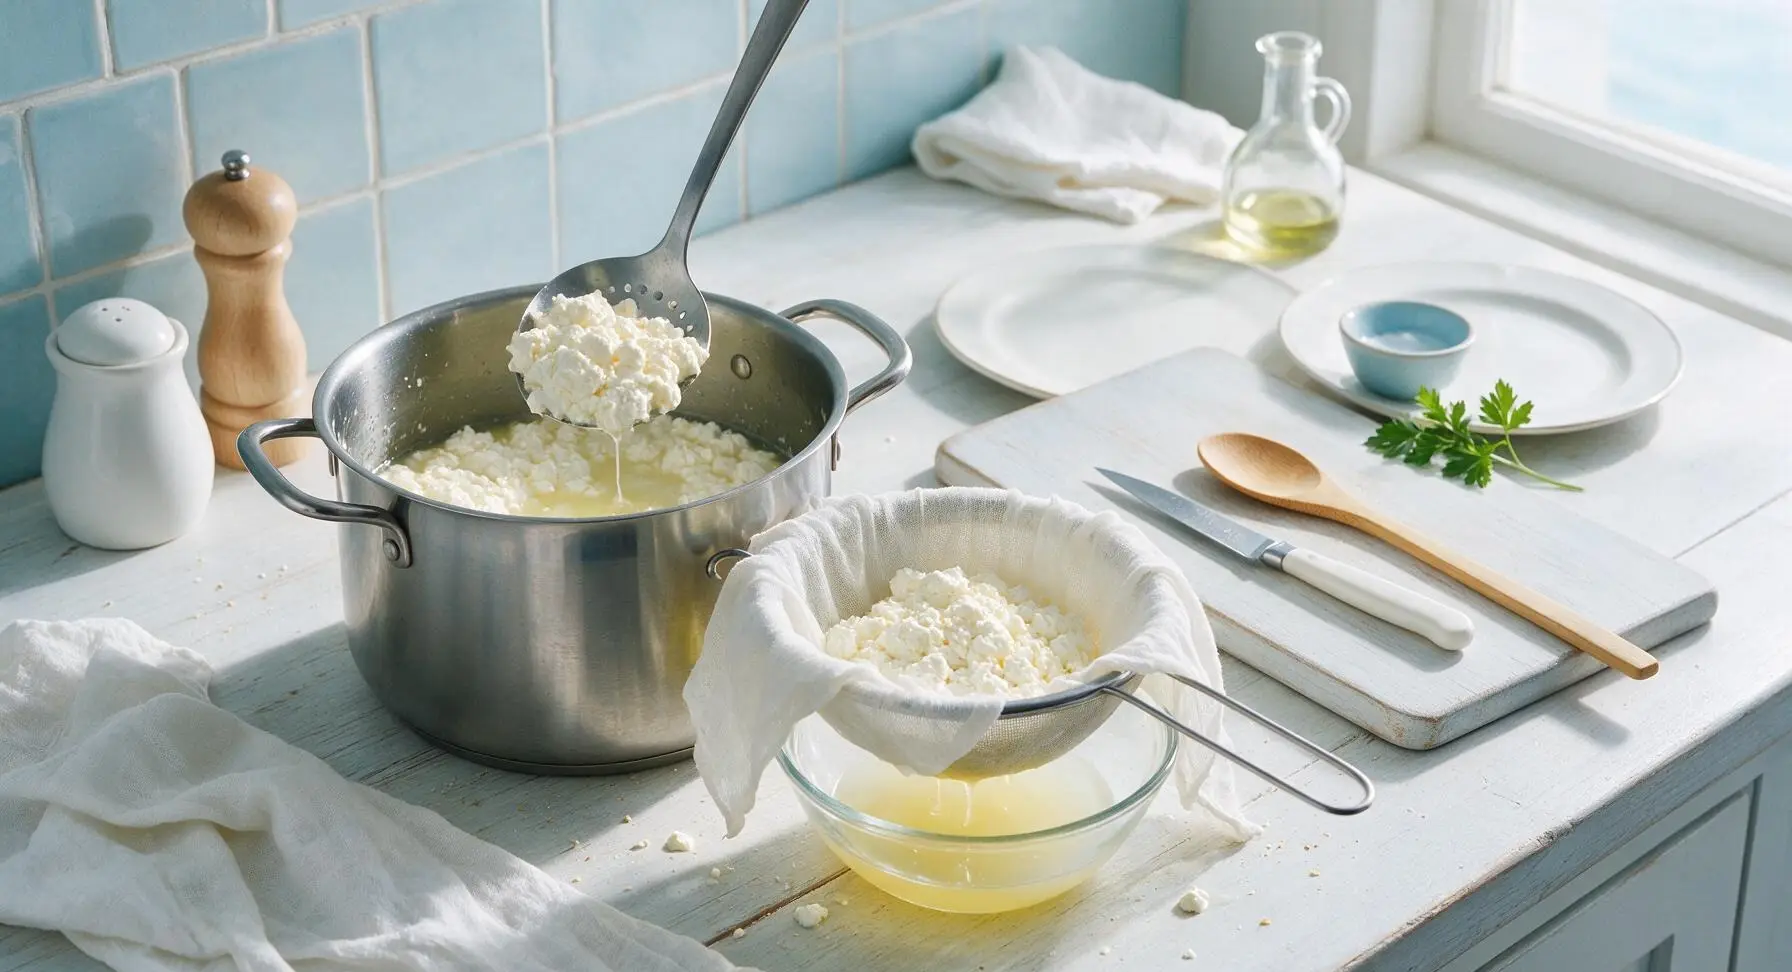
Gently ladle the curds and whey into the cheesecloth-lined sieve using the slotted spoon, pouring slowly to avoid splashing. Let the initial watery whey drain through the cloth into the glass bowl below for 1 minute, then lightly shake the sieve to help excess whey drain away from the curds.
Step 4
step4:Strain Curds from Whey
5

Season Curds Lightly

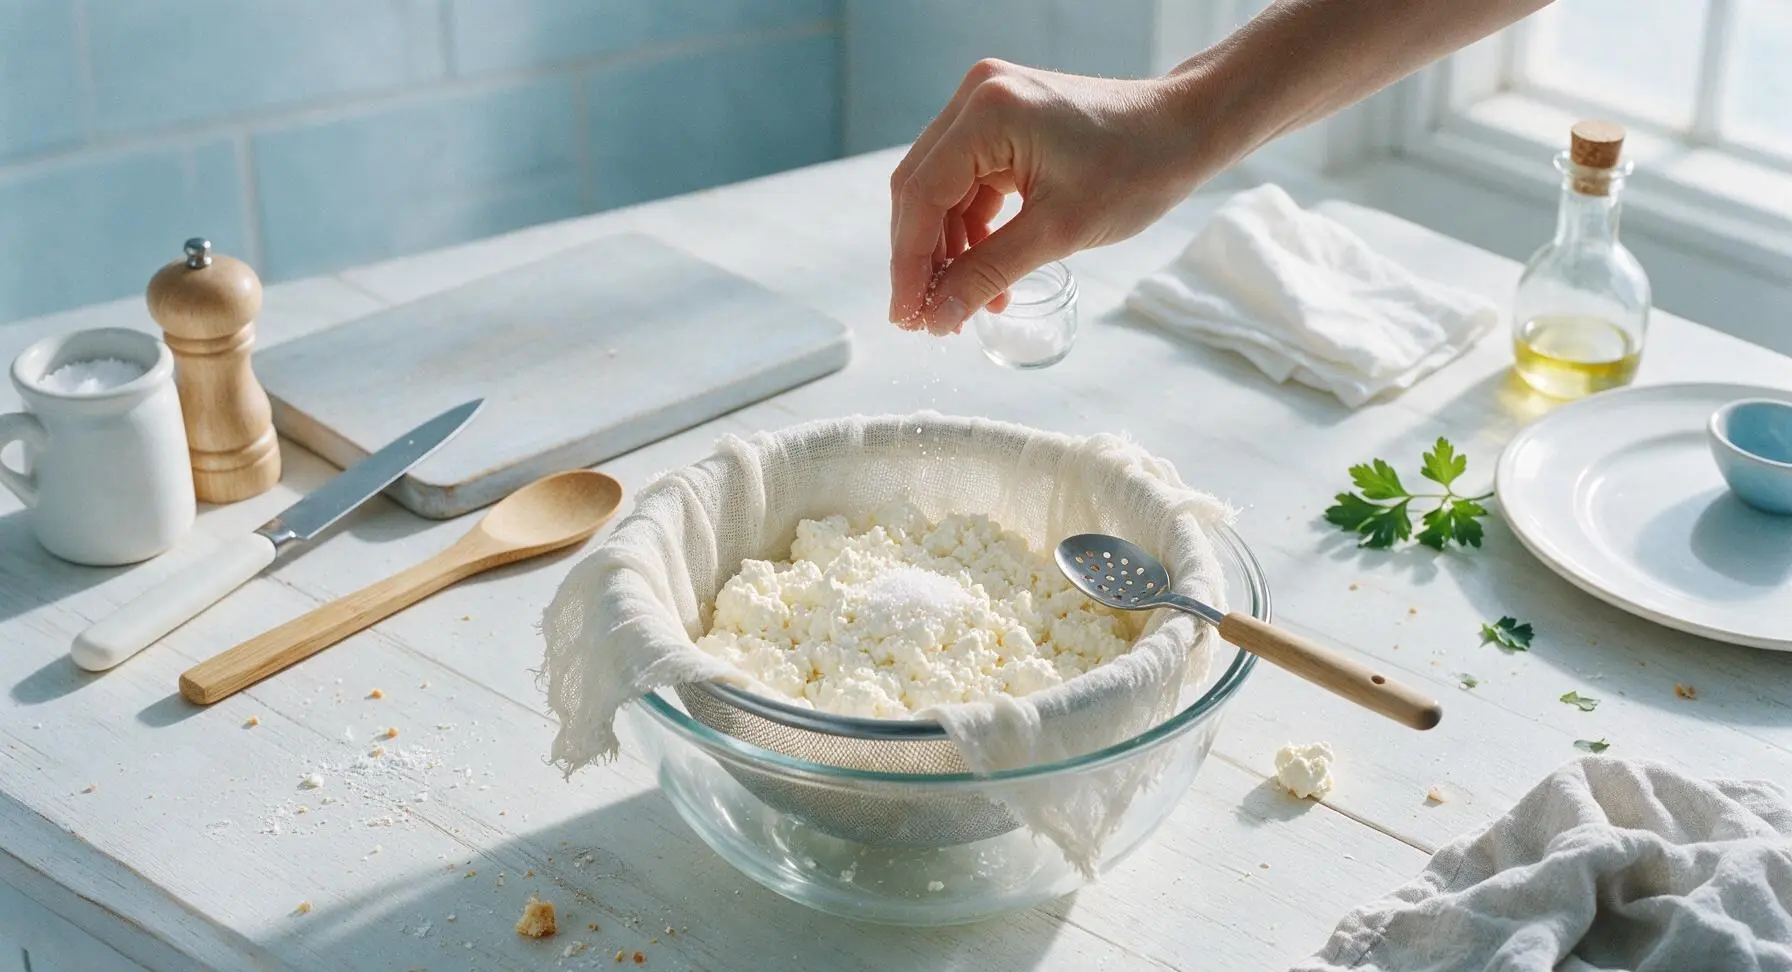
Open the top of the cheesecloth bundle to expose the warm, drained curds. Sprinkle 1 teaspoon of fine sea salt over the curds, then use the tip of the slotted spoon to toss the curds gently to distribute the salt evenly. Taste a small crumb of curd, and add a pinch more salt if desired for a savorier cheese.
Step 5
step5:Season Curds Lightly
6

Press Cheese to Set

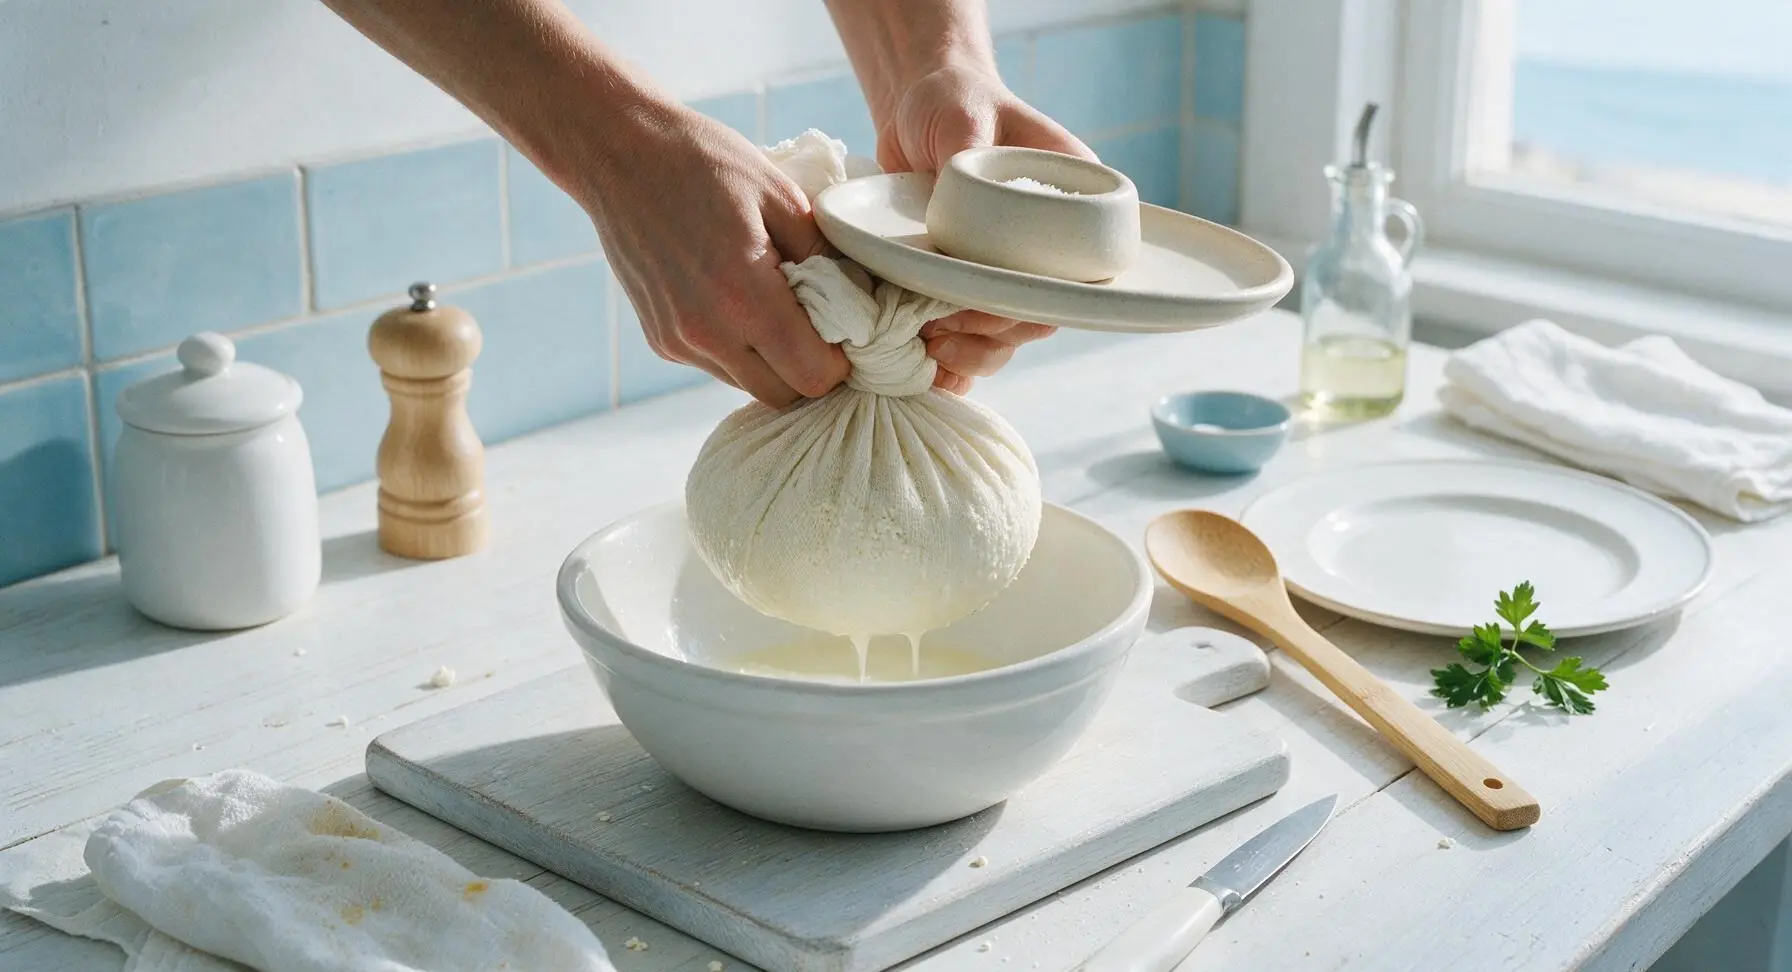
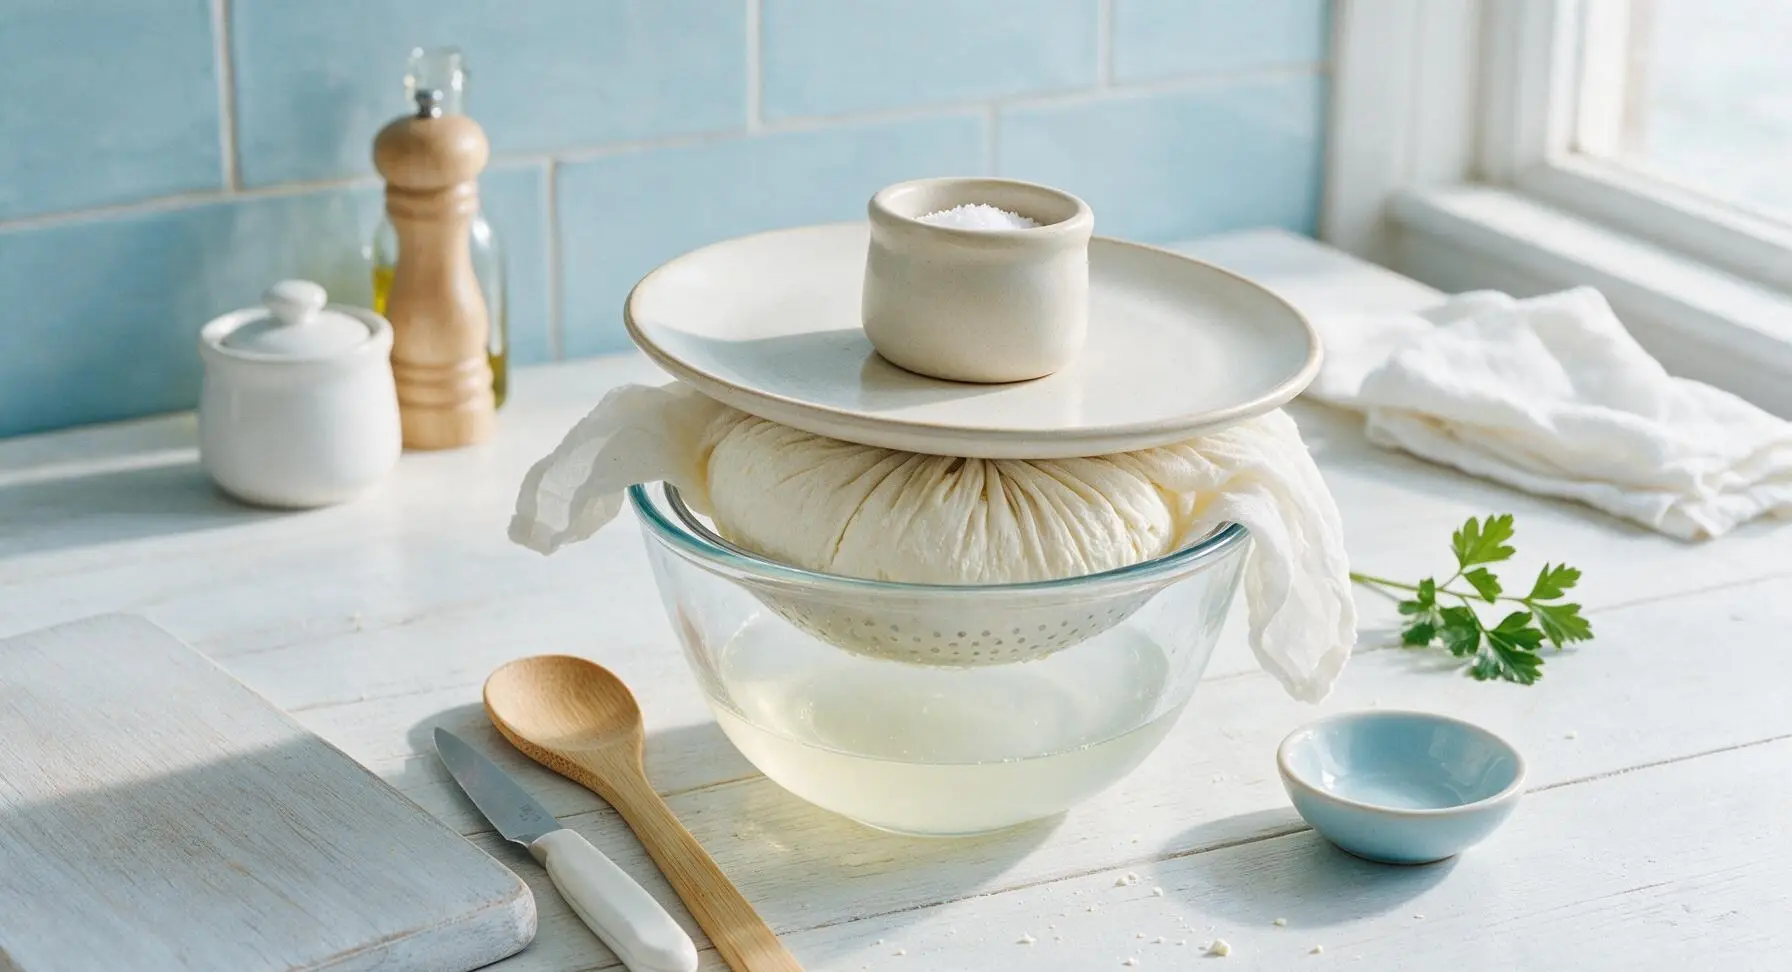
Gather the cheesecloth edges tightly again around the salted curds, twisting the top gently to squeeze out excess whey: squeeze gently for a soft, spreadable cheese, squeeze more firmly for a firmer, sliceable cheese. Set the off-white matte ceramic serving plate on top of the twisted cheese bundle, then place the matte cream ceramic salt cellar on top of the plate as a gentle weight. Let the cheese press and drain for 45 minutes to 1 hour at room temperature, until it holds a firm, solid round shape.
Step 6
step6:Press Cheese to Set
Step 6
step6:Press Cheese to Set
7

Unmold Finished Cheese

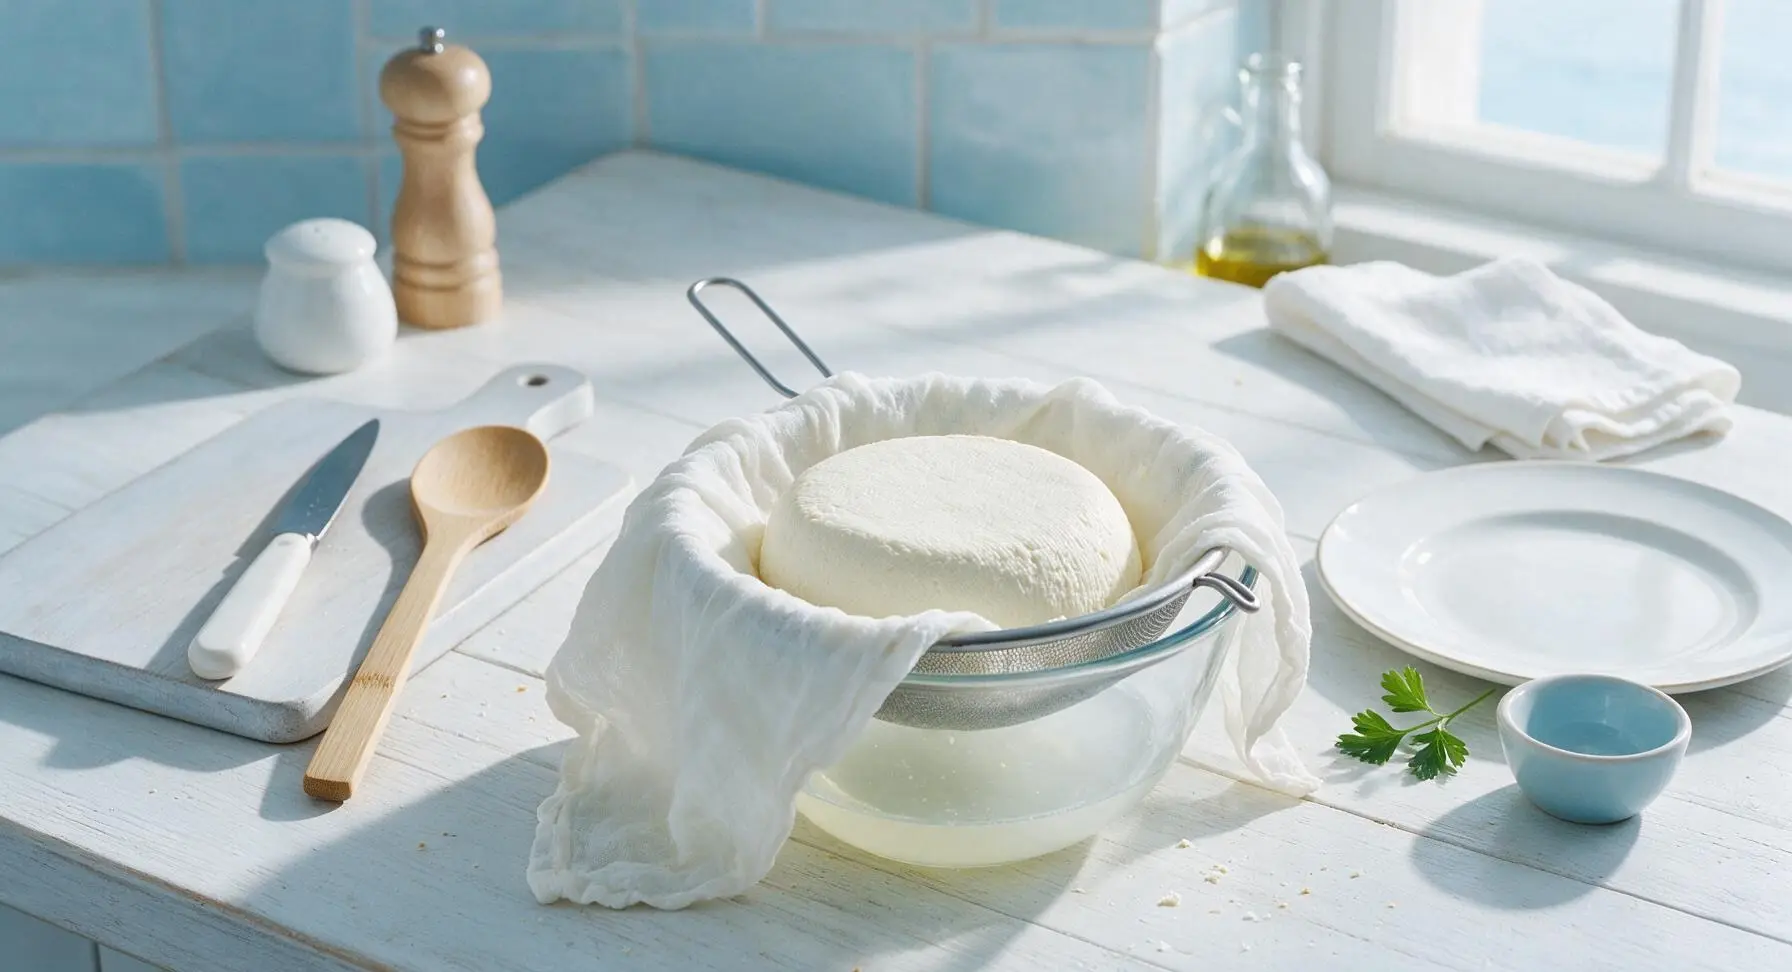
After 1 hour of pressing, remove the salt cellar weight and serving plate (return the salt cellar to its fixed position on the counter), untwist the cheesecloth top. Gently peel the cheesecloth away from the firm, smooth round of fresh cheese. Invert the cheese onto the off-white matte ceramic serving plate, so the smooth, unmarked side faces up, ready for garnishing and serving.
Step 7
step7:Unmold Finished Cheese

Tips

1.Avoid ultra-pasteurized milk for this recipe: the high-heat processing used for ultra-pasteurized milk denatures milk proteins, preventing curds from forming properly and resulting in soft, grainy cheese that will not hold a solid shape.
2.Do not over-stir after adding vinegar: stirring too aggressively will break tender curds into tiny pieces that slip through the cheesecloth, reducing your final cheese yield and creating a mushy, uneven texture.
3.Save the drained whey left in the glass bowl: this protein-rich, slightly tangy liquid can be used in place of water for bread baking, blended into smoothies, or added to soup stocks to reduce food waste and add subtle flavor.


✨ You May Also Like

Snacks & Appetizers
🍜 Mexico

Crispy thick-cut tortilla chips piled high with seasoned beef, melted cheese, and bright fresh toppings for a shareable, crowd-favorite bite.

⏱️ 25 minuteSnacks & Appetizers ★ 4.8
Snacks & Appetizers
🍜 United States

Crisp, sweet-tangy spiced pickled watermelon rind is a zero-waste summer staple, perfect with grilled meats, charcuterie, or eaten straight from the jar as a bright snack.

⏱️ 30 minuteSnacks & Appetizers ★ 4.6
Snacks & Appetizers
🍜 Germany

A tangy, jellied pork cold cut slow-simmered with aromatic spices, set into a firm sliceable loaf, served cold with mustard and crusty bread.

⏱️ 3 hours 4Snacks & Appetizers ★ 4.8
Snacks & Appetizers
🍜 United States

Creamy, tangy, perfectly seasoned hard-boiled egg halves filled with a rich, smooth yolk mixture, a timeless, crowd-pleasing bite for holiday and casual gatherings alike.

⏱️ 40 minuteSnacks & Appetizers ★ 4.8
Snacks & Appetizers
🍜 Russia

Silky, dill-forward no-smoke cured salmon, a Scandinavian classic with bright salty-sweet flavor, ideal for holiday starter platters and open-faced rye sandwiches.

⏱️ 48 hours Snacks & Appetizers ★ 4.7
Snacks & Appetizers
🍜 Japan

Crisp golden bottoms, juicy savory pork and vegetable filling, and tangy dipping sauce make these pan-fried gyoza a beloved shareable bite.

⏱️ 45 minuteSnacks & Appetizers ★ 4.8

homemade cheese:Frequently Asked Questions

1.Why can’t I use ultra-pasteurized milk for this farmhouse cheese? ▾
Ultra-pasteurized milk is heated to extremely high temperatures that denature whey proteins, so it will not form solid, clean curds when you add vinegar. You’ll end up with weak, crumbly bits that won’t set properly, even with extra acid. Stick to regular pasteurized whole cow’s milk for the creamiest, most consistent curd every time.
2.Do I need special cheesemaking equipment to make this recipe? ▾
Nope, no fancy cheese presses, specialty cultures, or high-end gear required! All you need is a heavy-bottomed pot, slotted spoon, fine-mesh sieve, and cheesecloth or a clean cotton kitchen towel to drain curds. A basic instant-read thermometer is helpful but not mandatory, making this perfect for total beginners.
3.Can I substitute other types of vinegar for white distilled vinegar? ▾
You can swap in fresh lemon juice or unseasoned rice vinegar in a pinch, but skip strongly flavored options like apple cider, balsamic, or red wine vinegar—those will leave a sharp, off-flavor in your mild cheese. Stick to white distilled vinegar for the cleanest, most neutral base that lets the fresh thyme shine.
4.How do I know when the milk is ready to add the vinegar? ▾
Heat milk slowly over medium-low until it reaches 190°F, right when it starts to steam and form tiny bubbles around the pot edge, before it hits a rolling boil. If you don’t have a thermometer, watch for that gentle steady steam and faint edge froth—boiling will make your finished curds tough and rubbery.
5.My curds didn’t separate from the whey—what did I do wrong? ▾
This most often happens from using ultra-pasteurized milk, but it can also occur if your milk wasn’t hot enough when you added vinegar, or if your vinegar is old and lost its acidity. Stir in an extra tablespoon of vinegar, wait 2 minutes, and if you still don’t see clear yellow whey, your milk is likely the culprit.
6.How long do I need to drain the curds to get the right texture? ▾
For a soft, spreadable cheese perfect for crusty bread, drain curds for 15 to 20 minutes at room temperature. If you prefer a firmer, crumblier cheese for salads or fruit boards, let it drain 45 minutes to an hour, pressing gently with a spoon every 10 minutes to squeeze out extra whey.
7.Can I skip the fresh thyme if I don’t have any on hand? ▾
Absolutely! Fresh thyme adds a subtle, earthy herby note, but it’s totally optional. Swap it for other soft fresh herbs like chopped chives, tender rosemary, or oregano, leave it plain for a super mild base, or mix in a little cracked black pepper or honey for a custom flavor profile.
8.What’s the difference between the fine sea salt and flaky sea salt in the recipe? ▾
Fine sea salt is mixed directly into warm curds right after draining, so it dissolves evenly to season the cheese all the way through. Flaky sea salt is sprinkled on top right before serving, to add little pops of bright, salty crunch that contrast beautifully with the creamy cheese and sweet spring fruit pairings.
9.How long will this homemade cheese stay fresh in the fridge? ▾
Stored in an airtight container in the coldest part of your fridge (skip the door, where temperatures fluctuate!), this cheese stays fresh for 5 to 7 days. It will get slightly firmer as it chills, and you should discard it if you spot mold, notice off odors, or see a slimy texture develop on the surface.
10.Can I use low-fat or skim milk instead of whole milk? ▾
I don’t recommend it! The fat in whole milk is what gives this cheese its rich, creamy, smooth texture. Skim or low-fat milk will produce a dry, rubbery, bland cheese that doesn’t spread well, even with shorter drain time. If you want a slightly lighter version, 2% milk works, but whole milk always gives best results.
11.What can I do with the leftover whey after draining the cheese? ▾
Don’t pour that leftover whey down the drain! It’s packed with protein and has a mild, tangy flavor perfect for swapping into recipes that call for water or milk. Use it to make homemade bread, cook oatmeal or rice, blend into smoothies, or even water acid-loving garden plants like tomatoes for a nutrient boost.
12.Do I have to press this cheese to get it to hold its shape? ▾
No heavy pressing required! If you want a firmer block you can slice for charcuterie boards, after draining curds for 30 minutes, tie them tightly in cheesecloth, set in a sieve over a bowl, and place a 1-pound can or jar on top for 1 hour in the fridge. That light pressure forms a soft, sliceable round without fancy gear.
13.Can I make this cheese with goat’s milk instead of cow’s milk? ▾
You can! Fresh goat’s milk (again, avoid ultra-pasteurized versions) will make a tangy, bright chevre-style cheese using the exact same method. Just note that goat’s milk curds tend to be a bit softer, so you may need to drain them an extra 10 to 15 minutes to reach your preferred, spreadable or crumbly texture.
14.My cheese turned out rubbery—what went wrong? ▾
Rubbery curds almost always come from heating milk too hot (past 200°F, or to a full rolling boil) or stirring curds too roughly after adding vinegar. Next time, heat milk slowly over medium-low, skip the boil, and stir very gently once curds form to avoid breaking them up and squeezing out too much moisture.
15.Can I add mix-ins like garlic or dried fruit to the cheese? ▾
Definitely! Wait until curds are drained and still slightly warm, then gently fold in add-ins like roasted garlic, chopped dried apricots, toasted nuts, cracked pepper, or even a swirl of jam. Just skip very wet mix-ins, as they will make the cheese runny and shorten its shelf life in the fridge.
16.Do I need to use cheesecloth to drain the curds? ▾
No, you don’t have to run out and buy cheesecloth! A clean, lint-free cotton kitchen towel, a few layers of high-quality unprinted paper towels, or a fine-mesh nut milk bag all work perfectly to strain curds. Just make sure your material is free of fabric softener or detergent residue that could flavor the cheese.
17.Is this cheese safe to serve to kids and pregnant people? ▾
Yes! Because you heat the milk to 190°F during the process, any potentially harmful bacteria are killed, making it safe for all eaters, including kids and pregnant people. Just use fresh, properly pasteurized milk, keep the cheese chilled at 40°F or below, and eat it within that 5 to 7 day freshness window.
18.Can I freeze this farmhouse cheese for later use? ▾
I don’t recommend freezing it, unfortunately. Its high moisture content means the texture will turn crumbly and grainy once it thaws, and it will lose that smooth, creamy spreadability that makes it so enjoyable. It’s best made in small batches so you can enjoy it at its peak texture and flavor all week long.

Comments (15)

2 days ago

OMG this was SO good! I’ve been intimidated to make homemade cheese forever but this was genuinely so easy, even with my three kids running around the kitchen begging for snacks the whole time. I served it sliced with fresh apple slices and crackers for our after-school snack spread yesterday, and all three boys devoured it before I could even get a photo for my Instagram. Game changer for quick, no-fuss snacks! The 1 hour press time was perfect because I could get homework done while it set, no constant babysitting required.

yesterday

Wait did you add any extra seasonings? I’m thinking of mixing in some garlic powder and dried chives next time I make it for my book club!

2 hours ago

So happy your kids loved it! Garlic powder and chives sound like a fantastic add-in — feel free to stir those right in right before you transfer the curds to the press, it works beautifully. We love mixing in cracked black pepper too for a little kick!

1 week ago

Tried this last weekend for a small cookout with my roommates, we used it on top of grilled burgers and everyone lost their minds. Who knew homemade cheese was this straightforward? The only thing I messed up was I cut my curds a little too big at first, so they didn’t drain quite as evenly, but even then it turned out creamy and delicious. Will 100% make again for our next potluck.

5 days ago

So glad it was a hit at the cookout! If you cut curds a bit too large next time, just let them drain an extra 5-10 minutes before pressing and you’ll be good to go — no fancy fix needed!

3 days ago

Made this with fresh raw milk from the small family farm down the road from my house and it tasted like pure summer. So creamy, mild, perfect for slicing up to add to my lunch salads all week for meal prep. 10/10, no notes, this is going into my regular rotation.

5 days ago

Wait, hold on, I thought making cheese at home required all kinds of fancy equipment? I only have a regular colander and some cheesecloth, no fancy cheese press — will this still work? I really want to make this for my daughter’s birthday brunch next weekend but I don’t have time to order special gear.

3 days ago

I made this last month without a press! I lined my colander with cheesecloth, set the curds in it, put a small plate on top, and stacked a couple of canned beans on the plate to weigh it down. Worked perfectly! Just make sure you set it over a bowl to catch the whey that drips out.

2 days ago

PotluckQueen is exactly right! You don’t need a specialty press at all — that weighted plate hack works perfectly for this recipe, which is why we love it so much for beginner cheesemakers. Hope the birthday brunch is a hit!

2 weeks ago

This was such a fun weekend project! I pressed mine for an extra 20 minutes because I like a firmer cheese that crumbles a little easier for salads, and it turned out perfectly. I even saved the whey to use in my sourdough bread baking, zero waste!

1 week ago

Oh smart call saving the whey! I usually pour mine down the drain but I’ve been looking for ways to cut food waste, I’ll have to try that for my next loaf of bread too.

just now

As a broke college student who’s sick of pre-shredded cheese that tastes like plastic, this was a revelation. All the ingredients are cheap, it doesn’t take that much active work, and I feel like a whole professional chef making my own cheese. My dorm neighbors all knocked on my door when they smelled it cooking and begged for bites lmao.

yesterday

I’ve been making farmhouse cheese for 40 years and I have to say, this recipe is the simplest, most consistent version I’ve ever tried. I taught my 10-year-old granddaughter how to make it last weekend and she did almost all the steps by herself! We added a little dill from my garden to half the batch and it was divine with our Sunday dinner ham.

2 hours ago

That makes our day to hear! There’s nothing better than passing down simple, homemade recipes to the next generation — the dill addition sounds absolutely perfect with ham, what a great combo.

2 hours ago

Question for folks who’ve made this — how long does this keep in the fridge? I want to make a big batch on Sunday to use for sandwiches, cheese boards, and snack time for the whole week, but I don’t want it to go bad before we get through it.

30 minutes ago

I’ve kept mine in an airtight container in the coldest part of my fridge for up to a week and it’s stayed perfectly fresh! Just pat any excess moisture off the surface every couple days if you notice it building up.

5 minutes ago

Great question! Stored in a tightly sealed airtight container, this cheese will stay fresh for 7-10 days in the fridge. We don’t recommend freezing it, as that changes the creamy texture pretty noticeably.

yesterday

Wait a second, can I crumble this over tacos? I know it’s farmhouse cheese but I’m obsessed with queso fresco and I’m wondering if this is a dupe if I press it a little less? Would that work to get that crumbly, fresh texture I love on street tacos?

2 hours ago

I crumbled the extra from my batch over carnitas tacos last week and it was chef’s kiss! I pressed mine for 45 minutes instead of the full hour to keep it softer and more crumbly, exactly like queso fresco. 10/10 would recommend.

1 week ago

Made this last night and added a pinch of smoked paprika and a little flaky sea salt on the outside after pressing, and it tasted like the fancy $12/lb cheese they sell at the farmers market. My partner thought I bought it until I told him I made it from scratch in less than an hour and a half. Total win.

3 days ago

Quick question — does this recipe call for any rennet? My kid has a really bad sensitivity to animal-derived rennet so I need to make sure before I gather ingredients, I’d love to make a cheese that’s safe for him to eat without buying a specialty brand.

2 days ago

I made this last week and it just uses white vinegar to curdle the milk, no rennet at all! I have the same sensitivity and it didn’t bother me one bit, you’re going to love it.

yesterday

That’s right! This recipe uses plain white vinegar to form the curds, no rennet required, so it’s totally vegetarian-friendly as long as you use your preferred milk. We hope your kid loves it!

2 weeks ago

First time making cheese ever, and I’ll be honest I was sure I was going to mess it up. I heated the milk a tiny bit too hot at first, but I pulled it off the heat, let it cool a couple degrees, and kept going, and it still turned out amazing! Sliced it up for our family dinner charcuterie board and everyone raved. So approachable for total newbies.

1 week ago

So proud of you for sticking with it even when the milk temp was off! That’s the best part of this recipe — it’s really forgiving for beginners, even if you don’t get every step perfectly on the first try.

1 week ago

This is perfect for my high protein meal prep! It’s so much lower in weird additives than store-bought cheese, and I can control exactly how much salt goes in which is great for my fitness goals. I’ve been adding slices to my egg breakfast sandwiches every morning this week and it’s chef’s kiss.

5 days ago

Served this at my girls’ brunch last weekend with homemade jam, crusty sourdough, and fresh berries, and every single person asked me for the recipe. I felt like such a fancy hostess and I barely had to do any work! The inactive press time meant I could set it and finish getting the rest of the brunch spread ready without hovering over the stove.

3 days ago

Oh serving it with jam is such a good idea! I’ve only had it savory so far, I’m definitely making a sweet version with a little honey stirred in next time to go with my weekend brunch spreads too.

yesterday

I tried making this yesterday with skim milk because that’s all I had on hand, and it turned out really rubbery and didn’t have that creamy texture everyone is talking about. Did I do something wrong? I followed all the steps exactly otherwise.

2 hours ago

Oh I did the same thing my first batch! The higher fat content in whole milk is what gives it that creamy, smooth texture — skim milk doesn’t have enough fat, so it ends up tough and rubbery. Grab a gallon of whole milk next time, it makes all the difference!

30 minutes ago

SuburbanDad is spot on! Whole milk works best for that rich, creamy farmhouse cheese texture because of the higher fat content. If you want to use a lower fat milk, we’d recommend mixing in a splash of heavy cream to bump up the fat content a bit for better results. Sorry your first batch didn’t turn out as expected!



