
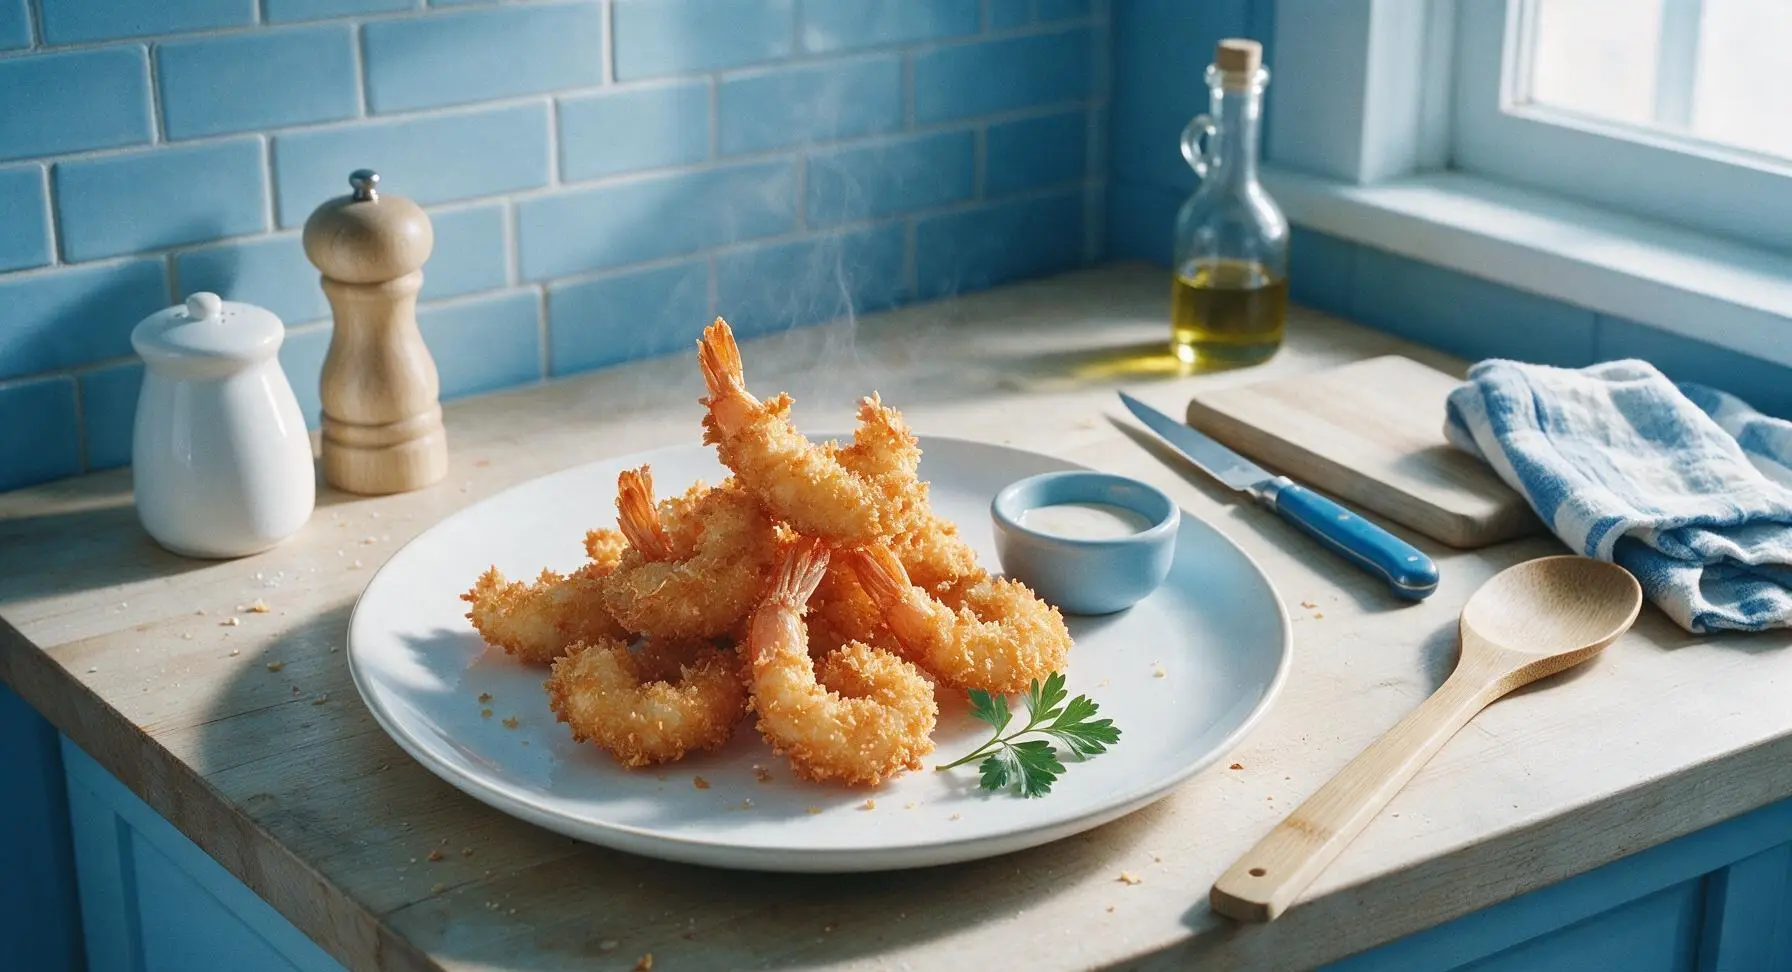
shrimp breading

title 1
shrimp breading
⏱️ cook time 10 minutes
🍽️ servings 4
⚡ Difficulty easy

intro

Shatteringly crisp, golden breaded shrimp with a craggy panko coating that stays firmly attached, never turns soggy, and pairs perfectly with tangy dipping sauces for casual gatherings.

Ingredients
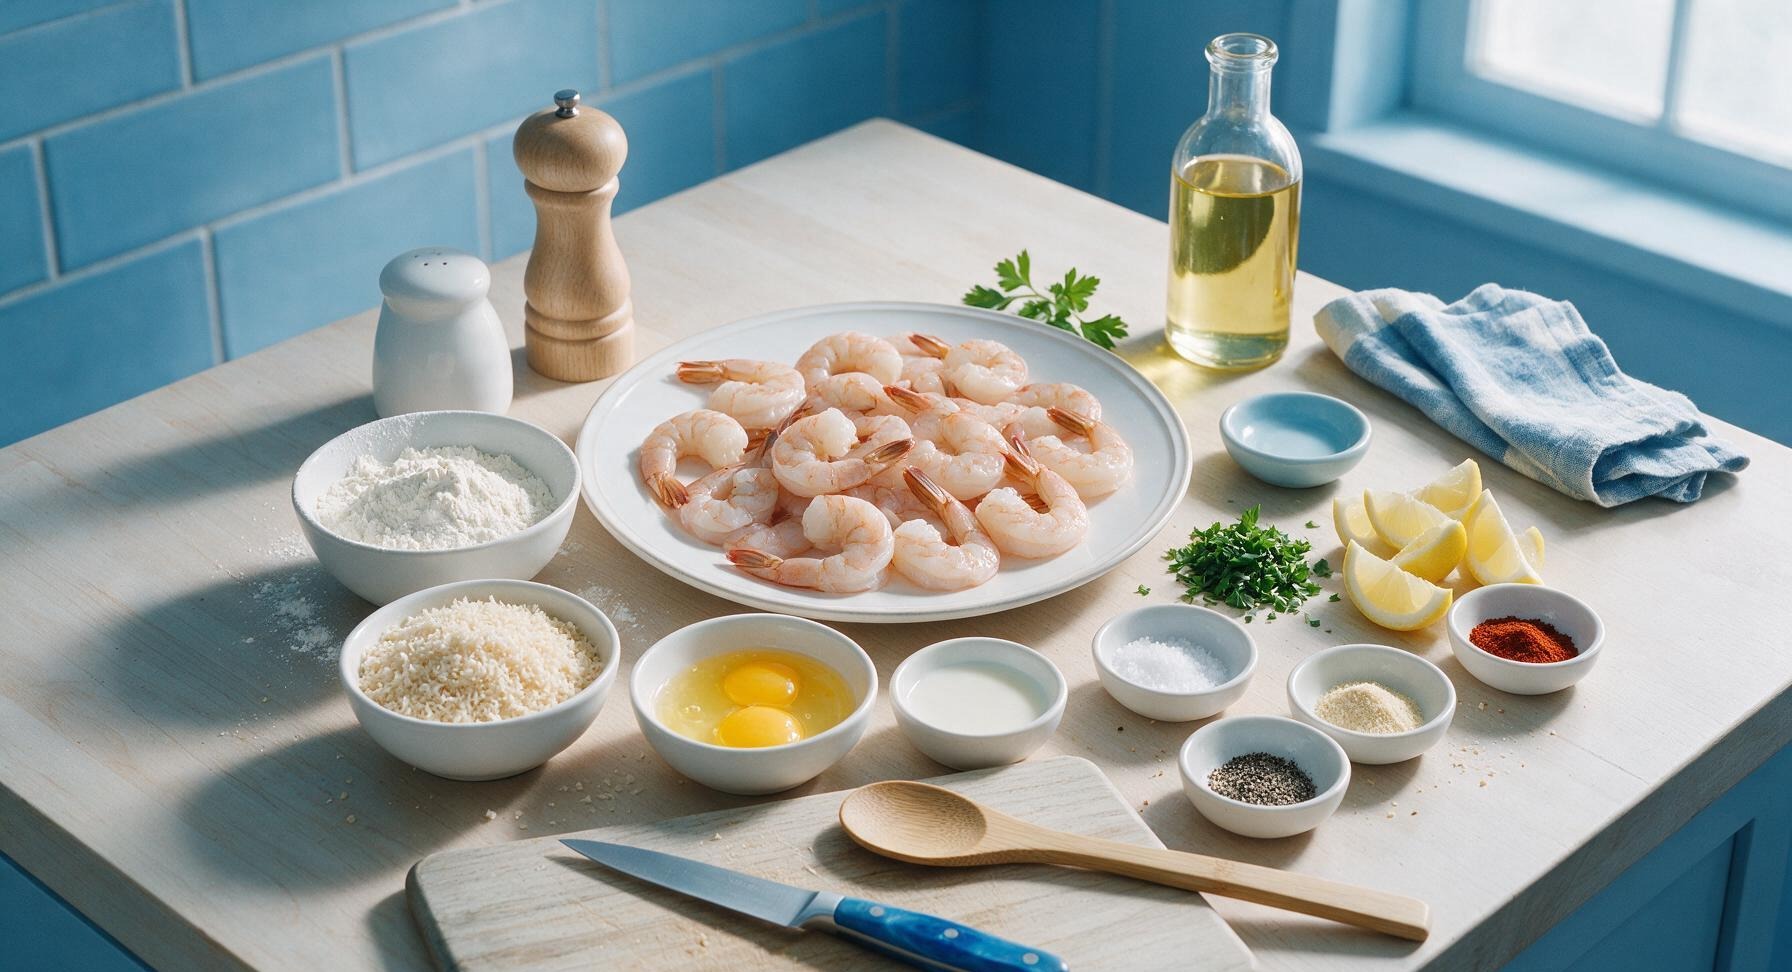
Large raw shrimp (peeled, deveined, tail-on) 1 lb (450g, ~20 count)
All-purpose flour ¾ cup
Large eggs 2
Whole milk 2 tbsp
Panko breadcrumbs 1 ½ cups
Kosher salt 1 tsp, divided
Freshly ground black pepper ½ tsp
Garlic powder ½ tsp
Smoked paprika ¼ tsp
Fresh lemon 1, cut into wedges
Fresh flat-leaf parsley 2 tbsp chopped, plus sprigs for garnish
Neutral frying oil (canola/vegetable) 4 cups

Steps

1

Pat Shrimp Dry

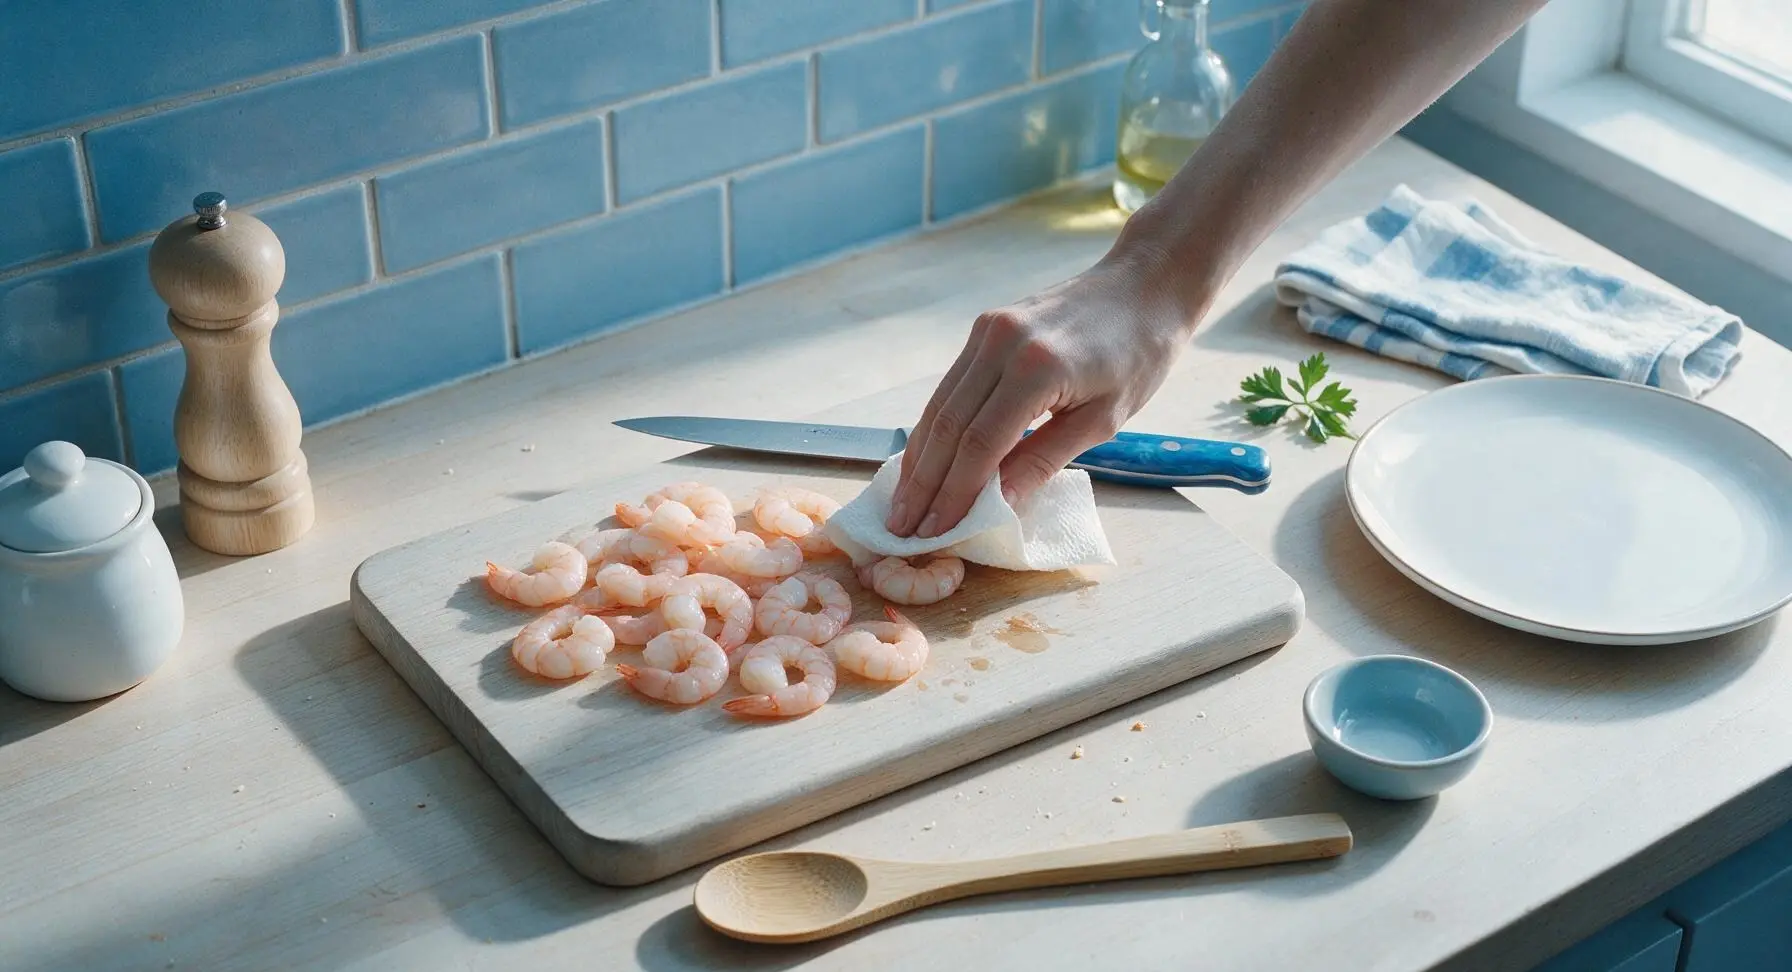
Place the raw shrimp on the light grey cutting board. Pat every surface of the shrimp thoroughly with paper towels until no visible surface moisture remains—this is the single most important step to prevent breading from sliding off during frying. Leave tail shells intact for easy handling, then season shrimp lightly with ¼ tsp of the kosher salt.
Step 1
step1:Pat Shrimp Dry
2

Set Up Breading Station

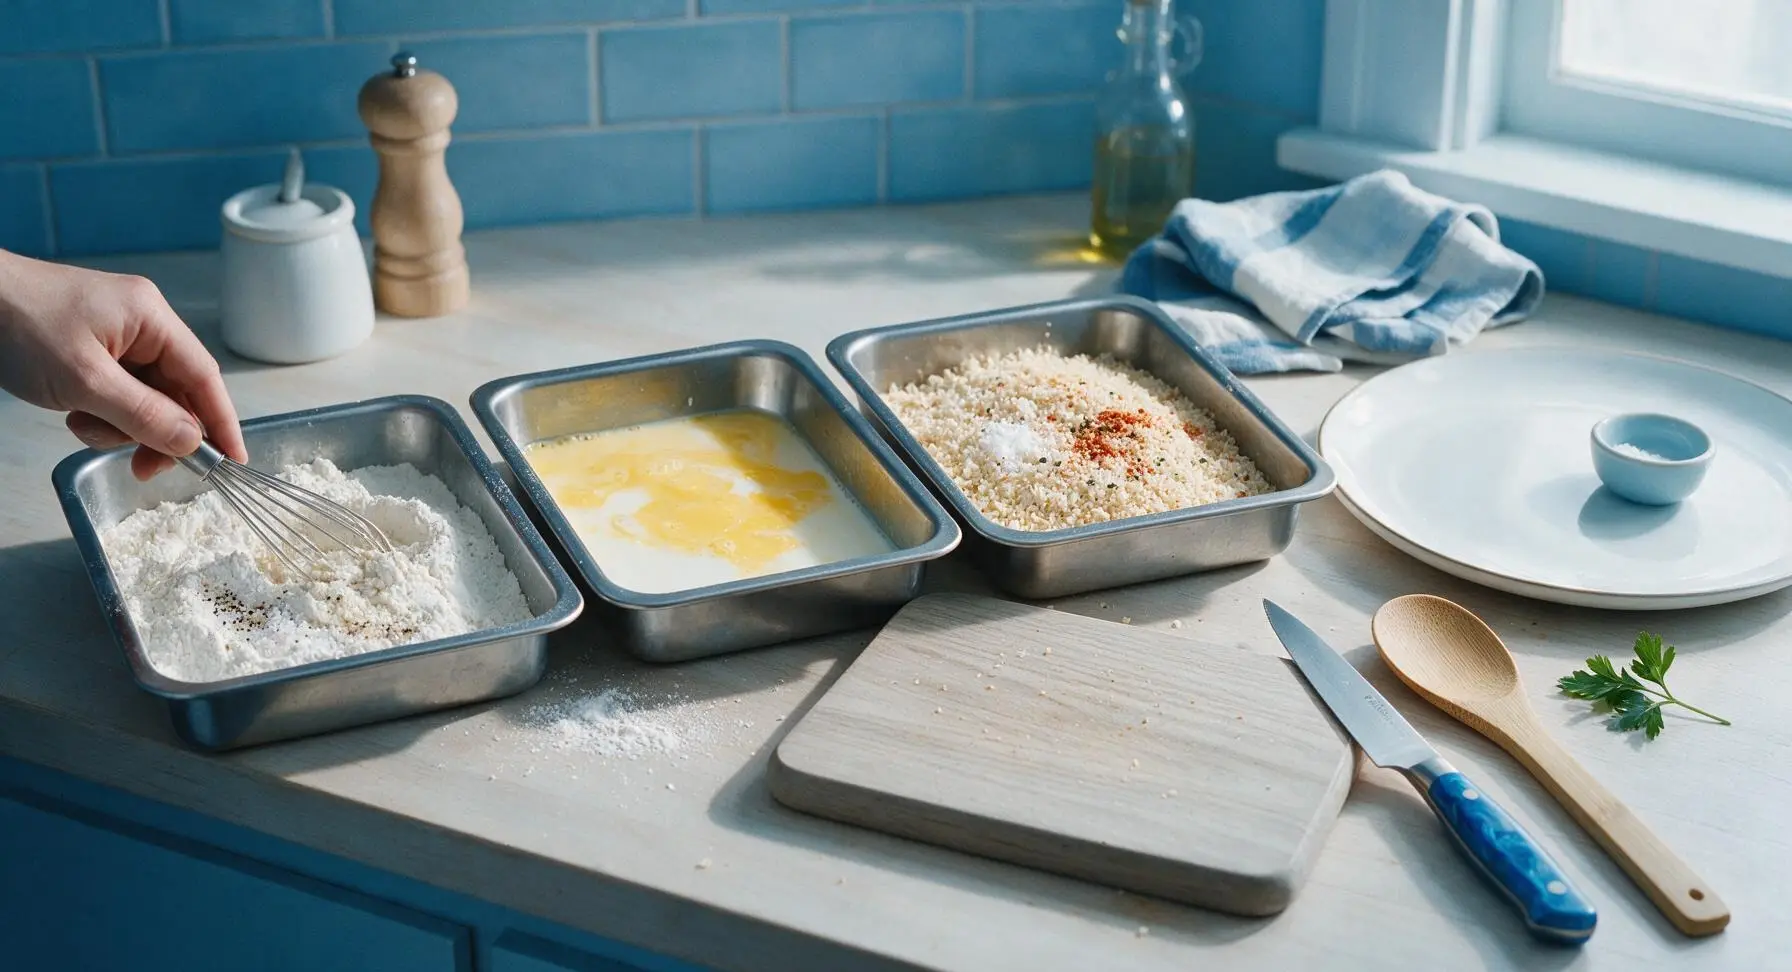
Unnest the three stainless steel breading trays and line them up in a straight left-to-right row next to the cutting board. In the leftmost tray, combine the all-purpose flour with ¼ tsp kosher salt, ¼ tsp black pepper, and ¼ tsp garlic powder, stirring with the small whisk to combine. In the middle tray, whisk the eggs and whole milk together until completely smooth, with no streaks of separated egg white remaining. In the rightmost tray, mix panko breadcrumbs with the remaining ½ tsp salt, ¼ tsp pepper, ¼ tsp garlic powder, and smoked paprika, stirring until spices are evenly distributed through the crumbs.
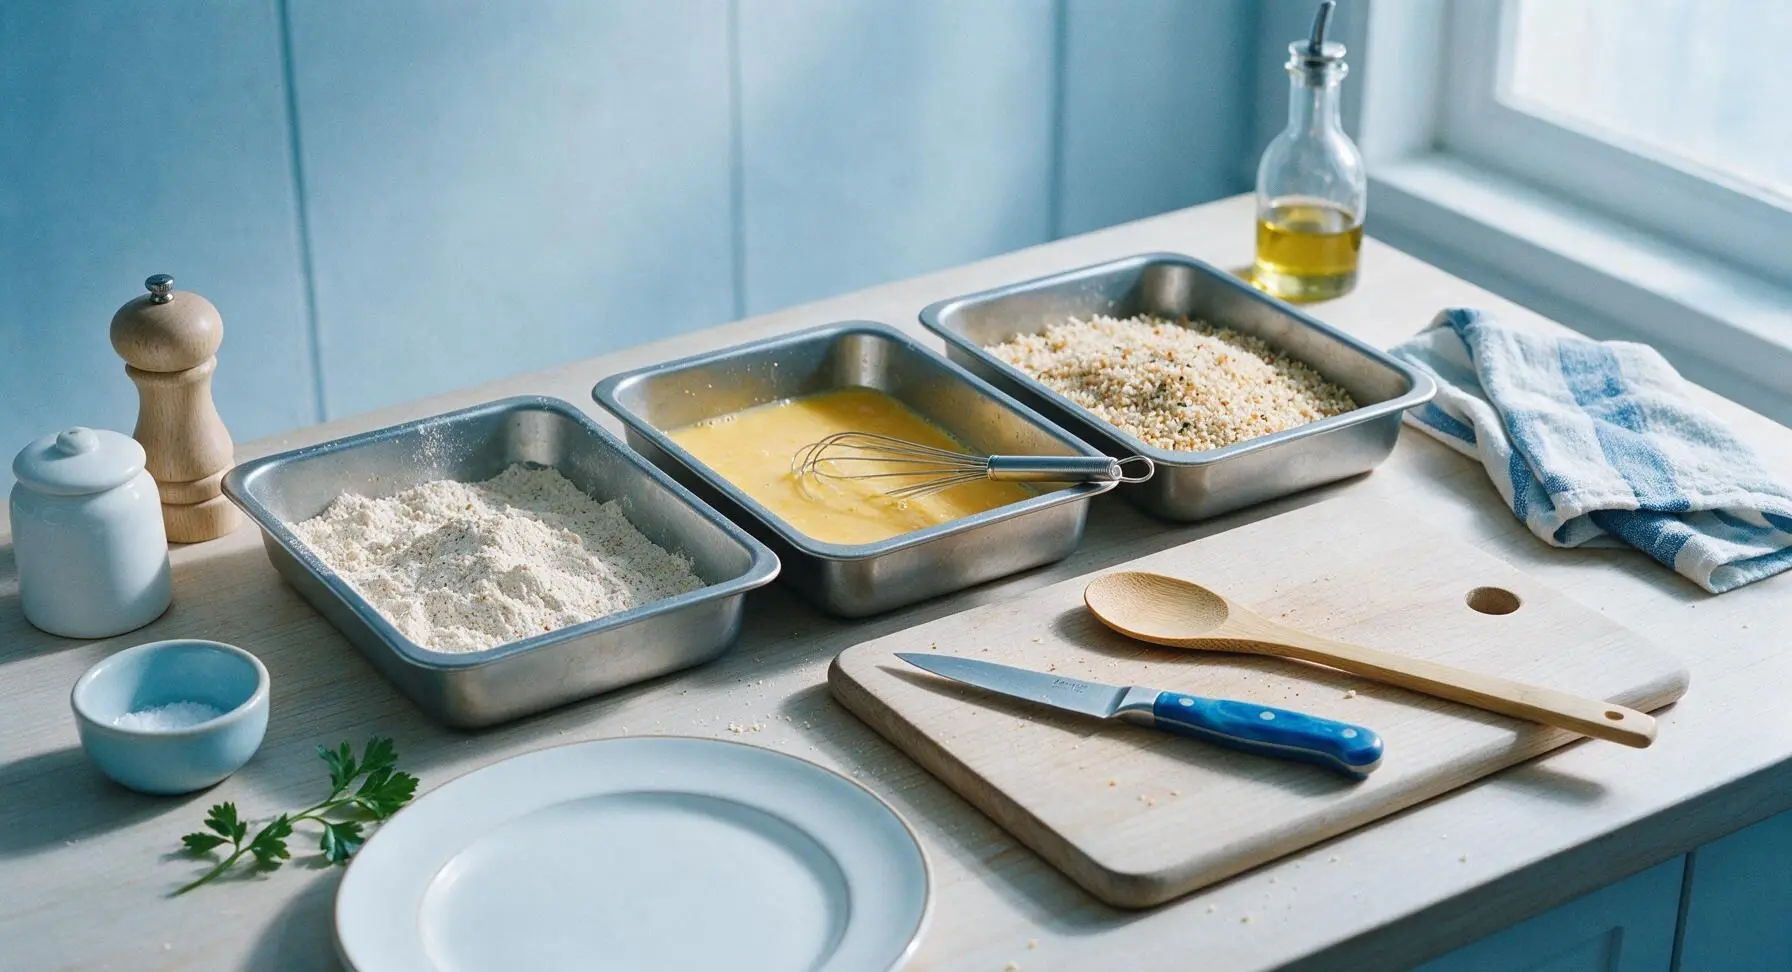
Step 2
step2:Set Up Breading Station
Step 2
step2:Set Up Breading Station
3

Dredge Shrimp in Flour

Working one shrimp at a time, pick up a shrimp by the tail, place it in the flour tray, and turn it to coat every surface completely, including the seam where the tail meets the shrimp flesh. Gently shake off excess flour so only a thin, even dusting remains—thick clumps of flour will cause the breading to bubble and peel off during frying. Set flour-dusted shrimp on the clean empty edge of the cutting board as you work.
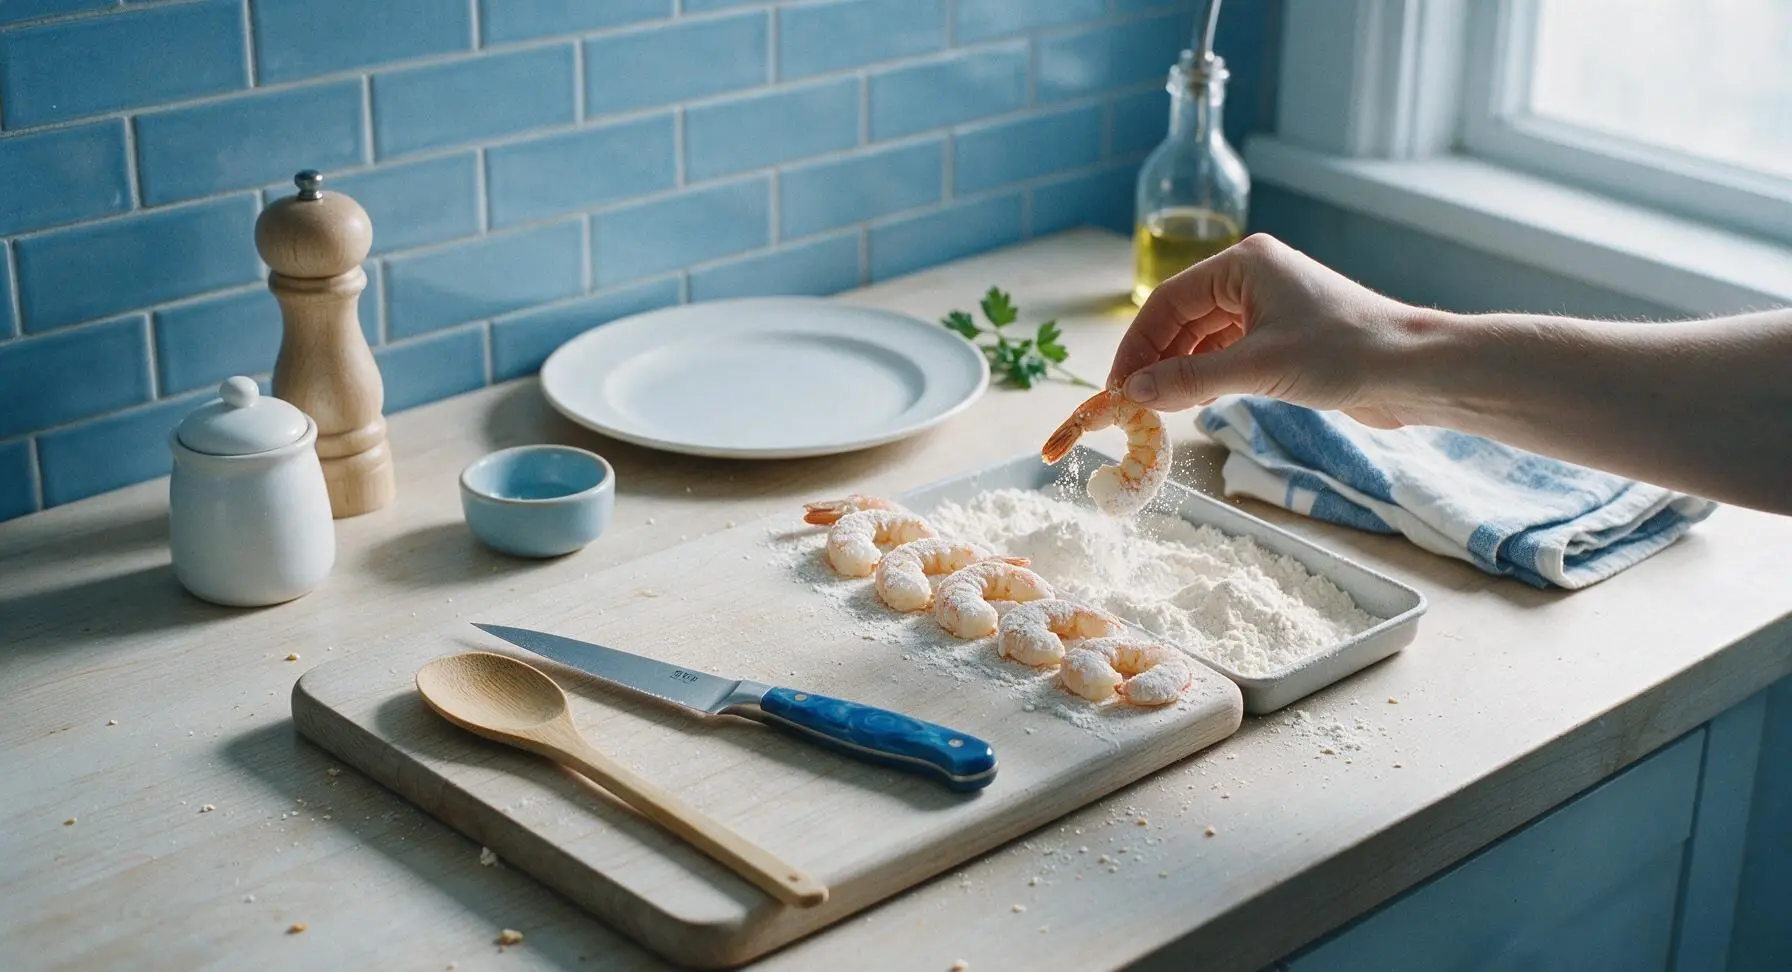
Step 3
step3:Dredge Shrimp in Flour
4

Dip in Egg Wash

Transfer each flour-dusted shrimp to the middle egg wash tray, turning to fully submerge every floured surface in the egg mixture. Hold the shrimp above the tray for 2 full seconds to let excess egg drip off, so the coating does not become soggy or slide off. The flour layer will now look slightly pasty, which creates the sticky base for the panko to adhere to.
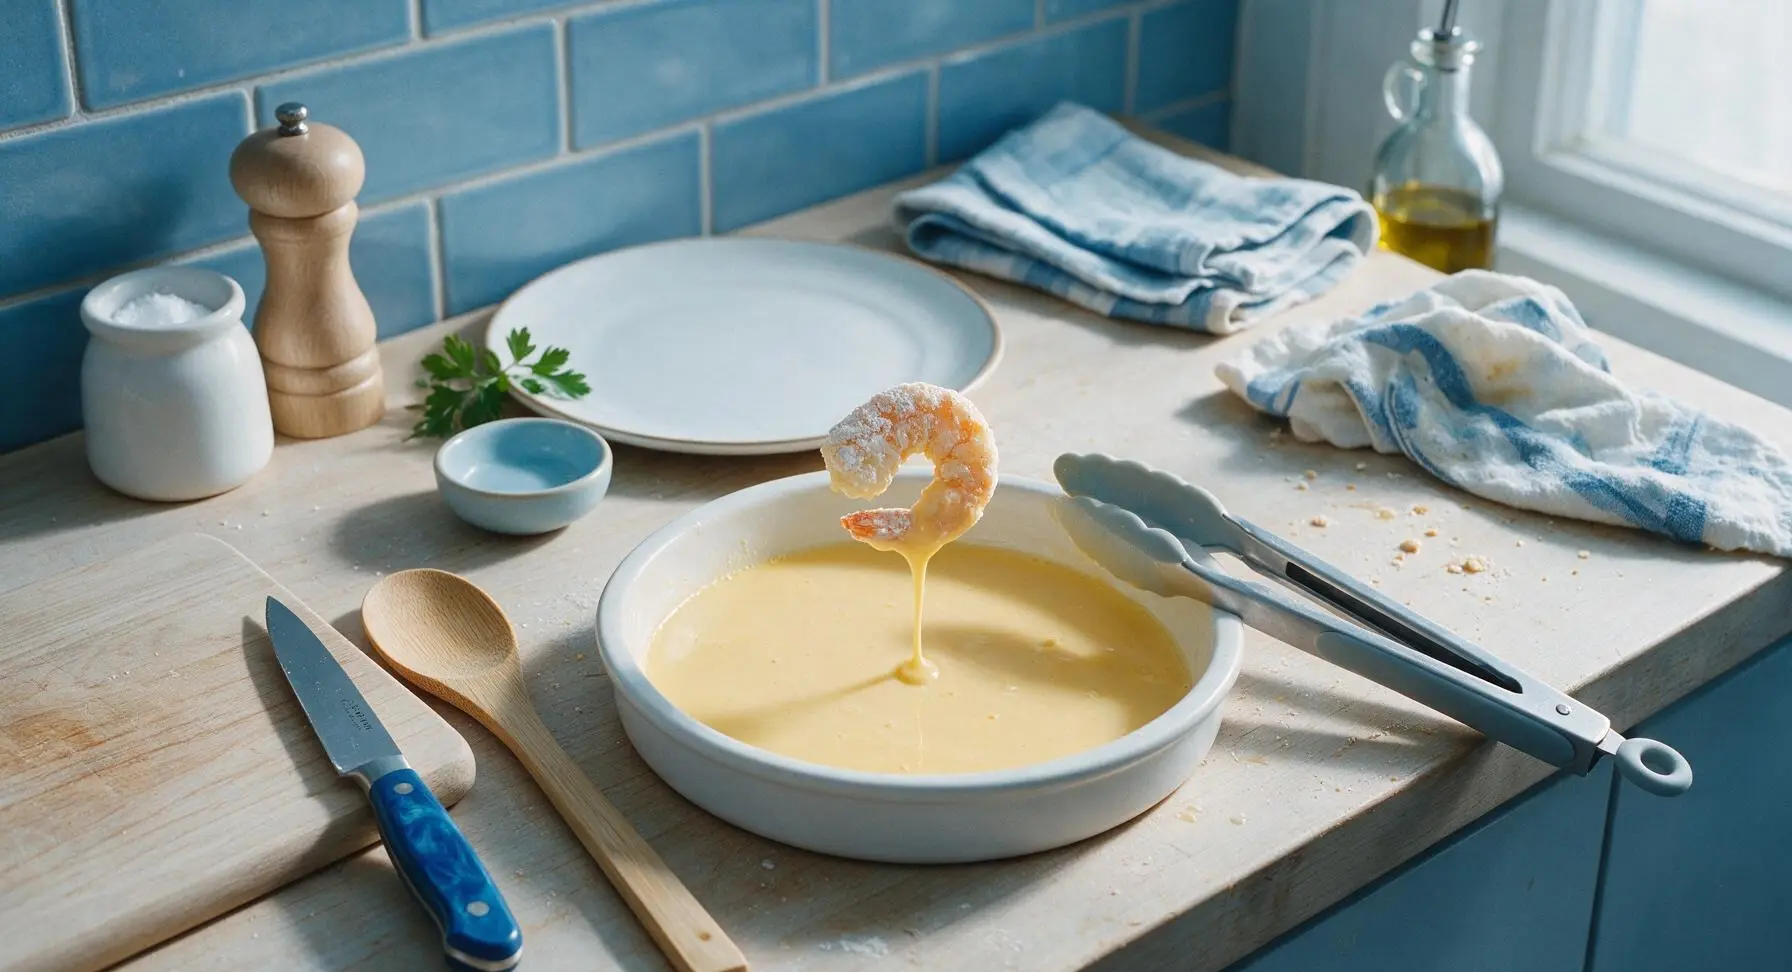
Step 4
step4:Dip in Egg Wash
5

Press in Panko Crumbs

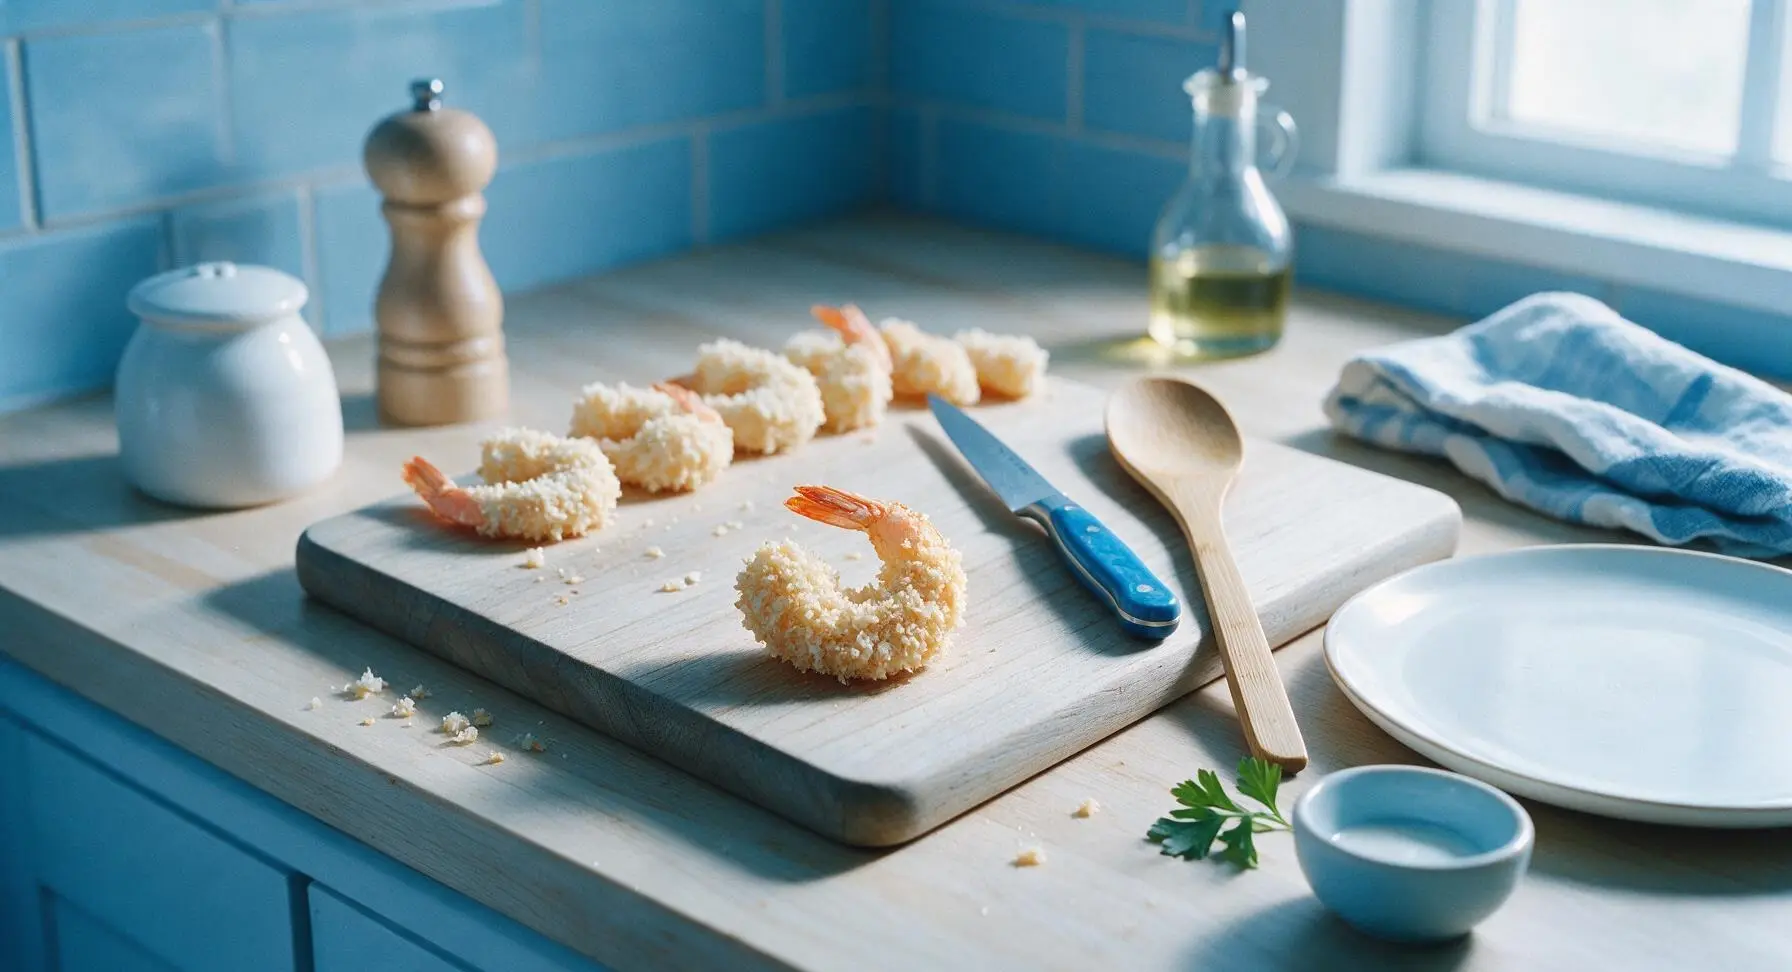
Place the egg-dipped shrimp directly into the panko breadcrumb tray. Scoop crumbs over the top of the shrimp, then press firmly with your fingertips to make sure crumbs adhere to every side, creating a thick, even coating. Do not just roll the shrimp—pressing helps crumbs stay attached during frying and creates a craggy, extra-crispy texture. Set fully coated shrimp on the clean empty far edge of the cutting board for 5 minutes before frying to let the breading set, which drastically reduces breading fall-off.
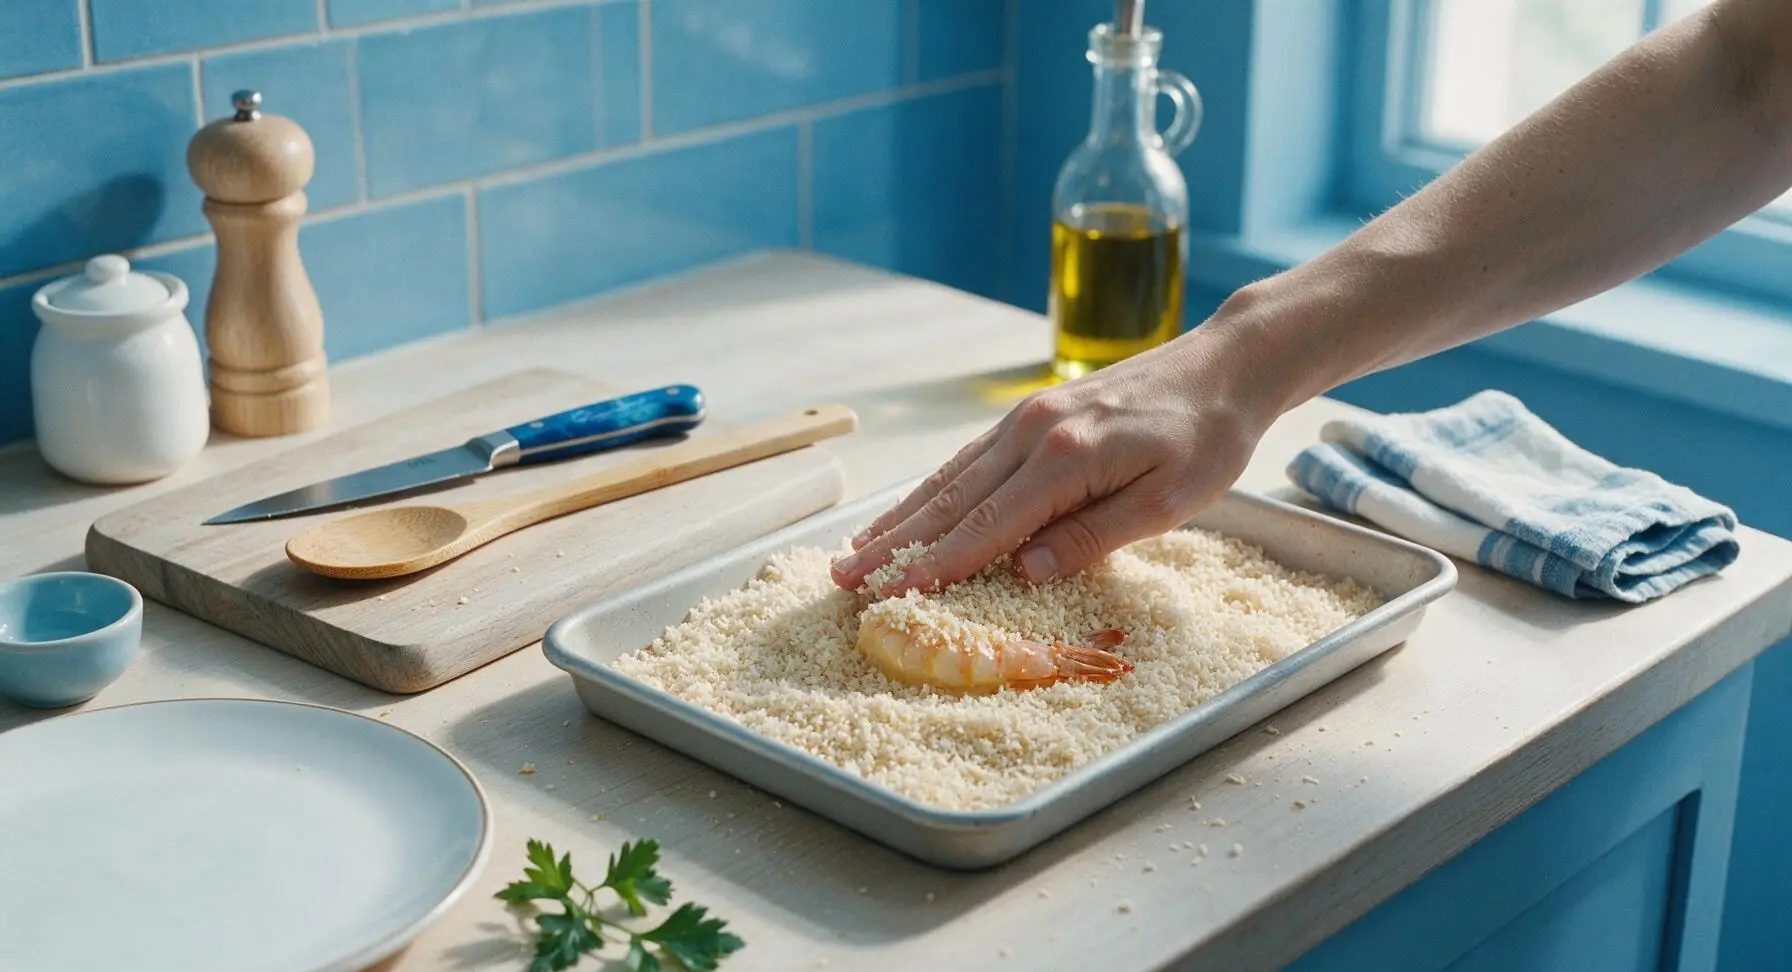
Step 5
step5:Press in Panko Crumbs
Step 5
step5:Press in Panko Crumbs
6

Fry to Crisp Perfection

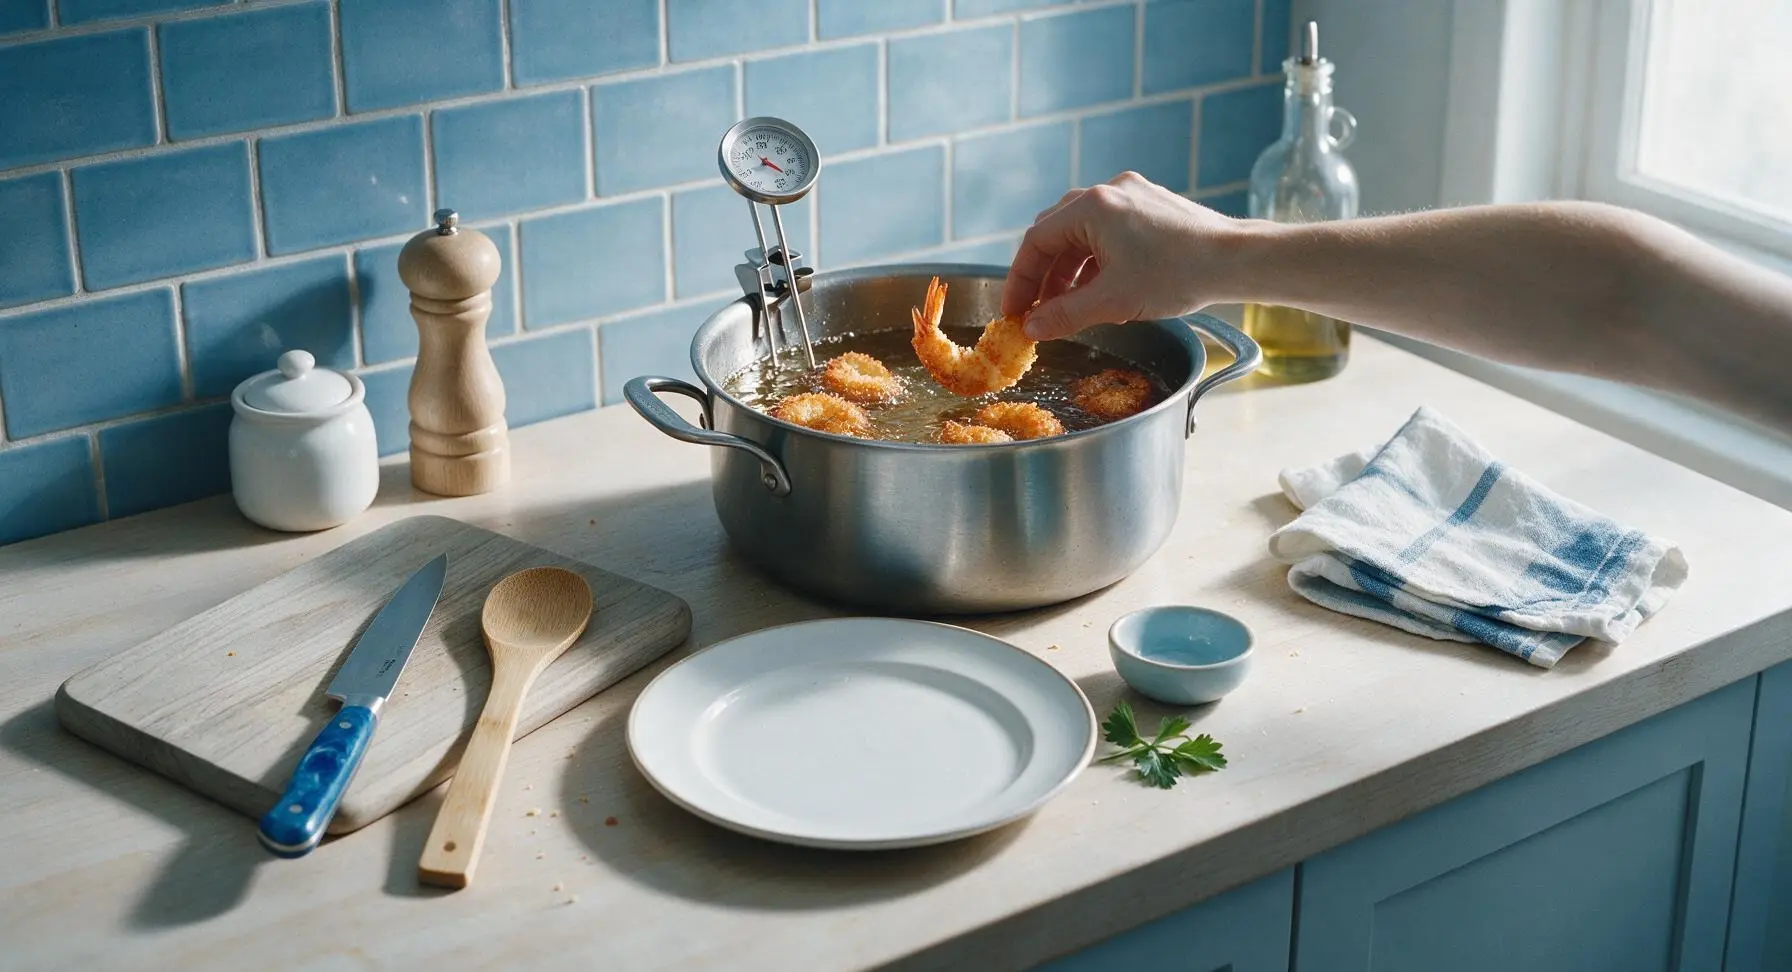
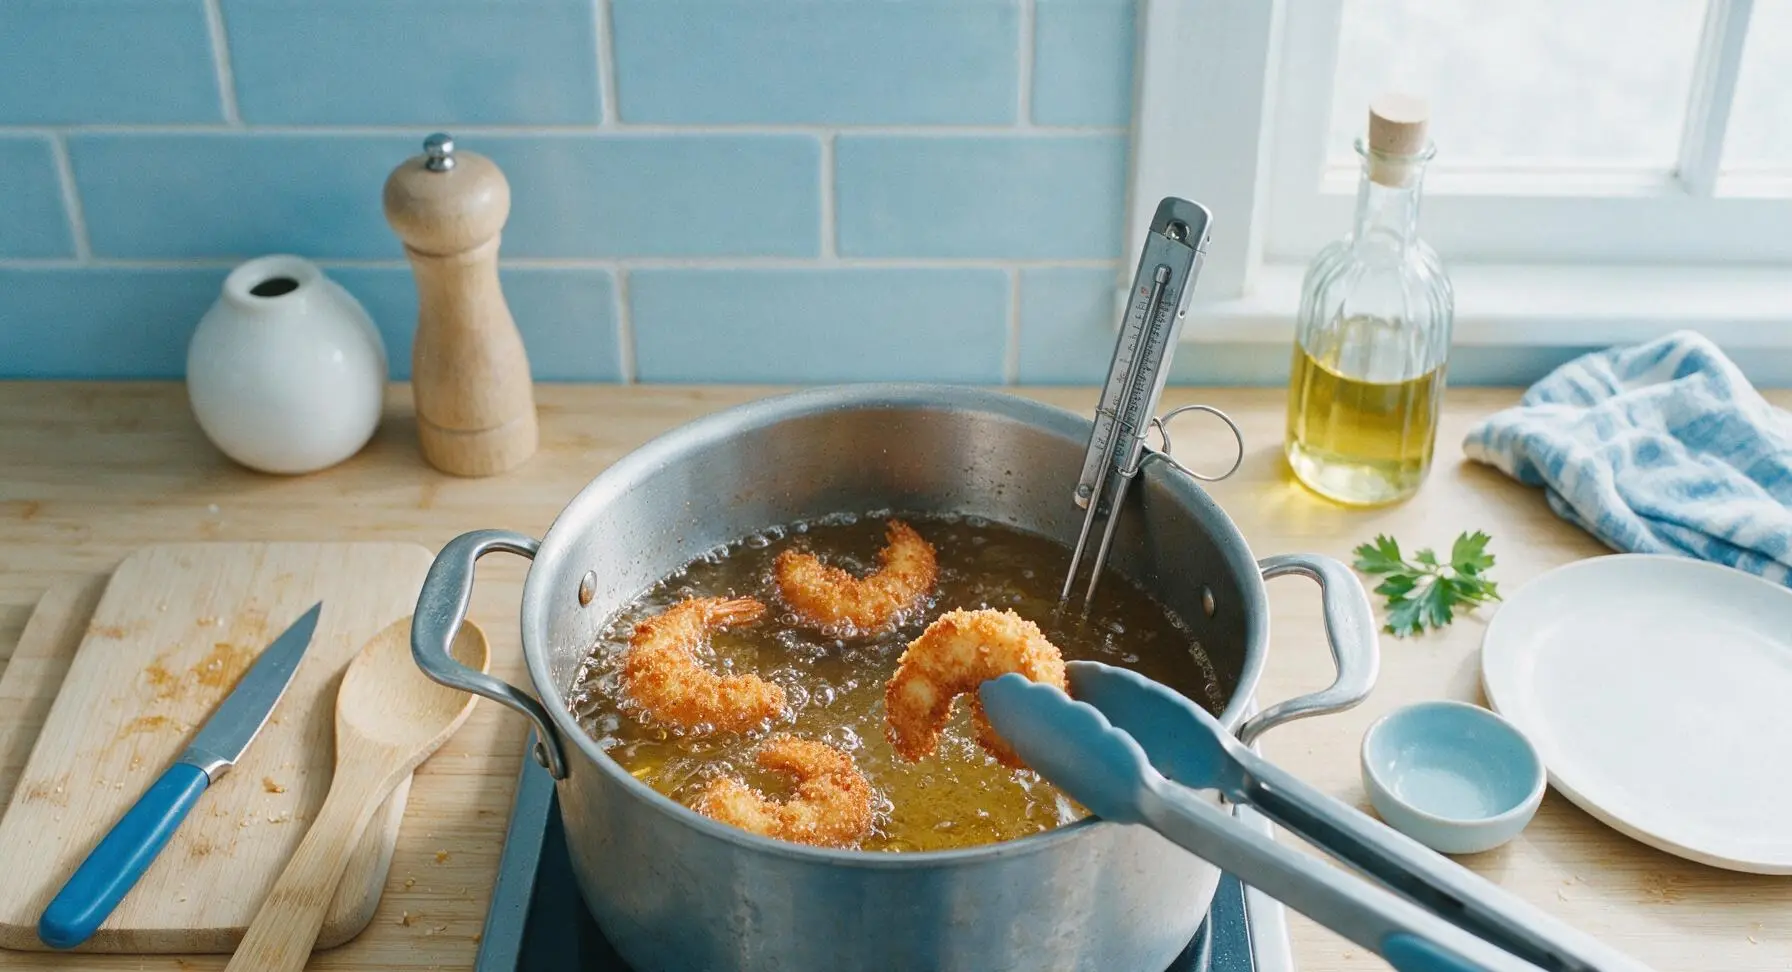
Retrieve the 5-quart matte stainless steel Dutch oven, place it at the back center of the counter, and heat the 4 cups of neutral frying oil to 350°F (175°C), confirmed with a clip-on candy thermometer attached to the pot edge. Working in batches of 4-5 shrimp to avoid dropping oil temperature, carefully lower breaded shrimp into the hot oil. Fry for 2–2.5 minutes total, flipping once halfway with the silicone tongs, until the breading is deep golden brown and shrimp is opaque inside. Overcrowding the pot will drop oil temperature and result in soggy, greasy breading.
Step 6
step6:Fry to Crisp Perfection
Step 6
step6:Fry to Crisp Perfection
7

Drain and Season Hot

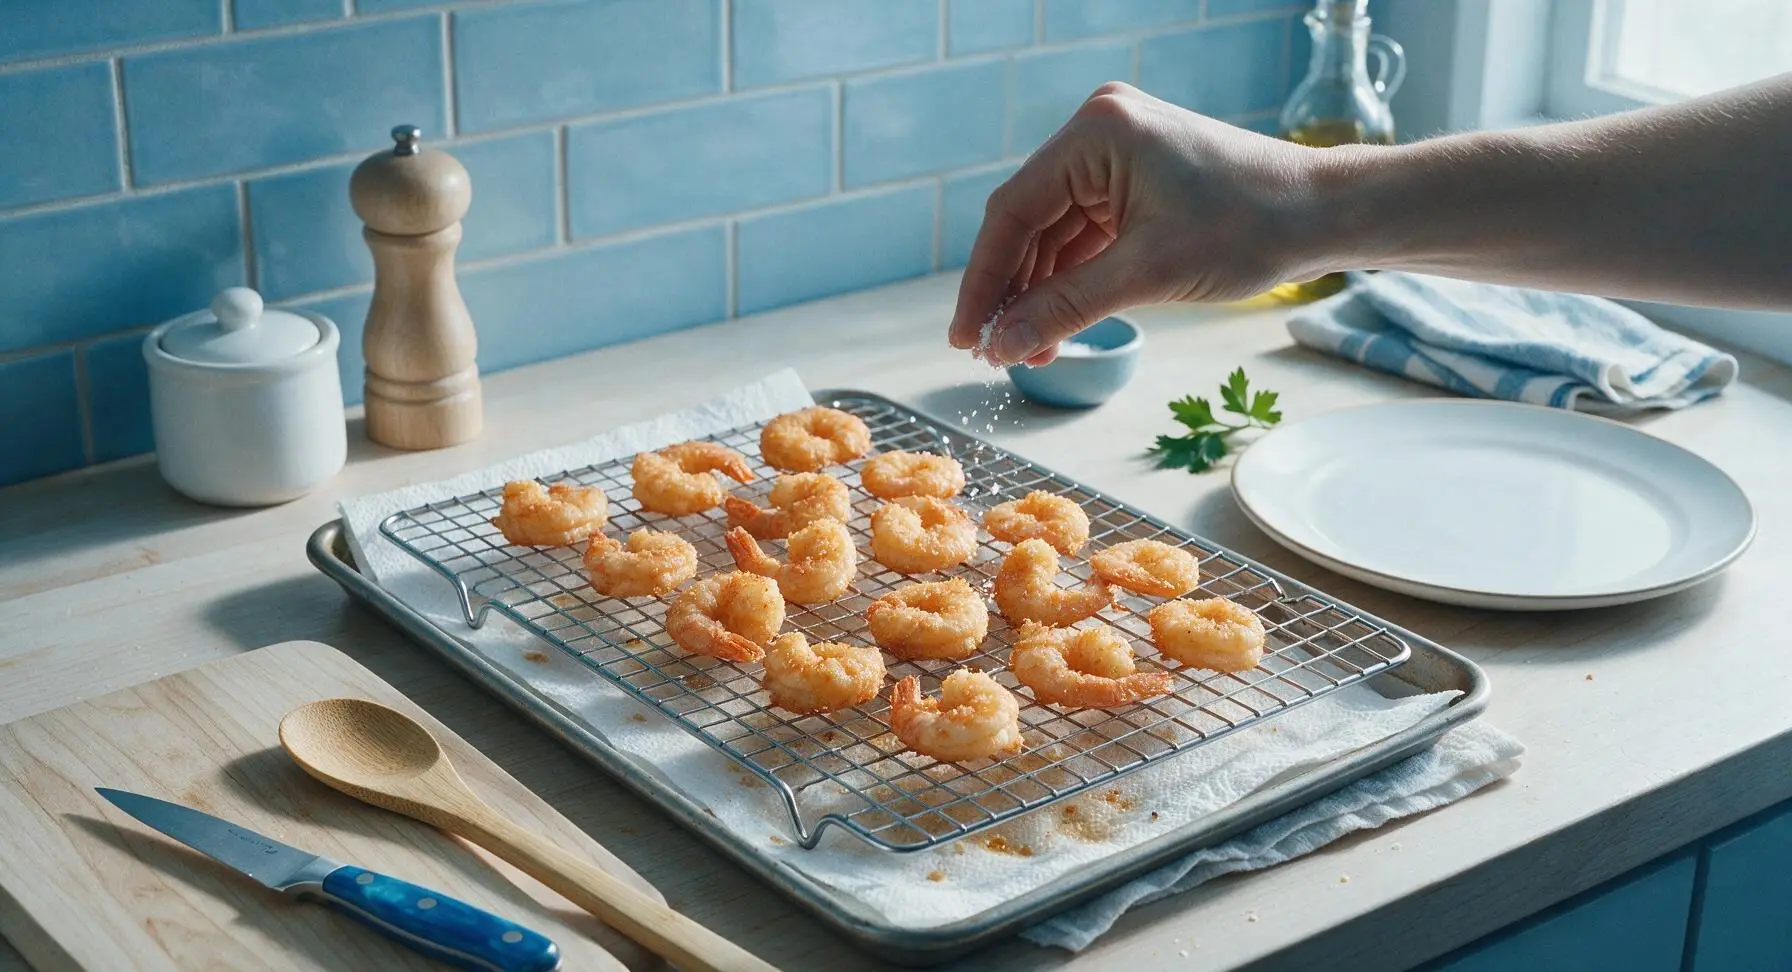
Use the silicone tongs to lift cooked shrimp out of the oil, holding them above the pot for 2 seconds to let excess oil drip off, then transfer them in a single layer to the chrome wire rack set over the paper-towel lined baking sheet. Immediately sprinkle shrimp with a tiny pinch of kosher salt while the breading is still hot and porous, so the salt sticks and dissolves evenly. Let shrimp rest for 2 minutes before plating—this allows excess steam to escape so breading stays crisp, instead of getting soggy from trapped moisture under the coating.
Step 7
step7:Drain and Season Hot
8

Plate and Serve

Pile the drained, crispy breaded shrimp onto the matte cream white ceramic serving platter. Tuck lemon wedges alongside the shrimp, garnish with a sprig of fresh flat-leaf parsley, and fill the small clear glass ramekins with cocktail sauce and tartar sauce for dipping. Serve immediately, while the breading is still shatteringly crisp.
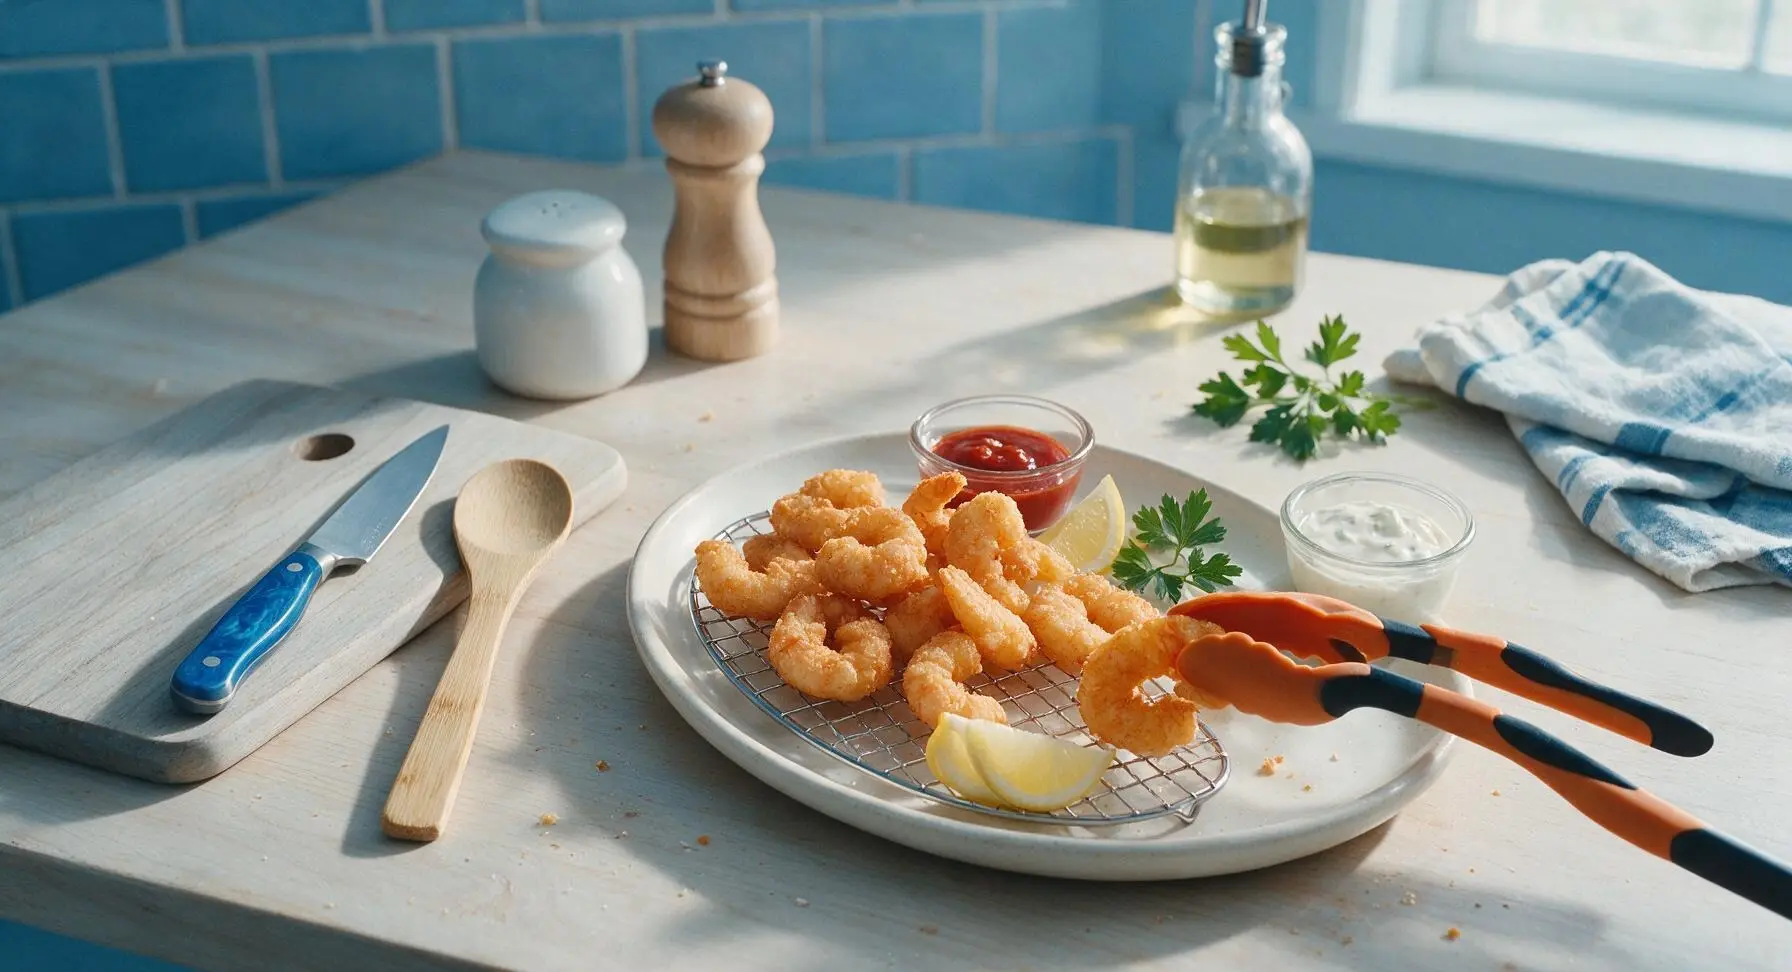
Step 8
step8:Plate and Serve

Tips

1.Never skip thoroughly drying shrimp: Any surface moisture on raw shrimp creates a steam barrier between the shrimp and flour, causing the entire breading layer to slide off during frying instead of adhering tightly.
2.Let coated shrimp rest 5 minutes before frying: This short pause allows the flour, egg, and panko to bind into a single cohesive coating, rather than separate layers that fall off at the first bite.
3.Hold oil at a steady 350°F: Oil that is too cool makes breading absorb excess grease and turn soggy, while oil that is too hot burns the panko before the shrimp cooks through. Use a clip-on candy thermometer to check temperature between batches.


✨ You May Also Like

Snacks & Appetizers
🍜 Mexico

Crispy thick-cut tortilla chips piled high with seasoned beef, melted cheese, and bright fresh toppings for a shareable, crowd-favorite bite.

⏱️ 25 minuteSnacks & Appetizers ★ 4.8
Snacks & Appetizers
🍜 United States

Crisp, sweet-tangy spiced pickled watermelon rind is a zero-waste summer staple, perfect with grilled meats, charcuterie, or eaten straight from the jar as a bright snack.

⏱️ 30 minuteSnacks & Appetizers ★ 4.6
Snacks & Appetizers
🍜 Germany

A tangy, jellied pork cold cut slow-simmered with aromatic spices, set into a firm sliceable loaf, served cold with mustard and crusty bread.

⏱️ 3 hours 4Snacks & Appetizers ★ 4.8
Snacks & Appetizers
🍜 United States

Creamy, tangy, perfectly seasoned hard-boiled egg halves filled with a rich, smooth yolk mixture, a timeless, crowd-pleasing bite for holiday and casual gatherings alike.

⏱️ 40 minuteSnacks & Appetizers ★ 4.8
Snacks & Appetizers
🍜 Russia

Silky, dill-forward no-smoke cured salmon, a Scandinavian classic with bright salty-sweet flavor, ideal for holiday starter platters and open-faced rye sandwiches.

⏱️ 48 hours Snacks & Appetizers ★ 4.7
Snacks & Appetizers
🍜 Japan

Crisp golden bottoms, juicy savory pork and vegetable filling, and tangy dipping sauce make these pan-fried gyoza a beloved shareable bite.

⏱️ 45 minuteSnacks & Appetizers ★ 4.8

shrimp breading:Frequently Asked Questions

1.Why does my breading always fall off the shrimp when I fry them? ▾
That almost always traces back to excess moisture on the shrimp or skipping a key prep step! Pat peeled shrimp completely dry with paper towels before dredging, coat evenly in flour first to create a tacky base, press panko firmly to stick, and let breaded shrimp rest 15 minutes on a wire rack before frying to lock the coating in place.
2.Can I use regular fine breadcrumbs instead of panko for this recipe? ▾
You can, but you won’t get that signature shatteringly crisp, craggy texture the recipe is known for. Fine breadcrumbs create a denser, smoother coating that gets soggy much faster. If you only have regular breadcrumbs, mix them 50/50 with crushed cornflakes for extra crunch, and toast them lightly first for a richer golden color.
3.How do I keep the breading from getting soggy right after I fry the shrimp? ▾
Skip draining fried shrimp on stacked paper towels, which traps steam and softens the coating fast! Instead, transfer cooked shrimp straight to a wire rack set over a baking sheet, and keep them in a 200°F oven while you fry subsequent batches. Don’t cover them, and serve within 20 minutes for the best crisp texture.
4.Do I have to leave the tails on the shrimp for this breading method to work? ▾
Nope, leaving tails on is totally optional—it just makes for a fun, easy handheld appetizer, as the tail acts as a little handle for dipping. If you prefer fully peeled, tail-off shrimp, the breading process works exactly the same; just make sure every exposed shrimp surface gets an even coat at each dredging step.
5.What oil temperature gives the crispiest, most golden breaded shrimp? ▾
Aim for a steady 350°F, measured with a candy or deep-fry thermometer. If the oil is too cool, the breading will soak up excess grease and turn soggy; if it’s too hot, the panko will burn dark brown before the shrimp cooks through. Fry in small batches to keep the oil temperature from dropping too sharply.
6.Can I prep these breaded shrimp ahead of time to fry later? ▾
Absolutely! Bread the raw shrimp fully, arrange them in a single layer on a parchment-lined baking sheet, and chill them uncovered for up to 4 hours before frying, or freeze them solid for up to 1 month. You don’t even need to thaw frozen breaded shrimp—just drop them straight into hot oil, adding 1 to 2 minutes of cook time.
7.Why does my breading turn out pale instead of that nice deep golden color? ▾
Pale coating usually means your oil is too cool, or you’re using fresh, untoasted panko straight from the box. For a deeper golden hue, toast panko in a dry skillet for 2 to 3 minutes until light golden before using it to bread shrimp, and double-check your oil holds a steady 350°F throughout frying.
8.Can I adjust this breading recipe to be gluten-free? ▾
You can easily swap in gluten-free all-purpose flour for the regular AP flour, and use certified gluten-free panko breadcrumbs (most major U.S. grocery stores carry these now) to make this recipe fully gluten-free. Stick to the exact same dredging process, and you’ll get the same crisp, golden coating with almost no noticeable texture difference.
9.How thick should the egg and milk wash be to get the breading to stick properly? ▾
Whisk 2 large eggs with ¼ cup whole milk just until fully combined—you want it the consistency of thin, runny custard, not thick and frothy. If the wash is too thick, it creates a gummy layer under the panko; if it’s too thin, it won’t give crumbs enough tacky surface to grip firmly to the floured shrimp.
10.Do I need to season the breading layers, or is plain coating fine? ▾
Plain breading will taste flat, even paired with a great tangy dipping sauce! Add a pinch of kosher salt, black pepper, and garlic powder to the flour, a tiny pinch to the egg wash, and a light sprinkle to the panko to build flavor in every layer. This ensures every bite is well-seasoned, not just the outer crumb or shrimp.
11.Can I bake these breaded shrimp instead of deep frying them for a lighter option? ▾
You can, though the texture won’t be quite as shatteringly crisp as deep-fried. Arrange breaded shrimp on a wire rack over a baking sheet, spritz generously with neutral cooking spray, and bake at 425°F for 12 to 15 minutes, flipping halfway, until coating is golden and shrimp is cooked through. Skip baking directly on a sheet pan, which makes the bottom soggy.

Comments (16)

2 days ago

OMG this breading is SO crispy! I made this for our Sunday family fish fry (we did shrimp too, obviously) and everyone was raving. Didn’t get soggy even after sitting on the platter for 20 minutes while we finished the hushpuppies. Total game changer.

30 minutes ago

Wait, can I use this breading for chicken tenders too? I have a kid who refuses to eat seafood but loves anything crispy fried, would love to double this batch for meal prep this week.

5 minutes ago

Absolutely! This breading works amazing on chicken tenders, onion rings, even fried pickles! Just adjust cook time slightly to make sure chicken reaches 165°F internal temp and you’re good to go.

1 week ago

Made this for our neighborhood potluck last night and people were asking me for the recipe before I even set the platter down! The golden color is so pretty, it looks like it came straight out of a beachside seafood shack. My only tiny note is I added a pinch of old bay to the mix and it slapped.

3 days ago

Old bay addition is genius! I did a half teaspoon of smoked paprika last time I made it and it added such a nice smoky kick, no soggy breading at all.

2 days ago

Love those custom spice additions! Old bay and smoked paprika are both perfect swaps to match your flavor preferences, so glad it was a potluck hit!

yesterday

Super easy recipe, threw this together last minute after a day hike when my buddies showed up with a bag of frozen shrimp. 10 minute cook time is no joke, we were eating crispy shrimp and drinking beers 15 minutes after we walked in the door. 10/10.

3 days ago

Wait, is there a gluten free swap for the flour base here? I have celiac and have been chasing that perfect crispy fried shrimp texture forever, would kill to make this for my birthday dinner next week.

2 days ago

You can absolutely swap the all purpose flour for a 1:1 gluten free all purpose flour blend! I recommend adding a tiny pinch of xanthan gum if your blend doesn’t already have it to help the breading stick and stay extra crispy.

5 days ago

Tried this last night and my kids loved it! Usually they turn their noses up at shrimp but they ate three servings each and asked if we can have “crunchy golden shrimp” every Friday from now on. Win for dad.

2 days ago

Same here! My 4 and 6 year old go crazy for this. I let them help shake the shrimp in the breading bag and they think it’s the most fun dinner activity ever.

yesterday

That’s the best kind of win! So glad the whole family is enjoying it, those weekly Friday shrimp nights sound like the best tradition.

2 hours ago

I don’t have a deep fryer so I made these in my air fryer with a light spritz of oil and they still got so crispy! Way less mess than traditional fried shrimp, will be making this on repeat for weeknight dinners.

2 weeks ago

I’ve tried so many fried shrimp breading recipes that slide right off the shrimp mid-fry, does this one actually stay put? I’m so tired of wasting shrimp and breading on floppy, naked shrimp.

1 week ago

I had the same problem forever! Pat your shrimp totally dry before you dip them in the egg wash and the breading sticks perfectly, no sliding at all. I made this last weekend and every single shrimp had perfect, even breading.

1 week ago

Can I bread the shrimp ahead of time and freeze them for quick weeknight meals? I do most of my meal prep on Sundays and would love to have a bag of these ready to drop in the fryer when I get home from work.

5 days ago

I did this last month! Breaded them, laid them on a baking sheet to flash freeze, then tossed them in a freezer bag. They cooked straight from frozen perfectly, breading stayed crispy, no sogginess.

3 days ago

Frank is exactly right! Flash freezing the breaded shrimp on a tray before bagging prevents them from sticking together, and they’ll keep in the freezer for up to 3 months for super quick meals.

5 days ago

Made this for our college football tailgate last Saturday and it was gone in 10 minutes. People were coming back for seconds and thirds before the burgers were even done. So good, will be a regular in our tailgate rotation.

3 days ago

That’s what we love to hear! Crispy shrimp is such a perfect tailgate snack, so glad it was a hit with your crew.

5 minutes ago

Added a half teaspoon of cayenne and a quarter teaspoon of garlic powder to the breading and it was *chef’s kiss*. Perfect crunch, perfect golden color, had just the right kick to pair with my homemade comeback sauce. Will make again and again.

2 days ago

I’m a total beginner at frying things and this was so easy! I was so nervous I’d burn it or mess up the breading but it turned out perfectly golden and crispy on the first try. My roommate thought I ordered takeout lmao.

yesterday

Same! I’ve never fried anything in my life and this came out perfect the first time too. The instructions are so straightforward, no fancy steps or weird ingredients needed.

2 hours ago

That makes us so happy to hear! We designed this recipe to be totally approachable for new cooks, so it’s awesome to see you nailing it on the first try. Great job!

yesterday

Made this for my partner’s birthday dinner last night paired with garlic butter pasta and roasted broccoli, and they said it was better than the shrimp we get at our favorite fancy seafood restaurant. Total win for date night!

2 hours ago

I did this for date night too! Paired it with cocktail sauce and coleslaw and my girlfriend was so impressed, she thought I spent hours in the kitchen. Little does she know it only took 10 minutes to cook 😂

just now

All the ingredients are stuff I already have in my pantry! No fancy specialty breadcrumbs or weird seasonings required, which is perfect for my grocery budget right now. Tastes way better than the frozen pre-breaded shrimp from the grocery store too.

1 week ago

This tastes exactly like the crispy fried shrimp my grandma used to make at our summer lake trips! The golden color, the perfect crunch, even the smell took me right back to being 10 years old sitting on her porch. Absolute perfection.

5 days ago

That’s the highest compliment we could get! There’s nothing better than a recipe that brings back happy childhood food memories, so glad this one hit the mark for you.

3 days ago

Pro tip: Save a little bit of the breading mix to toss on fried pickles while you’re making the shrimp. I did this last weekend and had the perfect combo appetizer platter for game night, everyone lost their minds.

2 days ago

Oh my gosh that’s such a good idea! I always have extra breading left over and just throw it out, next time I’m definitely frying up some pickles and zucchini fries with it.

yesterday

We love that hack! The breading works so well on all kinds of fried snacks, so using up the extra for pickles or veggies is such a smart, low-waste move.



