
Veggie Sliders Grilled Cheese

title 1
Veggie Sliders Grilled Cheese
⏱️ cook time 20 minutes
🍽️ servings 4
⚡ Difficulty easy

intro

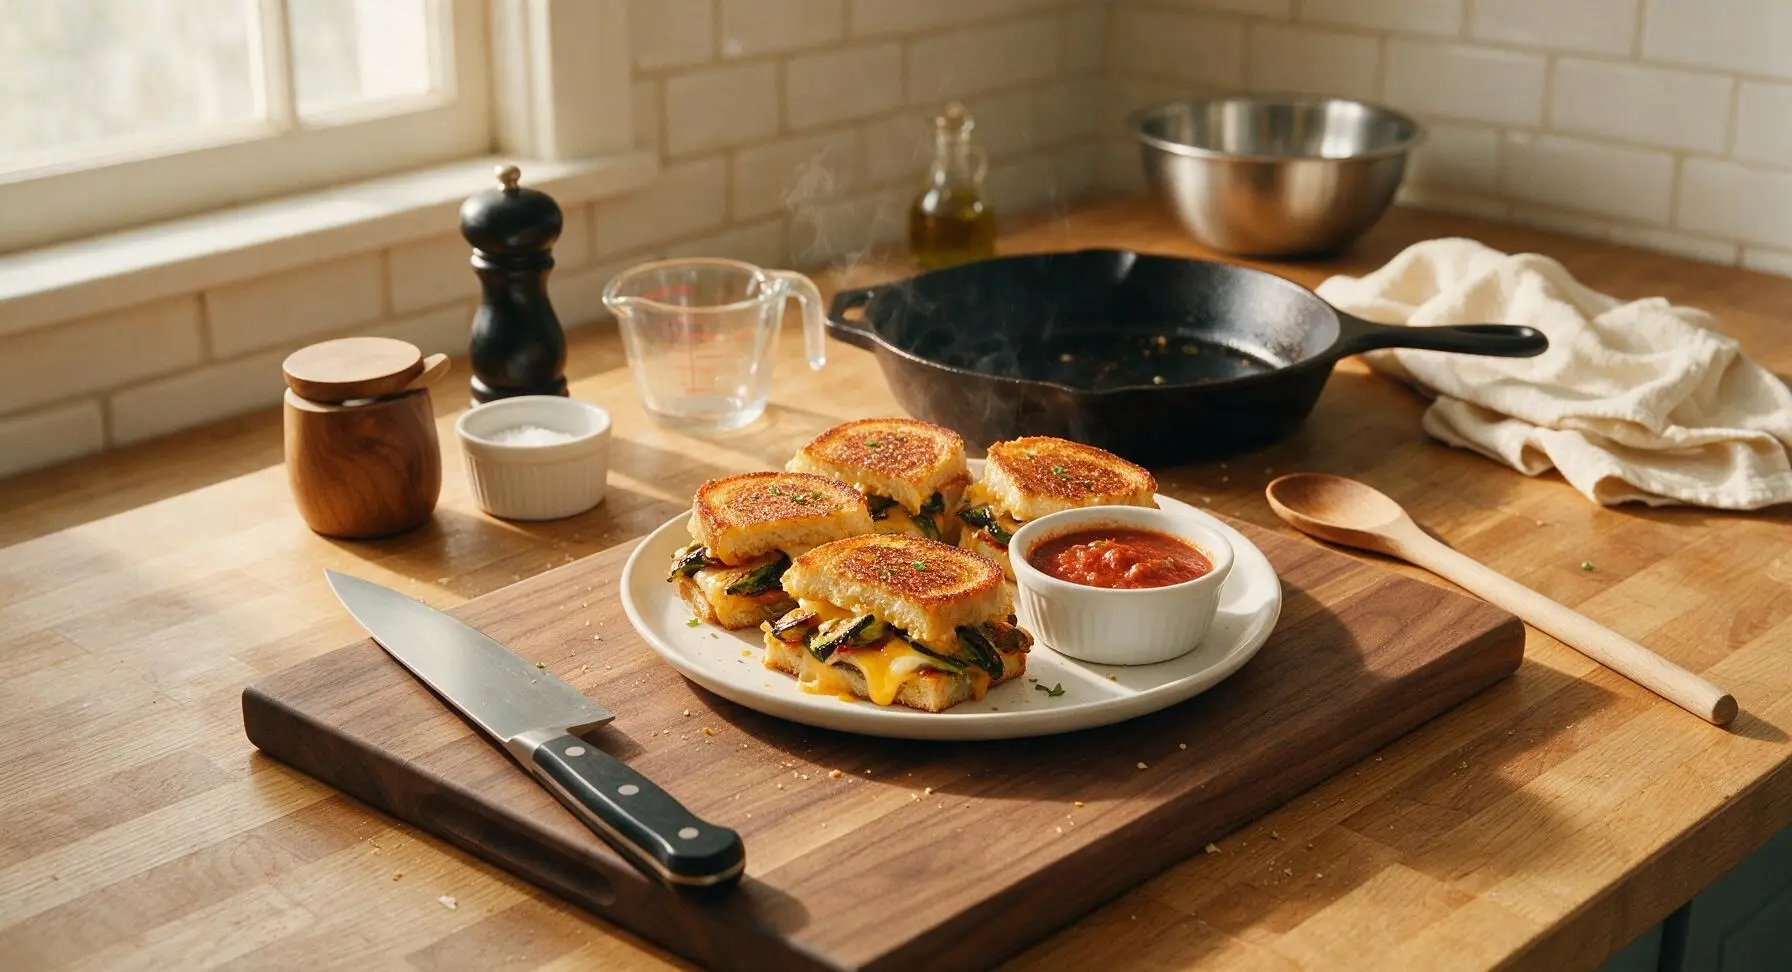
Crispy, buttery mini grilled cheese sliders loaded with tender charred veggies and gooey melted cheddar, perfect for handheld snacking with warm marinara dip.

Ingredients
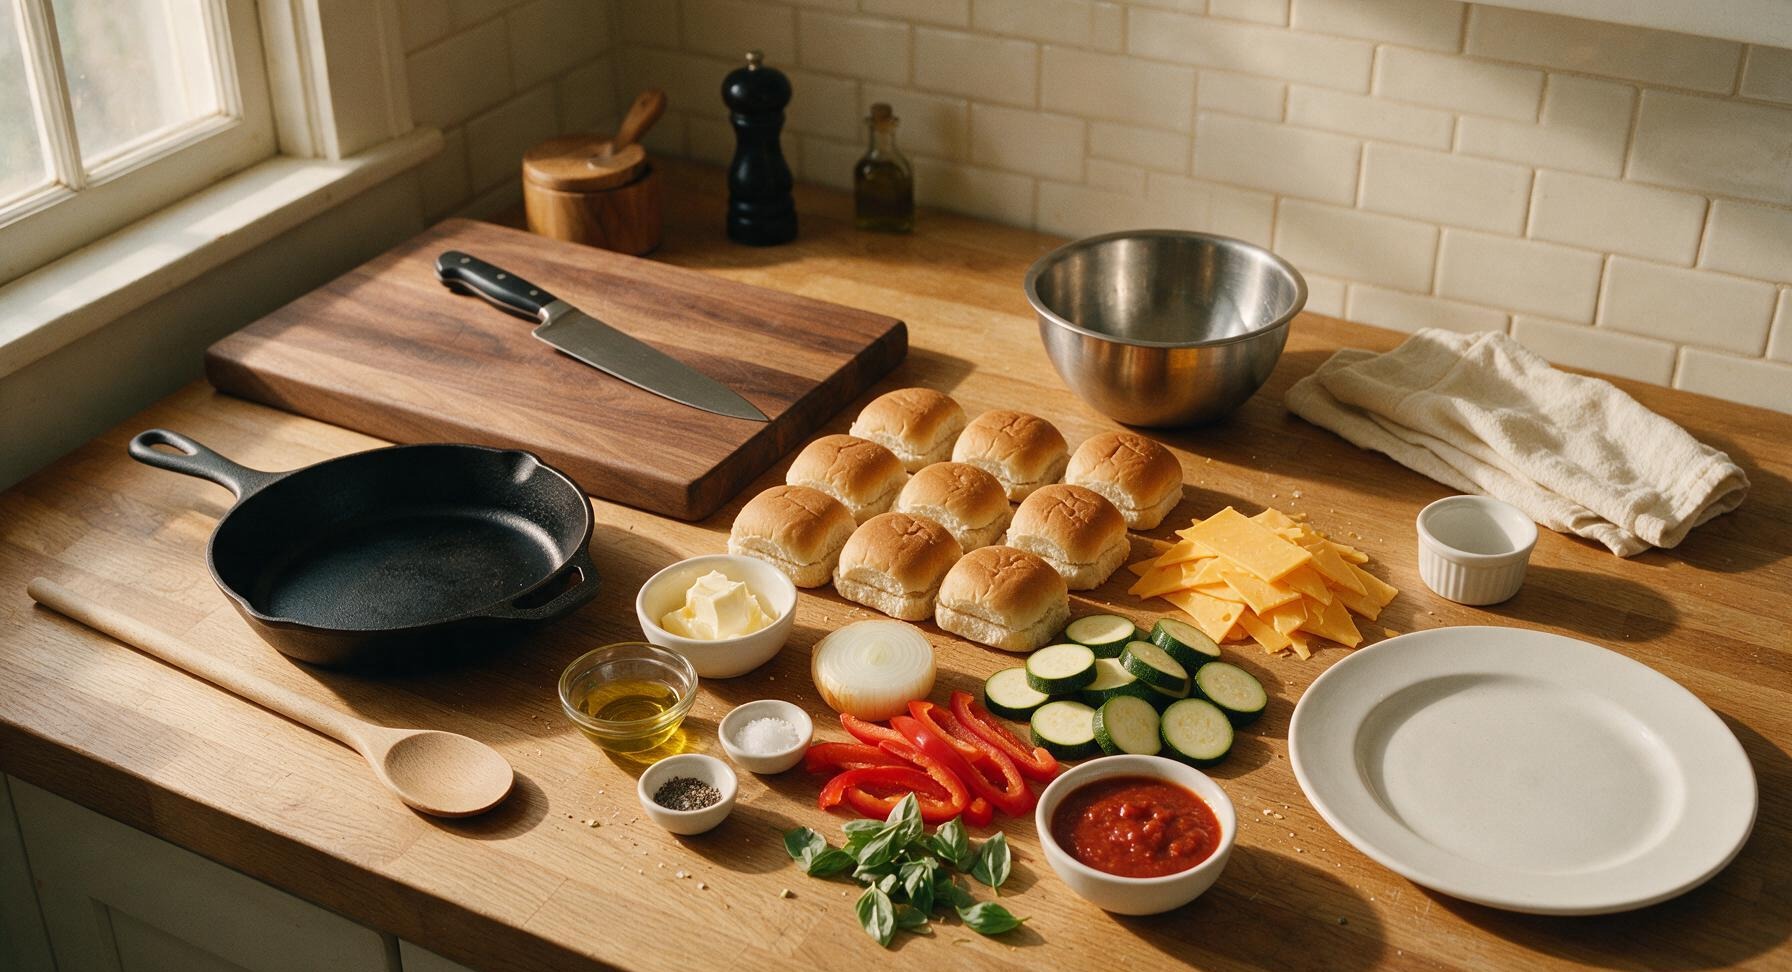
Mini slider buns (split, white or whole grain) 12 count
Sharp cheddar cheese (thinly sliced) 150g (5.3oz)
Zucchini 1 medium (180g)
Red bell pepper 1 medium (150g)
Sweet yellow onion 1 small (100g)
Salted butter (softened) 3 tbsp (42g)
Extra-virgin olive oil 1 tbsp (15ml)
Kosher salt 1/2 tsp
Freshly ground black pepper 1/4 tsp
Fresh basil leaves 1/4 cup (10g)
Marinara sauce (for dipping) 1/2 cup (120ml)

Steps

1

Prep Seasoned Veggies

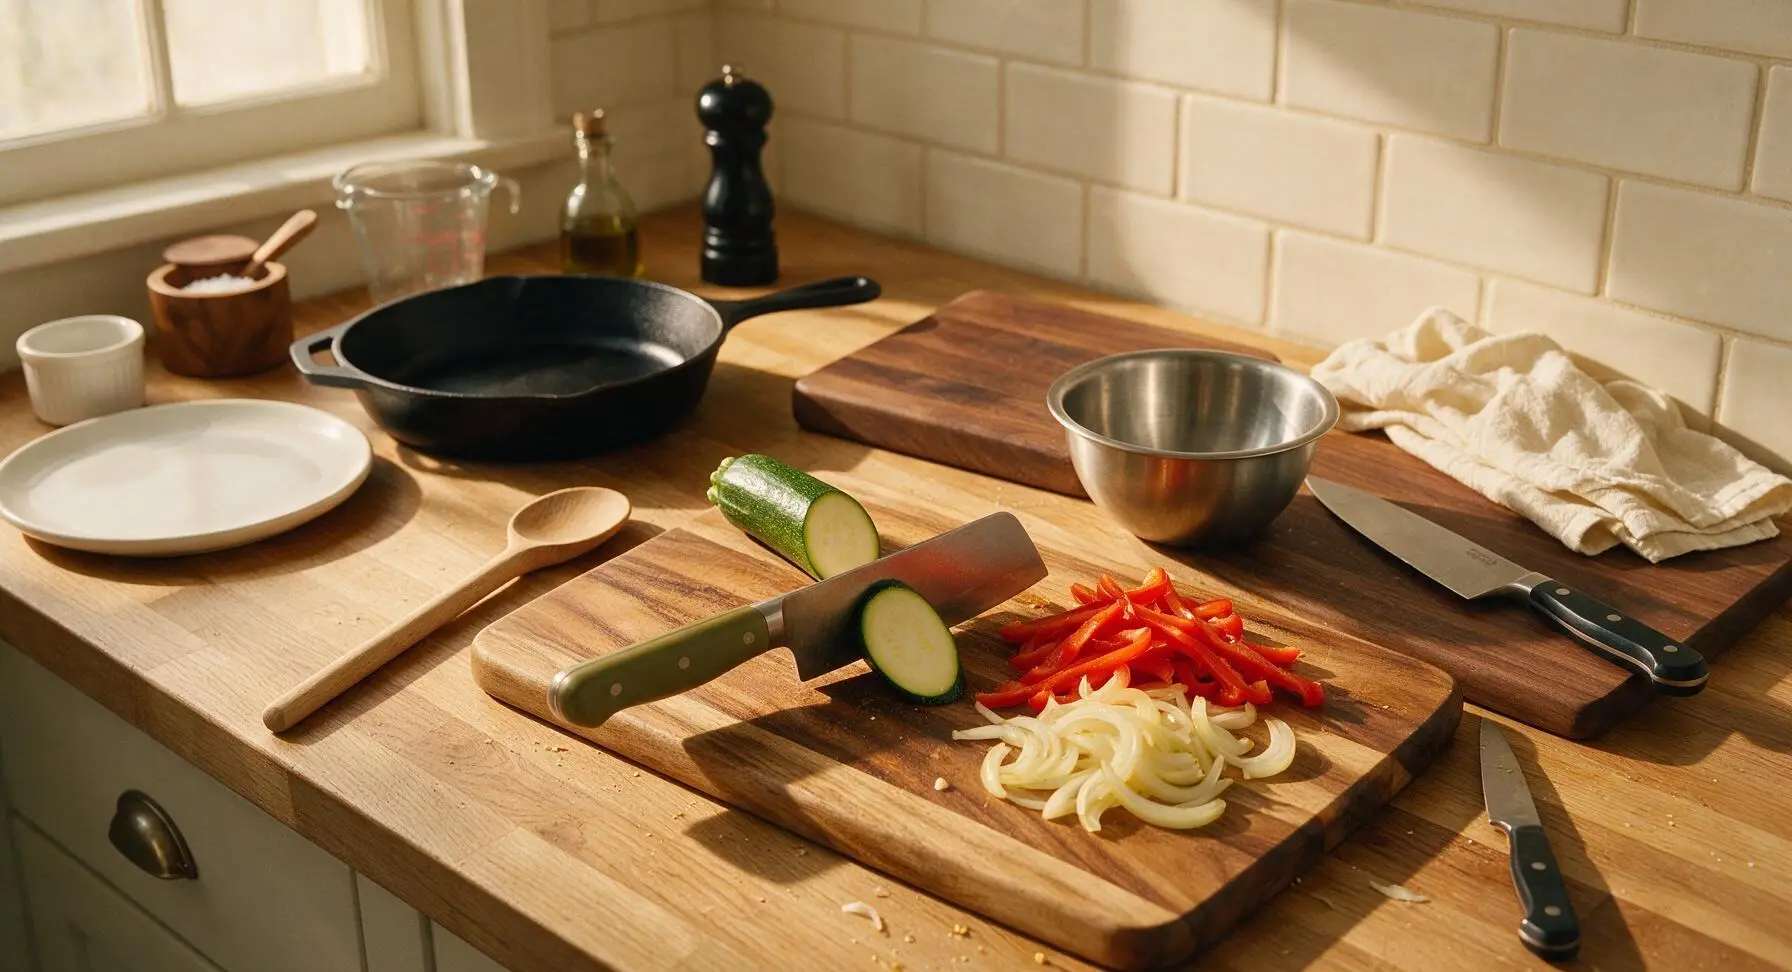
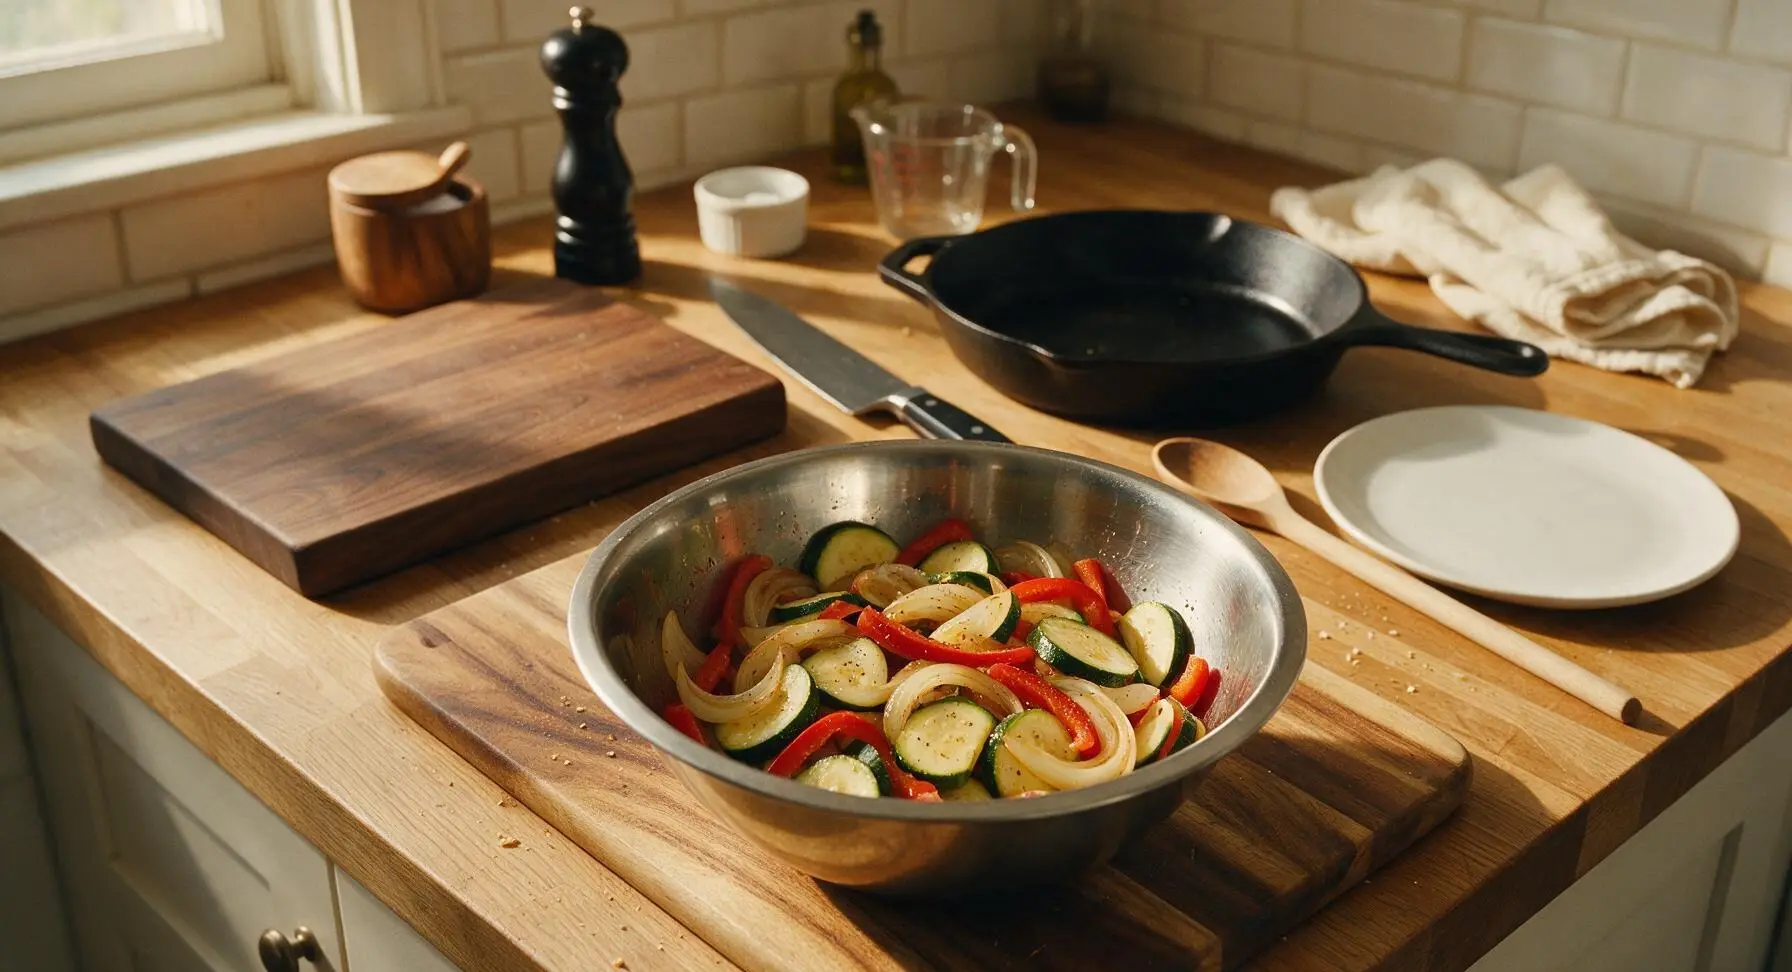
Place the acacia wood cutting board on the center of the counter. Using the 7-inch santoku knife, slice zucchini into 1/4-inch thick rounds, red bell pepper into 1/4-inch wide strips, and sweet yellow onion into thin half-moons. Toss sliced veggies in the small stainless steel mixing bowl with 1 tbsp extra-virgin olive oil, 1/2 tsp kosher salt, and 1/4 tsp freshly ground black pepper until evenly coated. Veggies should be lightly glistening with oil, not drowning in excess liquid.
Step 1
step1:Prep Seasoned Veggies
Step 1
step1:Prep Seasoned Veggies
2

Sauté Veggie Filling

Place the 12-inch matte black carbon steel griddle pan on the center work area and heat to medium (350°F / 175°C). Once hot, spread the seasoned veggies in a single even layer across the pan surface. Cook for 6-8 minutes, flipping once with the stainless steel spatula, until veggies are tender with light golden char marks on the edges, with no raw crunchy bite remaining. Transfer cooked veggies to a clean section of the cutting board to cool for 2 minutes.
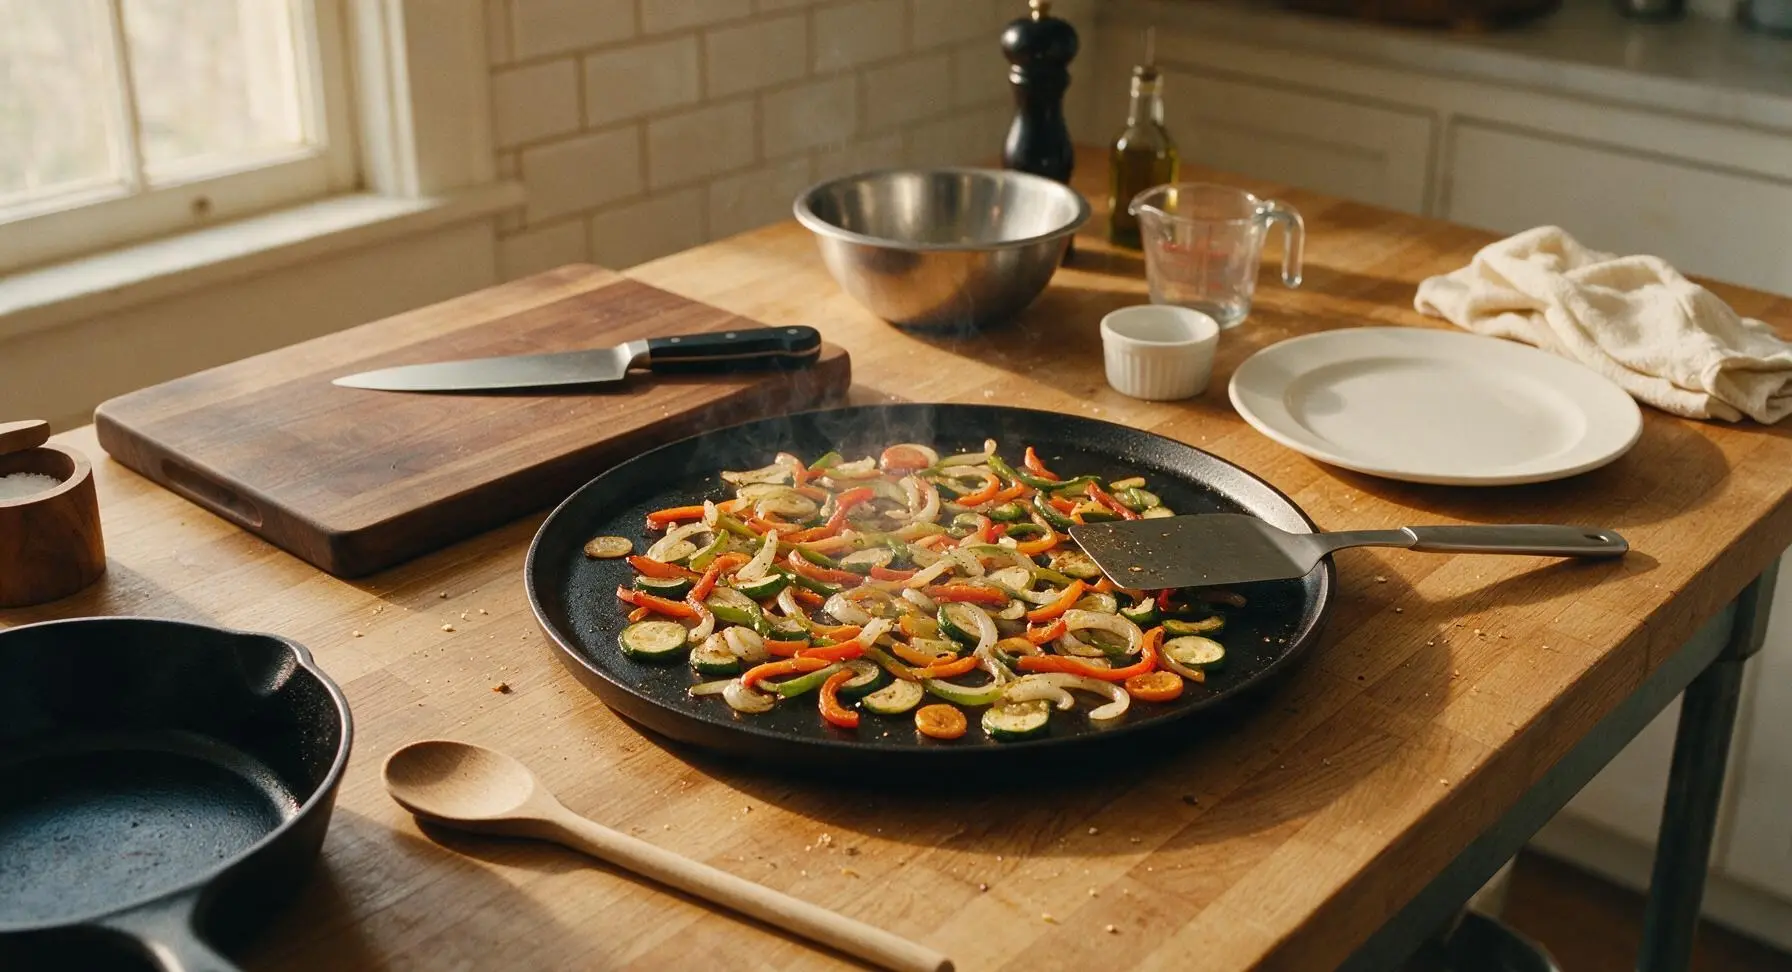
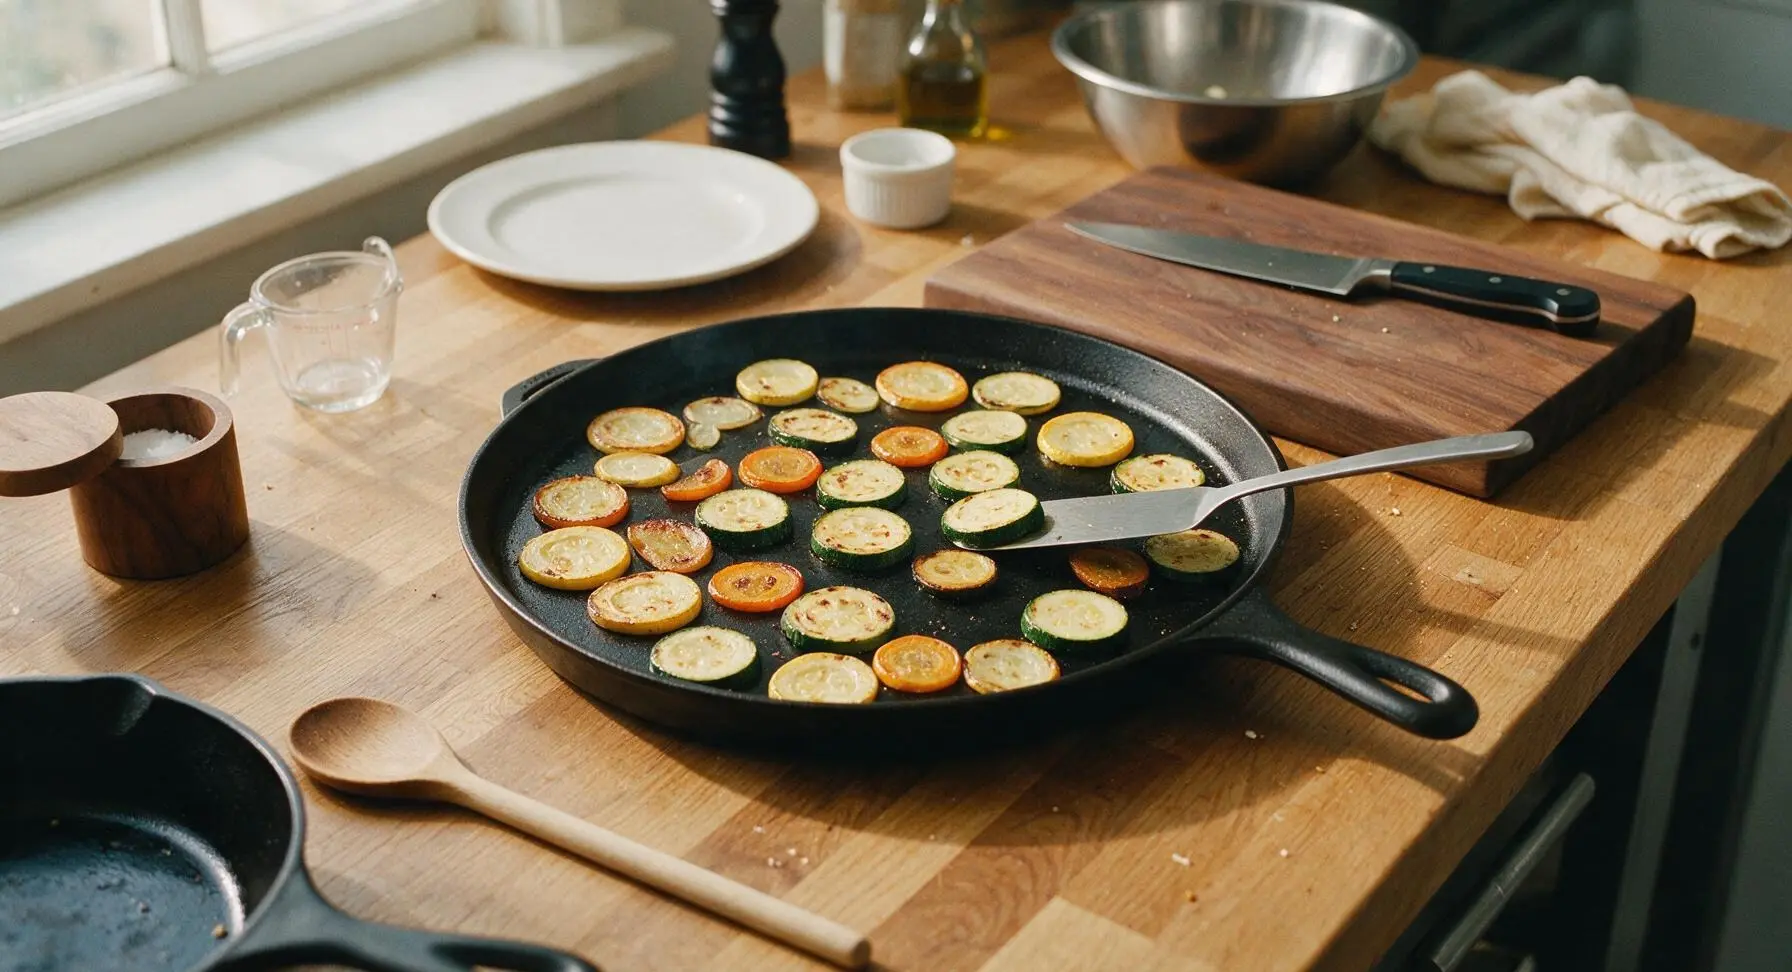
Step 2
step2:Sauté Veggie Filling
Step 2
step2:Sauté Veggie Filling
3

Butter Split Buns

Using the light gray silicone pastry brush, spread 3 tbsp of softened salted butter evenly across the cut inner sides of all 12 split slider buns. Spread butter all the way to the bun edges for even toasting, and avoid leaving dry unbuttered patches that will burn unevenly. Set buttered buns cut-side up on the edge of the cutting board until ready to toast.
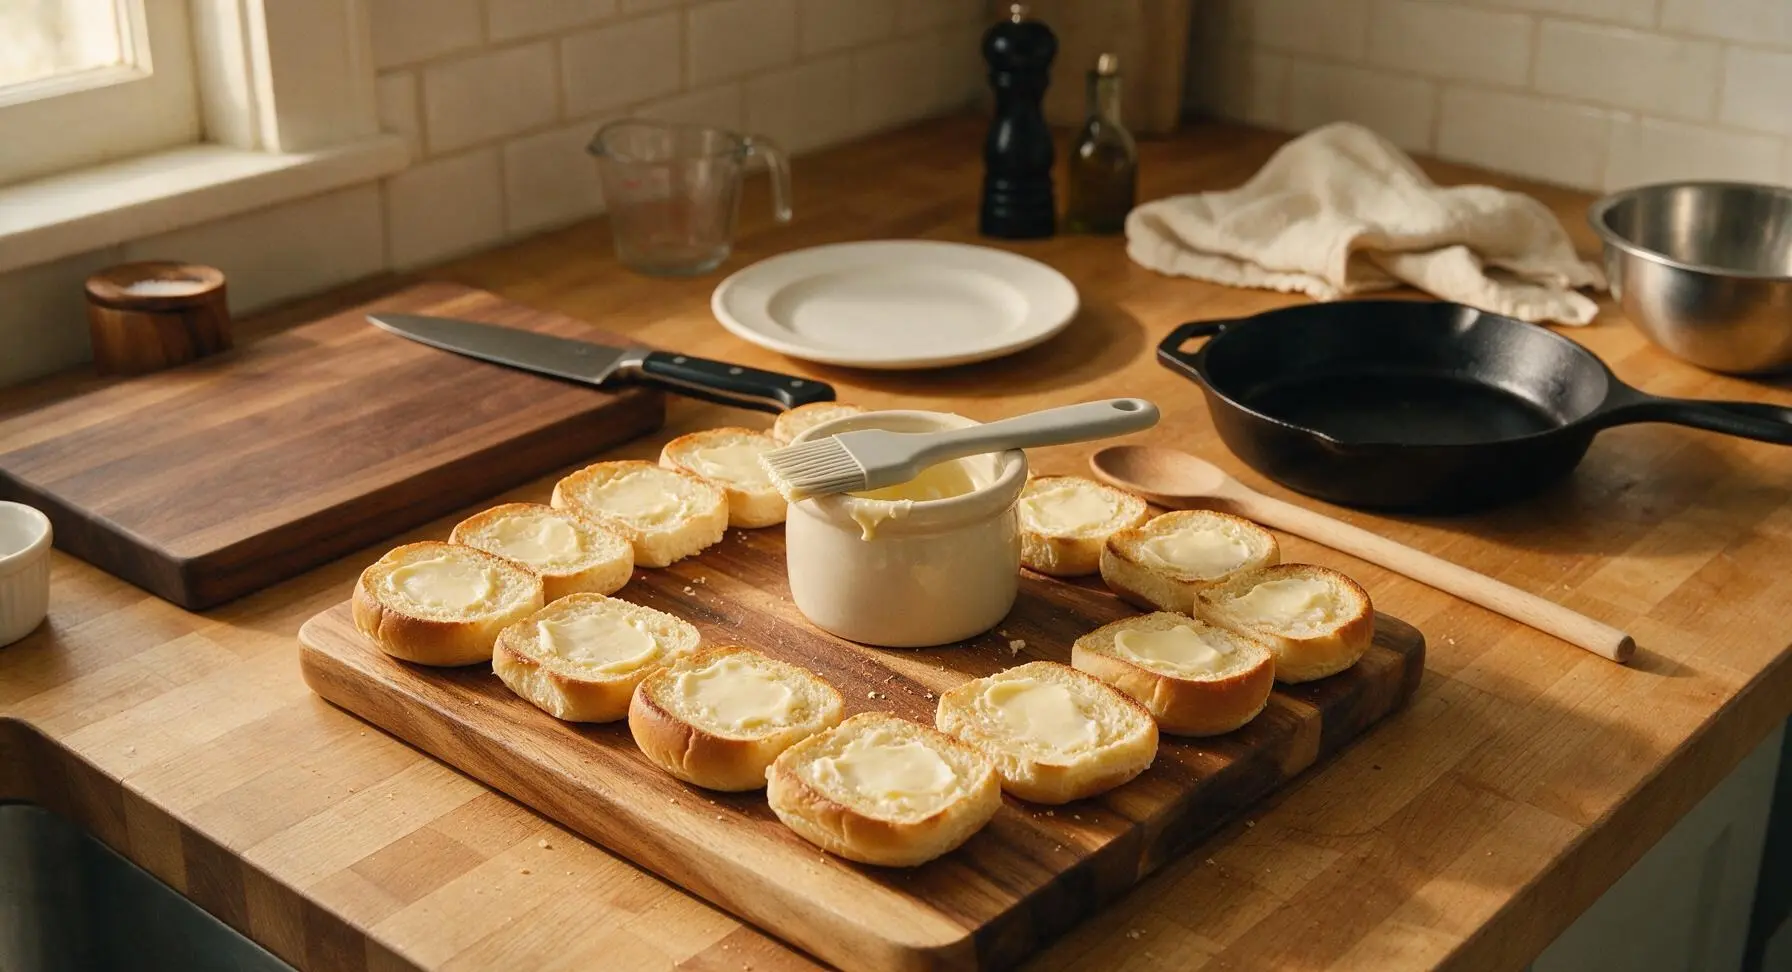
Step 3
step3:Butter Split Buns
4

Toast Buns Until Crisp

Place the buttered slider buns cut-side down on the preheated griddle pan, maintaining medium heat (350°F / 175°C). Toast for 2-3 minutes, pressing lightly with the stainless steel spatula, until the cut surfaces are deep golden brown and crispy to the touch, with no pale soft spots remaining. Transfer toasted buns cut-side up to the edge of the cutting board, arranging bottom buns in a straight row for easy assembly.
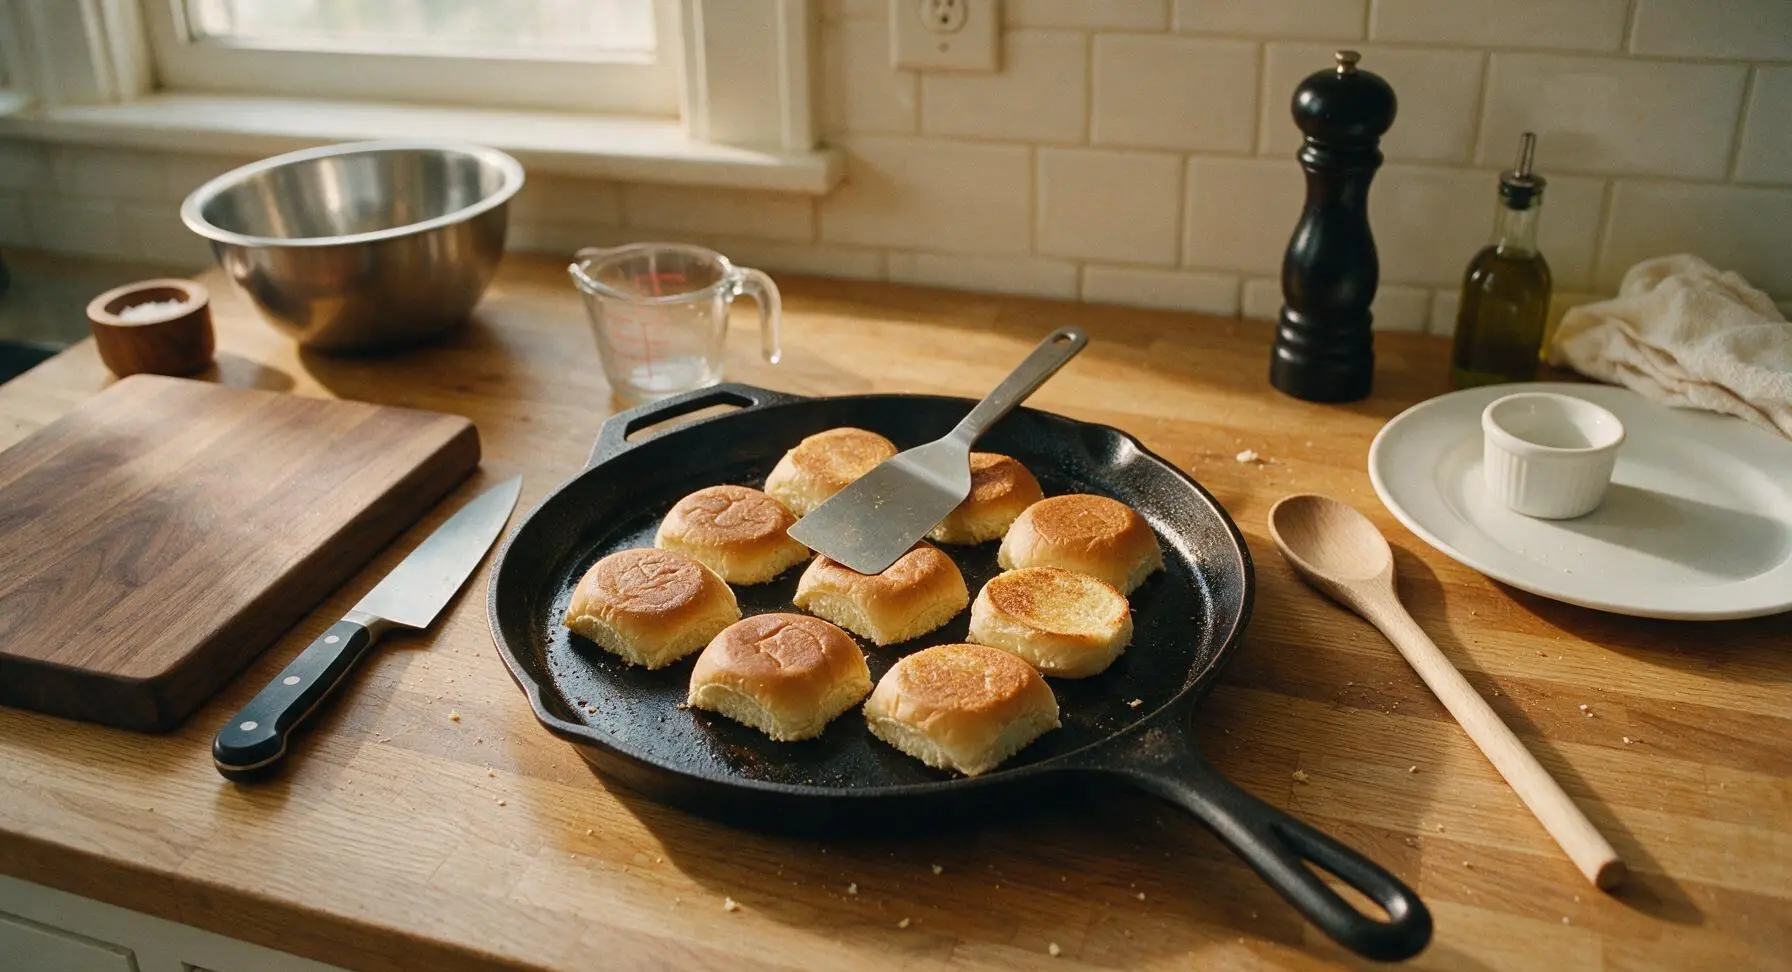
Step 4
step4:Toast Buns Until Crisp
5

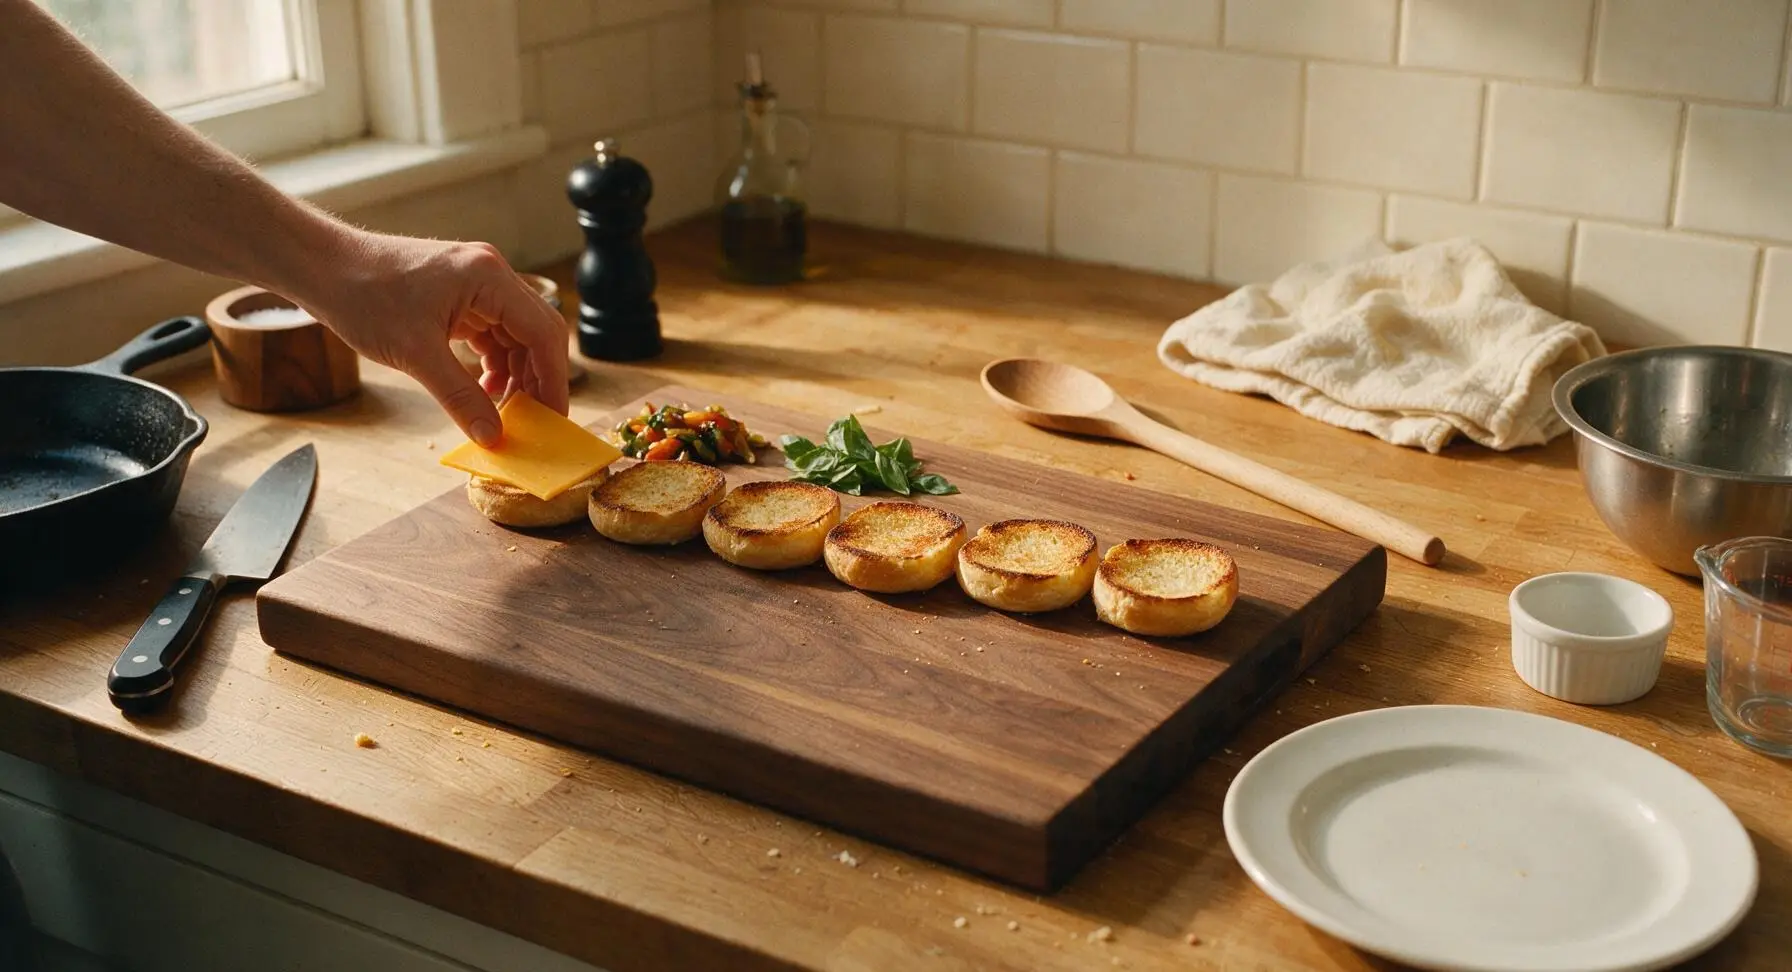
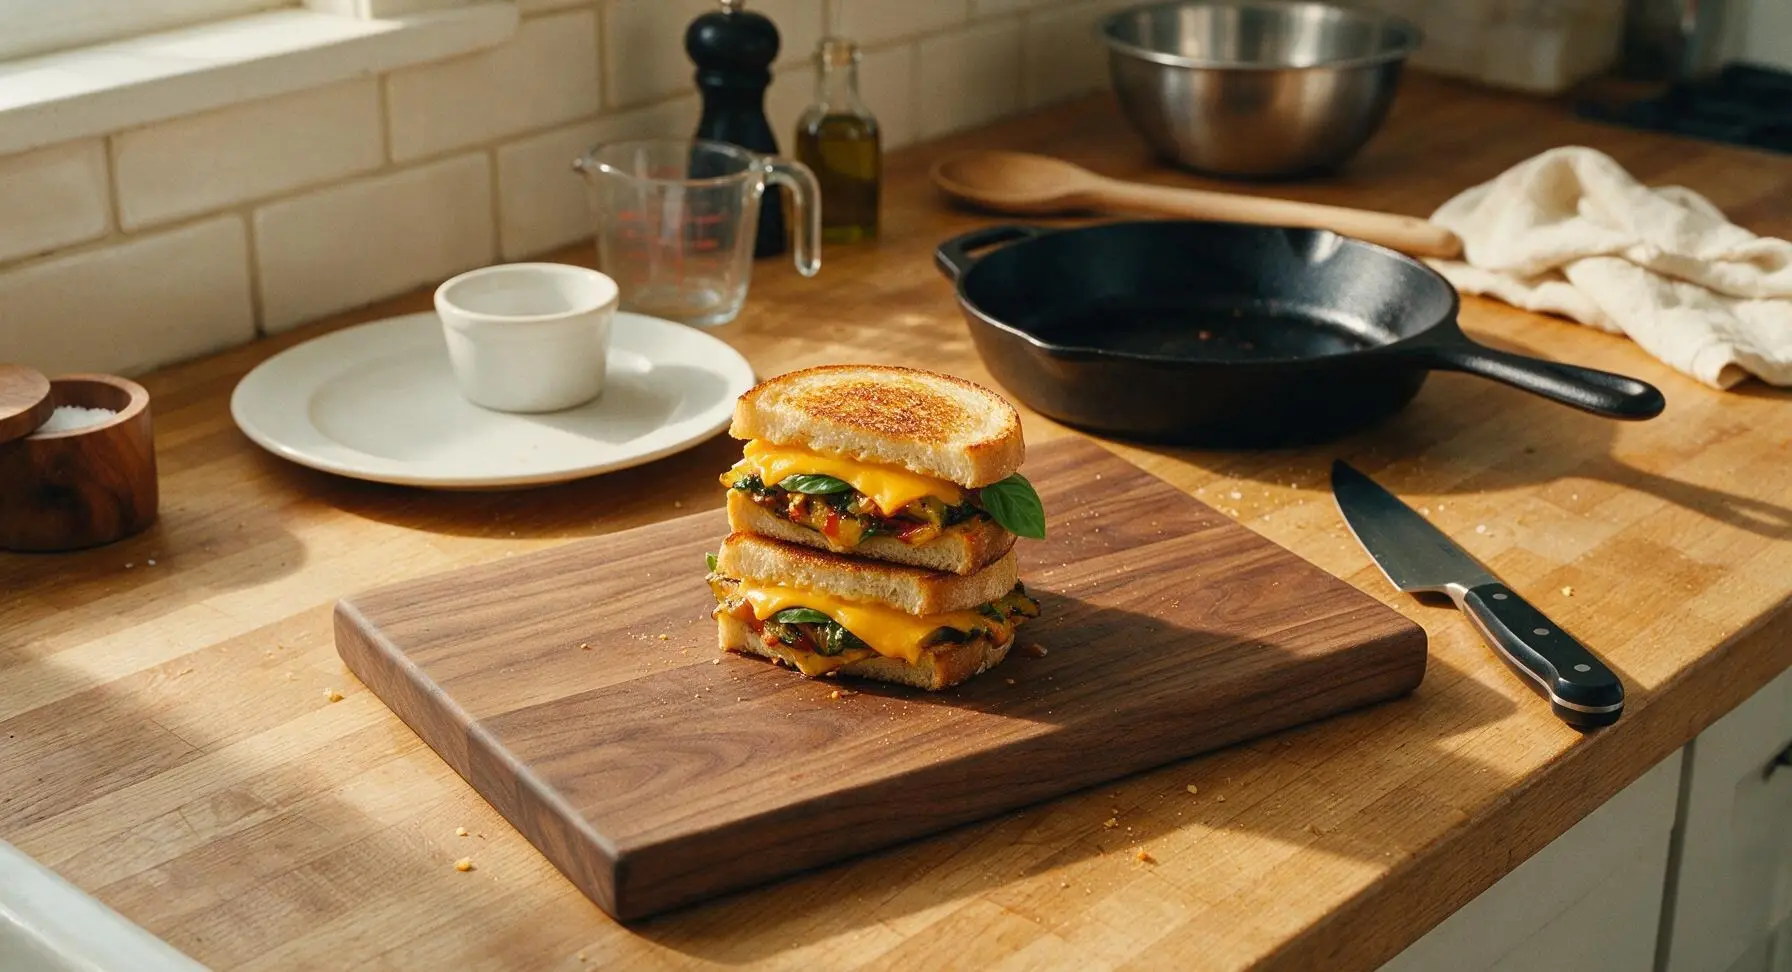
Layer Cheese and Veggies

Arrange half of the thin sharp cheddar slices across the cut surface of the bottom toasted buns. Top the cheese with an even layer of the cooled cooked veggies, tucking 2-3 fresh basil leaves into each veggie pile, then cover with the remaining cheddar slices. Place the top toasted bun on each slider, pressing down gently so the cheese starts to adhere to the warm fillings. Position cheese layers directly against the warm bun and warm veggies to encourage even melting.
Step 5
step5:Layer Cheese and Veggies
Step 5
step5:Layer Cheese and Veggies
6

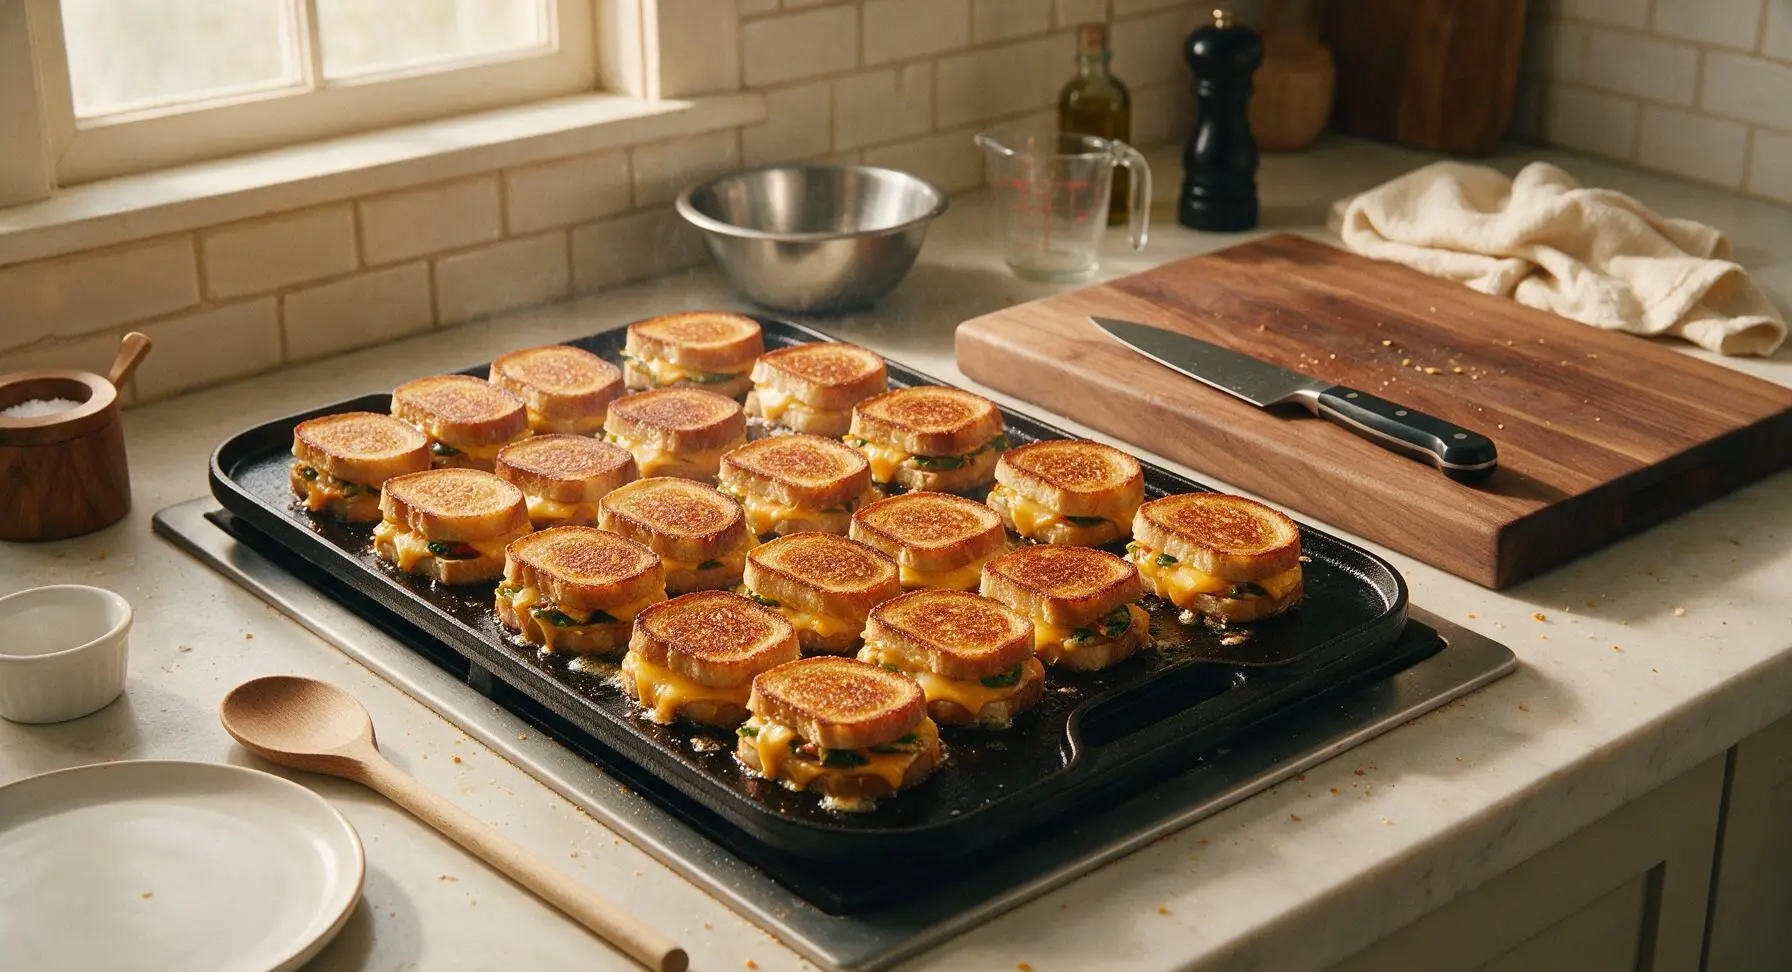
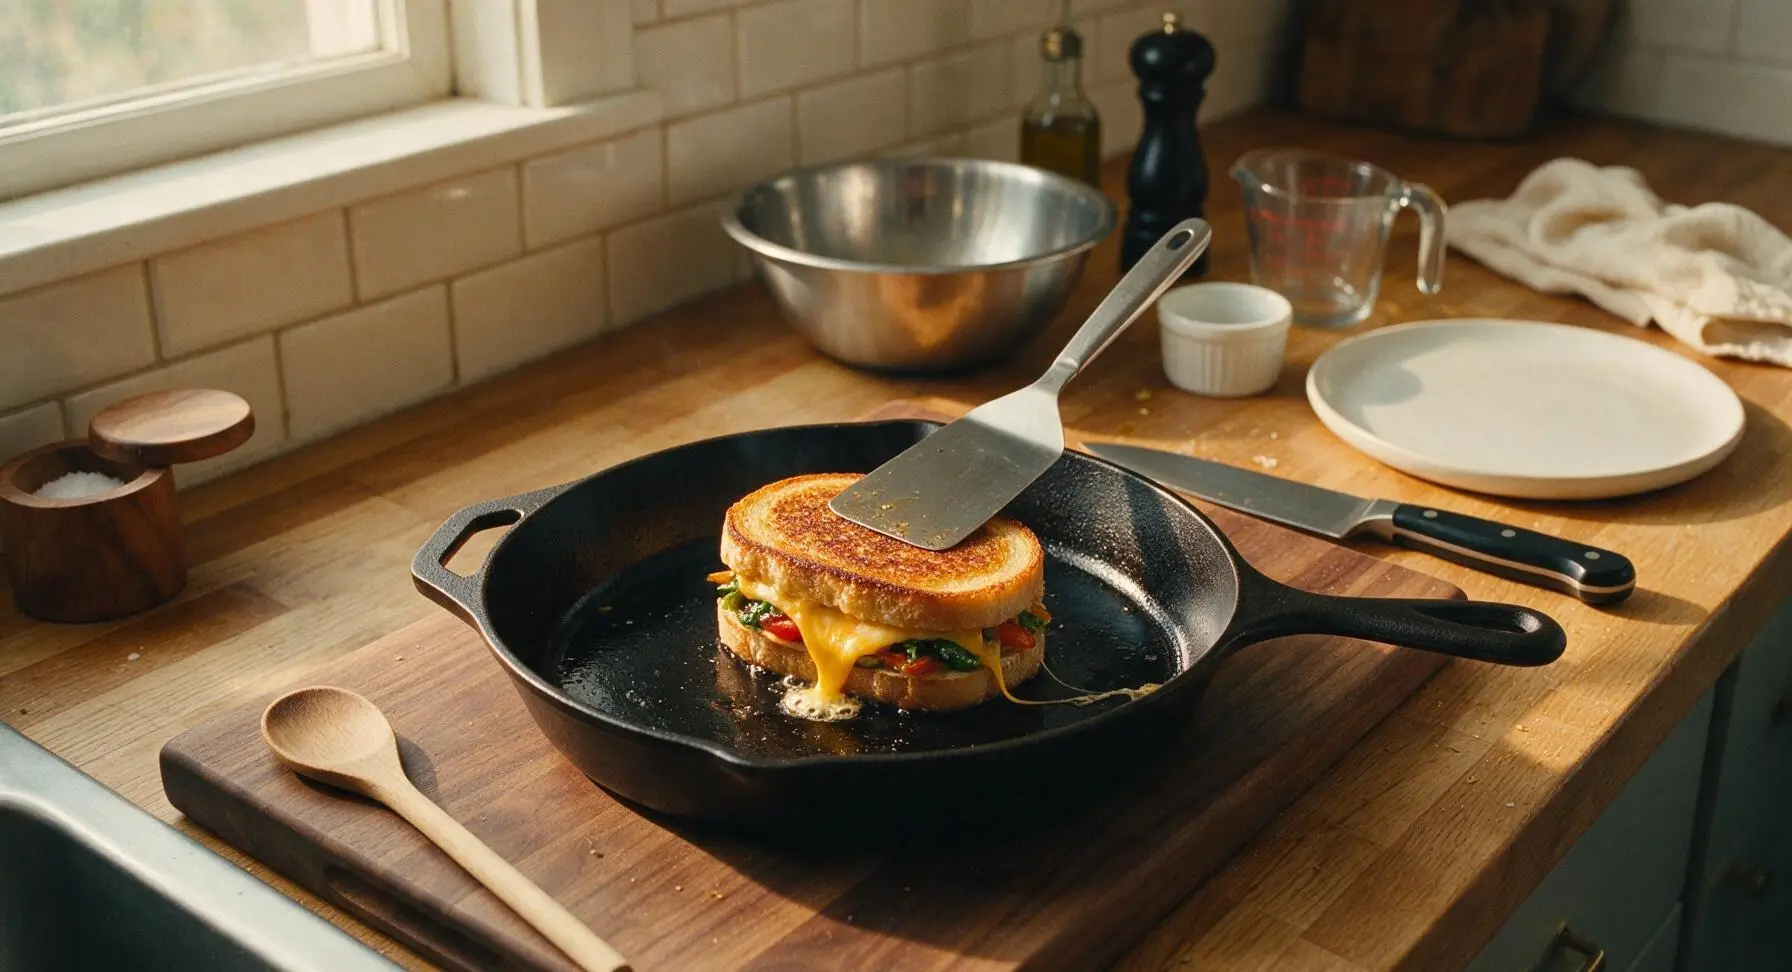
Grill Until Cheese Melts

Return assembled sliders to the medium-heat griddle pan. Cook for 3-4 minutes per side, pressing firmly with the spatula every minute, until the outer bun surfaces are golden and crispy, and the cheddar cheese is fully melted and oozing slightly out the slider sides. The center of each slider should feel warm to the touch when pressed, indicating cheese is fully melted. Do not turn heat higher than medium, or buns will burn before cheese melts through.
Step 6
step6:Grill Until Cheese Melts
Step 6
step6:Grill Until Cheese Melts
7

Plate With Dipping Sauce

Transfer cooked sliders to the rectangular matte white ceramic serving platter, arranging them slightly offset for visual appeal. Pour 1/2 cup warm marinara sauce into the small clear glass ramekin and place it on the right corner of the platter. Garnish sliders with a few extra small fresh basil leaves, and serve warm while cheese is still gooey and stretchy.
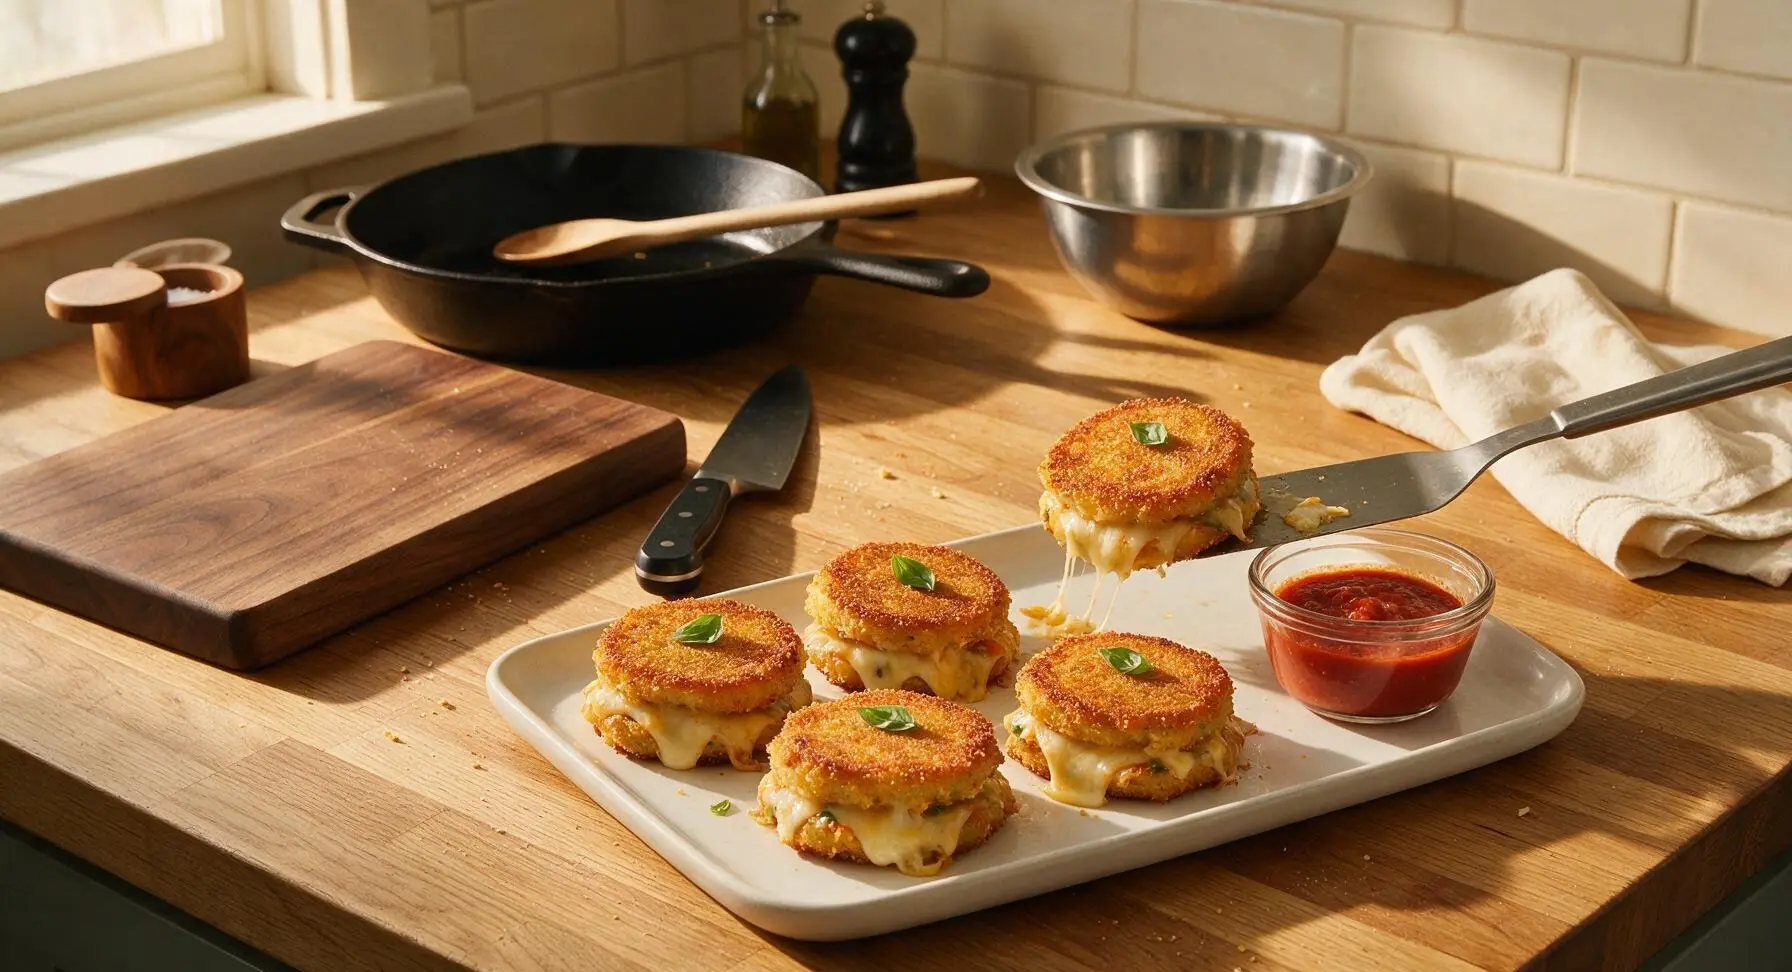
Step 7
step7:Plate With Dipping Sauce

Tips

1.Pat sliced zucchini dry with a paper towel before tossing with oil if it looks very moist (common with fresh summer zucchini) — excess vegetable moisture will seep into buns and make them soggy instead of crispy.
2.Use fully softened room-temperature butter for spreading on buns: cold butter will tear soft slider bun surfaces and leave uneven patches that burn faster during toasting.
3.Avoid overstuffing sliders: too many veggies or extra-thick cheese slices will cause fillings to slide out when pressed on the griddle, leading to burnt cheese on the pan instead of gooey filling inside the bun.


✨ You May Also Like

Snacks & Appetizers
🍜 Mexico

Crispy thick-cut tortilla chips piled high with seasoned beef, melted cheese, and bright fresh toppings for a shareable, crowd-favorite bite.

⏱️ 25 minuteSnacks & Appetizers ★ 4.8
Snacks & Appetizers
🍜 United States

Crisp, sweet-tangy spiced pickled watermelon rind is a zero-waste summer staple, perfect with grilled meats, charcuterie, or eaten straight from the jar as a bright snack.

⏱️ 30 minuteSnacks & Appetizers ★ 4.6
Snacks & Appetizers
🍜 Germany

A tangy, jellied pork cold cut slow-simmered with aromatic spices, set into a firm sliceable loaf, served cold with mustard and crusty bread.

⏱️ 3 hours 4Snacks & Appetizers ★ 4.8
Snacks & Appetizers
🍜 United States

Creamy, tangy, perfectly seasoned hard-boiled egg halves filled with a rich, smooth yolk mixture, a timeless, crowd-pleasing bite for holiday and casual gatherings alike.

⏱️ 40 minuteSnacks & Appetizers ★ 4.8
Snacks & Appetizers
🍜 Russia

Silky, dill-forward no-smoke cured salmon, a Scandinavian classic with bright salty-sweet flavor, ideal for holiday starter platters and open-faced rye sandwiches.

⏱️ 48 hours Snacks & Appetizers ★ 4.7
Snacks & Appetizers
🍜 Japan

Crisp golden bottoms, juicy savory pork and vegetable filling, and tangy dipping sauce make these pan-fried gyoza a beloved shareable bite.

⏱️ 45 minuteSnacks & Appetizers ★ 4.8

Veggie Sliders Grilled Cheese:Frequently Asked Questions

1.Can I prep the charred veggies for these sliders ahead of time for a party? ▾
Absolutely! You can char the zucchini, bell pepper, and onion up to 3 days in advance, stored in a sealed airtight container in the fridge. Just pat the veggies gently with a paper towel before assembling to soak up excess moisture—this keeps your slider buns from getting soggy when you grill them to golden perfection.
2.What’s the best way to get that perfect crispy, buttery bun without burning the cheese? ▾
Cook your sliders over medium-low heat, not cranked high! Spread a thin, even layer of softened salted butter on the outside of each bun half, then cook 3-4 minutes per side, pressing gently with a spatula. This gives the bun time to crisp while the cheddar melts fully into the layered veggie filling.
3.Can I use a different cheese if I don’t have sharp cheddar on hand? ▾
Of course! Sharp cheddar brings that bold, tangy bite that pairs so well with charred veggies, but you can swap in pepper jack for a little heat, smoked gouda for a rich, nutty twist, or provolone for that classic stretchy, mild melt. Just stick to thinly sliced cheese for even, fast melting.
4.How do I keep the veggie filling from sliding out when I take a bite? ▾
Layer strategically! Start with a thin slice of cheese on the bottom bun, add your patted-dry charred veggies, then top with a second cheese slice before adding the buttered top bun. The melted cheese acts as a 'glue' on both sides of the veggie layer to lock everything in place as you grill.
5.Can I make these sliders in the oven instead of on a stovetop griddle? ▾
Totally! Preheat your oven to 375°F, arrange assembled sliders on a rimmed baking sheet, and place a second weighted baking sheet on top to press them slightly. Bake for 10-12 minutes, until the buns are toasty and the cheese is fully melted. This is a great hack for making a big batch all at once for crowds.
6.Do I need to salt the zucchini before cooking it to draw out moisture? ▾
It’s a smart extra step if you have 10 extra minutes! Slice your zucchini, sprinkle with a pinch of kosher salt, and let it rest 10 minutes before patting dry and charring. This cuts down on excess water that can make sliders soggy, and it also concentrates the zucchini’s sweet, earthy flavor.
7.Are these sliders freezable for quick weeknight snacks? ▾
They freeze really well for quick, grab-and-go snacks! Assemble uncooked sliders, wrap each individually in plastic wrap, and store in a labeled freezer bag for up to 2 months. Cook straight from frozen over low heat (add 1-2 minutes per side) so the bun toasts evenly without burning before the cheese and filling heat through.
8.What other veggies work well in these grilled cheese sliders if I don’t have the listed ones? ▾
You can swap in thinly sliced portobello mushrooms, roasted cherry tomatoes (patted very dry), charred corn cut off the cob, or thin-sliced roasted broccoli. Just avoid super watery veggies like raw cucumber or undrained fresh tomato, as those will make your buns soggy fast and ruin that crispy texture.
9.Do I have to use mini slider buns, or can I make these with regular sandwich bread? ▾
You can absolutely adapt the recipe to what you have on hand! If you don’t have slider buns, cut regular sandwich bread into 3-inch squares to make mini portions, or scale up to full-sized grilled cheese sandwiches with the same veggie and cheddar filling. Just adjust cook time slightly to ensure the cheese melts all the way through.
10.How do I get that nice char on the veggies without making them mushy? ▾
Cook your sliced veggies over medium-high heat in a dry skillet or on a ridged grill pan, and don’t stir them too often! Let them sit 2-3 minutes per side to develop that dark, smoky, flavorful char, then pull them off while they’re still crisp-tender, rather than cooking them until soft and limp.
11.Is there a dairy-free swap that works well for these sliders? ▾
Definitely! Use your favorite thinly sliced dairy-free sharp cheddar-style melting cheese (look for brands formulated for grilled cheese, not just standalone snacking) and swap the butter on bun outsides for softened dairy-free butter or thin olive oil mayo for that same crispy, golden crust.
12.What else can I serve with these sliders besides warm marinara dip? ▾
Marinara is a classic pairing, but you’ve got tons of tasty options! Try them with creamy garlic aioli, spicy honey mustard, tangy ranch dressing, or warm pesto dip for a herby twist. Pair with a simple side salad, baked sweet potato fries, or dill pickles for a full, shareable spread.
13.Can I cook these sliders on an outdoor grill for a summer cookout? ▾
You sure can, they’re perfect for cookouts! Heat your grill to medium-low, and use a cast iron griddle plate or perforated grill basket to keep sliders from falling through the grates. Cook 3-4 minutes per side with the grill lid closed to help cheese melt fast, and watch closely so buttery buns don’t char too quickly over hot spots.

Comments (7)

2 hours ago

OMG these veggie sliders grilled cheese are a total game changer for our weekly family dinner! My 3 and 5 year old usually turn their noses up at any veggie, but they gobbled two each and asked for more. I used a mix of shredded zucchini and carrot in the filling, super easy to throw together even on a busy weeknight. Cook time was exactly 20 mins like the recipe said, no fancy skills needed at all!

30 minutes ago

Wait did you sauté the veggies first before adding them to the sliders? I’ve had issues with soggy grilled cheese before when adding raw veggies!

5 minutes ago

Great question! We recommend patting shredded veggies dry with a paper towel really well if you’re using raw, or a quick 2 minute sauté and drain to avoid sogginess. So glad your family loved the recipe, MamaBear2020!

3 days ago

Brought these to our neighborhood block party potluck last weekend and they were gone in 10 minutes flat! People kept asking where I got the recipe, I can’t believe how simple they are. I added a little sprinkle of everything bagel seasoning on the buttered bun tops before grilling, chef’s kiss. 10/10 will be making these for every get together from now on.

5 days ago

Perfect for Sunday meal prep! I made a big batch on Sunday, wrapped them individually, and popped them in the fridge for quick lunches all week. They reheat so well in the air fryer for 3 minutes, crispy outside and melty inside every time. Only note is I wish I’d added a little extra cheese, but that’s just my personal preference!

2 days ago

So smart to prep these for the week! Extra cheese is never a bad call in our book — feel free to pile on an extra slice of pepper jack or cheddar if that’s your vibe. Thanks for the great review!

1 week ago

Dude, SO good. I’m a total beginner in the kitchen and I didn’t mess these up at all? Used cheap slider buns from the grocery store, frozen mixed veggies I thawed and drained, and whatever sliced cheese I had in the fridge, and they turned out amazing. Way better than the sad fast food I usually eat for dinner.

5 days ago

Wait frozen veggies work? I’ve been using fresh because I thought frozen would make them mushy, that’s a total game changer for my tight grocery budget!

3 days ago

Just make sure you squeeze all the water out of them after thawing! I threw mine in a colander and pressed with a bunch of paper towels until they were totally dry, zero sogginess.

2 weeks ago

I’m not even a vegetarian but I saw these and thought I’d give them a shot, and wow, they don’t feel like a "sad veggie meal" at all. The crispy buttered bun with the melty cheese and tender veggies hits exactly the same as a regular burger slider, if not better. My roommate who’s a total meathead ate three without even realizing there was no meat in them lmao.

yesterday

Made these for my kid’s after school snack today and they were a home run! I used mini Hawaiian rolls instead of regular slider buns for a little sweet and salty vibe, and dipped them in tomato soup. 10/10, so easy to make even when the kids are running around screaming for snacks right after school.

2 hours ago

Oh the tomato soup dip idea is genius! I always make tomato soup with regular grilled cheese, never thought to do it with these veggie sliders, trying that this weekend!

5 minutes ago

Wait, quick question — can I cook these on a regular indoor grill pan instead of an outdoor grill? I live in a tiny apartment with no balcony, so outdoor grilling isn’t an option for me. The recipe looks so good I don’t want to skip it!

just now

Absolutely! A grill pan works perfectly for these — just heat it over medium heat, butter the outside of your sliders, and cook 3-4 minutes per side until the cheese is fully melted and the buns are toasty. You’ll get the same great grilled flavor without an outdoor grill. Hope you love them!



