
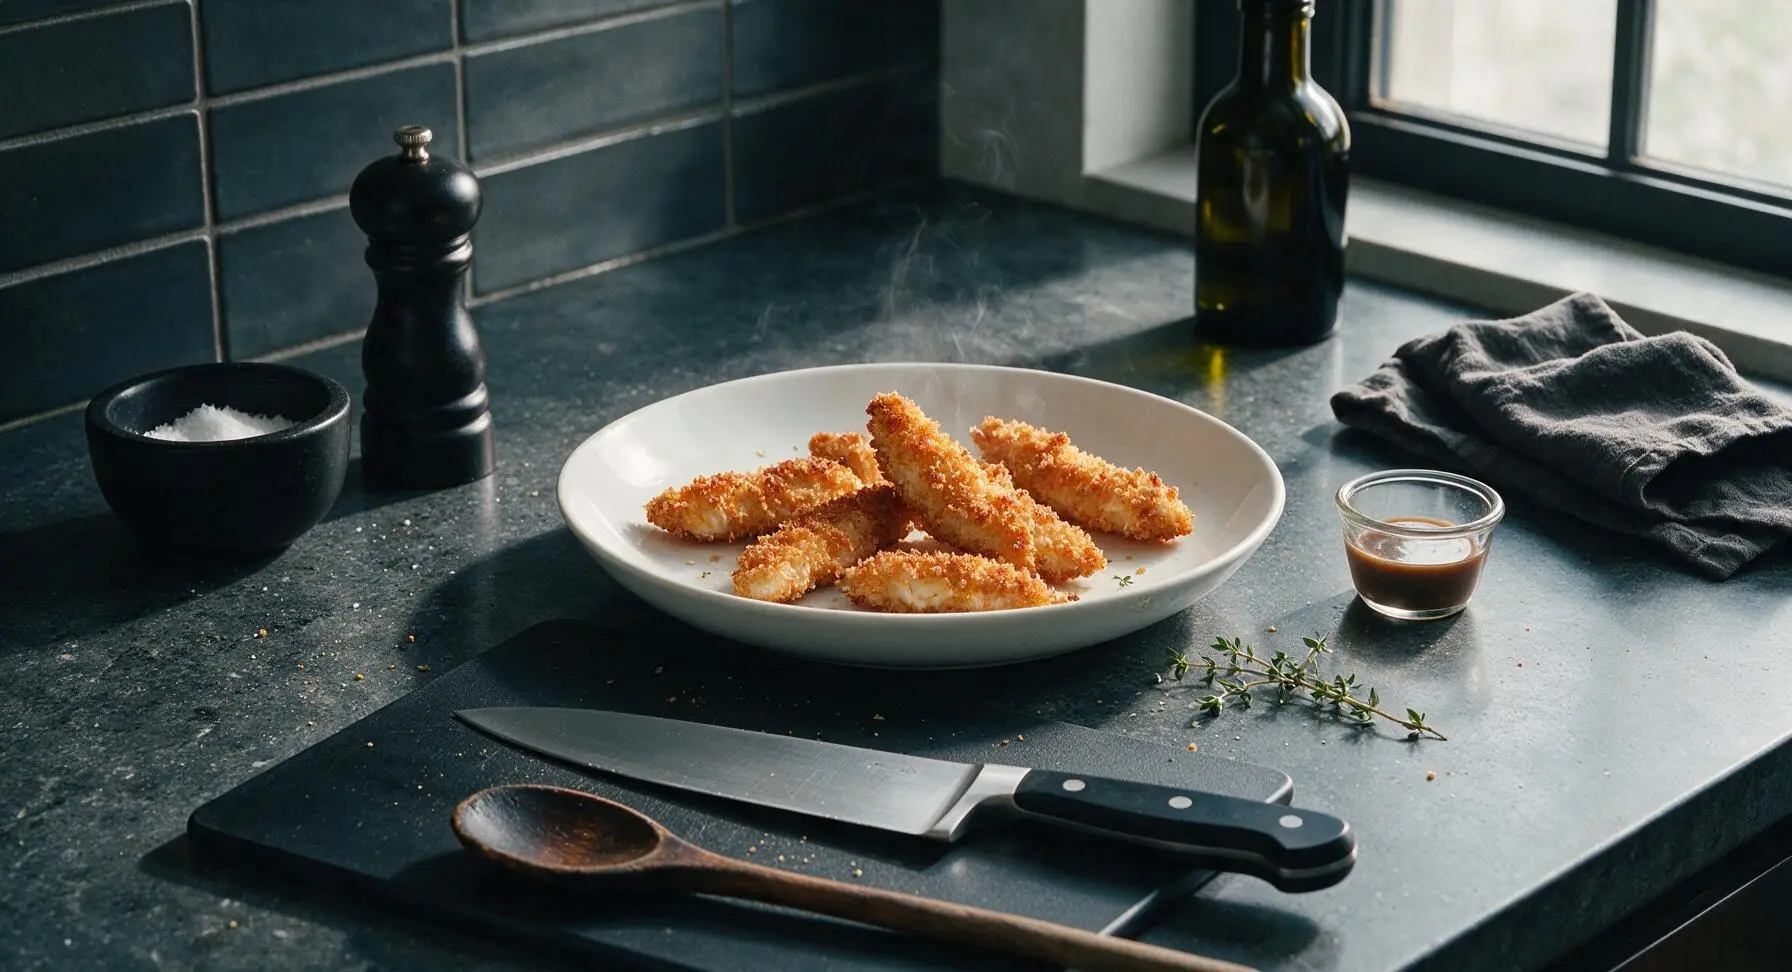
crispy chicken fingers

title 1
crispy chicken fingers
⏱️ cook time 20 minutes
🍽️ servings 4
⚡ Difficulty easy

intro

Shatteringly golden, crisp panko-crusted chicken fingers with juicy, tender interior, made for dipping. A nostalgic, crowd-pleasing game night favorite ready in under an hour.

Ingredients
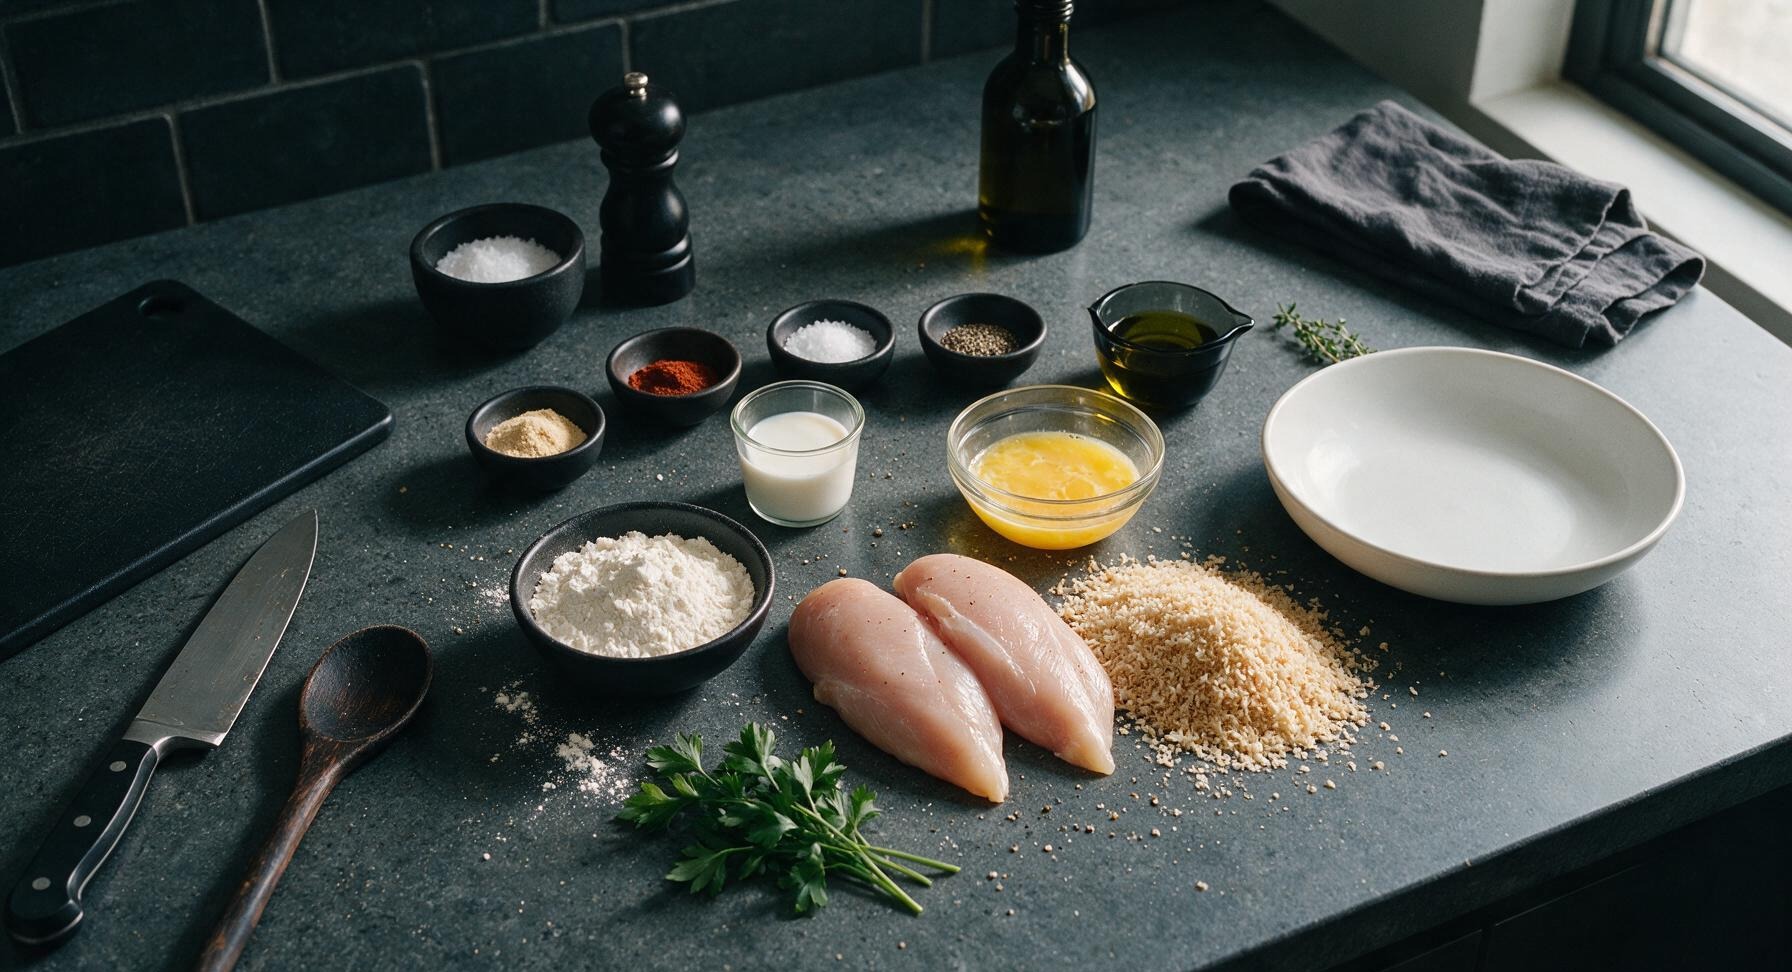
Boneless, skinless chicken breasts 680g (1.5 lbs)
All-purpose flour 120g (1 cup)
Large eggs 2, beaten
Whole milk 60ml (1/4 cup)
Panko breadcrumbs 180g (2 cups)
Garlic powder 1 tsp
Smoked paprika 1/2 tsp
Kosher salt 1.5 tsp
Freshly ground black pepper 1/2 tsp
Olive oil 2 tbsp
Fresh flat-leaf parsley 1 small bunch

Steps

1

Cut chicken into strips

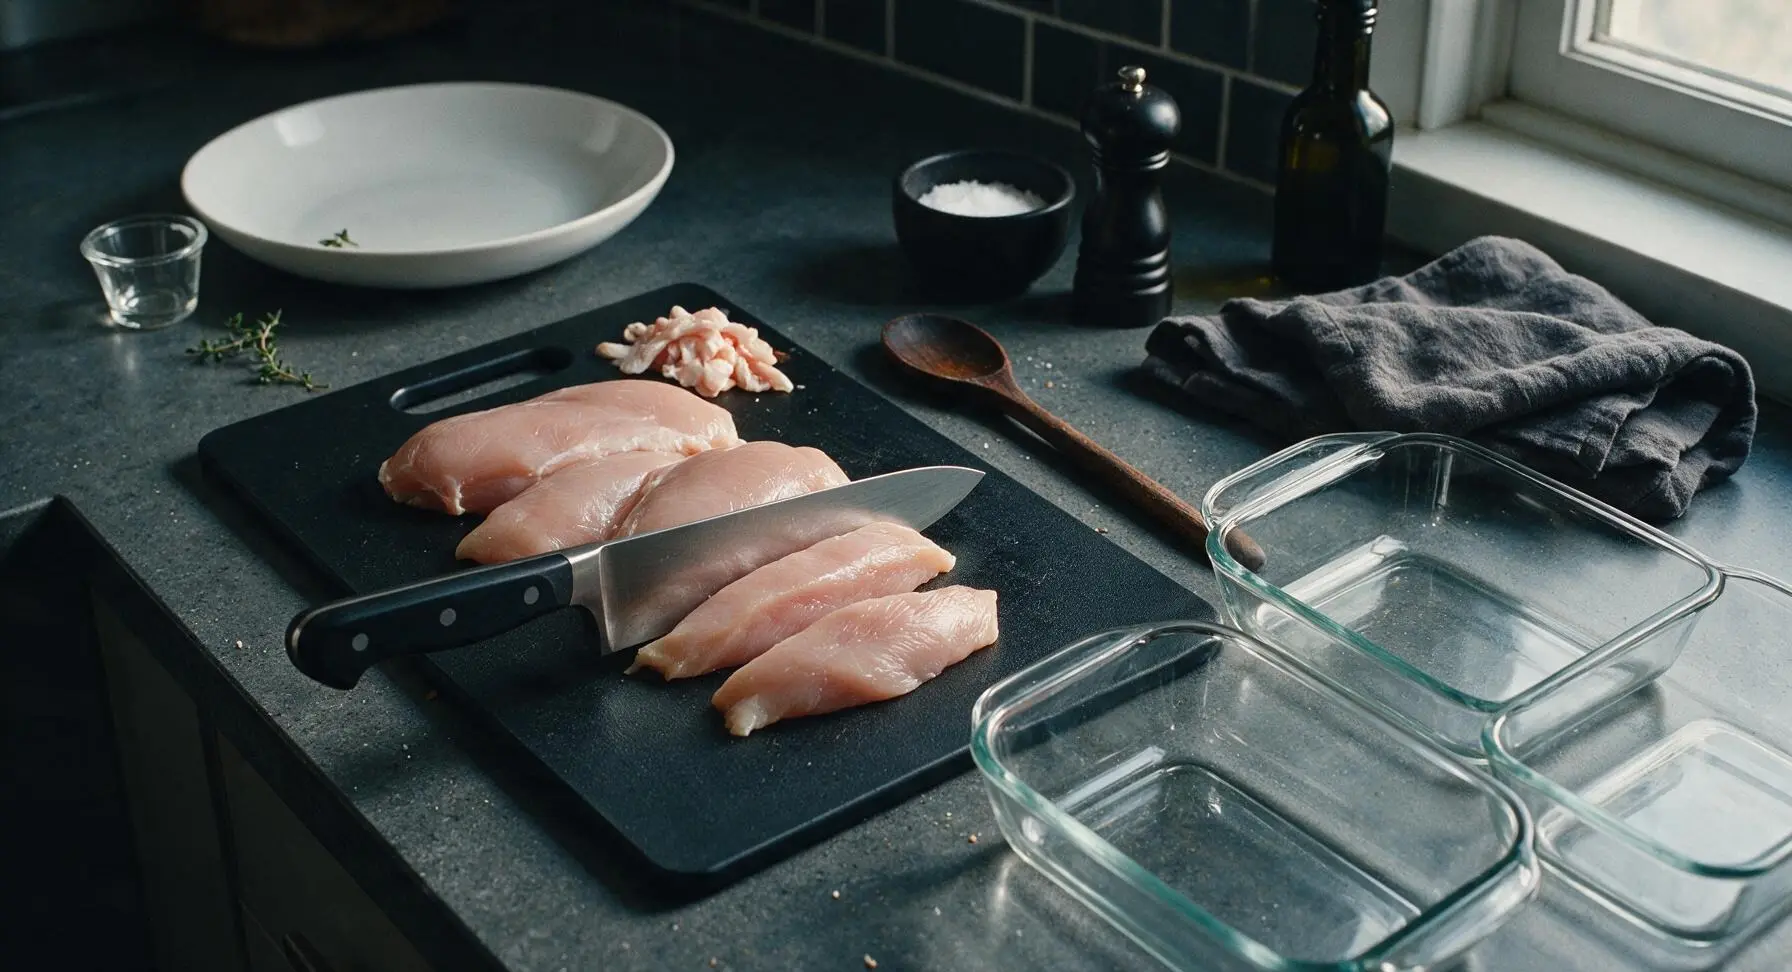
Place raw boneless, skinless chicken breasts on the maple cutting board. Use the 8-inch chef knife to trim away all tough white silver skin and small patches of excess hard fat. Slice the chicken against the grain into uniform 1-inch thick, 4-inch long strips (about 16 total pieces), ensuring all pieces are close to the same size so they cook at an even rate. Pat all strips thoroughly dry with a clean corner of the linen towel; dry chicken creates a sticky surface for breading to adhere to, and prevents steaming during cooking.
Step 1
step1:Cut chicken into strips
2

Toast panko for crispness

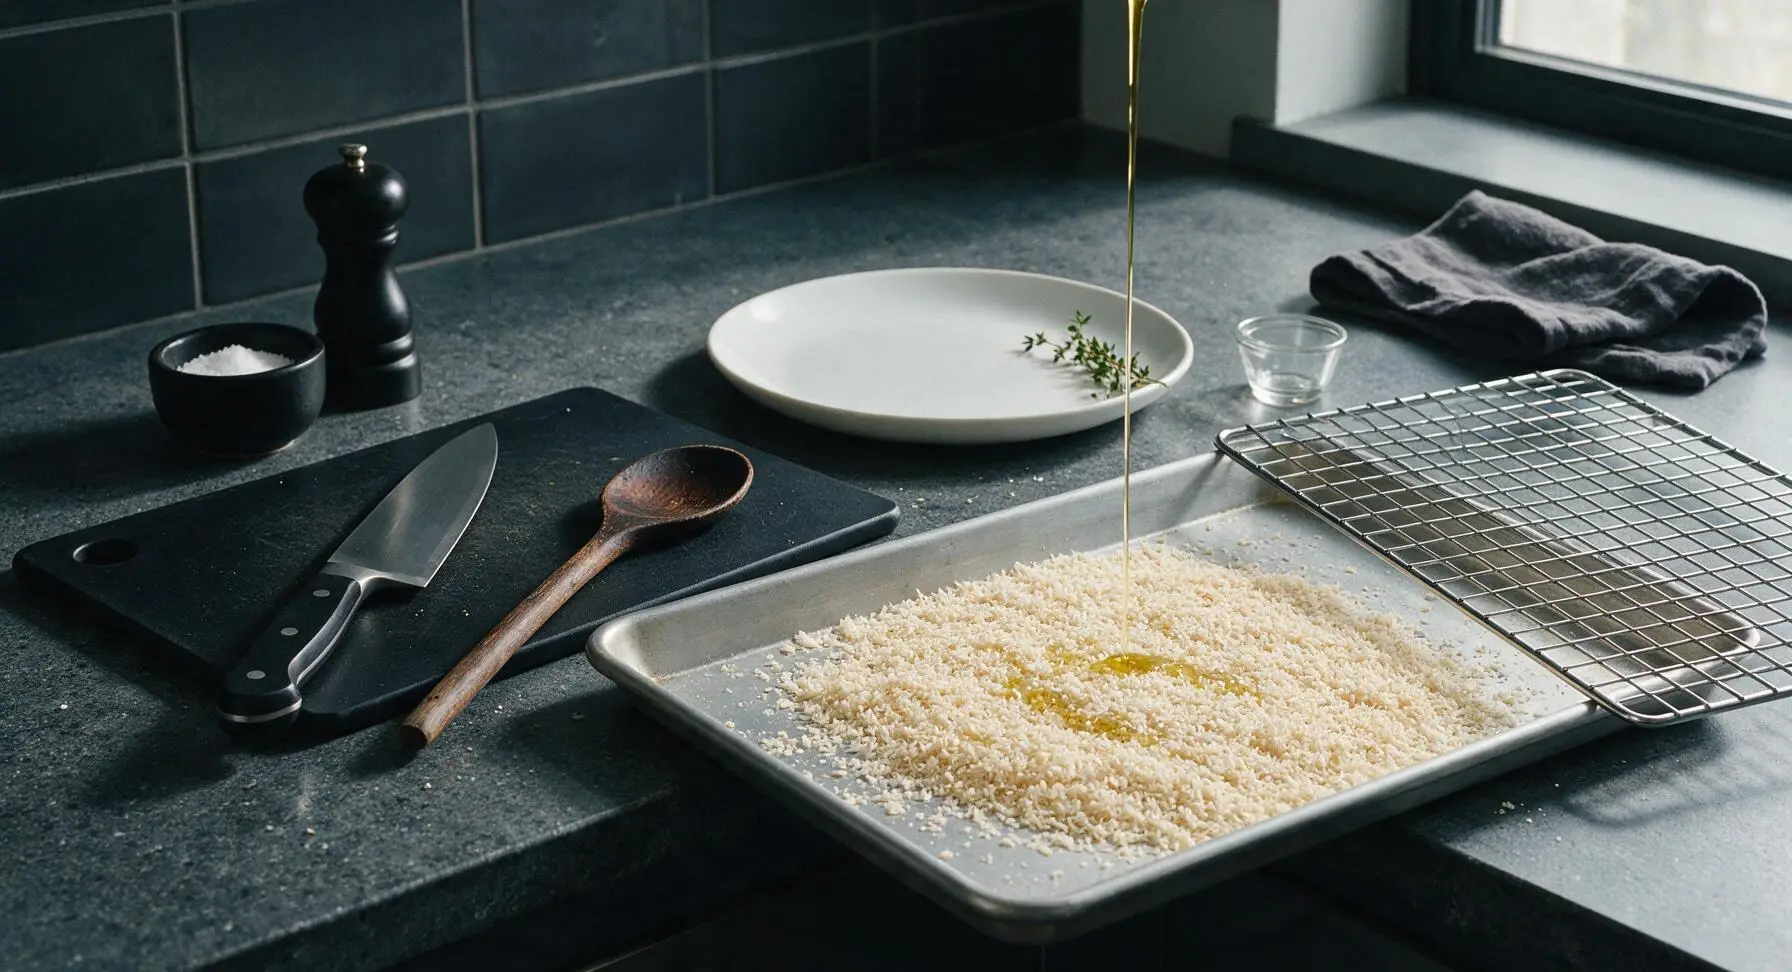
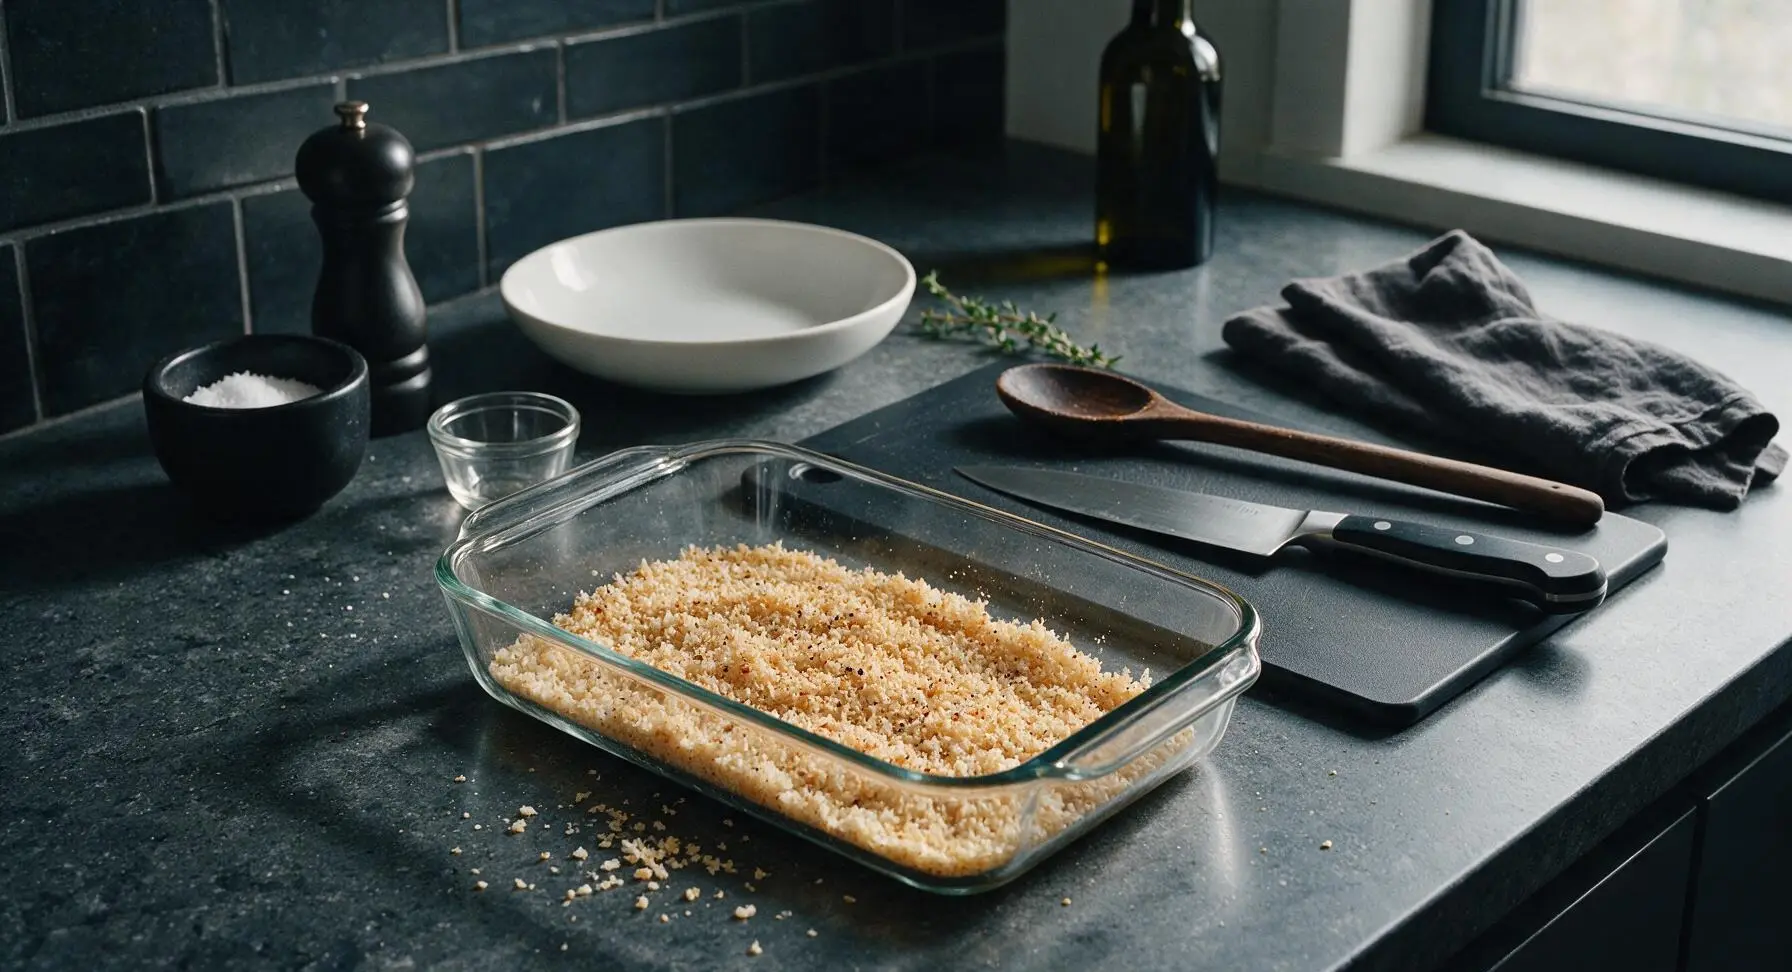
Preheat oven to 425°F (220°C). Spread panko breadcrumbs evenly across the rimmed matte aluminum baking sheet, drizzle with 1 tablespoon of olive oil, and toss to coat every crumb. Toast the panko in the preheating oven for 3-4 minutes, stirring once halfway with the beech wood spoon, until crumbs are light golden brown and nutty fragrant. Watch closely to avoid burning, as panko darkens very quickly once hot. Remove from oven, transfer toasted crumbs to one of the glass baking dishes, and stir in ½ tsp garlic powder, ¼ tsp smoked paprika, ¼ tsp kosher salt, and ¼ tsp black pepper.
Step 2
step2:Toast panko for crispness
Step 2
step2:Toast panko for crispness
3

Set up breading station

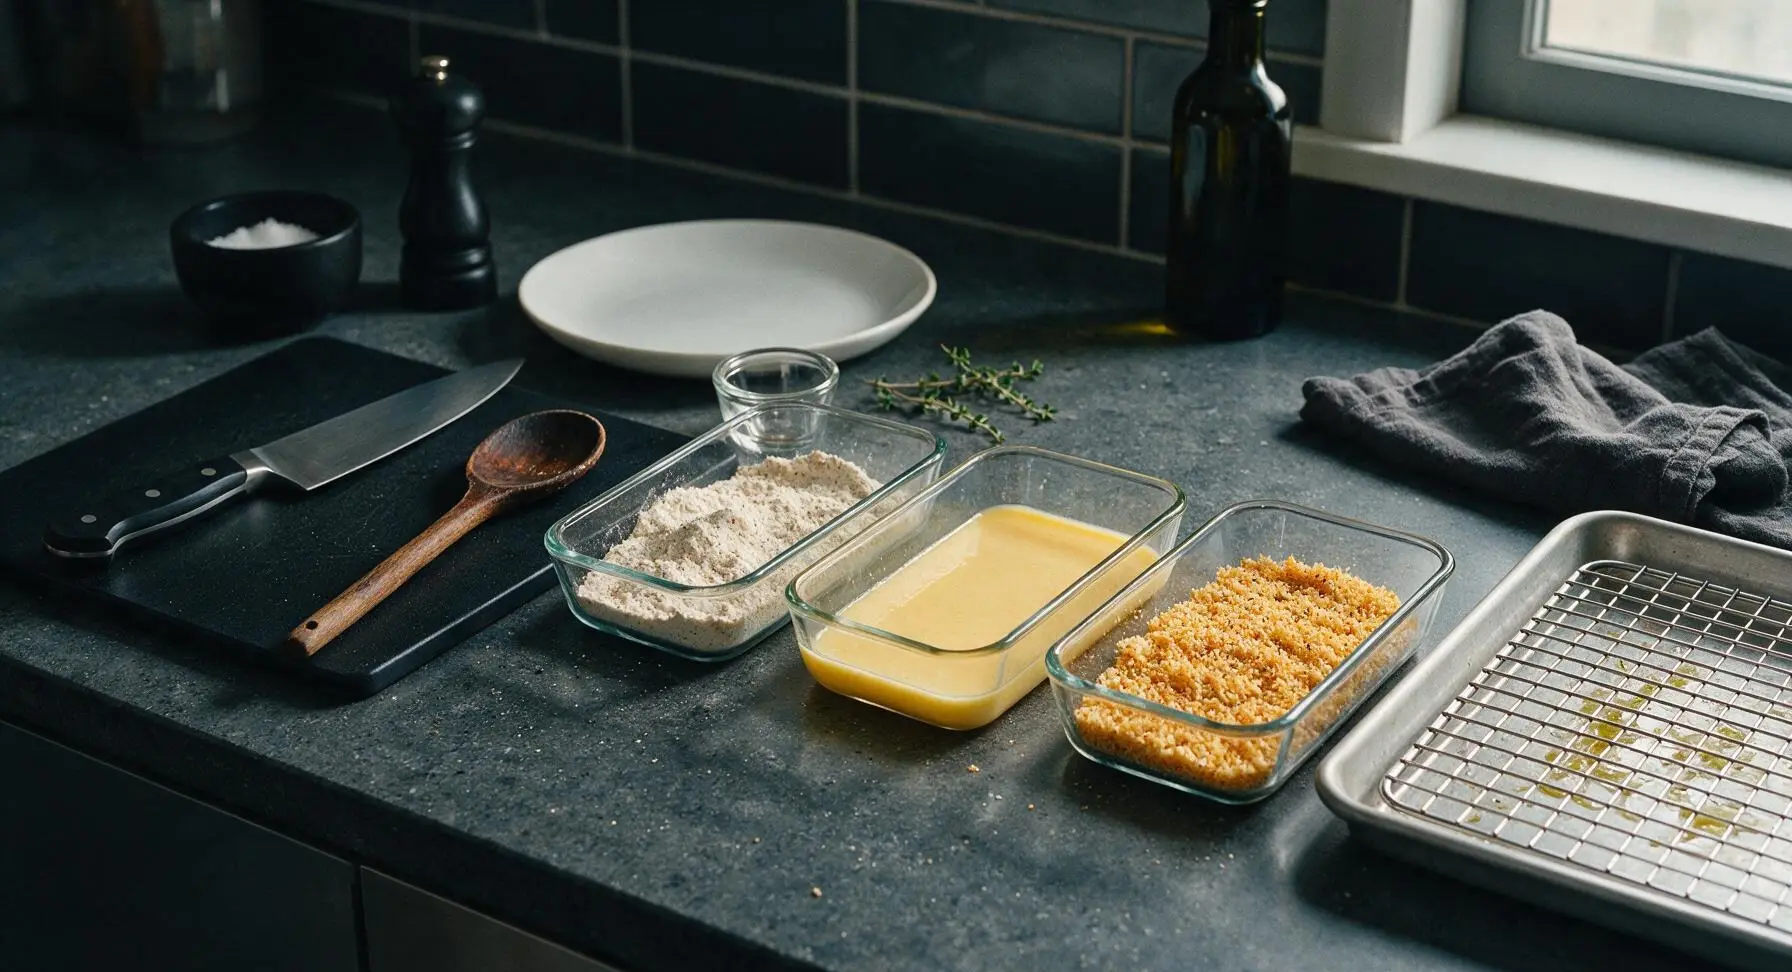
Arrange the three glass baking dishes in a straight row to the right of the cutting board. In the first (leftmost) dish, use the beech wood spoon to mix all-purpose flour with the remaining ½ tsp garlic powder, ¼ tsp smoked paprika, 1 tsp kosher salt, and ¼ tsp black pepper until spices are evenly distributed. In the middle dish, whisk the 2 beaten eggs and whole milk together until completely smooth, with no streaks of separate egg white visible. The rightmost dish holds the cooled, spiced toasted panko from the prior step. Fit the chrome wire rack inside the now-empty aluminum baking sheet, and brush the rack lightly with remaining olive oil to prevent chicken from sticking during baking.
Step 3
step3:Set up breading station
4

Coat chicken strips evenly

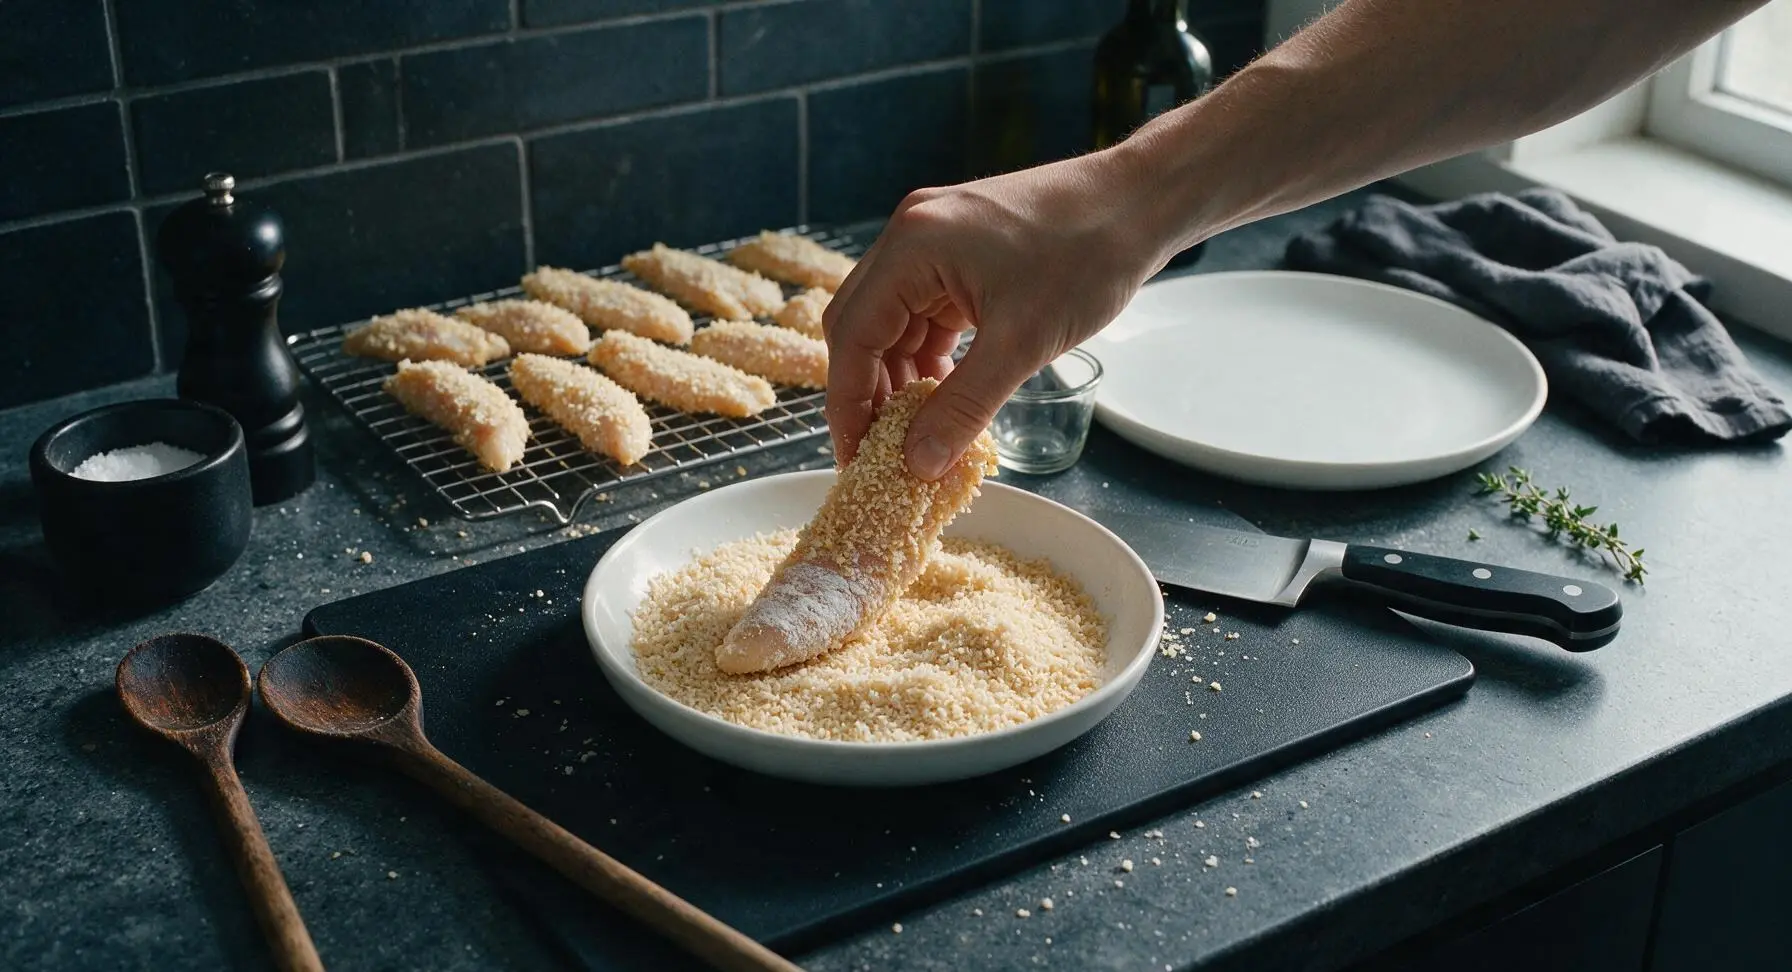
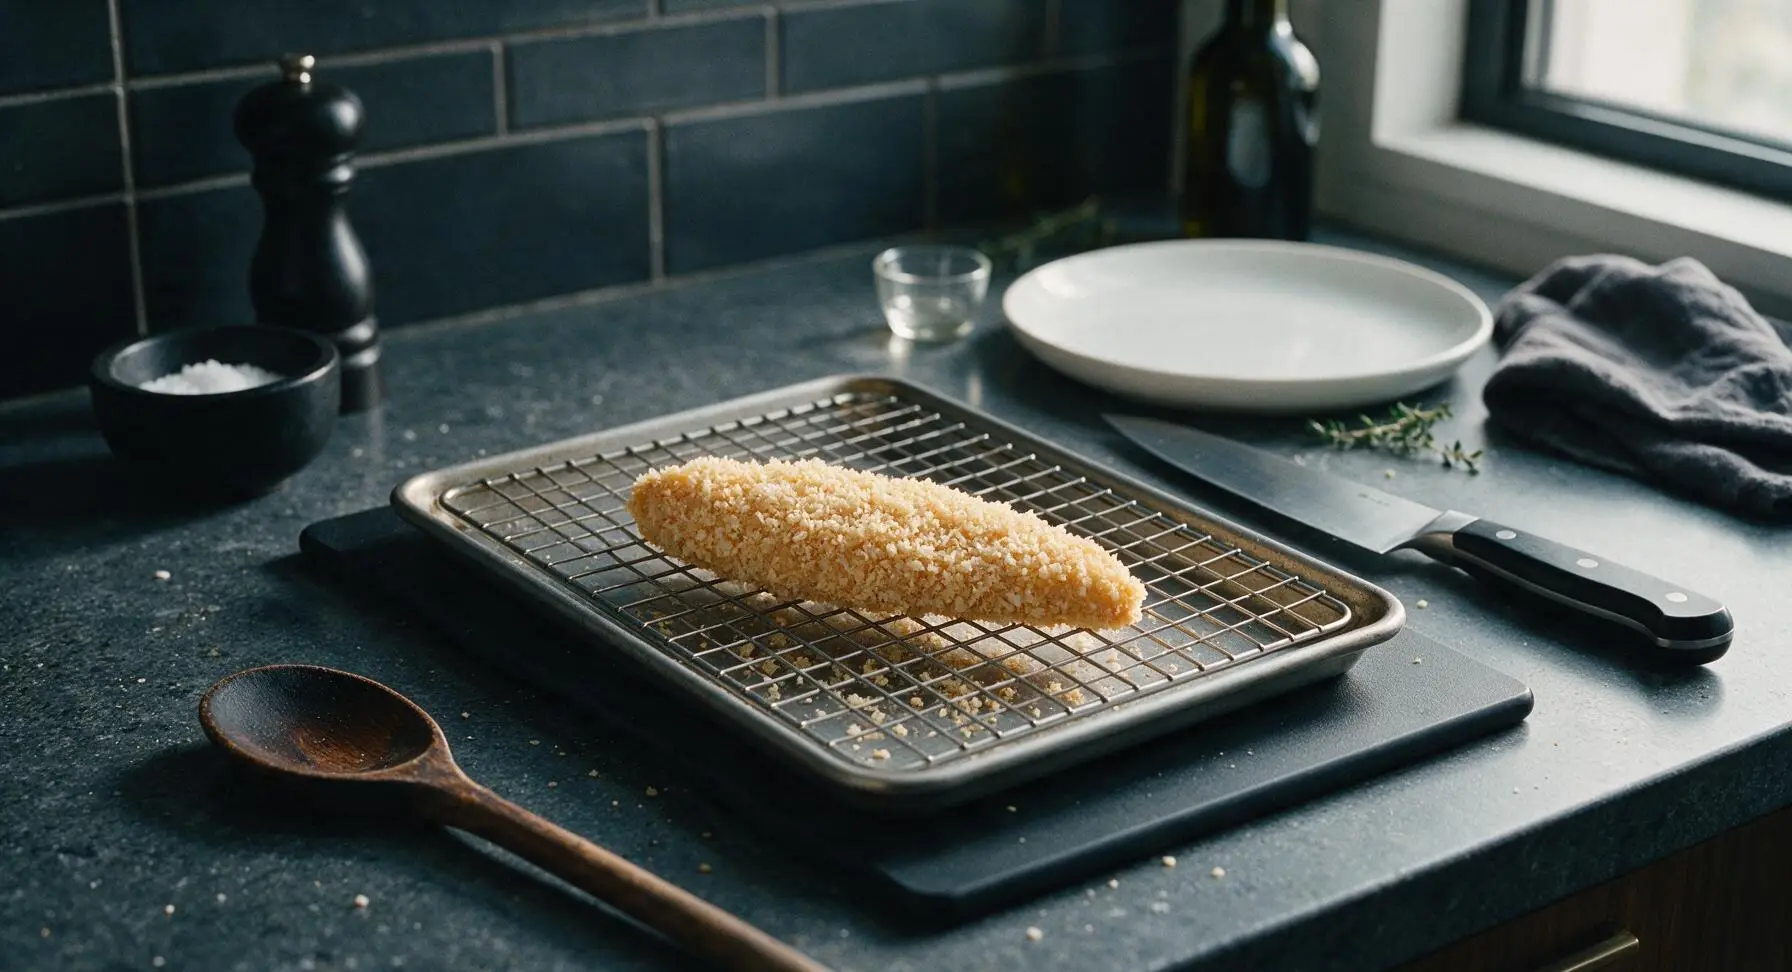
Working one strip at a time to avoid clumpy breading: first dredge a dry chicken strip in the seasoned flour, pressing firmly so flour coats every surface, then shake off all excess flour over the dish. Next, dip the floured strip fully into the egg wash, letting excess egg drip back into the dish for 2 full seconds to avoid gummy layers. Finally, press the strip firmly into the toasted panko crumbs, turning to coat every side, pressing crumbs into the chicken so they adhere securely. Place each fully breaded strip in a single layer on the oiled wire rack, leaving ½ inch of space between strips to allow hot air to circulate. Do not stack strips, as trapped moisture will create soggy crust spots.
Step 4
step4:Coat chicken strips evenly
Step 4
step4:Coat chicken strips evenly
5

Bake to golden crisp

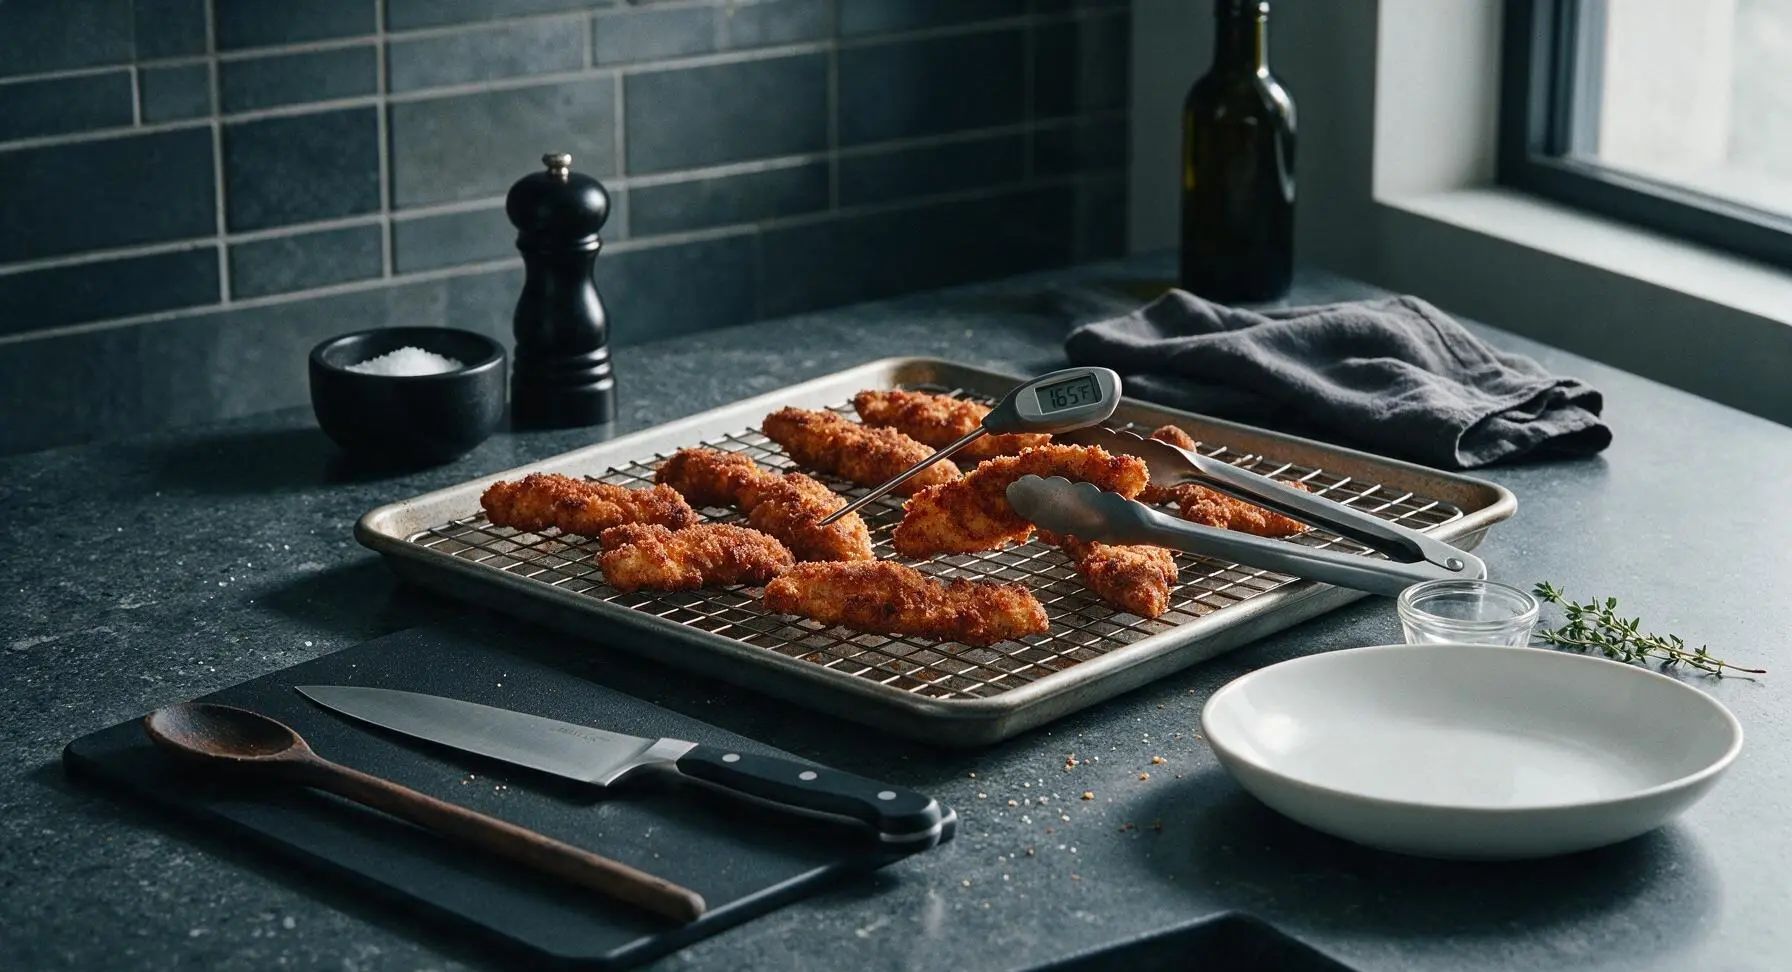
Lightly drizzle the tops of the breaded chicken strips with the remaining ½ tablespoon of olive oil. Place the baking sheet on the middle oven rack, bake for 12 minutes, then use the stainless steel tongs to carefully flip each strip to ensure even browning. Bake for an additional 8-10 minutes, until the crust is deep golden brown and crispy on all sides, and the internal temperature of the thickest strip reaches 165°F (74°C) when checked with the instant-read thermometer. There should be no translucent pink remaining in the center of any strip.
Step 5
step5:Bake to golden crisp
6

Rest chicken briefly

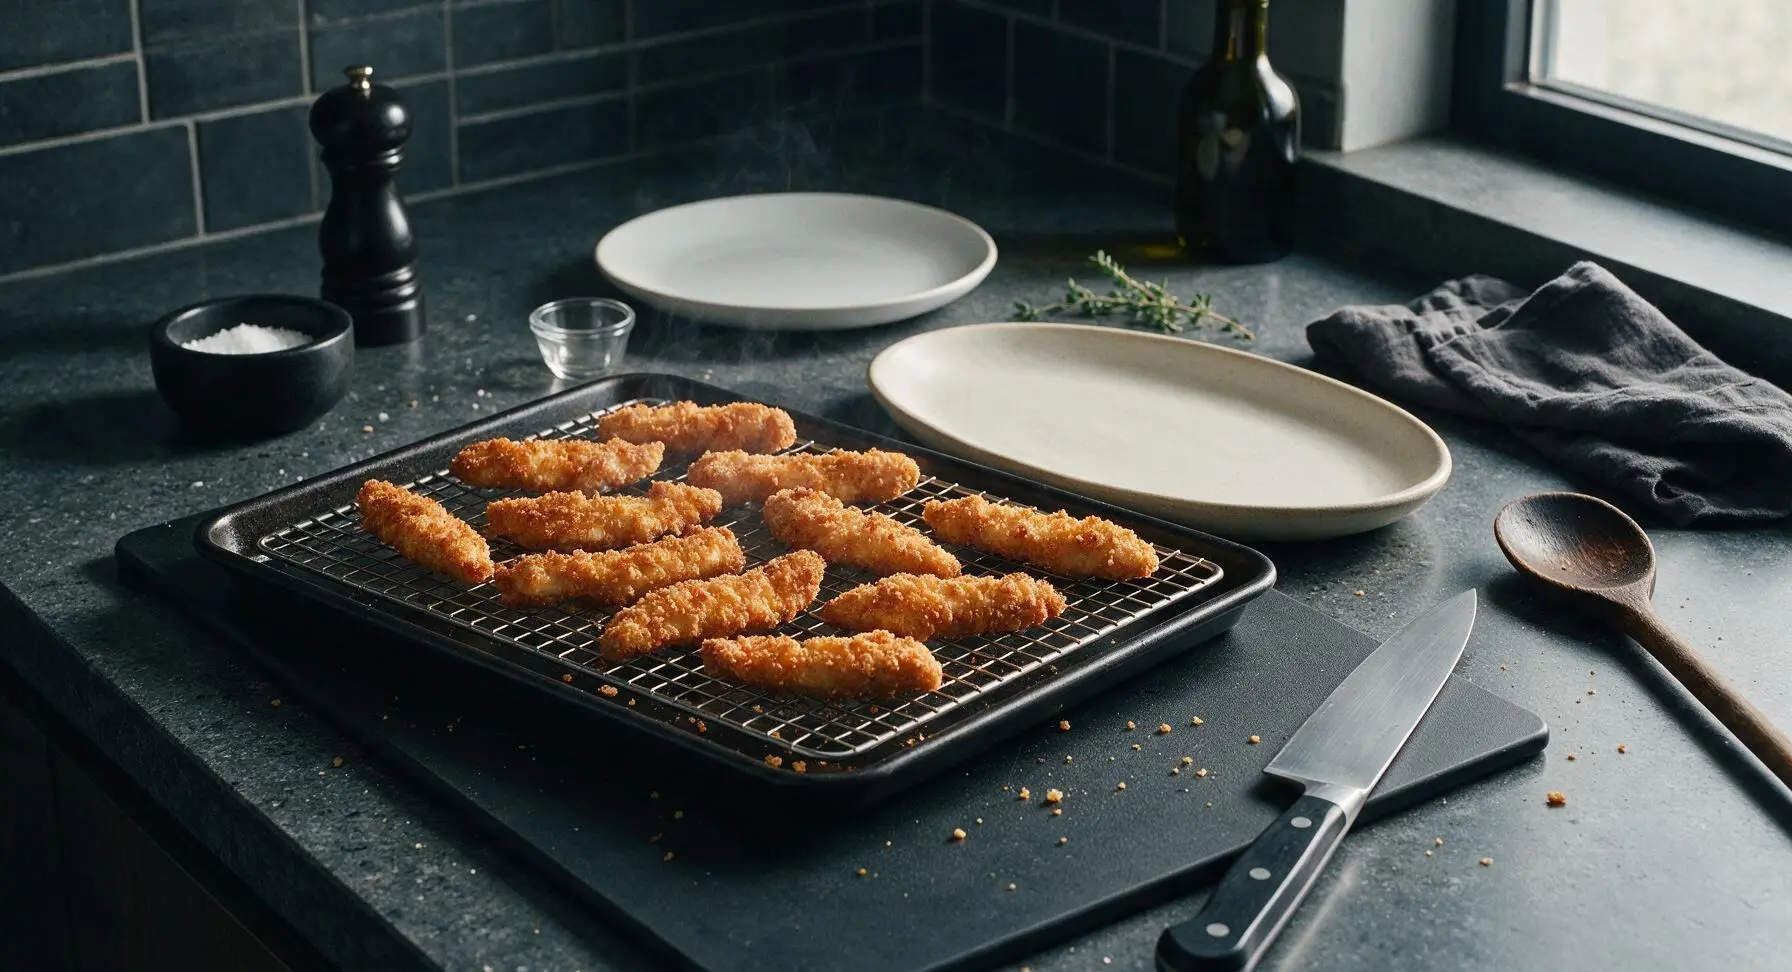
Once fully cooked, transfer the baking sheet back to the counter, and let the chicken fingers rest undisturbed on the wire rack for 3 minutes. This short rest allows the crispy crust to set and the chicken juices to redistribute, so every bite is juicy instead of having juices run out when you bite into a strip. Do not rest the chicken on paper towels, as trapped steam will make the bottom crust soggy.
Step 6
step6:Rest chicken briefly
7

Plate and serve hot

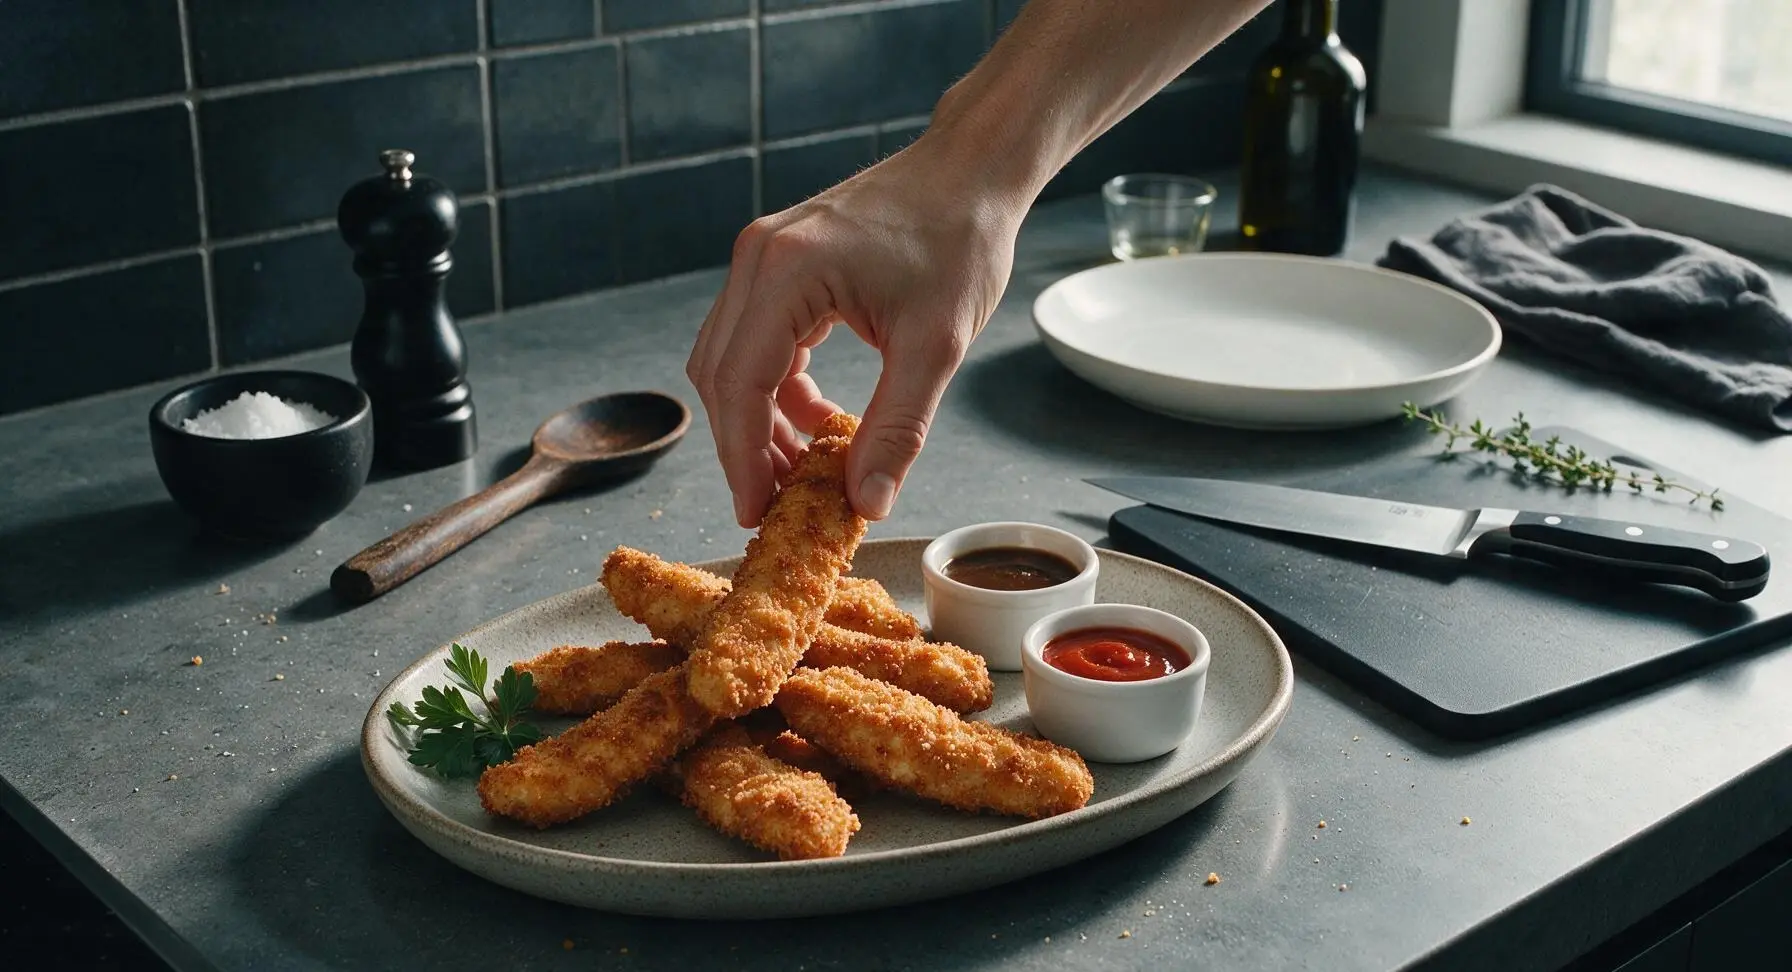
Arrange the rested crispy chicken fingers in a loose, natural overlapping pile on the oval stoneware serving platter. Tuck a small sprig of fresh flat-leaf parsley at the left edge of the platter for a pop of green garnish. Fill two of the small white ramekins with your preferred dipping sauces (honey mustard, marinara, or ranch are classic pairings) and place them on the platter beside the chicken. Serve immediately while the crust is hot and shatteringly crisp.
Step 7
step7:Plate and serve hot

Tips

1.Toast panko before breading for maximum crispness: Raw panko stays pale and soft when baked, but a quick 3-4 minute toast in the oven creates a nutty, deep flavor and guarantees a shatteringly crisp crust that won’t turn soggy, even when baking instead of deep frying.
2.Always bake chicken fingers on a wire rack over a baking sheet: Elevating the strips allows hot oven air to circulate under every piece, so the bottom crust gets just as crispy as the top, with no soggy, steamed spots that happen when chicken sits directly on a flat baking sheet.
3.Shake off excess flour and egg between breading steps: Too much flour creates a gummy, doughy layer under the crust, while excess egg causes clumpy, sliding breading. Press panko firmly onto each strip to help crumbs adhere, so your crust stays intact even when dipping in sauce.


✨ You May Also Like

Snacks & Appetizers
🍜 Mexico

Crispy thick-cut tortilla chips piled high with seasoned beef, melted cheese, and bright fresh toppings for a shareable, crowd-favorite bite.

⏱️ 25 minuteSnacks & Appetizers ★ 4.8
Snacks & Appetizers
🍜 United States

Crisp, sweet-tangy spiced pickled watermelon rind is a zero-waste summer staple, perfect with grilled meats, charcuterie, or eaten straight from the jar as a bright snack.

⏱️ 30 minuteSnacks & Appetizers ★ 4.6
Snacks & Appetizers
🍜 Germany

A tangy, jellied pork cold cut slow-simmered with aromatic spices, set into a firm sliceable loaf, served cold with mustard and crusty bread.

⏱️ 3 hours 4Snacks & Appetizers ★ 4.8
Snacks & Appetizers
🍜 United States

Creamy, tangy, perfectly seasoned hard-boiled egg halves filled with a rich, smooth yolk mixture, a timeless, crowd-pleasing bite for holiday and casual gatherings alike.

⏱️ 40 minuteSnacks & Appetizers ★ 4.8
Snacks & Appetizers
🍜 Russia

Silky, dill-forward no-smoke cured salmon, a Scandinavian classic with bright salty-sweet flavor, ideal for holiday starter platters and open-faced rye sandwiches.

⏱️ 48 hours Snacks & Appetizers ★ 4.7
Snacks & Appetizers
🍜 Japan

Crisp golden bottoms, juicy savory pork and vegetable filling, and tangy dipping sauce make these pan-fried gyoza a beloved shareable bite.

⏱️ 45 minuteSnacks & Appetizers ★ 4.8

crispy chicken fingers:Frequently Asked Questions

1.Why do my baked chicken fingers turn out soggy instead of crispy? ▾
Sogginess almost always traces to three common missteps: overcrowding the pan, baking at too low a temperature, or letting breading get mushy before baking. Set a wire rack inside your rimmed baking sheet to let hot air circulate around every finger, bake at 425°F, and avoid stacking coated strips as you prep to keep breading light and intact.
2.Can I use regular breadcrumbs instead of panko for this recipe? ▾
You can, but you won’t get that signature shatteringly crisp crust panko delivers. Regular fine breadcrumbs create a denser, softer coating that tends to get soggy faster. If you only have regular breadcrumbs on hand, toast them lightly in a dry pan for 3-4 minutes first to add crunch, and press them firmly to the chicken so they adhere well.
3.How do I keep the breading from falling off the chicken while baking? ▾
Breading slips off when there’s excess moisture on the chicken or your breading station layers are out of order. Pat chicken strips completely dry with paper towels first, then follow the sequence: dip in flour (shake off excess), then egg and whole milk wash, then press firmly into panko. Let coated strips rest 5 minutes before baking to set the breading, too.
4.What size should I cut the chicken breasts for even cooking? ▾
Cut boneless, skinless chicken breasts against the grain into uniform 1-inch wide strips, roughly 3-4 inches long. This size cooks evenly in 15-18 minutes at 425°F, stays juicy inside, and is the perfect handheld size for dipping. Keep all strips a consistent thickness so you don’t end up with some overcooked and some underdone.
5.Can I prep these chicken fingers ahead of time for game night? ▾
Absolutely! You can bread the chicken strips up to 8 hours ahead, arrange them on a wire rack-lined baking sheet, cover loosely, and store in the fridge until you’re ready to bake. Don’t prep them more than a day in advance, though, as the panko will start to absorb moisture from the chicken and lose its crispness when baked.
6.What internal temperature means the chicken fingers are done and safe to eat? ▾
Use an instant-read thermometer inserted into the thickest part of the largest strip to confirm doneness—you’re aiming for 165°F, per USDA food safety guidelines. If you don’t have a thermometer, cut into the thickest strip: juices should run clear with no pink remaining in the center, and the crust will be deep, even golden brown.
7.Do I need to flip the chicken fingers halfway through baking? ▾
If you’re using a wire rack set over your baking sheet, you don’t have to flip them—hot air circulates under and around the strips to crisp every side evenly. If you’re baking directly on a greased baking sheet without a rack, flip the fingers gently with tongs halfway through the 15-18 minute bake time to crisp both sides and avoid sticking.
8.Can I make these gluten-free for friends with dietary restrictions? ▾
You can easily adapt this recipe to be gluten-free with a few simple swaps. Swap the all-purpose flour for a 1:1 gluten-free all-purpose flour blend, and use certified gluten-free panko breadcrumbs in place of regular panko. Double check your egg and milk ingredients are unmodified, and the finished fingers will have the same great crunch and juicy interior.
9.Why is the chicken inside tough and dry instead of tender? ▾
Dry, tough chicken usually comes from overcooking, cutting strips with the grain, or baking chicken straight from a very cold fridge. Cut strips against the grain to keep meat tender, pull them as soon as they hit 165°F internally, and let them rest 3 minutes after baking so juices redistribute instead of running out when you bite in.
10.What’s the purpose of the flour step in the breading process? Can I skip it? ▾
Don’t skip the flour! The thin, even layer of flour creates a dry, starchy base that helps the egg and milk wash cling tightly to the chicken, rather than sliding off the smooth, moist chicken surface. Without it, your panko coating will slip during baking, leaving bald patches on the chicken and uneven crunch across each finger.
11.Can I add seasonings to the breading for extra flavor? ▾
Of course! Plain panko gives you a neutral, classic base that’s perfect for dipping, but you can easily amp up flavor. Mix garlic powder, paprika, dried oregano, a pinch of cayenne, or grated parmesan into the panko or flour before breading. Just avoid adding too much wet seasoning, which can make panko clump and turn soggy as it bakes.
12.Can I freeze these baked chicken fingers for quick weeknight meals? ▾
Yes, they freeze beautifully! Let fully baked chicken fingers cool completely, then arrange them in a single layer on a baking sheet to flash freeze for 2 hours before transferring to a labeled freezer bag for up to 3 months. Reheat them on a wire rack in a 400°F oven for 10-12 minutes until crisp, no thawing needed.
13.Do I need to spray the panko with oil to get it crispy in the oven? ▾
A light mist of cooking spray over the top of the breaded strips right before baking helps the panko toast to that perfect deep golden, shatteringly crisp finish without frying. You don’t need to douse them—just a quick, even spritz across all the strips is enough to encourage browning, as panko toasts well with a small amount of added fat.
14.What dips pair best with these crispy baked chicken fingers? ▾
These classic fingers are made for dipping, so you can’t go wrong with nostalgic favorites like honey mustard, ranch dressing, marinara sauce, or buffalo dip. For a fun game night spread, set out a dip bar with sweet and savory options like BBQ sauce, cheese dip, sweet chili sauce, or even maple syrup for a sweet-savory twist.
15.Can I use chicken thighs instead of chicken breasts for this recipe? ▾
You absolutely can! Boneless, skinless chicken thighs cut into 1-inch strips will stay even juicier than breast meat, thanks to their slightly higher fat content. Keep the same breading process, though you may need to add 2-3 minutes of cook time to ensure thighs reach the safe 165°F internal temperature, and the crust will crisp up exactly the same.
16.Can I cook these chicken fingers in an air fryer instead of a conventional oven? ▾
You can absolutely make these in an air fryer for extra crunch with even less effort, keeping total cook time well under an hour. Arrange breaded strips in a single layer in the air fryer basket (don’t overcrowd, work in batches if needed), spritz lightly with oil, and cook at 400°F for 10-12 minutes, flipping halfway, until golden and 165°F internally.

Comments (18)

2 days ago

OMG these were such a game changer for our weeknight dinner! My 4, 6, and 8 year old usually turn their nose up at baked chicken but they devoured every single finger and asked for seconds. The crispiness is insane, I didn't even miss frying! I did add a little extra paprika to the breading for a tiny kick, so good.

yesterday

Wait did you use regular paprika or smoked? I've been looking for a little extra zing too!

2 hours ago

So glad your kids loved them! Smoked paprika works fantastic here for that extra depth of flavor, if you try it next time let us know how it turns out!

3 days ago

Super easy to make in my tiny dorm oven! Cook time was exactly 20 mins like the recipe said, no guessing. I paired mine with frozen fries and honey mustard, fed me and my roommate for under $10 total. Only thing is I wish I sprayed the pan a little more, a couple stuck to the foil.

2 days ago

Pro tip: line the pan with parchment paper instead of foil! Nothing sticks, way easier cleanup too.

yesterday

Great call from BrokeCollegeCook! Parchment paper is our go-to for zero sticking, and a light spritz of cooking spray on the rack if you're using one also helps. So glad this worked for your dorm cooking!

1 week ago

Added these to my Sunday meal prep rotation! They stay crispy in the fridge for 3 days no problem, reheat great in the air fryer for 3 mins at 375. I make a big batch on Sundays and grab them for lunch all week with a side of veggies. 10/10, way better than the frozen processed ones from the grocery store.

5 days ago

Wait do they get soggy if you microwave them? My office doesn't have an air fryer, only a sad break room microwave.

3 days ago

If you're microwaving, pop them on a paper towel to soak up any excess moisture and heat in 30 second bursts, it helps keep them from getting soggy! So stoked these are working for your meal prep routine.

5 days ago

Brought these to our neighborhood block party potluck last weekend and they were gone in 15 minutes! People were asking me for the recipe left and right, even the picky teens were hovering over the platter. I served them with 3 different dips: ranch, buffalo, and honey sriracha, total hit.

3 days ago

Did you make them ahead of time or bake them right before the party? I need to bring something to our next potluck and want to time it right!

2 days ago

These hold up really well for 20-30 minutes after baking if you keep them on a wire rack so air circulates under them! If you make them ahead, you can reheat them on a baking sheet at 350 for 5 mins right before serving to crisp them back up. So glad they were a potluck hit!

2 weeks ago

I swapped the regular panko for gluten free panko and these came out perfect! I've tried so many GF baked chicken finger recipes that turn out soggy or have that weird GF aftertaste, but these were just as crispy as the regular version. My husband (who eats gluten) didn't even notice the difference!

1 week ago

Oh thank you for sharing the GF swap! My kid has a wheat allergy and I've been searching for a recipe the whole family will eat, this is perfect.

5 days ago

Love that GF panko works so well here! We've also tested this with crushed cornflakes for another GF option that adds a little extra crunch, too. So happy you and your husband enjoyed them!

yesterday

Okay I am NOT a good cook, like at all. I burn 90% of the things I try to make, but these were foolproof! The instructions were super straightforward, no weird ingredients I had to run to 3 stores for, and they came out crispy and fully cooked in exactly 20 minutes. My teen said they're better than the fast food ones. Win.

2 hours ago

Same here! I can barely make pasta without messing it up, this makes me feel like I can actually cook. Did you use a meat thermometer to check doneness?

30 minutes ago

Love hearing this! This recipe is made for beginner cooks, no fancy skills required. If you don't have a meat thermometer, just cut into the thickest one to make sure there's no pink left and the juices run clear, 20 mins at the temp listed works every time for us. So glad your teen approved!

30 minutes ago

These were SO good! I added a teaspoon of cayenne and a little garlic powder to the breading mix, and they had the perfect little kick. Dip them in homemade ranch? *Chef's kiss.* Will be making these every other week for sure.

5 minutes ago

That cayenne addition sounds incredible! We love when people add their own twist to the recipe, thanks for sharing the tip!

1 week ago

Perfect quick dinner for busy school nights! I can get these prepped in the time it takes my oven to preheat, which is a total lifesaver when we're running between soccer practice and homework. Only note is I ran out of panko and used crushed Ritz crackers once, it was actually amazing, extra buttery.

5 days ago

The Ritz cracker swap is genius! We've heard that from a few other readers too, it adds such a rich, buttery crunch that kids go crazy for. So glad this fits into your busy schedule!

2 hours ago

I love that these are baked instead of fried! I've been trying to cut back on fried foods but I was really craving chicken fingers, these hit the spot completely without leaving me feeling gross and greasy after.

30 minutes ago

Same! I make these as my post-workout meal a couple times a week, high protein, way less oil than takeout. I dip them in Greek yogurt ranch for extra protein!

3 days ago

Made these for our weekly board game night with friends and everyone raved! We cut them into smaller nugget-sized pieces so they were easy to grab while playing, no plates needed. I set out a whole dip bar and people were mixing and matching dips all night.

2 days ago

Cutting them into nugget sizes for game night is such a smart move! We're definitely stealing that idea for our next game night. So glad they were a hit with your friends!

5 days ago

These were good but mine came out a little soggier than I expected? Maybe I didn't space them out enough on the baking sheet? I crowded 2 pans worth onto one because I was in a rush. Flavor was great, just not as crispy as the photos look.

3 days ago

Oh no, sorry to hear they were soggy! Crowding the pan is usually the culprit for that – if the chicken pieces are too close together they steam instead of crisp up. Next time spread them out in a single layer, or use two baking sheets, and that crunch will be perfect!

2 weeks ago

I made these last week and they were so tasty! Has anyone tried freezing them before baking? I want to stock my freezer with easy meals for when the baby comes next month, these seem perfect.

1 week ago

I did this! I breaded them, laid them on a baking sheet to freeze solid, then transferred them to a freezer bag. Bake straight from frozen at 400 for 30 mins, they come out perfect! Total lifesaver with newborns.

5 minutes ago

Bro. These. Are. Insane. I ate half the batch in one sitting no cap. The breading is so flavorful even without dip, but obviously I drowned them in ranch anyway. 10/10 no notes, making them again tomorrow.

just now

LMAO same, I had to force myself to save a couple for my partner when I made these last week. They're dangerously good!

2 days ago

Served these with mac and cheese and collard greens for Sunday supper and the whole family cleaned their plates! The seasoning in the breading is just right, not too salty, not too bland. I will absolutely be adding this to our regular rotation.

30 minutes ago

Tweaked this for the air fryer! 400 degrees for 12 minutes, flip halfway, came out extra crispy. Even faster than baking, perfect for a quick lunch when I'm working from home.

1 week ago

My super picky 7 year old who only eats chicken nuggets from one specific fast food place ate THREE of these without complaining. I almost cried. Thank you for this recipe, it's so hard finding things he'll actually eat.

yesterday

Made these for my date night in with my girlfriend last night, we did chicken fingers and fries and watched a movie, she said they were better than the fancy restaurant version we got on our first date. Total win, looked way more impressive than it was hard to make.

just now

Total cost to make a whole batch? Like $6 for chicken, $2 for panko, I already had the spices at home. Way cheaper than ordering takeout for the family, and way less waste too. Great budget friendly recipe that doesn't taste cheap.



