
Gummy bears (red/pink)

title 1
Gummy bears (red/pink)
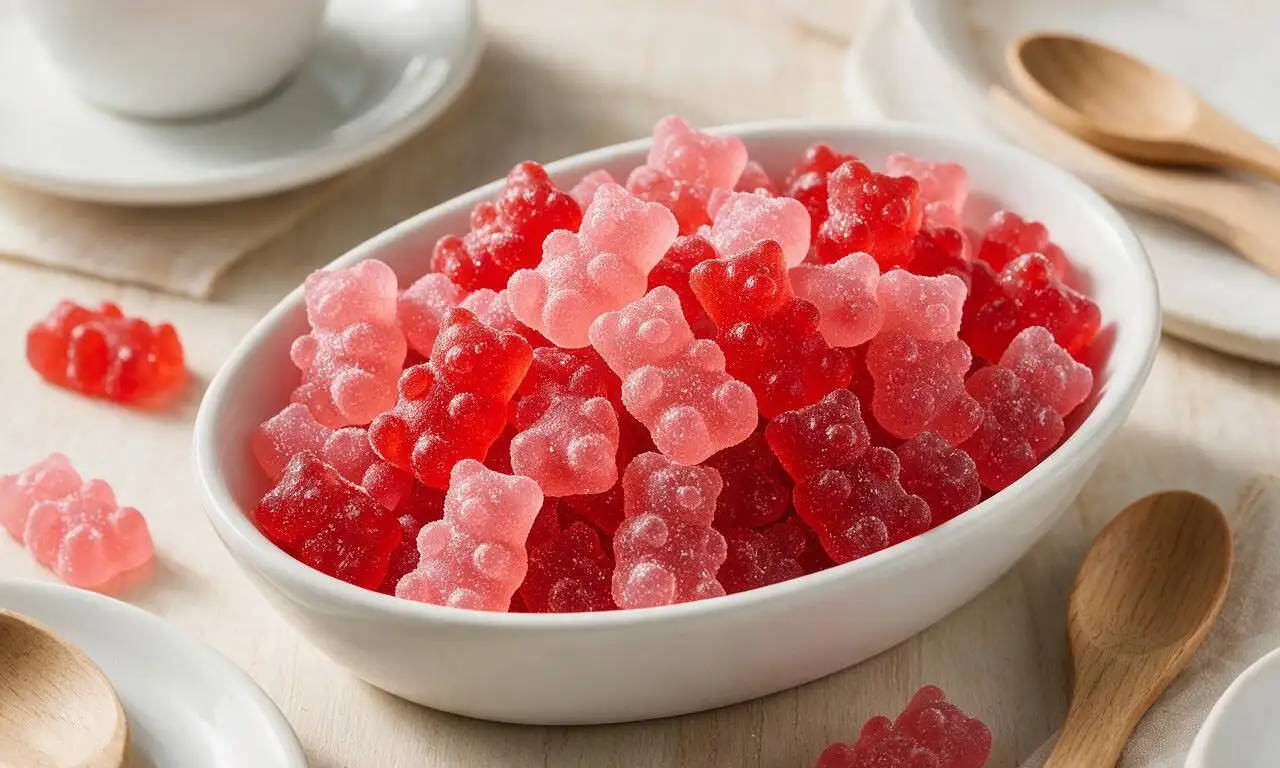
⏱️ cook time 2 hours 15 minutes (includes 2 hours chilling time)
🍽️ servings 6
⚡ Difficulty easy

intro

Bright, chewy red and pink fruit-flavored gummy bears, easy to make at home with no special equipment, perfect for gifting or sweet snacking.

Ingredients

Unflavored gelatin powder 3 tablespoons (28g)
Cold filtered water 1/2 cup (120ml)
Unsweetened red raspberry juice 1/3 cup (80ml)
Unsweetened strawberry white grape juice 1/3 cup (80ml)
Granulated white sugar 2 tablespoons (25g)
Citric acid 1/4 teaspoon (1g)
Red gel food coloring (optional) 2 drops
Soft pink gel food coloring (optional) 1 drop
Neutral non-stick cooking spray 1/4 teaspoon

Steps

1

Prep gummy bear molds

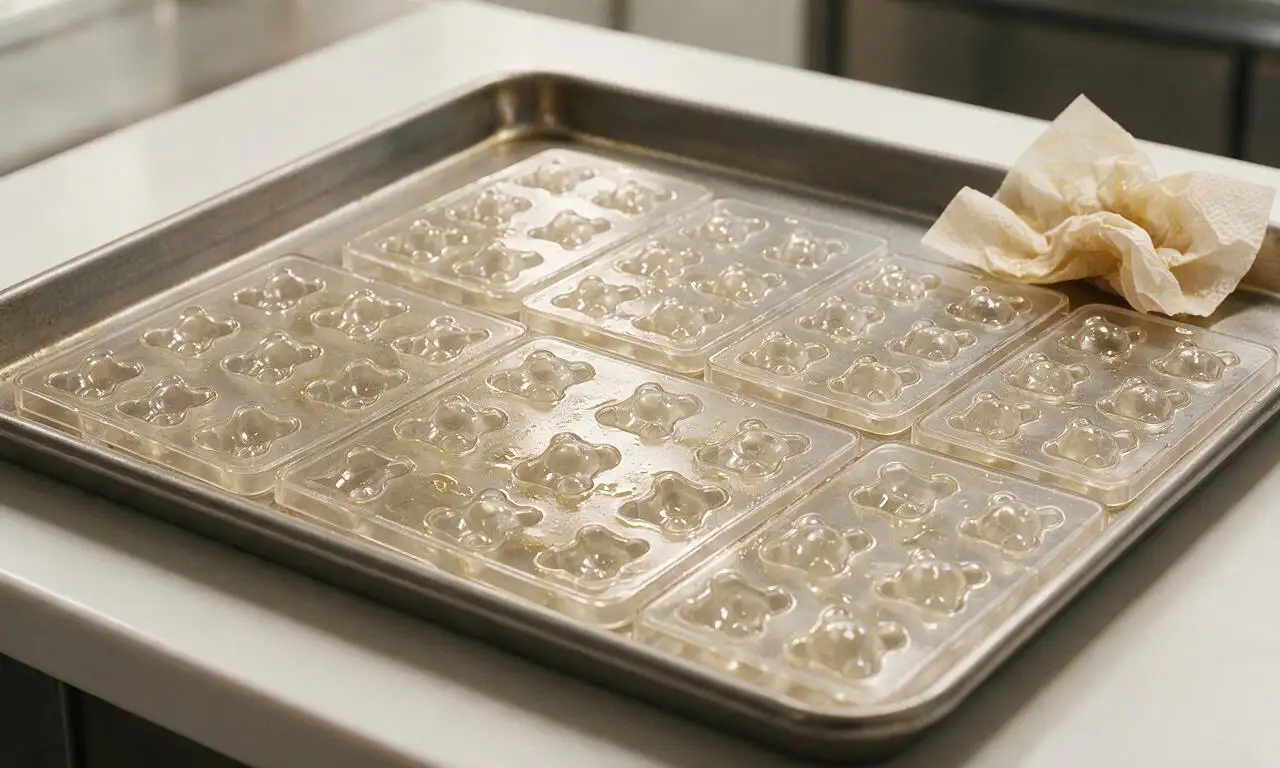
Lightly coat two 50-cavity silicone gummy bear molds with 1/4 teaspoon neutral non-stick cooking spray, then wipe away all excess spray with a paper towel to leave only a thin, invisible layer. Set the prepared molds on a small rimmed baking sheet for easy, stable transfer to the fridge later.
Step 1
step1:Prep gummy bear molds
2

Bloom the gelatin

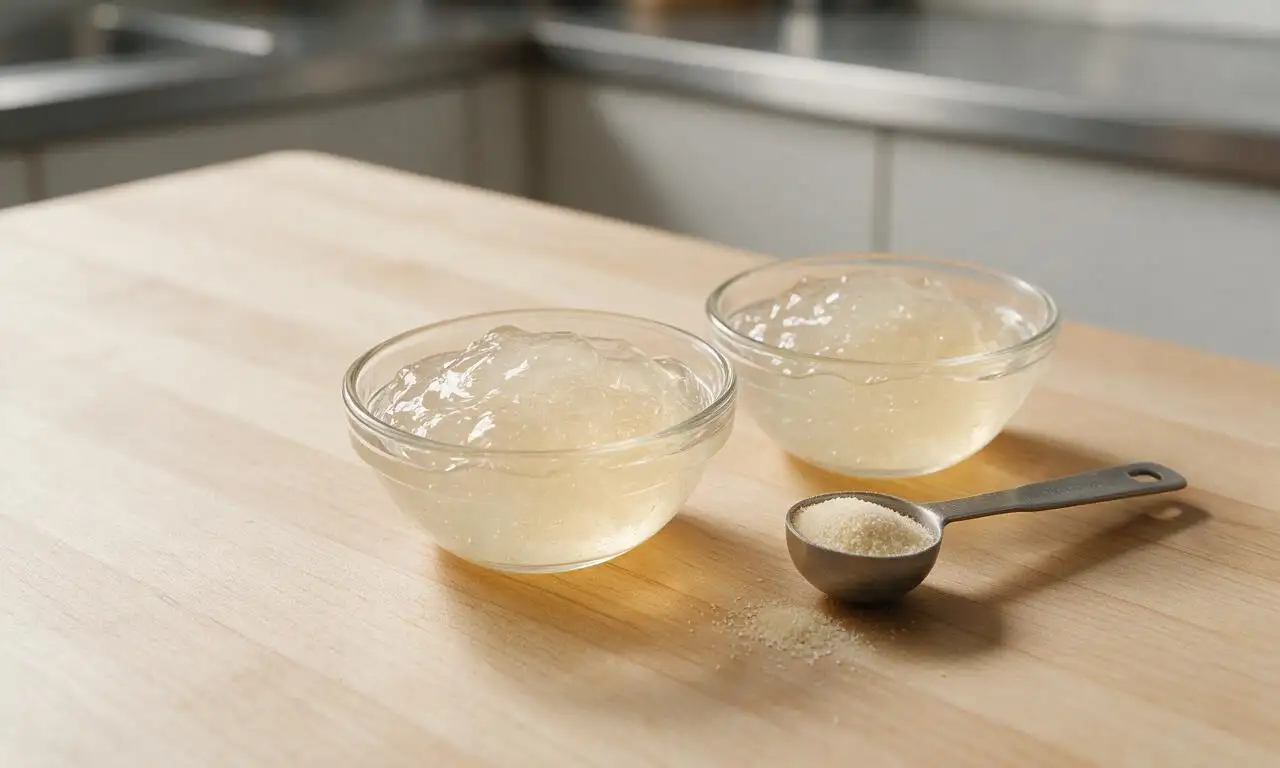
Set out two small glass mixing bowls. Add 1/4 cup (60ml) cold filtered water to each bowl, then sprinkle 1.5 tablespoons (14g) of unflavored gelatin powder over the surface of the water in each bowl. Stir once very gently to break up large clumps, then let rest for 5 full minutes at room temperature to bloom; the gelatin will absorb the water and form a thick, wobbly gel paste.
Step 2
step2:Bloom the gelatin
3

Heat flavored juice bases

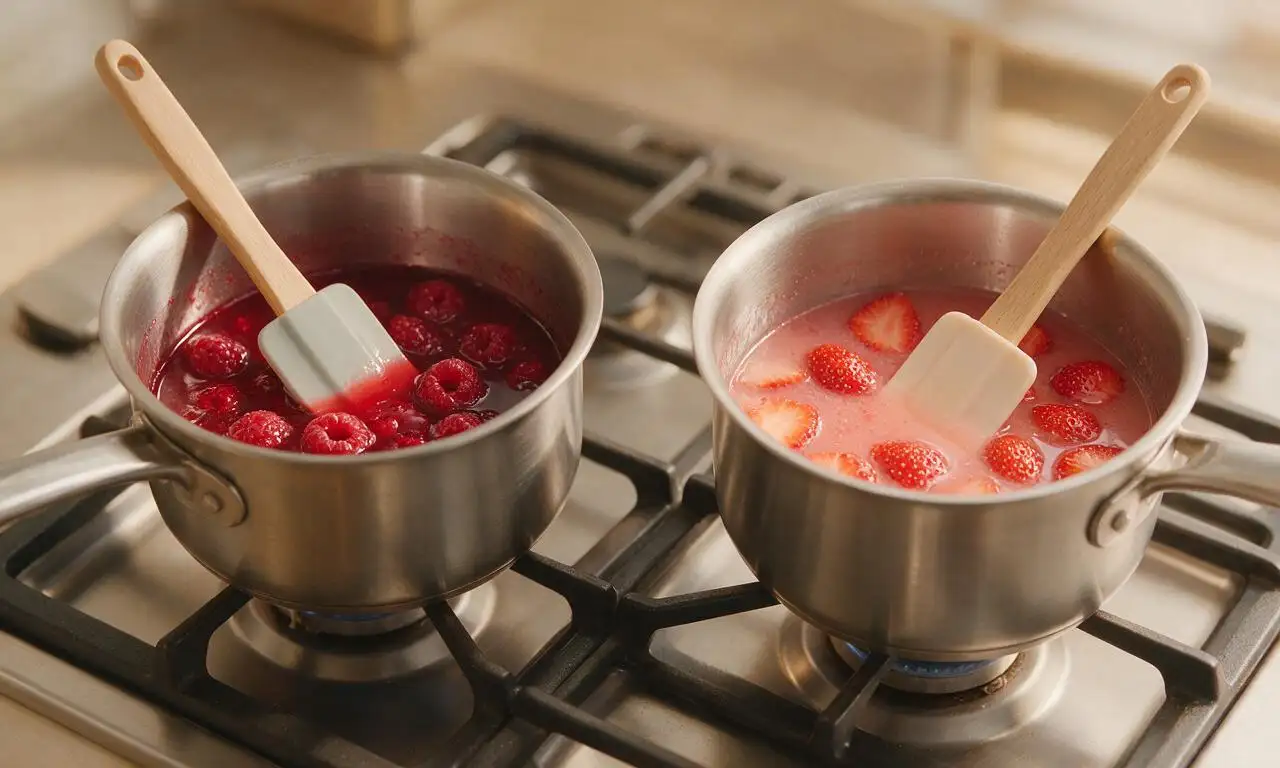
Place two small saucepans on the stovetop over low heat. Add 1/3 cup (80ml) unsweetened red raspberry juice, 1 tablespoon (12.5g) granulated sugar, and 1/8 teaspoon (0.5g) citric acid to the first pan. Add 1/3 cup (80ml) unsweetened strawberry white grape juice, 1 tablespoon (12.5g) granulated sugar, and 1/8 teaspoon (0.5g) citric acid to the second pan. Stir continuously with a silicone spatula for 2-3 minutes, until sugar is fully dissolved; do not bring the liquid to a boil, keeping temperature below 130°F (54°C) to avoid breaking down the gelatin and creating soft, poorly set gummies. If using, stir 2 drops red gel food coloring into the raspberry pan and 1 drop pink gel food coloring into the strawberry pan for more vibrant color.
Step 3
step3:Heat flavored juice bases
4

Combine gelatin and juice

Add one full bowl of bloomed gelatin paste to the red raspberry juice pan, and the second bowl of bloomed gelatin paste to the pink strawberry juice pan. Stir continuously over low heat for exactly 1 minute, until the gelatin is fully melted and the liquid is completely smooth with no visible lumps, then immediately remove both pans from the stovetop.
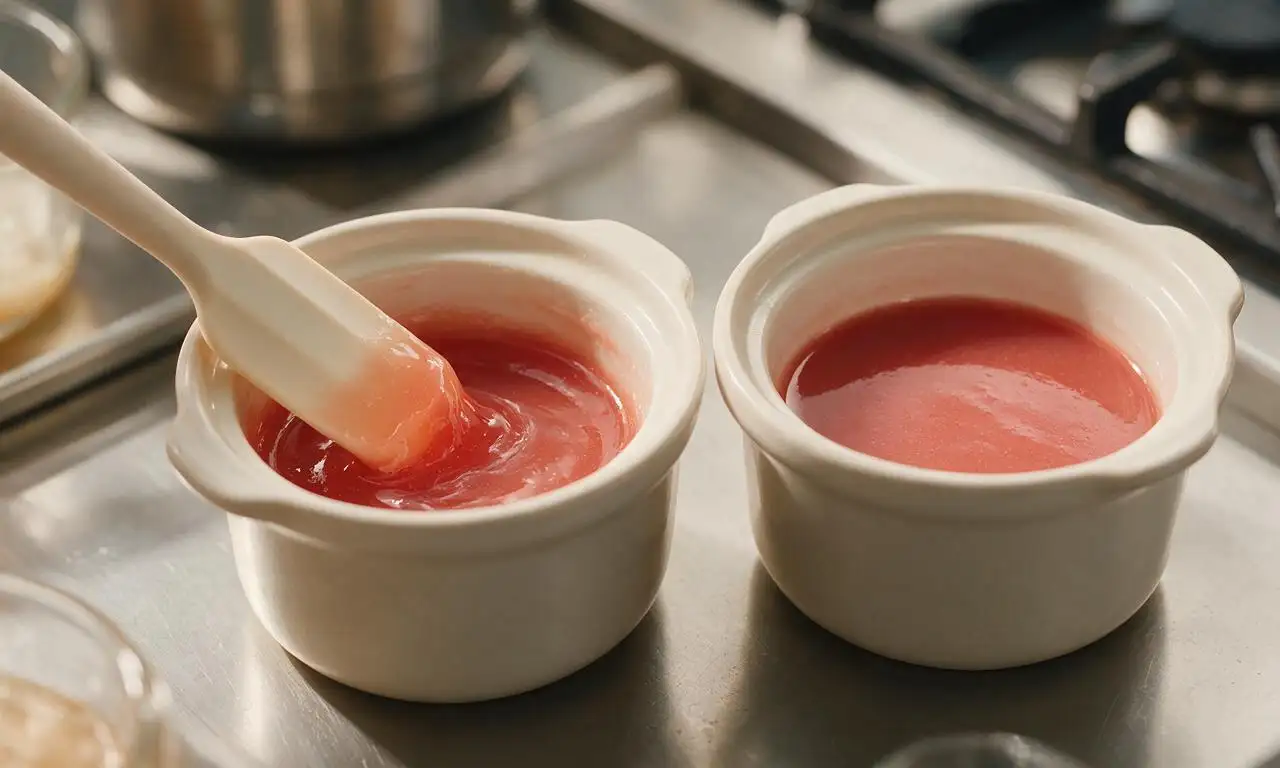
Step 4
step4:Combine gelatin and juice
5

Fill the mold cavities

Use a small plastic squeeze dropper or a tiny pouring spout to fill each bear-shaped cavity in the prepared molds, pouring red liquid into half the cavities and pink liquid into the remaining half. Work within 8 minutes of removing the pans from heat, as the gelatin will begin to set at room temperature quickly and become too thick to pour neatly.
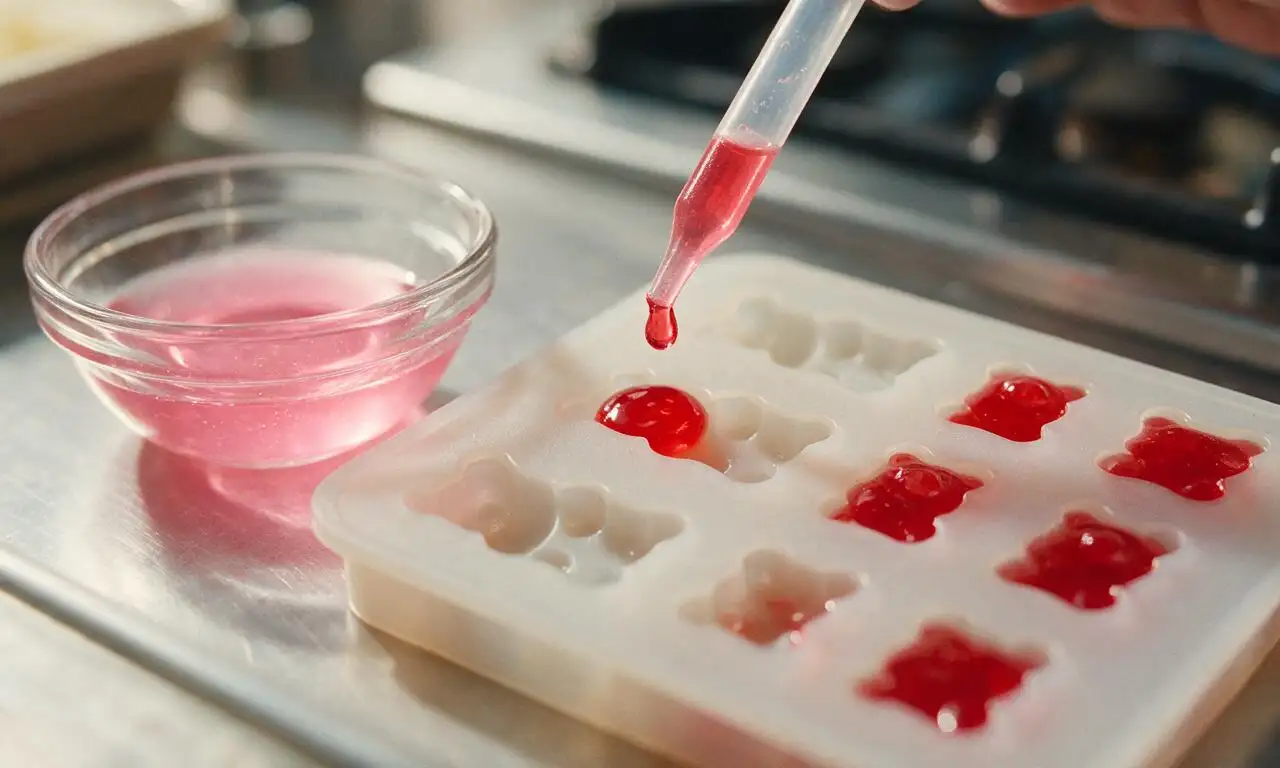
Step 5
step5:Fill the mold cavities
6

Chill gummies to set

Carefully transfer the baking sheet holding the filled molds to a level shelf in the refrigerator. Chill uncovered for 2 full hours, until the gummies are completely firm to the touch. Do not place the molds in the freezer, as freezing will break down the gelatin structure and cause grainy, mushy gummies.
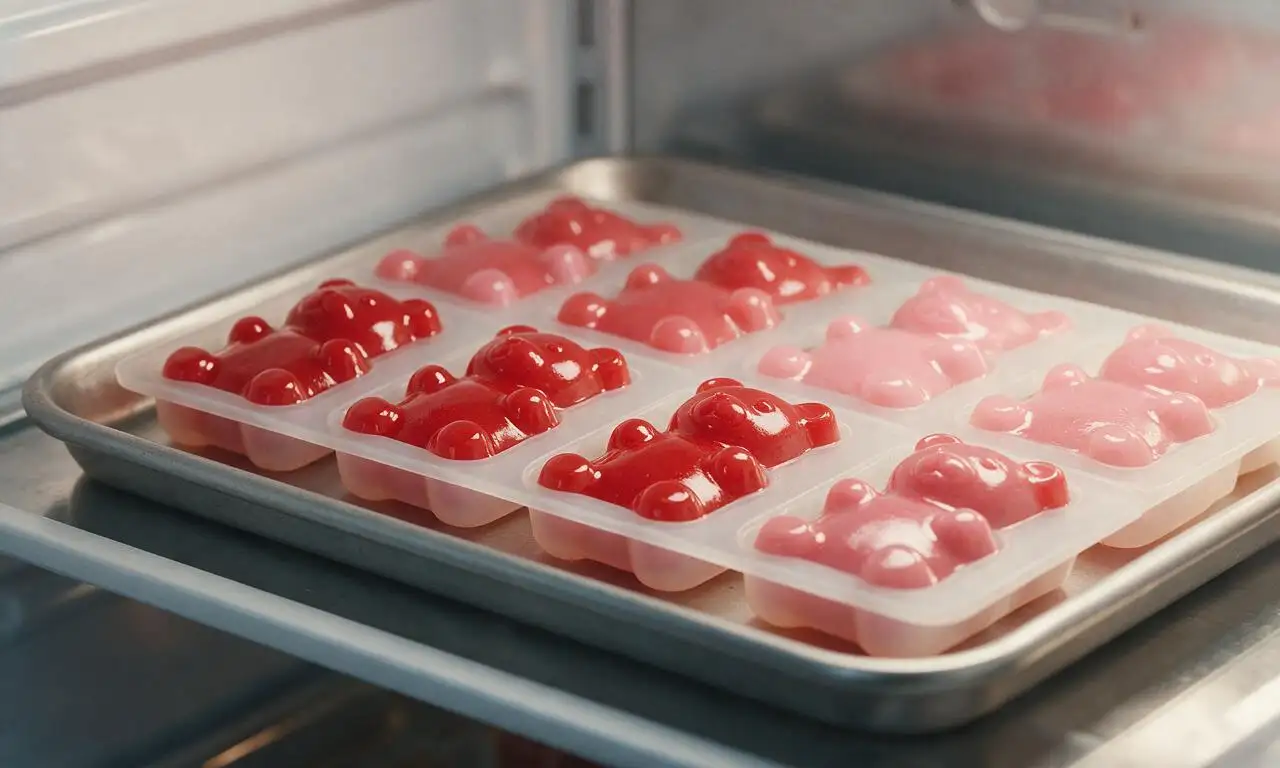
Step 6
step6:Chill gummies to set
7

Unmold and store gummies

Once fully set, gently peel back the edges of the silicone mold to release air, then press up from the bottom of each cavity to pop the gummy bears out. Store finished red and pink gummy bears in an airtight glass container in the refrigerator for up to 2 weeks.
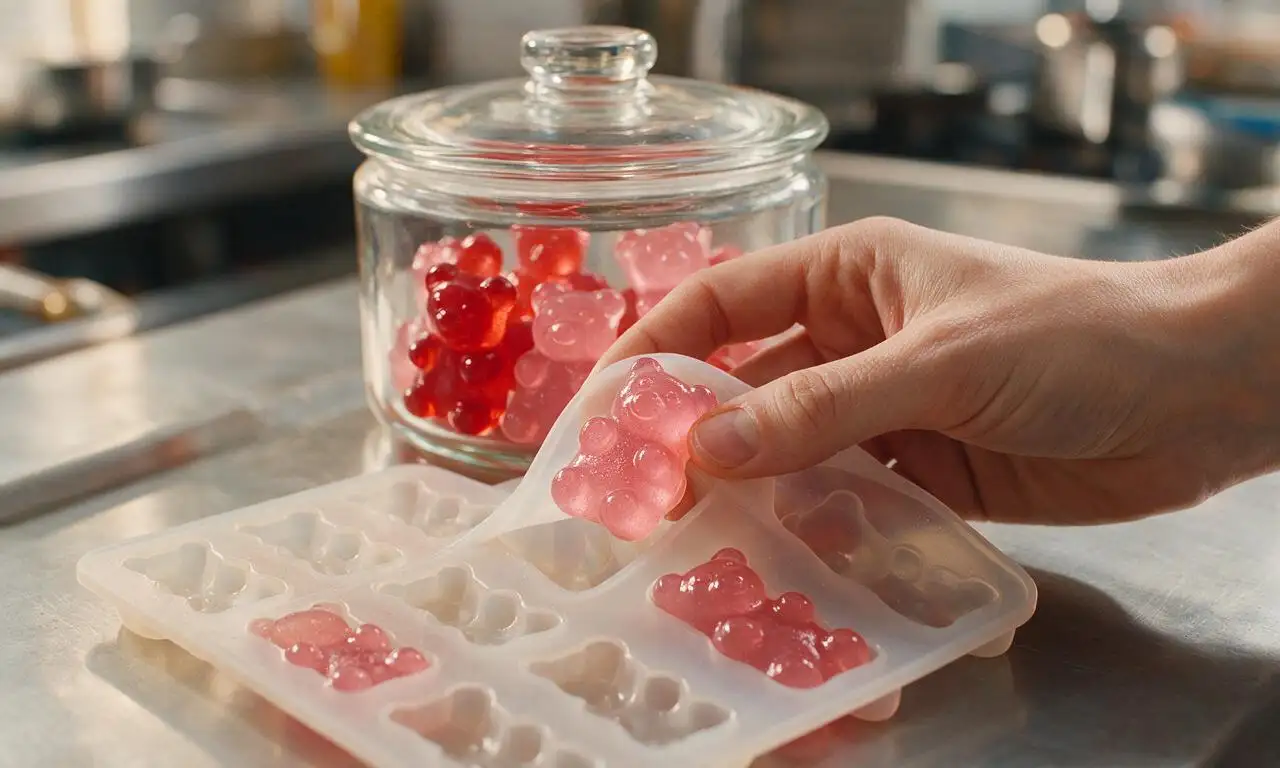
Step 7
step7:Unmold and store gummies

Tips

1.Avoid using fresh pineapple, kiwi, papaya, or mango juice for your gummies—these fruits contain proteolytic enzymes that break down gelatin and will prevent your gummies from setting firmly.
2.Gel food coloring is preferred over liquid food coloring, as liquid coloring can thin the gummy mixture and create a softer texture; skip coloring entirely for soft, natural muted red and pink hues from the juice.
3.For extra chewy, less rubbery gummies, add 1 teaspoon of light corn syrup to each juice base before heating to prevent sugar crystallization and create a smoother texture.


✨ You May Also Like

Snacks & Appetizers
🍜 Mexico

Crispy thick-cut tortilla chips piled high with seasoned beef, melted cheese, and bright fresh toppings for a shareable, crowd-favorite bite.

⏱️ 25 minuteSnacks & Appetizers ★ 4.8
Snacks & Appetizers
🍜 United States

Crisp, sweet-tangy spiced pickled watermelon rind is a zero-waste summer staple, perfect with grilled meats, charcuterie, or eaten straight from the jar as a bright snack.

⏱️ 30 minuteSnacks & Appetizers ★ 4.6
Snacks & Appetizers
🍜 Germany

A tangy, jellied pork cold cut slow-simmered with aromatic spices, set into a firm sliceable loaf, served cold with mustard and crusty bread.

⏱️ 3 hours 4Snacks & Appetizers ★ 4.8
Snacks & Appetizers
🍜 United States

Creamy, tangy, perfectly seasoned hard-boiled egg halves filled with a rich, smooth yolk mixture, a timeless, crowd-pleasing bite for holiday and casual gatherings alike.

⏱️ 40 minuteSnacks & Appetizers ★ 4.8
Snacks & Appetizers
🍜 Russia

Silky, dill-forward no-smoke cured salmon, a Scandinavian classic with bright salty-sweet flavor, ideal for holiday starter platters and open-faced rye sandwiches.

⏱️ 48 hours Snacks & Appetizers ★ 4.7
Snacks & Appetizers
🍜 Japan

Crisp golden bottoms, juicy savory pork and vegetable filling, and tangy dipping sauce make these pan-fried gyoza a beloved shareable bite.

⏱️ 45 minuteSnacks & Appetizers ★ 4.8

Gummy bears (red/pink):Frequently Asked Questions

1.Do I need special equipment to make these red and pink gummy bears? ▾
You don’t need any fancy specialty tools at all! While silicone gummy bear molds make cute, classic bear shapes, you can pour the warm mixture into a parchment-lined small glass baking dish, chill until fully set, then cut it into tiny bite-sized pieces. Lightly grease surfaces for super easy release.
2.Can I use regular sweetened juice instead of unsweetened for this recipe? ▾
I recommend sticking to unsweetened juice for the best texture and balanced, not cloying flavor. If you only have sweetened juice on hand, cut the added granulated sugar by 2 to 3 tablespoons to avoid overly sweet gummies, and taste the warm liquid before pouring to adjust sweetness to your preference.
3.Why did my gummy bears turn out rubbery and tough instead of soft and chewy? ▾
Tough, rubbery gummies almost always come down to two common mistakes: using too much gelatin, or boiling the gelatin mixture for too long, which breaks down gelatin’s setting power unevenly. Measure your gelatin precisely, and only heat the mixture just until sugar and gelatin fully dissolve, no hard rolling boil.
4.How long do these homemade gummy bears stay fresh, and how should I store them? ▾
Stored in an airtight container in the refrigerator, these gummies will stay chewy and fresh for up to 2 weeks. Toss them lightly in a tiny bit of cornstarch if they start to stick together, but avoid leaving them at room temperature for more than 2 days, since they have no commercial preservatives.
5.Can I make these gummies vegan by swapping the regular unflavored gelatin? ▾
You can absolutely make a vegan version! Swap the unflavored bovine gelatin for an equal amount of powdered agar agar, noting that agar-set gummies will have a slightly firmer, less bouncy bite. Add 1 to 2 extra tablespoons of water to get as close to the classic chewy texture as possible.
6.How do I get those bright red and pink colors without using artificial food dye? ▾
You don’t need any artificial dye for these bright, vibrant hues! The deep red shade comes naturally from unsweetened red raspberry juice, and the soft pink comes from the strawberry white grape juice. Adjust ratios for pretty custom shades: more raspberry for deeper color, more strawberry blend for paler pink.
7.My gummies stuck really bad to the mold when I tried to pop them out—what went wrong? ▾
Sticky gummies that won’t release are usually from not letting them set long enough, or skipping quick mold prep. Make sure you chill them for a full 2 hours in the fridge before unmolding, and give molds a very light spray of neutral cooking oil, wiped with a paper towel, before pouring in the warm mixture.
8.Can I add extra flavors, like lemon or sour candy tang, to these gummy bears? ▾
Absolutely! These gummies are super customizable. Add 1/4 teaspoon of fresh lemon zest, a tiny drop of vanilla extract, or a pinch of citric acid for a sour candy kick right after taking the warm gelatin mixture off the heat. Stir well before pouring to keep the texture perfectly smooth.
9.Do I have to bloom the gelatin first, or can I stir it straight into hot liquid? ▾
Don’t skip blooming the gelatin in cold filtered water first! Sprinkling gelatin over cold water and letting it sit 5 minutes lets granules hydrate evenly, so you won’t end up with lumpy, grainy gummies. Adding gelatin straight to hot liquid makes outer granules seize up, leaving hard, unappetizing little clumps.
10.Are these gummy bears sturdy enough to package as homemade gifts for friends? ▾
They make fantastic, crowd-pleasing homemade gifts! Let gummies set fully, pat off any excess surface moisture with a paper towel, and pack them in cellophane treat bags or small lidded candy jars. Tuck a small food-safe silica gel packet in each container to prevent sogginess if gifting in warm weather.

Comments (20)

2 days ago

OMG these homemade red and pink gummy bears were a total game changer for my Galentine’s potluck last weekend! I used cherry juice for the red and pink lemonade for the pink, and everyone kept asking where I bought them. Who knew gummies were this easy to make?!

yesterday

Love the flavor combo you picked, Sarah! Cherry and pink lemonade sound like the perfect fruity pair. So stoked they were a potluck hit!

3 days ago

Wait, has anyone tried making these with sugar-free Jell-O? I’m trying to cut back on added sugar but still need my candy fix, and these look way too good to pass up.

2 days ago

I did! Used sugar-free strawberry and raspberry Jell-O, added a tiny bit of extra unflavored gelatin to make sure they set firm, and they turned out perfect. My roommates didn’t even notice they were sugar-free!

2 days ago

Great question, Jake! As BakingBabe92 mentioned, sugar-free Jell-O works beautifully here — just add ½ tsp extra gelatin per batch if you like your gummies extra chewy!

1 week ago

My kids loved it! We made these after school on Friday as a little weekend treat, and they had a blast picking out the bear molds and mixing the different red and pink shades. Already planning to make a green and orange batch for St. Patrick’s Day next month!

5 days ago

Bro these are SO good. I made them for my dorm movie night and they were gone in 10 minutes flat. No fancy equipment needed, just a saucepan and molds, which is perfect for my tiny dorm kitchen. 10/10 would make again.

3 days ago

So glad the recipe worked out in your dorm kitchen, Kev! Pro tip for next time: you can pour the mix into ice cube trays if you don’t have bear molds handy, works just as well.

1 week ago

Quick question — can I swap the regular gelatin for agar agar to make these vegan? I’ve been looking for a cute vegan candy recipe to bring to my friend’s Galentine’s gathering.

5 days ago

I made these vegan last week with agar agar! Use 1 tbsp of agar powder per cup of liquid, and they set up nice and firm, no chalky texture at all. I used beet juice to get the pink color so no artificial dyes!

5 days ago

Hi Tina! Agar agar is a fantastic swap for a vegan version, just follow Gigi’s measurement tip and make sure to bring the mixture to a quick boil so the agar activates properly. Hope you love them!

yesterday

Made these for my office potluck yesterday and they were the first thing to disappear! I dusted half of them with a little sour sugar to get that sweet-sour kick, and people were going crazy for them. Super easy recipe, zero stress to throw together the night before.

30 minutes ago

Game changer!!! I’ve wasted so much money on fancy artisanal gummies at the farmers market, and these taste identical for a fraction of the cost. The texture is perfect — chewy, not too rubbery, just right.

5 minutes ago

That’s the best compliment, thank you! Homemade candy is so much more budget-friendly, and you can tweak the flavors exactly how you like them. So glad you enjoyed the texture!

2 weeks ago

Made these for my wife for Valentine’s Day, and I think I earned major husband points. Only thing is mine came out a little softer than I expected — did I not chill them long enough?

1 week ago

I had that same issue my first batch! Turns out I didn’t bloom the gelatin long enough before heating it. Let it sit in the cold juice for 5 full minutes before warming it up, and they’ll be perfectly chewy every time.

1 week ago

Aww that’s such a sweet Valentine’s gesture, Nate! Soft gummies are usually from too little gelatin, not chilling long enough, or not blooming the gelatin properly like Mike mentioned. Try adding an extra ¼ tsp of gelatin next batch if you like extra chewy bears!

1 week ago

As someone with celiac, I’m always nervous about processed candy having hidden gluten, so these are a total win! I used 100% fruit juice and natural food coloring from beets and pomegranate to get the red and pink shades, and they’re totally safe for my diet.

5 days ago

Oh thank you for the natural dye tip! My youngest has a sensitivity to artificial food dyes, so I’ve been looking for ways to make fun snacks without the weird stuff. Can’t wait to try this!

3 days ago

So happy this recipe works for your gluten-free needs, Gigi! The natural dye idea is brilliant — beet juice gives such a pretty vibrant pink without any artificial aftertaste.

3 days ago

These are perfect for meal prep snacking! I make a big batch every Sunday, portion them out into little snack bags, and grab them on my way to work all week. Curbs that 3pm candy craving way better than a candy bar from the vending machine.

2 days ago

My kids loved it! We did a little taste test between these homemade gummies and the name brand ones, and both of my picky eaters picked the homemade ones hands down. The best part? I don’t have to fight them to eat a snack with actual fruit juice in it.

yesterday

That’s the ultimate win when picky eaters prefer the homemade version, Liz! It makes sneaking in a little extra fruit juice feel like a fun treat instead of a chore.

2 hours ago

Wait, I’ve made gummy bears before and they always stuck to the silicone molds like crazy. Any trick to getting them to pop out easy? I want to make these for my little cousin’s birthday party next weekend.

30 minutes ago

Great question! A quick light spray of nonstick cooking oil on the molds before pouring the mixture in makes the gummies pop right out with zero sticking. No broken bear heads, promise!

1 week ago

OMG I had the best time making these with my niece last weekend! We added little edible glitter to the pink ones to make them sparkle, and they looked so fancy. She gave bags of them out to all her friends at school, and she felt like a total rockstar.

5 days ago

The edible glitter idea is so cute! I make these for my grandkids every holiday, and I know they’d go crazy for sparkly gummies. What kind of edible glitter do you use, if you don’t mind me asking?

3 days ago

I used the Wilton edible glitter from the craft store! It’s totally tasteless and doesn’t leave a weird texture, just adds that pretty shimmer. The pink ones looked like little valentine gems!

2 weeks ago

I’ve been making candy for over 40 years, and this is one of the easiest gummy recipes I’ve ever tried. No fancy candy thermometers needed, just simple ingredients, and they set perfectly every time. I’ll be adding this to my regular holiday treat rotation for sure.

3 days ago

Bro, I messed up my first batch because I boiled the gelatin too hard and it got all weird and lumpy. Second batch I kept the heat super low like the recipe said, and they came out chef’s kiss. 10/10, just don’t crank the heat like I did lol.

2 days ago

So glad you gave it a second shot! High heat can break down gelatin really fast, which is why low and slow is the way to go. Cheers to your perfect second batch!

5 days ago

Love that these don’t have a ton of weird artificial ingredients! I used grass-fed gelatin and tart cherry juice for the red batch, and they feel like a treat I don’t have to feel guilty about eating. Any idea how long these stay good in the fridge?

3 days ago

I’ve kept mine in an airtight container in the fridge for up to 2 weeks and they still tasted totally fresh! They get a little chewier after the first couple days, which I actually prefer.

2 days ago

Great question, Hannah! Stored in a sealed airtight container in the fridge, these gummies will stay fresh for 1-2 weeks, just like mentioned. You can also freeze them for up to 3 months if you want to make a big batch ahead!

yesterday

Made these with my daughter last night for her Valentine’s day card exchange, and we had a total blast. Told her the pink ones were “love potions” and she thought that was the funniest thing ever. Super easy recipe, even for a dad who burns toast half the time lmao.

2 hours ago

The “love potion” line is genius! So glad you two had fun making them — easy recipes that make silly family memories are what it’s all about, even if you burn toast sometimes 😉

2 weeks ago

I run a small home bakery, and I tested these out as a little add-on treat for Valentine’s day orders. My customers went absolutely wild for them! I’m already brainstorming color combos for Easter — pastel yellow, purple, and green gummies are gonna be so cute for spring orders.

5 minutes ago

Wait a second, these taste exactly like the gummy bears I used to get as a kid at the movie theater! I added a little extra citric acid to the top for that sour kick, and I’m not even kidding I ate half the batch in one sitting. Worth every single bite.

just now

Citric acid for sour gummies is such a good call! I won’t judge you for eating half the batch — they’re so good it’s hard to stop at just a handful!

3 days ago

I made these for my preschool class’s Valentine’s party, and they were the perfect size for little hands! I skipped any extra added sugar so they weren’t too sweet, and all the kids (and fellow teachers!) raved about them. So easy to make ahead of time too, which is a total lifesaver when you’re wrangling 15 wiggly four-year-olds.



